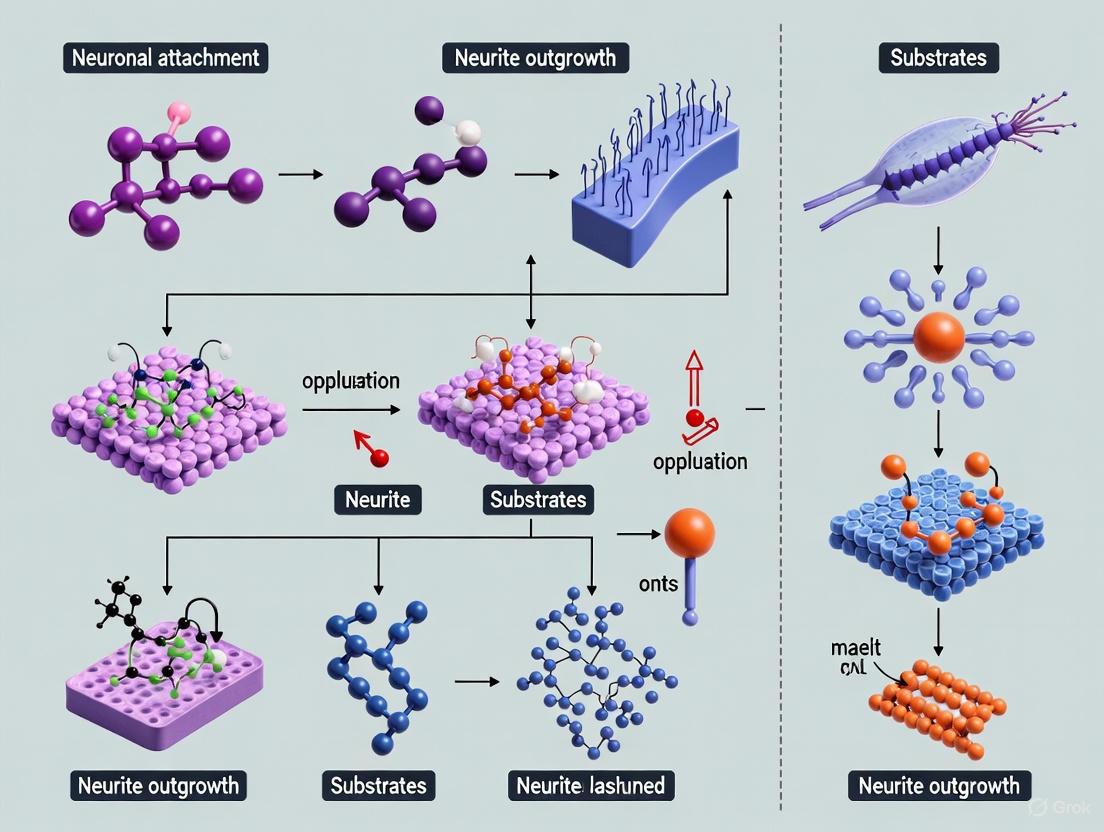
Strategic Enhancement of Neuronal Attachment and Neurite Outgrowth for Advanced Biomedical Applications
This article provides a comprehensive resource for researchers and drug development professionals seeking to optimize in vitro neuronal models.
Strategic Enhancement of Neuronal Attachment and Neurite Outgrowth for Advanced Biomedical Applications
Abstract
This article provides a comprehensive resource for researchers and drug development professionals seeking to optimize in vitro neuronal models. It covers the foundational principles of neuron-substrate interactions, detailing established and emerging methodologies for promoting attachment and outgrowth. The content further explores advanced troubleshooting, optimization strategies, including dynamic platforms and glial co-culture, and concludes with rigorous validation and comparative analysis techniques to ensure reliable, quantifiable outcomes for both basic research and high-throughput screening applications.
The Blueprint for Growth: Core Principles of Neuron-Substrate Interactions
Technical Troubleshooting Guide: FAQs for Neuronal Cell Culture
This guide addresses common challenges in experimental workflows aimed at improving neuronal attachment and neurite outgrowth on engineered substrates.
FAQ 1: My neuronal cells are not adhering properly to my RGD-functionalized substrate. What could be wrong?
- Potential Cause: The RGD motif may be presented in a suboptimal conformation or density, or it may be competing with adsorbed serum proteins.
- Troubleshooting Steps:
- Check Peptide Conformation: The linear RGD peptide has significantly lower affinity (100-1000 fold) for integrins compared to the native RGD loop in fibronectin. Consider using a cyclic RGD variant or engineering the motif within a cysteine-constrained loop (e.g., CTGRGDSPAC, or "FNCC") to mimic the natural β-hairpin turn found in fibronectin, which dramatically enhances cell attachment and spreading [1].
- Evaluate Substrate Fouling: If your biomaterial is highly adsorptive, it will rapidly coat itself with serum proteins (e.g., fibronectin, vitronectin) from your culture media. This creates a complex background that can overshadow your synthetic RGD peptide. In some cases, high densities of synthetic RGD can even compete with and inhibit the robust signaling from adsorbed native proteins. Test cell adhesion in reduced-serum conditions or use non-fouling materials (e.g., certain PEG hydrogels) to ensure your RGD motif is the dominant adhesive signal [2].
- Verify Integrin Expression: Ensure your neuronal cell type expresses RGD-sensitive integrins, such as αvβ3 or α5β1. If not, alternative motifs may be required.
FAQ 2: I have good cell adhesion, but neurite outgrowth is poor. How can I promote outgrowth specifically?
- Potential Cause: Adhesion is necessary but not sufficient for neurite outgrowth. The substrate may lack specific outgrowth-promoting motifs or present inhibitory cues.
- Troubleshooting Steps:
- Incorporate Specific Outgrowth Motifs: Neurite outgrowth is driven by specific sequences beyond the standard RGD.
- The VFDNFVLK peptide from the fnD domain of tenascin-C is a potent promoter of neurite extension and can even overcome inhibition from chondroitin sulfate proteoglycans [3].
- For α4β1 integrin-mediated outgrowth, ensure your fibronectin substrate includes the IIICS/V region containing the LDV motif. The interaction between this domain and α4β1 is a strong promoter of neurite outgrowth, and it requires the adaptor protein paxillin for signaling [4].
- Use a Combination of Proteins: Laminin is consistently one of the most effective matrices for neurite outgrowth. Consider coating with laminin alone or in combination with other proteins. Studies show neurite growth is more pronounced on laminin than on fibronectin or collagen [5].
- Check the Status of Your Fibronectin: Native, intact plasma fibronectin may not support adhesion or outgrowth for all neuronal types. Denaturation can sometimes uncover cryptic RGD sites, enhancing its functionality [6].
- Incorporate Specific Outgrowth Motifs: Neurite outgrowth is driven by specific sequences beyond the standard RGD.
FAQ 3: My in vitro results with RGD peptides are promising, but they fail in animal models. Why?
- Potential Cause: The in vivo environment is far more complex, with rapid protein adsorption and different integrin signaling dynamics.
- Troubleshooting Steps:
- Pre-adsorb with Serum Proteins: Perform a pre-test by exposing your RGD-functionalized implant to serum or placing it in vivo for a short period (e.g., 30 minutes), then retrieving it and evaluating cell adhesion in vitro. This can reveal if protein adsorption is interfering with your peptide's function [2].
- Consider Alternative Motifs: For certain applications, non-RGD peptides may be more effective. For example, the DGEA peptide (derived from collagen I) was shown to enhance osteoblastic differentiation where RGD was inhibitory in a bone formation model [2].
- Optimize Peptide Density: A high density of RGD peptides can sometimes lead to excessive adhesion, reducing cell motility and process extension. Titrate the concentration of RGD on your surface to find an optimal range for neurite outgrowth.
The following tables summarize key experimental findings from the literature to guide your experimental design.
Table 1: Neurite Outgrowth Performance of Different ECM Molecules
| ECM Molecule / Peptide | Key Motif(s) | Relative Neurite Outgrowth | Key Integrins Involved | Notes |
|---|---|---|---|---|
| Laminin-1 | SIKVAV (and others) | +++ (Most pronounced) [5] | α1β1, α3β1, α6β1, α7β1 [4] | A classic and highly effective promoter of neurite outgrowth. |
| Fibronectin (V120 region) | RGD + IIICS/V (LDV) | ++ (Enhanced) [4] | α4β1, α5β1 [4] | Outgrowth is highly dependent on α4β1-paxillin interaction. |
| Tenascin-C (fnD domain) | VFDNFVLK | +++ (Dramatically increased) [3] | To be determined | Potent outgrowth promotion; can overcome inhibitory cues. |
| Collagen I | DGEA | + | α1β1, α2β1 [4] | Supports baseline outgrowth. |
| RGD peptide (linear) | RGD | + to ++ (Variable) [2] | αvβ3, α5β1, others | Effectiveness highly dependent on presentation and context. |
Table 2: Functional Comparison of RGD Presentations
| RGD Format | Example | Cell Adhesion | Neurite Outgrowth | Key Findings & Mechanisms |
|---|---|---|---|---|
| Linear Peptide | GRGDSP | + | + | Low affinity; susceptible to competition; signaling is weaker than full-length proteins [2]. |
| Cysteine-Constrained Loop (FNCC) | CTGRGDSPAC | +++ | ++ | Mimics native fibronectin loop; enhances α5β1 integrin binding, cell spreading, and focal adhesion formation [1]. |
| In Native Fibronectin | RGD in FN-III10 | ++ | ++ | Requires synergy site (PHSRN in FN-III9); essential for embryonic development [7]. |
| In Denatured Fibronectin | N/A | +++ | Not specified | Denaturation uncovers cryptic RGD sites, dramatically enhancing adhesion compared to native FN [6]. |
Experimental Protocols for Key Assays
Protocol 1: Evaluating the Role of α4 Integrin-Paxillin Interaction in Neurite Outgrowth
This protocol is adapted from research demonstrating the critical role of the α4-paxillin interaction in neurite outgrowth on embryonic fibronectin substrates [4].
- 1. Cell Preparation:
- Use PC12 cells (a model for PNS neurons) that do not natively express α4 integrin.
- Transfect cells with constructs expressing:
- Wild-type α4 integrin.
- Mutant α4 integrin (e.g., E983A/Y991A) that cannot bind paxillin.
- Empty vector control.
- 2. Substrate Coating:
- Coat culture surfaces with recombinant fibronectin fragments containing the V120 region (which includes the IIICS/V domain with the α4β1-binding site).
- Use laminin or collagen-coated surfaces as controls for α4-independent outgrowth.
- 3. Neurite Outgrowth Assay:
- Plate transfected PC12 cells on the coated surfaces.
- Culture for 24-48 hours in serum-free medium supplemented with 50 ng/mL NGF to induce neuronal differentiation.
- Fix and stain cells for β-tubulin III (to visualize neurons and neurites).
- 4. Data Analysis:
- Quantify neurite outgrowth by measuring the length of the longest neurite per cell or the percentage of cells with neurites longer than the cell body diameter.
- Expected Outcome: Cells expressing wild-type α4 will show significantly enhanced neurite outgrowth on FN V120 compared to controls. Cells expressing the paxillin-binding-deficient α4 mutant will show outgrowth levels similar to the negative control, confirming the importance of this specific interaction.
Protocol 2: Testing the Efficacy of a Tenascin-Derived Peptide against Inhibitory Substrates
This protocol uses the VFDNFVLK peptide to overcome inhibition, such as that from the glial scar component CSPG [3].
- 1. Substrate Preparation:
- Coat glass coverslips with a mixture of inhibitory chondroitin sulfate proteoglycans (CSPGs).
- Co-add or pre-coat with the synthetic VFDNFVLK peptide. Use laminin-1 as a positive control and CSPGs alone as a negative control.
- 2. Cell Plating and Culture:
- Dissociate and plate primary dorsal root ganglion (DRG) neurons or other relevant neuronal cells onto the prepared substrates.
- Culture cells in a defined neuronal medium for 24-72 hours.
- 3. Analysis:
- Fix and immunostain for neuronal markers (e.g., β-tubulin III) and actin (phaloidin) to visualize cell morphology.
- Quantify total neurite length per neuron or the number of neurite crossings over a defined area.
- Expected Outcome: Neurons on CSPGs + VFDNFVLK will exhibit significantly longer and more extensive neurites compared to those on CSPGs alone, demonstrating the peptide's ability to promote outgrowth in an inhibitory environment.
Signaling Pathway and Experimental Workflow Diagrams
The Scientist's Toolkit: Research Reagent Solutions
Table 3: Essential Reagents for Neuronal Substrate Research
| Reagent | Function/Application | Key Considerations |
|---|---|---|
| Recombinant Spider Silk (4RepCT) | A versatile, biocompatible biomaterial that can be genetically engineered to present specific adhesion motifs like RGD or FNCC [1]. | Allows for controlled presentation of peptides. Less adsorptive than some materials, reducing confounding protein adsorption. |
| Synthetic Peptide VFDNFVLK | A potent neurite outgrowth-promoting peptide derived from the fnD domain of tenascin-C [3]. | Can be used to coat surfaces or incorporate into hydrogels. Particularly useful for overcoming inhibitory environments like those containing CSPGs. |
| Recombinant Fibronectin Fragments (e.g., V120) | Contains the IIICS/V region that binds α4β1 integrin, crucial for studying α4-mediated neurite outgrowth [4]. | Essential for experiments focusing on the α4β1-paxillin signaling axis. |
| Paxillin Mutants (e.g., ΔLD4) | Used to dissect the role of paxillin domains in integrin signaling. The LD4 domain is critical for promoting neurite outgrowth [4]. | Transfection of dominant-negative mutants can pinpoint specific protein functions in neuronal signaling. |
| Hydroxyapatite (HA) Biomaterials | A highly adsorptive biomaterial used to study the effects of protein adsorption on synthetic peptide performance [2]. | Useful for modeling the complex in vivo environment where competition with serum proteins occurs. |
| Poly(Ethylene Glycol) (PEG) Hydrogels | A synthetic, non-fouling polymer that resists protein adsorption. Ideal as a "blank slate" for functionalization with specific peptides [8]. | Provides high control over the cellular microenvironment by eliminating confounding signals from adsorbed proteins. |
Core Concepts and Definitions
What are the fundamental mechanisms of topographical guidance? Topographical guidance, or contact guidance, is the phenomenon where cells sense and align with physical features on a substrate. The growth cone, a highly motile structure at the tip of a growing axon, translates these physical cues into localized cytoskeletal remodeling, directing axon outgrowth and turning [9] [10]. This process is driven by the dynamic reorganization of actin filaments and microtubules within the cell [10].
What is the role of immobilized chemical ligands? Immobilized chemical ligands are bio-active molecules (e.g., proteins like laminin or peptides like RGD) covalently bound or adsorbed to a substrate. They primarily influence neuronal attachment and neurite outgrowth by engaging specific cell surface receptors, such as integrins. This engagement triggers intracellular signaling pathways that promote cell adhesion, survival, and cytoskeletal reorganization [9].
How do these cues differ in their mode of action? The primary distinction lies in how the signal is presented and sensed:
- Physical/Topographical Cues: Provide a continuous, structural scaffold. Cells respond to the shape and geometry of the environment through mechanotransduction [10].
- Chemical/Ligand Cues: Provide discrete, molecular signals. Cells respond through specific receptor-ligand binding and biochemical signaling cascades [9].
Table 1: Key Characteristics of Physical and Chemical Cues
| Characteristic | Topographical Guidance | Immobilized Ligands |
|---|---|---|
| Primary Nature | Physical, mechanical | Biochemical, molecular |
| Sensing Mechanism | Mechanosensing; whole-cell response | Receptor-ligand binding (e.g., integrins) |
| Typical Features | Grooves, ridges, fibers, pores [10] | Laminin, Poly-D-Lysine, RGD peptides [11] |
| Key Cellular Process | Contact guidance; cytoskeletal alignment [9] | Focal adhesion formation; signal transduction [9] |
| Spatial Presentation | Often anisotropic or isotropic patterns [10] | Can be patterned or homogeneous |
Troubleshooting Guides and FAQs
Substrate Preparation and Coating
Issue: Neurons are piling into clumps and not adhering evenly to the substrate.
- Potential Cause: Degradation of the coating substrate.
- Solution:
- If using Poly-L-Lysine (PLL), which is susceptible to enzymatic degradation, switch to the more stable Poly-D-Lysine (PDL) [11].
- For persistent issues, consider switching to a non-peptide alternative like dendritic polyglycerol amine (dPGA), which is highly resistant to degradation because it lacks peptide bonds [11].
Issue: Poor neuronal attachment or neurite outgrowth on fabricated topographies.
- Potential Cause: Incompatible surface chemistry or insufficient coating on the topographical features.
- Solution:
- Ensure your topographical substrate (e.g., PDMS, silicon) is properly sterilized and coated with an adhesion-promoting molecule like PDL or laminin before seeding cells [10].
- The coating protocol may need optimization for complex 3D structures to ensure uniform coverage.
Cell Culture and Health
Issue: Low cell viability or unhealthy neuronal cultures after seeding.
- Potential Causes and Solutions:
- Dissection Damage: For primary neurons, use embryonic tissue (e.g., E17-19 in rats) and gentle mechanical trituration during dissociation. Consider using papain instead of trypsin for digestion to reduce RNA degradation [11].
- Incorrect Plating Density: Plate cells at an appropriate density. For rat primary hippocampal neurons, a standard density for histology is 25,000 - 60,000 cells/cm² [11].
- Suboptimal Medium: Use a serum-free medium like Neurobasal supplemented with B27 and GlutaMAX to support neurons while minimizing glial overgrowth [11].
Issue: Excessive glial cell contamination in primary neuronal cultures.
- Potential Cause: Proliferation of non-neuronal cells from the dissected tissue.
- Solution: Use culture media optimized for neurons (e.g., Neurobasal/B27). If high purity is critical, a low concentration of cytosine arabinoside (AraC) can be used to inhibit glial proliferation, but be aware of its potential neurotoxic side effects [11].
Experimental and Assay Outcomes
Issue: Neurons are not aligning with grooved topographical patterns as expected.
- Potential Causes and Solutions:
- Feature Size Mismatch: The dimensions of the grooves may not be optimal. Test a range of groove widths and depths (from nano- to micro-scale), as neuronal response is highly dimension-dependent [9] [10].
- Anisotropic vs. Isotropic Cues: Verify that your pattern is anisotropic (directionally dependent, like parallel grooves). Neurons will not align on isotropic topographies (e.g., random pits or posts) [10].
Issue: High variability in neurite outgrowth measurements.
- Potential Cause: Inconsistent quantification methods.
- Solution: Implement a standardized, quantitative method for assessment. Common metrics include:
Table 2: Quantitative Metrics for Assessing Neuronal Response
| Metric | Description | Typical Measurement Method |
|---|---|---|
| Neurite Length | Average length of cellular extensions per cell [9] | Fluorescence microscopy & image analysis |
| Alignment Angle | Angle of neurite outgrowth relative to the topographical cue [9] | Circular statistics; angular binning |
| Branching Degree | Number of branch points per neurite [9] | Skeletonization of neurite traces |
| Adhesion Strength | Percentage of cells that remain attached after gentle washing [9] | Cell counting pre- and post-wash |
Detailed Experimental Protocols
Protocol 1: Creating and Coating Microgrooved Substrates for Contact Guidance Studies
Methodology Summary (based on common practices from literature [10]):
- Substrate Fabrication: Microgrooves are typically fabricated on silicon or polymer surfaces (e.g., PLGA, PDMS) using techniques like photolithography or replica molding.
- Sterilization: Sterilize substrates by immersion in 70% ethanol for 15-30 minutes, followed by exposure to UV light for at least 1 hour.
- Surface Coating:
- Prepare a sterile aqueous solution of Poly-D-Lysine (PDL) at a concentration of 0.1 mg/mL.
- Cover the entire surface of each substrate with the PDL solution.
- Incubate at 37°C for a minimum of 1 hour, or at room temperature overnight.
- Aspirate the PDL solution and wash the substrates three times with sterile distilled water.
- Allow substrates to air dry completely in a sterile environment before cell seeding.
Protocol 2: Culturing Primary Hippocampal Neurons for Outgrowth Assays
Methodology Summary [11]:
- Dissection: Dissect hippocampal tissue from embryonic day 17-19 (E17-E19) rat pups.
- Dissociation: Gently dissociate the tissue using a papain-based dissociation system or gentle mechanical trituration with a fire-polished Pasteur pipette. Avoid bubbles to prevent cell shearing.
- Plating:
- Resuspend the cell pellet in pre-warmed, serum-free neuronal culture medium (e.g., Neurobasal Medium supplemented with B27 and GlutaMAX).
- Count cells and plate at the desired density (e.g., 25,000 - 60,000 cells/cm² for histology) onto pre-coated substrates.
- Maintenance:
- Conduct half-medium changes every 3-7 days to replenish nutrients.
- Maintain cultures in a humidified incubator at 37°C with 5% CO₂.
Signaling Pathway and Experimental Workflow Diagrams
The Scientist's Toolkit: Essential Research Reagents
Table 3: Key Reagent Solutions for Neuronal Cell Culture and Substrate Engineering
| Reagent/Material | Function | Example Use Case |
|---|---|---|
| Poly-D-Lysine (PDL) | Positively charged polymer coating that promotes neuronal attachment to glass or plastic surfaces [11]. | Standard substrate coating for 2D cultures and 3D topographies. |
| Laminin | Extracellular matrix protein that engages integrin receptors; promotes robust neurite outgrowth [9]. | Coating for enhanced differentiation and outgrowth assays. |
| Neurobasal Medium | Serum-free medium optimized for the long-term health of primary neurons [11]. | Base medium for maintaining hippocampal and cortical cultures. |
| B27 Supplement | Defined serum-free supplement containing hormones, antioxidants, and other neuronal survival factors [11]. | Added to Neurobasal Medium to support neuronal growth and minimize glial proliferation. |
| Cytosine Arabinoside (AraC) | Antimitotic agent that inhibits DNA synthesis; used to control glial cell proliferation [11]. | Added to cultures for short periods to obtain highly pure neuronal populations. |
| Papain Dissociation System | Enzyme-based system for gentle tissue dissociation, minimizing damage to sensitive neuronal cells [11]. | Preferred over trypsin for dissociating embryonic brain tissue. |
The Impact of Substrate Stiffness and Surface Energy on Neuronal Adhesion
Core Concepts: Stiffness and Surface Energy
The mechanical and physical properties of a cell culture substrate are critical instructive cues for neuronal cells. Substrate stiffness, typically measured as Young's modulus (E) in kilopascals (kPa) or megapascals (MPa), directly influences neuronal adhesion, viability, neurite outgrowth, and network formation. Cells sense this stiffness through a process called mechanotransduction. Simultaneously, surface energy, a property influenced by surface chemistry and nanoscale topography, governs protein adsorption and the initial cell-to-substrate attachment. An optimal combination of these parameters is essential for successful neuronal culture experiments.
The table below summarizes the primary effects of these two parameters on neuronal phenotypes.
Table 1: Key Effects of Substrate Stiffness and Surface Energy on Neurons
| Parameter | Key Effects on Neuronal Cells | Recommended Range / Type |
|---|---|---|
| Substrate Stiffness | - Soft, brain-like stiffness (∼0.1-1 kPa) promotes neurite branching and neuronal network activity [12] [13].- Stiffer substrates (∼GPa range of plastic) enhance neural stem cell differentiation and synaptic connectivity in hippocampal networks [12].- Very soft substrates (∼0.5 kPa) can select for neuronal over glial cell growth [14]. | 0.1 kPa - 5 kPa (to mimic brain parenchyma) [15] [12] |
| Surface Energy / Chemistry | - Disordered, nanoscale heterogeneities (e.g., mixed CH3/OH groups) promote robust PC12 cell adhesion and spontaneous differentiation [16].- High-energy surfaces (e.g., OH-terminated) and very low-energy surfaces (e.g., ordered CH3-terminated) can resist cell adhesion [16].- Chitosan serves as a effective adhesion factor supporting neuronal differentiation and maturation of hiPSCs [17]. | Nanoscale chemical heterogeneities; specific coatings (e.g., Chitosan, PDL/Laminin) [16] [18] [17] |
| Coatings | - Poly-D-lysine (PDL) with laminin is highly effective for PC-12 cell attachment under mechanical stress [18].- The optimal coating protocol (mixture vs. sequential layers) can be cell-type dependent [18]. | Cell-type specific (e.g., PDL/Laminin mixture for PC-12; sequential coating for RGCs) [18] |
Troubleshooting Guides & FAQs
Frequently Asked Questions
Q1: My primary neurons are detaching during my experiments, especially when I change the media. What could be the cause and how can I improve adhesion?
- A: This is a common issue often related to suboptimal substrate coating or excessive mechanical stress.
- Verify Your Coating: Ensure you are using an appropriate coating. A mixture of Poly-D-Lysine (PDL) and Laminin has been shown to provide excellent attachment for neuronal cells, even under mechanical stimulation [18]. Note that the best coating strategy (e.g., a mixture vs. sequential layers) may depend on your specific cell type [18].
- Check Coating Protocol: Confirm that your coating reagents are fresh and that you are following the recommended concentrations and incubation times. Inadequate washing after coating can also leave toxic residues.
- Minimize Fluid Shear: When changing media, avoid pipetting directly onto the cell layer. Add and remove media gently from the side of the culture vessel.
Q2: I am trying to mimic the brain's mechanical environment, but my neurite outgrowth is poor. What substrate stiffness should I be using?
- A: Neurons are highly sensitive to stiffness, and a mismatch can inhibit outgrowth.
- Target Brain-Like Stiffness: For most neuronal cultures, aim for a soft substrate with a Young's modulus between 0.1 kPa and 5 kPa to mimic the mechanical properties of brain parenchyma [15] [12] [14].
- Use Appropriate Materials: Standard tissue culture plastic (∼GPa) is far too rigid. Use tunable hydrogels like polyacrylamide (PA) or polydimethylsiloxane (PDMS) to achieve the desired softness [15] [12] [14].
- Confirm Stiffness Experimentally: Do not rely solely on vendor specifications or recipes. Use Atomic Force Microscopy (AFM) or other methods to confirm the elastic modulus of your prepared substrates.
Q3: My neuronal networks seem less active than expected. How can substrate properties influence network activity and synaptic function?
- A: Substrate properties directly modulate electrophysiological maturity and network connectivity.
- Stiffness and Calcium Signaling: Culturing hippocampal neurons on stiffer PDMS substrates (∼457 kPa) enhances voltage-gated calcium channel currents, increases the amplitude and frequency of spontaneous calcium oscillations, and strengthens excitatory synaptic connectivity and transmission compared to softer substrates (∼46 kPa) [12].
- Surface Topography and Clustering: Surfaces with nanoscale roughness can promote the formation of highly interconnected neuronal networks with "small-world" topological properties, which are associated with enhanced computational efficiency [13]. Ensuring your surface promotes cell clustering may improve overall network activity.
Q4: I am differentiating stem cells into neurons. Does the substrate only affect final maturation, or also the initial differentiation?
- A: The substrate plays an instructive role from the very beginning. The mechanical and chemical cues are critical for guiding stem cells toward a neuronal lineage.
- Stiffness Guides Fate: Soft substrates (0.1-1 kPa) that mimic the brain have been shown to promote the neuronal differentiation of human mesenchymal stem cells (hMSCs), while stiffer substrates promote muscle or bone cell fates [19].
- Surface Chemistry is Key: Beyond stiffness, the surface chemistry is vital for initial attachment and subsequent differentiation. Materials like Chitosan have been demonstrated to support the adhesion and early-stage neuronal differentiation of human induced pluripotent stem cells (hiPSCs) as effectively as standard matrices like Matrigel [17].
Detailed Experimental Protocols
Protocol 1: Fabricating and Characterizing Tunable PDMS Substrates for Stiffness Studies
This protocol outlines the creation of PDMS substrates with stiffnesses relevant to neuronal research [15] [12] [13].
Workflow Diagram: Creating PDMS Substrates
Materials:
- SYLGARD 184 Silicone Elastomer Kit (Dow Corning)
- Scale and mixing vessels
- Vacuum desiccator or centrifuge for degassing
- Oven (65°C)
- Molds (e.g., Petri dishes)
- Oxygen plasma cleaner (optional, for surface activation)
- Coating solutions (e.g., Poly-D-Lysine, Laminin)
Step-by-Step Method:
- Mixing: Thoroughly mix the PDMS elastomer base and curing agent in the desired weight-to-weight ratio. To achieve softer substrates, use a higher base-to-curing agent ratio. For example:
- Degassing: Place the mixed PDMS in a vacuum desiccator until all air bubbles are removed. This ensures uniformity.
- Curing: Pour the degassed mixture into your desired mold and cure in an oven at 65°C for at least 2 hours. Thicker layers may require longer curing times.
- Surface Preparation: After curing, peel the PDMS substrates from the mold. To render the surface hydrophilic for coating, treat with oxygen plasma for 1-2 minutes.
- Coating: Immediately after plasma treatment, coat the substrates with your chosen adhesion factors (e.g., PDL, Laminin, or their mixture) following standard sterile protocols.
- Validation: It is critical to validate the stiffness of your final substrates using techniques like Atomic Force Microscopy (AFM) or rheology.
Protocol 2: Isolating and Culturing Primary Neurons on Engineered Substrates
This protocol describes the general process for obtaining and maintaining primary neuronal cultures, a cornerstone of neuroscientific research [20].
Materials:
- Brain tissue from rodent (e.g., E18 rat or postnatal mouse pups)
- Dissection tools
- Enzymes: Papain or Trypsin
- Dissociation solution (e.g., HBSS)
- Cell strainers (70 µm, 40 µm)
- Coated substrates (from Protocol 1)
- Neuronal culture medium (e.g., Neurobasal with B-27 supplement)
Step-by-Step Method:
- Dissection: Rapidly and carefully dissect the desired brain region (e.g., hippocampus, cortex) in ice-cold, oxygenated dissection buffer.
- Meninges Removal: Remove the meninges completely, as they contain non-neuronal cells that can contaminate the culture.
- Tissue Dissociation:
- Mechanically mince the tissue into small pieces with a scalpel.
- Incubate the tissue pieces in a pre-warmed enzymatic solution (e.g., Papain, 20 U/mL) for 20-30 minutes at 37°C to digest extracellular matrix proteins.
- Gently triturate the tissue 10-15 times using a fire-polished Pasteur pipette to create a single-cell suspension.
- Cell Separation:
- Pass the cell suspension through a 70 µm cell strainer to remove large clumps.
- Optionally, use a Percoll gradient or immunomagnetic beads (e.g., against CD11b for microglia depletion) to further purify the neuronal population [20].
- Plating and Culture:
- Centrifuge the cell suspension, resuspend the pellet in complete neuronal medium, and count the cells.
- Plate the cells at the desired density onto your pre-coated substrates.
- Maintain cultures in a 37°C, 5% CO2 incubator. Change half of the medium every 3-4 days.
Signaling Pathways & Mechanotransduction
The beneficial effects of soft, brain-like substrates on neural cells are mediated by specific intracellular signaling pathways. Research indicates that the EGFR/PI3K/AKT pathway is a key mediator.
Diagram: Signaling Pathway on Soft Substrates
RNA-Seq and bioinformatics analysis on PC12 cells have confirmed that the promoting effects of soft substrates are linked to the upregulation of the EGFR/PI3K/AKT pathway. This leads to improved cell viability, cell cycle progression, and enhanced neuroprotective effects of chemicals [15].
The Scientist's Toolkit: Essential Research Reagents & Materials
Table 2: Key Reagents and Materials for Neuronal Substrate Research
| Item | Function / Application in Research | Key Considerations |
|---|---|---|
| PDMS (Polydimethylsiloxane) | A tunable elastomer for creating substrates of varying stiffness [15] [12] [13]. | Stiffness is controlled by the base-to-crosslinker ratio; requires surface activation (plasma) for coating. |
| Polyacrylamide (PA) Gels | Hydrogel for creating very soft, biologically relevant substrates (0.1 - 50 kPa) [14]. | Stiffness tuned by acrylamide/bis-acrylamide ratio; requires functionalization with adhesion ligands. |
| Poly-D-Lysine (PDL) | A positively charged polymer that coats surfaces to enhance neuronal attachment [18]. | Often used as a base coating; can be used alone or in combination with other proteins like laminin. |
| Laminin | An extracellular matrix protein that promotes neurite outgrowth and strong cell adhesion [18]. | Frequently used in combination with PDL. Optimal concentration and combination are cell-type dependent. |
| Chitosan | A natural biopolymer that serves as an effective adhesion factor for stem cell-derived neurons [17]. | Presents a viable alternative to animal-derived matrices like Matrigel for hiPSC neuronal differentiation. |
| Enzymes (Papain/Trypsin) | Used for the enzymatic digestion of tissue to isolate primary cells [20]. | Concentration and incubation time must be optimized to balance cell yield and viability. |
Troubleshooting Guides and FAQs
Frequently Asked Questions
Q1: My conducting polymer film is delaminating from the electrode substrate. What could be causing this and how can I improve adhesion?
A: Delamination is frequently caused by poor substrate preparation or overly rapid polymerization. Ensure your working electrode (e.g., Pt, ITO glass) is thoroughly cleaned by sequential sonication in solvents like hexane, methanol, and methylene chloride [21]. For electrodeposition, use a controlled technique like cyclic voltammetry rather than a constant high potential, which can create mechanically unstable films. Incorporating an adhesion layer or using dopants that improve interfacial properties can also enhance stability [22].
Q2: I am not observing the expected increase in neurite outgrowth despite electrical stimulation. What are the critical parameters to verify?
A: First, confirm your polymer is in its conductive (oxidized) state and that the electrical stimulus is properly applied. Key parameters include:
- Stimulation Setup: Use a three-electrode configuration with your polymer film as the working electrode. A common effective protocol is a steady, low potential (e.g., 100 mV) applied for several hours (e.g., 2h) [21].
- Cell Condition: Ensure cells are responsive. For PC-12 cells, "prime" them with Nerve Growth Factor (NGF, e.g., 25 ng/ml) for 24 hours prior to seeding and maintain NGF in the medium during experiments [21].
- Polymer Characterization: Verify that your film has a favorable fibrillar or nanostructured morphology, which is known to provide topographical cues that synergize with electrical stimulation [22].
Q3: The conductivity of my PANI-based coating is low under physiological conditions (pH ~7.4). How can I address this?
A: The high conductivity of pure PANI is primarily observed in acidic environments. A common and effective strategy is to create a hybrid structure by depositing a second polymer, such as PEDOT, over the PANI layer. This PEDOT layer can maintain stable conductivity at physiological pH while leveraging the beneficial cellular properties of PANI [22].
Q4: My polymer films are non-porous and show poor cellular integration. How can I improve the morphology for neural interfaces?
A: A non-porous, smooth surface limits tissue integration. To create a favorable 3D structure:
- Explore electrochemical synthesis parameters that lead to the formation of fibrillar nanostructures [22].
- Consider using sequential deposition of two different conducting polymers (e.g., PANI followed by PEDOT), which can naturally form a fibrous, high-surface-area network during synthesis [22].
Experimental Protocols for Key Experiments
Protocol 1: Electrodeposition of Hybrid PANI-PEDOT Films on Pt Electrodes
This protocol is adapted from the synthesis of hybrid coatings that demonstrated superior electrochemical properties and support for neural outgrowth [22].
- Setup: Use a three-electrode system with a Pt-coated substrate as the working electrode, an Ag/AgCl reference electrode, and a Pt-coated titanium rod as the auxiliary/counter electrode.
- Polyaniline (PANI) Deposition: Electrochemically polymerize aniline from an acidic aqueous solution onto the Pt working electrode. Use cyclic voltammetry (CV), initiating the polymerization at a potential of 0.9 V vs. Ag/AgCl. Monitor the development of characteristic redox peaks during the process [22].
- PEDOT Deposition: Subsequently, deposit PEDOT over the PANI layer. The sequential deposition of these two polymers results in the formation of a coating with a fibrillar morphology [22].
- Characterization: Characterize the resulting hybrid film. Expected outcomes include moderate hydrophilicity (contact angle around 49 ± 7°), low impedance (165 ± 6 Ω at 1 kHz), and high capacitance (19.9 mC/cm²) [22].
Protocol 2: In Vitro Neurite Outgrowth Assay with Electrical Stimulation
This protocol is based on classic and contemporary methods for assessing the biofunctionality of conductive substrates [21] [22].
- Cell Culture:
- Use rat PC-12 cells or primary neural cells (e.g., rat-derived embryonic ventral mesencephalon cells).
- For PC-12 cells, culture in DMEM supplemented with horse serum and fetal bovine serum. "Prime" the cells by adding 25 ng/ml of NGF 24 hours before seeding onto the polymer films to induce a neuronal phenotype [21].
- Electrical Stimulation:
- After cells have attached and spread on the polymer film for 24 hours, apply an electrical stimulus.
- Use the conductive polymer film as the anode. Place a cathode (e.g., a gold wire) at the opposite end of the culture well.
- Apply a constant potential of 100 mV for 2 hours using a potentiostat. Maintain cells in a CO2 incubator during stimulation [21].
- Analysis:
- After a further incubation period (e.g., 24 hours post-stimulation), fix the cells and analyze neurite outgrowth.
- Use image analysis software to measure neurite lengths. A successful experiment on a polymer like polypyrrole should show a statistically significant increase in median neurite length compared to unstimulated controls (e.g., ~18.1 μm vs. ~9.5 μm) [21].
Data Presentation
Table 1: Electrochemical and Physical Properties of Neural Interface Coatings
This table summarizes key quantitative data from research on conductive polymer coatings, providing benchmarks for your own experimental results.
| Polymer Material | Impedance (at 1 kHz) | Capacitance | Contact Angle | Key Morphological Feature | Citation |
|---|---|---|---|---|---|
| Hybrid PANI-PEDOT | 165 ± 6 Ω | 19.9 mC/cm² | 49° ± 7° | Fibrillar morphology | [22] |
| PEDOT:PSS | Information Not Provided | Information Not Provided | Relatively non-porous surface | [22] |
Table 2: Quantitative Neurite Outgrowth Results
This table compares the effects of different conductive polymer substrates and electrical stimulation on neurite extension.
| Experimental Condition | Cell Type | Median Neurite Length | Stimulation Details | Citation |
|---|---|---|---|---|
| Polypyrrole (PP) with Electrical Stimulation | Rat PC-12 | 18.14 μm (n=5643) | 100 mV for 2 hours | [21] |
| Polypyrrole (PP) Control (No Stimulation) | Rat PC-12 | 9.5 μm (n=4440) | None | [21] |
| Tissue Culture Polystyrene Control | Rat PC-12 | ~9.5 μm | None | [21] |
| Hybrid PANI-PEDOT Coating | Rat embryonic ventral mesencephalon | Supported neural outgrowth and adhesion | Information Not Provided | [22] |
The Scientist's Toolkit
Research Reagent Solutions
This table lists essential materials used in the featured experiments for developing and testing conductive polymer-based neural interfaces.
| Reagent / Material | Function / Purpose | Example from Research |
|---|---|---|
| PEDOT & Polyaniline (PANI) | Intrinsically Conductive Polymers (ICPs) used to create electroactive coatings that reduce impedance and provide topographical/electrical cues. | Sequential deposition creates a hybrid fibrillar structure [22]. |
| Polypyrrole (PPy) | An electrically conductive polymer used as a substrate to apply electrical stimulation directly to cells. | Oxidized polypyrrole films served as the anode for electrical stimulation [21]. |
| Nerve Growth Factor (NGF) | A neurotrophic factor that induces differentiation of certain cell types (like PC-12) into a neuronal phenotype, enabling neurite outgrowth. | Used to "prime" PC-12 cells at 25 ng/ml 24h before seeding [21]. |
| Indium Tin Oxide (ITO) Glass | A transparent, conductive substrate used for the electrochemical synthesis of polymer films and for in vitro microscopy. | Served as the working electrode for polypyrrole film deposition [21]. |
| Poly(styrenesulfonate) - PSS | A dopant ion used during polymerization to incorporate negative charges, achieving charge neutrality and influencing properties like wettability. | Used as the dopant for polypyrrole synthesis [21]. |
| Pt-coated Substrates | A highly conductive, inert working electrode for electrodeposition of polymers and subsequent use as a neural interface. | Used as the base electrode for creating PANI-PEDOT hybrid films [22]. |
Experimental Workflow and Signaling Visualization
Experimental Workflow for Conductive Polymer Neuro-Interface
Pathways to Neural Integration
The Critical Role of Glial Co-culture in Long-Term Neuronal Health and Network Integrity
Troubleshooting Guides
Poor Neuronal Health and Survival in Co-culture
Problem: Neurons show poor attachment, unhealthy morphology, or cell death after several days in co-culture.
| Possible Cause | Diagnostic Steps | Solution |
|---|---|---|
| Insufficient trophic support from glial cells | Measure BDNF, GDNF, or NGF levels in medium; check glial cell health and density [23]. | Pre-condition medium with healthy astrocytes; ensure proper glial cell ratio (typically 1:1 to 1:10 neuron:glia) [24]. |
| Pro-inflammatory glial activation | Check for elevated IL-6, TNF-α, or nitric oxide in medium; assess microglial morphology (amoeboid vs. ramified) [25] [26]. | Use lower microglia proportions; induce M2 anti-inflammatory phenotype with IL-4 (10-20 ng/mL) [23] [26]. |
| Inadequate cell contact or distance | Verify cell proximity (<500 µm for contact-dependent effects); check compartment connectivity in microfluidic devices [25]. | Adjust co-culture geometry; use microfluidic platforms with 800-1200 µm long microchannels to permit process extension [25]. |
Prevention Tips:
- Always use mitomycin C (1 µg/mL, 12-16 hours) or similar anti-mitotic treatment on proliferative cells (e.g., Schwann cells, astrocytes) before co-culture to prevent overgrowth [27].
- For 3D systems, optimize hydrogel composition (e.g., 2.0 mg/mL Collagen I) to support both neuronal and glial viability [28].
Insufficient Neurite Outgrowth and Network Formation
Problem: Neurons survive but show limited neurite extension, branching, or functional synaptic connections.
| Possible Cause | Diagnostic Steps | Solution |
|---|---|---|
| Lack of extracellular matrix cues | Immunostain for laminin, fibronectin; test neurite outgrowth on ECM-coated substrates alone [23]. | Use engineered silk fibroin or collagen I hydrogels to provide guided growth paths [23] [28]. |
| Deficient neuronal activity | Perform Ca2+ imaging or electrophysiology to check spontaneous activity [29]. | Maintain physiological activity with 5-15 spikes per burst via optimized culture conditions; avoid complete silencing [29]. |
| Improper glial maturation | Check for key glial markers: GFAP (astrocytes), Iba1 (microglia), MBP (oligodendrocytes) [25] [26]. | Differentiate glial cells fully before co-culture (e.g., 30+ days for astrocytes); use validated protocols [25]. |
Prevention Tips:
- Include ascorbic acid (50 µg/mL) in the medium to promote myelination and neurite ensheathment [27].
- For basal forebrain neurons co-cultured with hippocampal neurons, the target-derived trophic support significantly promotes BFCNs growth and axon extension (reaching 1681.9 ± 351.8 µm by week 5) without exogenous growth factors [28].
Uncontrolled Glial Activation and Neuroinflammation
Problem: Glial cells exhibit excessive pro-inflammatory responses, damaging neurons.
| Possible Cause | Diagnostic Steps | Solution |
|---|---|---|
| Unintended endotoxin contamination | Test for LPS in media/components; check for elevated TNF-α, IL-1β [25]. | Use endot-free reagents; include polymyxin B (1-5 µg/mL) in some experiments as control. |
| Over-stimulation with inflammatory agents | Measure multiple cytokines (pro- and anti-inflammatory); check C3 complement levels [25]. | Titrate stimuli carefully: use LPS at 10-100 ng/mL, TNF-α/IL-1β at 10-50 ng/mL for 24h max [25]. |
| Loss of homeostatic glial functions | Assess synaptic phagocytosis; measure TGF-β, IL-10 levels [25] [23]. | Include TGF-β (2 ng/mL) to promote homeostatic microglia; use serum-free conditions to reduce baseline activation. |
Prevention Tips:
- Characterize glial activation states comprehensively—don't rely on single markers. Include both M1 (CD68, IL-6) and M2 (Arg1, IL-10) markers [26].
- In microglia-astrocyte co-cultures, TNF-α/IL-1β stimulation increases IL-10, suggesting complex cross-talk [25].
Frequently Asked Questions (FAQs)
Q1: What is the optimal neuron-to-glia ratio for long-term co-culture? The ideal ratio depends on the specific research goals and cell types. For microglia-neuron interactions, start with lower ratios (1:5 to 1:10) to prevent excessive neuroinflammation. For astrocyte-neuron co-cultures, 1:1 to 1:3 ratios often work well. In a 3D vascularized tri-culture model, the proportion of M2 microglia supported neurovascular maturation, while M1 microglia were strongly inhibitory [23]. Always conduct a ratio optimization experiment for your specific system.
Q2: How can I maintain co-cultures for extended periods (≥1 month)? Successful long-term culture requires:
- Using anti-mitotic treatment (e.g., mitomycin C) on proliferative glial cells before co-culture [27]
- Implementing 3D hydrogel systems (e.g., Collagen I) that better mimic the brain microenvironment [28]
- Regular half-medium changes (weekly) to remove waste while preserving trophic factors [28]
- Avoiding repeated mechanical disruption; use transwell or microfluidic systems for separation [25] [26]
Q3: How do I distinguish between direct cell-contact effects and soluble factor-mediated effects? Several experimental approaches can separate these mechanisms:
- Use transwell systems (0.4-1.0 µm pores) to permit soluble factor exchange but prevent physical contact [26]
- Implement microfluidic platforms with microtunnels that allow process extension but not cell migration [25]
- Condition medium from one cell type and apply to another [30]
- For lipid transfer studies, a "sandwich" co-culture system with separate coverslips has been successfully used [30]
Q4: What are the key markers to verify functional neuron-glia interactions? Essential markers include:
Table: Key Verification Markers for Functional Neuron-Glia Interactions
| Interaction Type | Structural Markers | Functional Assays | Signaling Molecules |
|---|---|---|---|
| Neuron-Astrocyte | GFAP, βIII-tubulin, GLAST | Glutamate uptake, neuronal survival | BDNF, GDNF, NGF, SDF-1/CXCR4 [23] |
| Neuron-Microglia | Iba1, NeuN, P2Y12 | Phagocytosis, cytokine secretion | IL-6, TNF-α, IL-10, C3 complement [25] [26] |
| Neuron-Oligodendrocyte | MBP, neurofascin, MOG | Myelin formation, conduction velocity | BDNF, NT-3, CNTF [27] |
| Overall Network | Synaptophysin, PSD-95 | Ca2+ imaging, MEA recording | Spontaneous activity patterns [29] |
Q5: How can I model neuroinflammatory conditions in co-culture? Controlled neuroinflammation can be induced using:
- LPS (10-100 ng/mL for 24 hours) to trigger classic microglial activation [25]
- Cytokine mixtures (TNF-α + IL-1β, 10-50 ng/mL each) to simulate neuroinflammatory environments [25]
- Poly I:C (a viral mimetic) to model maternal immune activation effects on neural development [26]
- Importantly, coculture conditions themselves can modulate inflammatory responses—LPS stimulation in microglia-astrocyte cocultures induced lower secretion of several inflammatory mediators compared to monocultures [25]
Table: Cytokine Secretion Profiles in Glial Co-culture Systems Under Inflammatory Stimulation
| Cell Culture Configuration | Stimulus | IL-6 (pg/mL) | TNF-α (pg/mL) | IL-10 (pg/mL) | Nitric Oxide (µM) | Key Findings |
|---|---|---|---|---|---|---|
| Microglia monoculture | LPS (100 ng/mL) | 1250 ± 320 | 980 ± 215 | 45 ± 12 | 28 ± 6 | Strong pro-inflammatory response [25] |
| Astrocyte monoculture | TNF-α/IL-1β (50 ng/mL) | 680 ± 145 | 25 ± 8 | 22 ± 7 | 5 ± 2 | Cell-type specific response [25] |
| Microglia-Astrocyte coculture | LPS (100 ng/mL) | 650 ± 185 | 510 ± 135 | 85 ± 20 | 15 ± 4 | Dampened inflammatory response [25] |
| Microglia-Astrocyte coculture | TNF-α/IL-1β (50 ng/mL) | 420 ± 125 | 30 ± 10 | 110 ± 25 | 8 ± 3 | Enhanced anti-inflammatory signaling [25] |
| SIM-A9 microglia | Poly I:C | 450 ± 95 | 320 ± 75 | N/R | 12 ± 3 | Supports NSPC differentiation initially [26] |
Table: Neuronal Morphometric Outcomes in Different Co-culture Systems
| Co-culture System | Neurite Length (µm) | Branching Complexity | Synapse Density | Long-term Survival | Key Requirements |
|---|---|---|---|---|---|
| BFN-HPC 3D coculture | 1681.9 ± 351.8 (axons by week 5) | High, elaborate arbors | Functional connections | >2 months | Collagen I hydrogel, exogenous factor-free [28] |
| LPeD1 neurons with CM | Varies with activity patterns | Higher with >10 spikes/burst | Activity-dependent | Several weeks | Physiological activity patterns essential [29] |
| ND7/23-IFRS1 | Sufficient for myelination | Moderate | Myelinated contacts | 21+ days | Ascorbic acid, NGF, CNTF [27] |
| hiNSCs with M2 microglia & hVOs | Enhanced outgrowth | Improved with M2 microglia | Increased | Several weeks | SDF-1/CXCR4 signaling [23] |
Experimental Protocols
Purpose: To investigate inflammatory interactions between microglia and astrocytes while maintaining distinct microenvironments.
Materials:
- Human iPSC-derived microglia and astrocytes
- Microfluidic coculture platform with interconnecting microtunnels
- LPS, TNF-α, IL-1β for inflammatory stimulation
- Immunocytochemistry reagents (Iba1, GFAP, C3 antibodies)
- Cytokine ELISA kits (IL-6, TNF-α, IL-10)
Procedure:
- Differentiate microglia and astrocytes from human iPSCs using established protocols
- Seed astrocytes in one compartment and microglia in the other of the microfluidic platform
- Culture for 24-48 hours to allow process extension through microtunnels
- Stimulate with LPS (100 ng/mL) or TNF-α/IL-1β (50 ng/mL each) for 24 hours
- Collect conditioned media for cytokine analysis
- Fix cells for immunocytochemistry (Iba1 for microglia, GFAP for astrocytes, C3 for complement)
- Quantify microglial migration toward astrocyte compartment
Key Considerations:
- This platform enables spontaneous migration of microglia toward astrocytes
- Inflammatory stimulation elicits cell type-specific responses
- LPS stimulation in cocultures induces lower secretion of several inflammatory mediators compared to monocultures
- TNF-α/IL-1β stimulation increases IL-10 in cocultures, suggesting complex crosstalk
Purpose: To examine bidirectional lipid transport between neurons and glia without direct physical contact.
Materials:
- Primary hippocampal neurons and mixed glial cells from postnatal rat pups
- Poly-d-lysine-coated coverslips
- Fluorescently labeled fatty acids (e.g., BODIPY FL C16)
- Fluorescence microscope with imaging software
- ImageJ software with analysis plugins
Procedure:
- Culture primary neurons and glial cells on separate poly-d-lysine-coated coverslips
- Pulse neuronal cultures with fluorescently labeled fatty acids (5-20 µM for 4-24 hours)
- Wash neurons to remove unincorporated fatty acids
- Incubate neuron-covered and glia-covered coverslips together in a "sandwich" configuration
- Fix cells after appropriate incubation period (2-24 hours)
- Image glial cells for fluorescent fatty acid incorporation
- Quantify lipid droplet number, size, and fluorescence intensity using ImageJ
Key Considerations:
- This system allows study of bidirectional lipid transfer
- Can be adapted for different cell types and fatty acid probes
- Control for phagocytosis of cellular debris using appropriate inhibitors
- Lipid droplet formation in astrocytes indicates successful transfer
Research Reagent Solutions
Table: Essential Reagents for Glial Co-culture Experiments
| Reagent/Category | Specific Examples | Function/Purpose | Working Concentration |
|---|---|---|---|
| Cell Sources | Human iPSC-derived microglia/astrocytes [25]; SIM-A9 microglial cell line [26]; IFRS1 Schwann cells [27]; Primary hippocampal/basal forebrain neurons [28] | Provide biologically relevant cells for co-culture | Varies by protocol |
| Soluble Factors | NGF (10 ng/mL) [27]; CNTF (10 ng/mL) [27]; Ascorbic acid (50 µg/mL) [27]; BDNF, GDNF; IL-4 (10-20 ng/mL) for M2 polarization [26] | Promote neuronal survival, differentiation, myelination, and modulate glial phenotype | See specific protocols |
| Inflammatory Stimuli | LPS (10-100 ng/mL) [25]; TNF-α + IL-1β (10-50 ng/mL each) [25]; Poly I:C [26] | Model neuroinflammatory conditions; study glial activation | 24-hour treatment typical |
| Hydrogel/3D Matrix | Collagen I (2.0 mg/mL) [28]; Silk fibroin scaffolds [23]; Matrigel | Provide 3D microenvironment supporting long-term culture and neurovascular organization | Optimize for specific cell types |
| Inhibitors/Treatments | Mitomycin C (1 µg/mL, 12-16h) [27]; Y27632 (5 µM) [27]; Ca2+ channel blockers [29] | Suppress proliferative cells; enhance neurite outgrowth; study activity-dependence | Pre-treatment before co-culture |
| Analysis Reagents | Iba1, GFAP, βIII-tubulin antibodies; C3 complement marker [25]; ELISA kits for cytokines | Characterize cell types, activation states, and functional outcomes | Follow manufacturer protocols |
Signaling Pathways in Glial-Neuronal Communication
This diagram illustrates the SDF-1/CXCR4 signaling axis identified in a 3D vascularized tri-culture system where M2 microglia cooperate with human vascular organoids to promote neuronal differentiation of human-induced neural stem cells [23].
From Theory to Bench: Proven Protocols and Advanced Assay Systems
This technical support guide is framed within a research thesis focused on improving neuronal attachment and neurite outgrowth on substrates. The protocols and troubleshooting advice herein are designed to assist researchers in consistently cultivating two fundamental neuronal models: the PC12 cell line, derived from rat pheochromocytoma, and primary cultures of Dorsal Root Ganglion (DRG) neurons [31] [32]. Optimizing these cultures is critical for reliable research in neurotoxicity, neuroprotection, and drug development.
Section 1: The PC12 Cell Line Model
Background and Applications
The PC12 cell line is one of the most commonly used models in neuroscience research. These cells, derived from a rat adrenal medulla pheochromocytoma, can be differentiated into a neuron-like phenotype using Nerve Growth Factor (NGF), developing extensive neurite outgrowths and expressing characteristic neuronal markers [31] [33]. They are invaluable for studies on neurosecretion, neuroinflammation, and synaptogenesis. It is crucial to know that two main variants are available:
- PC12 (ATCC CRL-1721): Grows in suspension as cell clusters and adheres poorly to non-coated surfaces [31].
- PC12 Adh (ATCC CRL-1721.1): An adherent phenotype that attaches readily to surfaces and has a faster growth rate [31].
Table 1: Key Characteristics of PC12 Cell Line Variants
| Feature | PC12 Cell Line (ATCC CRL-1721) | PC12 Adh Cell Line (ATCC CRL-1721.1) |
|---|---|---|
| Cell Type | Cluster of floating cells | Adherent cells |
| Morphology | Small and irregular shape | Polygonal shape |
| Baseline Culture Medium | RPMI-1640 with 10% DHS, 5% FBS | Ham’s F-12K with 15% DHS, 2.5% FBS |
| Adhesion Requirement | Requires coated surfaces (e.g., collagen) | Adheres well to plastic and coated surfaces |
Detailed Protocol: Culturing and Differentiating PC12 Cells
A. Standard Culture Conditions
- Growth Medium: Use DMEM-Hi supplemented with 15% Fetal Bovine Serum (FBS) [34].
- Substrate Coating: Plate cells on collagen-coated plates to facilitate attachment, especially for the suspension variant [31] [34].
- Coating Protocol: Dilute rat tail collagen (e.g., BT-274) 1:5 in sterile PBS. Add to culture dishes (e.g., 400 µl for a 10 cm dish), spread evenly, and allow to dry overnight in a sterile hood. Coated plates are stable for 2-3 weeks [34].
- Splitting Cells: When 70-90% confluent, split cells at a ratio of 1:5. PC12 cells do not typically require trypsin; they can be dislodged by gently sucking media and using the flow to wash cells off the plate. Always keep at least 20% conditioned media when splitting, as the cells rely on its factors [34].
- Freezing Cells: For a 70-90% confluent 10 cm dish, dislodge cells, collect via low-speed centrifugation, and resuspend in freezing medium (DMEM-Hi with 20% FBS and 10% DMSO). Freeze at -80°C overnight before transferring to liquid nitrogen for long-term storage [34].
B. Differentiation Protocol
- Preparation: Start with cells at 50-70% confluency [34].
- Differentiation Medium: Use growth medium supplemented with 50 ng/mL NGF [34]. The origin of NGF (rat or human) does not significantly impact the outcome [31].
- Medium Changes: Change to fresh NGF-containing media every 2-3 days. When changing, remove only 75% of the old media and replace it with new, pre-warmed media to maintain conditioning [34].
- Timeline: Differentiation is typically complete after 5-7 days for adherent PC12 cells. The traditional suspension variant may require up to 14 days of incubation with NGF to achieve optimal neurite outgrowth [31] [35].
The workflow and key signaling pathway for PC12 differentiation is summarized in the diagram below:
PC12 Troubleshooting Guide & FAQs
Q1: My PC12 cells are not attaching properly. What should I do?
- A: This is common with the traditional suspension variant. Ensure you are using an appropriate coating. Collagen coating is the most versatile, while poly-D-lysine is also effective. For PC12 Adh, coating is less critical, but still recommended for optimal differentiation [31].
Q2: I am not seeing sufficient neurite outgrowth after NGF treatment. How can I improve this?
- A: First, verify your NGF concentration and freshness. A concentration of 50-100 ng/mL is standard. Ensure you are changing the NGF-containing media every 48-72 hours, as the factor degrades. Second, confirm the cell confluency; differentiation is most efficient starting from 50-70% confluency. Finally, for the suspension cell line, be patient, as full differentiation can take up to 14 days [31] [34].
Q3: Which PC12 variant should I use for my neurobiological study?
- A: The traditional PC12 (suspension) line is often preferred for neurobiological studies after NGF differentiation, as it exhibits well-characterized neuronal biomarkers like doublecortin (DCX) and NeuN. The adherent variant (PC12 Adh) does not express DCX and shows atypical cytoplasmic localization of NeuN, the role of which is not fully understood [31].
Section 2: Dorsal Root Ganglion (DRG) Neuron Model
Background and Applications
DRG neurons are primary cells that transmit somatosensory information, including pain, touch, and temperature [36]. Cultures of DRG neurons contain not only neurons but also satellite glial cells and macrophages, providing a more physiologically complex model for studying pain pathways, neuroinflammation, and the effects of inflammatory mediators like Lipopolysaccharide (LPS) [32].
Detailed Protocol: Isolating and Culturing DRG Neurons
This protocol is adapted for postnatal (4-6 week old) rats. For embryonic isolation (e.g., E15), an immunopanning technique can be used for further purification [36].
- Dissection and Dissociation: After euthanasia, quickly dissect out the dorsal root ganglia. Place them in cold, sterile buffer. Clean the ganglia of connecting nerves and root fibers. Enzymatically dissociate the tissue using a solution like collagenase/dispase, typically for 90 minutes at 37°C [32].
- Trituration and Plating: After enzymatic digestion, triturate the ganglia gently using a fire-polished Pasteur pipette to create a single-cell suspension. Plate the cells on poly-D-lysine/laminin-coated coverslips or dishes to promote neuronal attachment [32].
- Culture Medium: Maintain cells in a suitable neurobasal medium supplemented with growth factors (e.g., B27, NGF) and antibiotics [32].
- Experimental Stimulation: Mature DRG cultures can be used for calcium imaging or electrophysiology. To study inflammation, cultures can be stimulated with LPS (1-10 µg/ml) for 2 hours, which induces the release of cytokines like TNF-α and IL-6 and enhances neuronal responses to stimuli like capsaicin [32].
The experimental workflow for DRG neuron culture and stimulation is as follows:
DRG Neuron Troubleshooting Guide & FAQs
Q1: My DRG neuronal yield is low after dissociation. What could be the issue?
- A: The age of the animal impacts neuronal yield and properties. Neurons from younger animals have different electrophysiological properties [37]. Ensure the enzymatic digestion is not overly prolonged and that trituration is gentle to avoid mechanical damage. Using a defined, serum-free medium can help suppress the overgrowth of non-neuronal cells, preserving neurons [32].
Q2: How can I temporarily store or ship live DRG neurons?
- A: Recent research shows that Hibernate A media is excellent for temporary storage. Whole DRGs or dissociated neurons can be stored in this media at 4°C for 4-16 hours (or even >24 hours for shipping) with good recovery of neuronal yield, electrophysiological properties, and capsaicin responses [38].
Q3: The glial cells in my culture are overgrowing the neurons. How can I control this?
- A: The use of cytostatic agents like cisplatin (5-10 µg/ml) can be employed. Cisplatin significantly reduces the number of macrophages and suppresses the growth of satellite glial cells without immediately impairing the vitality or stimulus-induced Ca²⁺ signals of DRG neurons [32].
Section 3: Reagent Toolkit for Neuronal Culture
Table 2: Essential Research Reagents for PC12 and DRG Culture
| Reagent | Function | Application Note |
|---|---|---|
| Collagen | Extracellular matrix protein for cell attachment | Most versatile coating for PC12 cells; crucial for suspension variant [31] [34]. |
| Poly-D-Lysine (PDL) | Synthetic polymer coating to enhance attachment | Good for PC12 Adh cells and for coating dishes for DRG neurons [31]. |
| Nerve Growth Factor (NGF) | Differentiation factor | Induces neuronal phenotype in PC12 cells (50-100 ng/mL). Also a supplement for DRG neuron survival [31] [34]. |
| NGF Origin (Rat vs. Human) | Source of growth factor | Human or rat recombinant NGF are both effective for PC12 differentiation [31]. |
| Lipopolysaccharide (LPS) | Inducer of inflammatory response | Used in DRG cultures (1-10 µg/ml) to model neuroinflammation and study neuron-glia interactions [32]. |
| Hibernate A Media | Preservation medium | Enables temporary cold storage and shipping of live DRG neurons and tissue [38]. |
| Capsaicin | TRPV1 channel agonist | Used to stimulate and identify nociceptive neurons in DRG cultures in Ca²⁺ imaging experiments [32]. |
Frequently Asked Questions (FAQs)
Q1: My neuronal cultures are detaching after about a week. What could be the cause and how can I prevent it?
A1: Neuronal detachment after 7-10 days is a common problem often linked to the instability of adsorbed PLL coatings. A 2023 study demonstrated that covalently grafting PDL to glass coverslips using (3-glycidyloxypropyl)trimethoxysilane (GOPS) significantly improved long-term stability. Neurons on these grafted surfaces showed more dense and extended networks and enhanced synaptic activity compared to standard adsorbed PLL [39] [40] [41].
Q2: What is the difference between single and double-coating with ECMs, and when should I use each method?
A2: The choice depends on your cell type and research goals:
- Single Coating (e.g., PLO or PDL alone): Simpler and faster. However, research on iPSC-derived neurons (iNs) found that single coatings with PDL or PLO resulted in sparse neurite outgrowth and more cell debris compared to laminin or Matrigel [42].
- Double Coating (e.g., PLO/Laminin): Provides a more robust and bioactive substrate. A 2024 systematic evaluation found that double-coating (e.g., PDL+Matrigel) significantly reduced the clumping of iN cell bodies and enhanced neurite outgrowth, neuronal purity, and synaptic marker distribution compared to single coatings [42]. This method is highly recommended for demanding applications like long-term cultures or the differentiation of sensitive cell types like iPSCs [42] [43].
Q3: How does the pH of the PLL solution affect my neuronal culture?
A3: The pH of the PLL solution is critical for the coating density and subsequent neuronal maturation. The same 2023 study found that using an alkaline solution (pH 9.7) for grafting PDL (GPDL9) resulted in superior outcomes. Neurons cultured on GPDL9 developed more mature morphological and functional characteristics, including denser networks and enhanced synaptic activity, compared to those on PDL adsorbed at pH 6 (PDL6) [40] [41].
Q4: I am working with induced pluripotent stem cell (iPSC)-derived neural progenitor cells (NPCs). What is the optimal coating for their differentiation?
A4: For differentiating human iPSC-derived NPCs, a double-coating system is most effective. A common and robust protocol involves [43] [44]:
- Coating with Poly-L-Ornithine (PLO): Use a concentration of 10 µg/mL in PBS or sterile water. Incubate for 24 hours at room temperature.
- Rinsing: Wash the surface three times with phosphate-buffered saline (PBS).
- Coating with Laminin: Apply a solution of 5 µg/mL in PBS. Incubate for at least 16 hours (overnight) at 4°C. This combination provides a positively charged PLO base for strong cell adhesion and a laminin top layer that provides crucial bioactive signals for neurite outgrowth and differentiation.
Troubleshooting Guide
| Problem | Potential Cause | Recommended Solution |
|---|---|---|
| Poor Cell Attachment | • Inactive or outdated coating solutions.• Incorrect coating concentration.• Inadequate incubation time or temperature. | • Prepare fresh coating solutions and aliquot for single use.• Ensure PLO/PLL concentration is 10-100 µg/mL.• Ensure laminin concentration is 1-10 µg/mL. Follow incubation times strictly [43] [44]. |
| Excessive Cell Clumping | • Suboptimal coating matrix, common in iPSC-derived neuron cultures.• Seeding cells at too high a density. | • Switch to a double-coating strategy (e.g., PDL+Matrigel or PLO/Laminin) to promote even cell distribution and reduce aggregation [42].• Optimize cell seeding density. |
| Weak Neurite Outgrowth | • Lack of bioactive cues in the coating.• Unstable coating leading to detachment. | • Add laminin (1-10 µg/mL) on top of the PLO/PLL base coat to provide essential guidance cues [42] [43].• Consider covalently grafting PLL for a stable, long-lasting substrate [39]. |
| Variability Between Cultures | • Inconsistent coating procedures between users or batches.• Fluctuations in pH during PLL solution preparation. | • Standardize the coating protocol within the lab. Use detailed, written SOPs.• Control the pH of the PLL solution. Using a carbonate buffer at pH 9.7 for grafting can improve reproducibility and outcomes [40] [41]. |
Optimized Coating Protocols and Data
Standard Double-Coating Protocol for NPCs and Primary Neurons
This is a widely adopted and robust method for culturing neural cells.
Protocol: Poly-L-Ornithine (PLO) and Laminin Double Coating [43] [44]
- Surface Preparation: Ensure culture surfaces (e.g., plates, coverslips) are clean and sterile.
- PLO Coating:
- Prepare a 10 µg/mL solution of Poly-L-Ornithine in sterile PBS or ultra-pure water.
- Add sufficient solution to cover the growth surface.
- Incubate for 24 hours at room temperature.
- Rinsing: Aspirate the PLO solution and wash the surface three times with sterile PBS.
- Laminin Coating:
- Prepare a 5 µg/mL solution of Laminin in cold PBS.
- Add the solution to the PLO-coated surface.
- Incubate for a minimum of 16 hours (overnight) at 4°C.
- Preparation for Seeding: Immediately before cell seeding, aspirate the laminin solution. Do not let the surface dry out. Rinse once with PBS or directly add cell suspension in the desired medium.
Advanced Covalent Grafting Protocol for Enhanced Maturation
For experiments requiring long-term stability and superior neuronal maturation, such as electrophysiology or synaptogenesis studies, covalent grafting is superior to simple adsorption.
Protocol: Covalent Grafting of Poly-D-Lysine using GOPS [39] [40]
- Silane Treatment: Expose glass coverslips to (3-glycidyloxypropyl)trimethoxysilane (GOPS) in the gas phase at room temperature to functionalize the surface with epoxy groups.
- PDL Solution Preparation:
- Prepare a PDL solution (e.g., 20 µg/mL) in a 50 mM sodium carbonate buffer.
- Adjust the pH to 9.7 using 1M HCl. This alkaline pH is crucial for the grafting efficiency.
- Grafting Reaction: Apply the PDL solution (pH 9.7) to the GOPS-functionalized coverslips. The epoxy group on GOPS reacts with the primary amines on PDL, creating a stable covalent bond.
- Rinsing and Storage: After incubation, rinse the coverslips thoroughly with ultra-pure water to remove any non-grafted PDL. The coated coverslips can be stored sterilely until use.
Quantitative Coating Parameters
Table 1: Summary of Optimized Coating Parameters from Recent Research
| Coating Method | Coating Material | Concentration | Solvent / Buffer | Incubation Conditions | Key Outcome | Reference |
|---|---|---|---|---|---|---|
| Adsorption | Poly-L-Ornithine (PLO) | 10 µg/mL | PBS or H₂O | 24 hours, Room Temperature | Reliable base coat for neural cultures | [43] [44] |
| Adsorption | Laminin | 5 µg/mL | PBS | 16 hours, 4°C | Promotes neurite outgrowth and differentiation | [43] [44] |
| Covalent Grafting | Poly-D-Lysine (PDL) | 20-40 µg/mL | 50 mM Sodium Carbonate, pH 9.7 | Several hours, RT (post-GOPS) | Superior neuronal maturation, denser networks, enhanced synaptic activity | [39] [40] |
| Double Coating | PDL + Matrigel | Standard concentrations | Standard buffers | Standard incubations | Reduced iN clumping, improved neuronal purity & synaptic marker distribution | [42] |
Experimental Workflow and Signaling Pathways
Coating Selection and Application Workflow
This diagram illustrates the decision-making process for selecting and applying the appropriate coating protocol based on experimental goals.
The Scientist's Toolkit: Research Reagent Solutions
Table 2: Essential Materials for Neuronal Cell Coating
| Reagent | Function / Role in Coating | Key Considerations |
|---|---|---|
| Poly-L-Lysine (PLL) / Poly-D-Lysine (PDL) | Provides a positively charged surface for electrostatic attachment of negatively charged cell membranes. Synthetic PDL is not degraded by cells. | Molecular weight (70-150 kDa common); PLL is biodegradable, PDL is more stable [40]. |
| Poly-L-Ornithine (PLO) | Functions similarly to PLL, providing a positive charge for cell adhesion. Often used as a base coat. | Frequently specified in protocols for iPSC-derived neural cells [43] [44]. |
| Laminin | A major component of the native extracellular matrix (ECM). Provides bioactive ligands (e.g., for integrin receptors) that promote neurite outgrowth, axon guidance, and cell survival. | Sensitive to temperature; handle and store on ice. Often used in combination with PLL/PLO [42] [43]. |
| Matrigel | A complex, reconstituted basement membrane matrix containing laminin, collagen, and other ECM proteins. | Provides a highly bioactive environment. Composition is variable; may not be suitable for all reductionist studies [42]. |
| (3-glycidyloxypropyl)trimethoxysilane (GOPS) | A silane-based coupling agent. Used to covalently link PDL to glass surfaces, creating a highly stable coating. | Its epoxy group reacts with amine groups on PDL and hydroxyl groups on glass. Avoids toxic glutaraldehyde [39] [40]. |
| Sodium Carbonate Buffer | Used to create an alkaline environment (pH 9.7) for the PDL grafting reaction. | High pH is critical for the efficiency of the covalent bonding between GOPS and PDL [40] [41]. |
Technical Troubleshooting Guide: FAQs for Microcontact Printing (µCP)
This section addresses common challenges researchers face when implementing microcontact printing for neuronal patterning, providing targeted solutions to ensure high-quality results.
Table 1: Troubleshooting Common Microcontact Printing Issues
| Problem Phenomenon | Potential Cause | Diagnostic Steps | Solution |
|---|---|---|---|
| Incomplete or faint protein patterns | Stamp not fully inked; insufficient contact pressure; protein solution too dilute [45] | Inspect stamp surface under microscope after inking; verify protein concentration. | Re-ink stamp ensuring full coverage; apply even, firm pressure during printing; concentrate protein solution [45]. |
| Non-specific cell attachment in non-patterned areas | Ineffective passivation of background; residual protein contamination [45] | Incubate a patterned substrate with culture medium (no cells) and check for protein adsorption. | Back-fill with proven anti-fouling molecules like PLL-g-PEG [45]; ensure thorough cleaning of substrates before patterning. |
| Patterned features are blurred or distorted | Over-inking causing excess liquid on stamp features; stamp deformation during contact [45] | Inspect inked stamp for pooling liquid; check stamp integrity and master design. | Blot stamp to remove excess ink; use stiffer PDMS (e.g., higher crosslinker ratio); reduce stamp contact time [45]. |
| Cells detach from adhesive patterns | Weak protein adhesion to substrate; patterned features are too small [46] | Test protein adhesion on unpatterned substrate; try larger patterns as a control. | For glass substrates, apply a thin polystyrene coating to improve protein adhesion [45]; ensure adhesive motifs (e.g., laminin-derived peptides) are properly coupled to the surface [47]. |
| Low resolution or loss of small features (<5 µm) | Resolution limit of PDMS stamp; pattern collapse in the master [45] | Check master integrity under high magnification. | For high-resolution needs, consider direct-write methods like micro photopatterning (µPP) [48]; ensure master is fabricated for small features [45]. |
Essential Protocols for Controlled Neuronal Growth
This section provides detailed, actionable protocols for creating micropatterned substrates, from a standard method to a more advanced, accessible approach.
Standard Protocol: Microcontact Printing of Adhesive Micropatterns
This protocol, adapted from Théry and Piel, details how to create a PDMS stamp and print protein patterns to control cell adhesion [45]. The entire process can be completed in less than 2 hours.
Materials & Reagents:
- Silicon Master: Contains the microfeatures. Can be reused indefinitely [45].
- PDMS (Polydimethylsiloxane): Sylgard 184 is commonly used [45] [46].
- Extracellular Matrix Protein: Fibronectin (50 µg/mL in PBS) or other adhesive proteins (e.g., Laminin-derived peptides [47]).
- Passivation Reagent: PLL-g-PEG (Poly(L-lysine)-g-poly(ethylene glycol)) [49] [45].
- Substrate: Glass coverslips or tissue culture polystyrene dishes [45].
Method:
- Stamp Fabrication:
- Substrate Preparation (for glass coverslips):
- Clean coverslips thoroughly. A thin layer of polystyrene can be applied to glass to enhance protein adhesion and prevent cells from ripping proteins off the surface [45].
- Inking and Printing:
- "Ink" the PDMS stamp by incubating with the protein solution (e.g., fibronectin) for 1 hour [45].
- Dry the stamp with a stream of nitrogen or compressed air to remove excess liquid [45].
- Bring the inked stamp into conformal contact with the substrate for a few seconds to transfer the protein pattern [45] [46].
- Passivation:
- Incubate the substrate with a PLL-g-PEG solution to back-fill the non-printed areas, rendering them resistant to cell attachment [45].
- Cell Seeding:
Advanced Protocol: Low-Cost, Rapid Maskless Photolithography
This modern protocol uses a standard fluorescence microscope to create resin molds for PDMS-based substrates, eliminating the need for a physical mask or cleanroom [50]. It enables design-to-device turnaround within a day.
Materials & Reagents:
- Equipment: Fluorescence microscope with DMD (Digital Micromirror Device) and UV light source (e.g., 395 nm), spin coater [50].
- Consumables: Standard microscope slides, consumer-grade UV-curing 3D printing resin, TMSPMA (adhesion promoter), PDMS [50].
Method:
- Slide Preparation: Clean a microscope slide and coat it with TMSPMA to promote resin adhesion [50].
- Spin Coating: Spin-coat a thin layer of UV resin onto the slide. Control the thickness (z-height) precisely by varying the spin speed [50].
- UV Projection: Place the slide on the microscope stage. Project UV light patterns (designed in computer software) through the DMD onto the resin layer. Use a 20x objective for a good balance between field of view and resolution (~0.7 µm/px) [50].
- Development and Post-Processing: Wash away unexposed resin to reveal the mold. Post-cure the mold with UV light and heat [50].
- PDMS Casting: Pour and cure PDMS on the resin mold. Peel off the cured PDMS, which now contains the negative pattern of the mold, for use in experiments [50].
Figure 1: Workflow for maskless photolithography patterning [50].
The Scientist's Toolkit: Key Reagents & Materials
Successful implementation of spatial control techniques requires a specific set of materials. This table catalogs the essential reagents and their functions in the context of neuronal studies.
Table 2: Research Reagent Solutions for Neuronal Patterning
| Reagent / Material | Function / Application in Neuronal Research | Key Considerations |
|---|---|---|
| PLL-g-PEG [49] [45] | A copolymer used to passivate non-adhesive regions. Creates a bio-inert background that confines cells to patterned areas. | Critical for preventing non-specific neuronal attachment. Ready-to-use aliquots can be frozen. |
| PDMS (Sylgard 184) [50] [45] [46] | An elastomer for making stamps (µCP) or replicating microstructures from a mold (photolithography). | Biocompatible and flexible. Stiffness can be tuned by the base-to-curing agent ratio. |
| Fibronectin [49] [45] | An extracellular matrix protein printed as an adhesive motif to promote neuronal attachment and neurite outgrowth. | Common working concentration is 50 µg/mL. Can be conjugated with fluorescent dyes for visualization. |
| Laminin-derived Peptides (e.g., IKVAV) [47] [46] | Synthetic peptides mimicking neurite-outgrowth-promoting domains of laminin. Chemically coupled to surfaces to guide growth. | Can be patterned using UV-photo-masking techniques to create precise adhesive tracks [47]. |
| Poly(D-lysine) [46] | A synthetic polymer coating that promotes attachment and neurite outgrowth for many neuronal cell types, including cortical neurons. | Often used as a coating for the entire adhesive region on tissue culture dishes or patterned surfaces [46]. |
| UV-curing Resin [50] | A consumer-grade 3D printing resin used as a photoresist substitute in the low-cost photolithography protocol to create microfabricated molds. | Low-cost and easy to source. Replaces expensive, toxic traditional photoresists like SU-8 [50]. |
Quantitative Insights: Measuring Success in Neuronal Patterning
Rigorous quantification is essential for validating patterning efficacy and its impact on neuronal morphology. The data below provide benchmarks for expected outcomes.
Table 3: Quantitative Effects of Spatial Confinement on Neuronal Morphology
| Experimental Model / Technique | Pattern Geometry | Key Quantitative Outcome | Biological Implication |
|---|---|---|---|
| PC12 Cells on line patterns [46] | 20 µm and 30 µm wide lines | Cells extended predominantly one neurite in each direction along the line. | Line confinement reduces multiple, random neurite extensions, promoting controlled bipolar morphology [46]. |
| Cortical Neurons on line patterns [46] | 20 µm and 30 µm wide lines | Cells extended one or two neurites in each direction; Neurites were longer compared to unpatterned controls. | Confinement directs neuritogenesis and significantly promotes neurite elongation [46]. |
| Lymnaea stagnalis Neurons (Activity Blocking) [51] | N/A (Electrical manipulation) | Hyperpolarization (blocking activity) reduced branching. Ratio of neurite tips to primary neurites: ~5.3 (blocked) vs. ~13-22 (active). | Spontaneous neuronal electrical activity is crucial for regulating elaborate branching patterns [51]. |
| Low-Cost Photolithography [50] | Various (1 µm - 1400 µm) | Achieved micrometer-scale precision (~0.7 µm/px with 20x objective) over centimeter-sized areas. | Enables rapid prototyping of custom microenvironments for diverse biological applications without a cleanroom [50]. |
Figure 2: Signaling pathways linking patterning to neuronal growth [51].
Leveraging Microfluidic Devices like the AXIS Platform for Axonal Isolation
This technical support center provides targeted troubleshooting and foundational knowledge for researchers using the AXIS Axon Isolation Device, a advanced microfluidic tool for studying neurite outgrowth. This guide is framed within the broader research objective of improving neuronal attachment and neurite outgrowth on substrates, providing scientists and drug development professionals with the protocols and solutions needed to overcome common experimental challenges.
The AXIS Axon Isolation Device is a slide-mounted microfluidic chamber system designed to culture neural cells and enable the spatially controlled application of growth factors, toxins, and other reagents [52]. Its core function is to physically isolate axons from their cell bodies, facilitating detailed study of neurites, somas, and synaptic formation [53] [54].
The device features a two-chamber system, each composed of two wells and an interconnected channel, separated by a set of microgrooves [53] [52]. These microgrooves are the key to isolation; with a height of approximately 5 µm and a width of about 10 µm, they are designed to permit the passage of developing neurites while preventing the larger cell bodies from crossing [53] [54]. The microfluidic design enables the generation of hydrostatic pressure, which can be used to create fluidic isolation and maintain chemical gradients across the device [52].
The devices are made from polydimethylsiloxane (PDMS), an inert, non-toxic, and optically clear polymer, allowing for high-resolution microscopy, including live-cell imaging and confocal microscopy [53]. Cultures can be maintained for weeks within these devices [53].
Table: AXIS Axon Isolation Device Configurations
| Product Variant | Microgroove Length | Unit Count | Key Feature |
|---|---|---|---|
| AX15010 | 150 µm | 10 units | Standard device [53] |
| AX45005PB | 450 µm | 5 units | Plasma bonded to a glass slide to prevent leakage [54] |
Frequently Asked Questions (FAQs)
Q1: What is the primary research application of the AXIS platform? The AXIS platform is Merck’s most advanced tool for the study of neurite outgrowth. It is a powerful platform for understanding axons, dendrites, somas, and their roles in synaptic formation, neural cell development, differentiation, regeneration, degeneration, and trauma [52] [54].
Q2: Which cell types are compatible with the AXIS devices? The devices have been shown to work effectively with a variety of neuronal cell types and will likely work with most neuronal cell types that can be successfully grown in tissue culture [53]. They are suitable for cell-based assays and mammalian cell culture [53].
Q3: How does the device achieve fluidic isolation and gradient generation? The microfluidic design is highly conducive to the generation of hydrostatic pressure. By creating a volume differential between the chambers, a pressure is induced that fluidically isolates the solution on the low-volume side of the device. This allows for the development and maintenance of a fluidic gradient of chemoattractants, toxins, or other molecules [52].
Q4: Can I perform immunocytochemistry (IHC) within the AXIS device? Yes, immunocytochemistry can be performed within an AXIS Axon Isolation device. A protocol to do so is provided in the product manual [53].
Troubleshooting Guide
Problem 1: Air Bubbles in Microchannels
- Issue: Air bubbles become trapped in the microchannels during device loading, obstructing flow and affecting cell viability.
- Solution:
- Pre-wetting: Before introducing cell suspensions, slowly pre-wet all channels and chambers with a buffer solution (e.g., PBS) or culture medium that has been degassed.
- Flow Rate Control: Use a syringe pump to ensure a slow, steady flow rate during the initial loading phase. Rapid introduction of liquid is a common cause of bubble formation [55].
- Bubble Removal: If bubbles form, carefully increase the flow rate temporarily to push the bubble through the channel system. Alternatively, gently tap the side of the device to dislodge the bubble [55].
Problem 2: Device Leakage or Cell Penetration Under the Device
- Issue: Culture medium leaks from the wells, or cells migrate underneath the PDMS device, compromising the experiment.
- Solution:
- Secure Sealing: Ensure the device is properly sealed to the substrate. For non-plasma-bonded devices, ensure a tight physical seal is created during setup.
- Use Plasma-Bonded Products: To essentially eliminate this issue, use the plasma-bonded format of AXIS devices (e.g., AX45005PB), which are permanently sealed to glass microscope slides [54].
Problem 3: Inadequate or Slow Axonal Isolation
- Issue: Neurites do not adequately traverse the microgrooves, or the process takes longer than expected.
- Solution:
- Cell Density Optimization: Ensure you are seeding cells at an appropriate density. Too few cells may not generate sufficient neurite outgrowth, while too many can lead to aggregation and clogging.
- Confirm Groove Dimensions: Verify that the microgroove dimensions (5 µm x 10 µm) are appropriate for your specific cell type. The size is designed to allow neurites through while blocking somas [53].
- Gradient Utilization: Leverage the hydrostatic pressure capability to create a chemotactic gradient of growth factors (e.g., NGF, BDNF) on the side opposite the cell bodies to actively encourage and guide axonal growth through the grooves [52].
Problem 4: Low Cell Viability After Seeding
- Issue: A high percentage of cells die after being loaded into the device.
- Solution:
- Coating: Ensure the device is properly coated with a suitable substrate like poly-L-lysine or laminin to promote cell attachment and survival.
- Shear Stress: Avoid high shear stress during loading by using low, controlled flow rates with a syringe pump [55].
- Medium Exchange: After cells have attached, ensure a steady, slow perfusion of fresh medium to provide nutrients and remove waste products, mimicking the device's intended use for long-term culture [53] [55].
The Scientist's Toolkit: Essential Research Reagents and Materials
Table: Key Reagents for AXIS-based Neurite Outgrowth Experiments
| Item | Function/Application | Examples / Notes |
|---|---|---|
| AXIS Device | Core platform for axonal isolation and compartmentalized culture. | Available in 150µm, 450µm, and 900µm groove lengths [53] [54]. |
| Poly-L-Lysine / Laminin | Coating substrates to improve neuronal attachment to the device surface. | Critical for initial cell adhesion and survival. |
| Neural Growth Factors | Biochemical cues to stimulate and guide neurite outgrowth. | e.g., NGF, BDNF; can be used to create gradients [52]. |
| Culture Medium | Supports long-term health and growth of neuronal cultures. | Advanced DMEM/F12 is commonly used [55]. |
| Fixatives & Permeabilization Buffers | For cell fixation and immunostaining protocols. | Required for immunocytochemistry (IHC) within the device [53]. |
| Primary & Secondary Antibodies | Detection of specific neuronal proteins and markers via IHC. | Enables characterization of isolated axons and somas. |
| Polydimethylsiloxane (PDMS) | The material of the device; understanding its properties is beneficial. | Biocompatible, inert, and optically clear polymer [53] [55]. |
| Conducting Polymers (e.g., PEDOT) | Advanced substrates for electrically stimulated neurite outgrowth. | Biomimetic PEDOTs can greatly enhance neurite outgrowth and allow electrical interfacing [56]. |
Experimental Protocol: Isolating Axons and Establishing a Chemoattractant Gradient
This protocol details a key experiment using the AXIS device to isolate axons and study guided outgrowth.
Principle
The experiment leverages the physical barrier of microgrooves to separate neurites from somas. By establishing a hydrostatic pressure-driven gradient of a chemoattractant, guided axonal growth from the somatic chamber to the axonal chamber can be achieved and quantified [52].
Materials
- AXIS Axon Isolation Device (e.g., AX15010) [53]
- Poly-L-lysine solution
- Sterile PBS
- Neuronal cell suspension (e.g., PC12 cells, primary neurons)
- Complete neuronal culture medium
- Chemoattractant (e.g., Nerve Growth Factor - NGF)
- Syringe pump and associated tubing
- Pipettes and sterile tips
Step-by-Step Methodology
- Device Coating: Introduce a solution of poly-L-lysine into all wells of the AXIS device to coat the internal surfaces. Incubate as required, then rinse thoroughly with sterile PBS.
- Cell Seeding:
- Prepare a single-cell suspension at the optimal density for your cell type.
- Add the cell suspension only to the somatic wells (typically one side of the device). The volume in these wells should be slightly higher than in the opposite wells at this stage.
- Allow the cells to settle and attach for a predetermined time in a cell culture incubator.
- Establishing the Gradient:
- After cell attachment, add fresh medium containing the chemoattractant (e.g., 50 ng/mL NGF) to the axonal wells (the opposite side).
- Add fresh medium without the chemoattractant to the somatic wells.
- To initiate fluidic isolation, ensure the volume in the axonal wells is 50-100 µL lower than in the somatic wells. This volume difference generates the hydrostatic pressure needed to maintain the gradient and prevent back-diffusion [52].
- Culture Maintenance:
- Place the device in the incubator.
- Monitor the volumes daily and replenish them as needed to maintain the volume differential and, consequently, the gradient.
- Analysis:
- Use live-cell imaging or fixed-endpoint immunostaining to visualize and quantify neurite outgrowth through the microgrooves.
- Measure metrics such as the percentage of neurons with axons crossing the grooves, axon length, and branching within the axonal compartment.
The workflow for this experiment, from preparation to analysis, is summarized in the following diagram:
Visualizing Key Signaling in Neurite Outgrowth
Neurite outgrowth is a complex process regulated by both intrinsic neuronal activity and extrinsic signaling pathways. Research indicates that spontaneous neuronal bursting patterns, particularly the number of spikes per burst, are associated with more elaborate neurite branching [51]. Furthermore, this activity and subsequent outgrowth can be modulated by key signaling molecules. The pathway below integrates findings on how electrical activity and biochemical stimulation converge to promote neurite outgrowth, which can be studied in the controlled environment of the AXIS device.
Implementing Real-Time, Modifiable Platforms for Dynamic Circuit Construction
FAQs & Troubleshooting Guide
This guide addresses common challenges in research on neuronal attachment and neurite outgrowth, providing targeted solutions to improve experimental reliability and reproducibility.
FAQ 1: What are the primary methods for guiding directional neurite outgrowth in vitro, and how can they be implemented in real-time?
Directional control of neurite extension is crucial for forming functional neuronal circuits. A prominent method involves using magnetic nanoparticles (MNPs) and static magnetic fields.
- Principle: Neuronal cells are labeled with superparamagnetic iron-oxide MNPs. When placed in a spatially variant magnetic field gradient, a force acts on the internalized particles, providing a directional cue that influences the growth of neurites [57].
- Implementation: A device using neodymium iron-boron (NdFeB) permanent magnets can generate the required field gradient (greater than 20 T m⁻¹ across the sample region). PC12 cells or primary dopaminergic neurons can be labeled with MNPs (e.g., 2 mM iron concentration for 24 hours) and differentiated under the applied magnetic field [57].
- Troubleshooting:
- Low MNP uptake: Ensure nanoparticles are well-dispersed in the culture medium and verify the labeling incubation time.
- No observed directional bias: Confirm the strength and orientation of the magnetic field gradient using a gaussmeter. Mathematical modeling of the expected force direction can help validate the setup [57].
- Reduced cell viability: Use MNPs with proven biocompatibility and ensure the static magnetic field strength does not generate excessive heat.
FAQ 2: How can I perform continuous, non-invasive quantification of neurite outgrowth in my co-culture models?
Traditional endpoint assays require fixing cells, which prevents kinetic analysis. Live-cell analysis systems overcome this limitation.
- Solution: Automated live-cell imaging systems (e.g., IncuCyte) placed inside a standard tissue culture incubator can continuously monitor neurite dynamics. These systems use software (e.g., NeuroTrack) to automatically analyze phase-contrast or fluorescence images to quantify parameters like neurite length and branch points over days or weeks [58].
- Troubleshooting:
- Poor image segmentation for analysis: For monocultures, optimize label-free phase-contrast imaging. For complex co-cultures with astrocytes, use fluorescent neuronal labeling reagents (e.g., IncuCyte NeuroLight Orange) to specifically highlight neurites [58].
- Low signal-to-noise ratio: Ensure the seeding density is appropriate to prevent over-confluence, which can complicate image analysis.
- Data variability between wells: Use multi-well plates and ensure even cell seeding and medium distribution across all wells to generate robust, reproducible kinetic data suitable for pharmacological screening [58].
FAQ 3: My neuronal co-cultures have inconsistent health and maturation. What are the critical steps in establishing a robust neuron-microglia co-culture?
A standardized protocol is key for consistency. The following table summarizes a reliable co-culture methodology [59].
- Troubleshooting:
- Low neuronal viability post-thaw: The thawing and initial plating process should be completed within one hour. Do not warm media in a 37°C water bath; equilibrate at room temperature instead to protect sensitive cells [59].
- Poor cell attachment: Use pre-coated plates (e.g., poly-D-lysine). After seeding, let the plate rest undisturbed for 10-15 minutes in the hood before moving it to the incubator to allow cells to settle evenly [59].
- Unhealthy co-cultures over time: Perform half-medium changes twice a week with freshly prepared maintenance medium to provide consistent nutrients and growth factors without fully disturbing the cellular environment [59].
Experimental Protocols & Data
Protocol 1: Magnetic Guidance of Neurite Outgrowth in 2D Culture
This protocol guides the directional outgrowth of neurites using magnetic nanoparticles, enabling the study of directed neural circuit formation [57].
Key Research Reagent Solutions
| Item | Function / Description |
|---|---|
| Iron-oxide MNPs (e.g., Fe₂O₃-PAA) | Superparamagnetic nanoparticles; coated with poly(acrylic acid) for stability and cellular uptake. Mean diameter ~8.4 nm [57]. |
| Nerve Growth Factor (NGF), e.g., β-NGF | Induces differentiation of neuronal cell lines (e.g., PC12) into a neuron-like phenotype, promoting neurite outgrowth [57]. |
| Differentiation Medium | Serum-reduced medium (e.g., 5% horse serum) supplemented with 100 ng/µl NGF to support neuronal maturation [57]. |
| NdFeB Magnet Array | Permanent magnet device generating a static, spatially variant magnetic field gradient >20 T m⁻¹ to exert force on MNP-labeled cells [57]. |
Methodology:
- Cell Culture: Culture PC12 cells in complete basal medium.
- MNP Labeling: Incubate cells in suspension with 2 mM (iron concentration) rhodamine-fluorescent MNPs in complete basal medium for 24 hours [57].
- Seeding and Differentiation: Seed MNP-labeled cells at a density of 20,000 cells cm⁻² on poly-L-lysine and laminin-coated glass-bottom dishes. Initiate differentiation by replacing the medium with Differentiation Medium. Place the culture dish within the magnetic field gradient of the NdFeB array.
- Maintenance: Differentiate cells for up to 8 days, replenishing the Differentiation Medium every 2 days.
- Analysis: Fix cells for endpoint immunostaining (e.g., for β3-tubulin) and analyze neurite directionality relative to the magnetic field gradient using confocal microscopy. Directional bias can be validated against mathematical models of the predicted magnetic force [57].
Quantitative Data from Magnetic Guidance Experiments The table below summarizes key parameters and outcomes from implementing this protocol [57].
| Parameter / Measurement | Value / Observation |
|---|---|
| MNP Diameter | 8.4 ± 1.9 nm |
| Magnetic Field Gradient | > 20 T m⁻¹ |
| Differentiation Period | 8 days |
| Observed Phenotype | MNP-labeled cells exhibited a significant shift in directional neurite outgrowth when cultured in the magnetic field gradient. |
| Validation | Directional changes agreed with mathematical modeling of magnetic force gradients. |
| Ex Vivo Translation | Directional neurite outgrowth from transplanted MNP-labeled cells was observed in rat organotypic brain slices. |
Protocol 2: Neuron-Microglia Co-culture for Modeling Neuro-immune Interactions
This protocol details the steps for co-culturing human iPSC-derived neurons and microglia, a key model for studying neuroinflammation and neurite dynamics in a complex cellular environment [59].
Methodology:
- Day 0 - Seeding Neurons:
- Thaw neurons quickly in a 37°C water bath and dilute slowly with pre-equilibrated Basal Medium.
- Centrifuge, resuspend, and count cells. Seed neurons at 20,000-30,000 viable cells/well in a PDL-coated 96-well plate in "Neuron Seeding Medium" containing Cultrex and appropriate BrainFast supplements [59].
- Day 1 - Medium Replacement: Aspirate and replace with 100 µl/well of fresh "Day 1 Medium" to remove non-adherent cells and debris.
- Day 4 - Medium Addition: Add 100 µl/well of "Day 4 Medium" without removing the old medium, bringing the total volume to 200 µl/well.
- Day 7 - Seeding Microglia:
- Thaw microglia and seed them directly onto the neuronal culture at a recommended neuron-to-microglia ratio between 2:1 and 4:1 in "Day 7 MG Seeding Medium" [59].
- Day 9 Onward - Maintenance: Twice weekly, perform a 100 µl half-medium change with "Maintenance Medium" to sustain the co-culture.
The Scientist's Toolkit
This table lists essential reagents and tools for dynamic circuit and neurite outgrowth research, as featured in the protocols and FAQs.
| Item | Function / Application |
|---|---|
| Magnetic Nanoparticles (MNPs) | Internalized by cells to allow remote guidance of neurite outgrowth via external magnetic fields [57]. |
| Live-Cell Analysis System (e.g., IncuCyte) | Enables automated, kinetic, and non-invasive imaging and quantification of neurite outgrowth inside an incubator [58]. |
| iPSC-Derived Human Neurons & Microglia | Provide a physiologically relevant human model system for co-culture experiments studying neuro-immune interactions [59]. |
| Nerve Growth Factor (NGF) | Critical neurotrophic factor that triggers differentiation and neurite outgrowth in neuronal cell lines and primary cultures [57]. |
| Growth Factors (BDNF, GDNF, TGF-β1) | Supplement culture medium to enhance neuronal survival, maturation, and synaptic connectivity in vitro [59]. |
| Laminin / Poly-D-Lysine | Coating substrates for cultureware to promote neuronal attachment and neurite extension [57] [59]. |
| Multi-Electrode Array (MEA) | Technology for recording network-level bursting activity and electrophysiological properties in neuronal cultures or brain slices [60]. |
| Anisotropic Conductive Film (ACF) | Enables electrical connections in flexible electronics; advanced versions allow dynamic control of conductivity [61]. |
Signaling Pathways & Experimental Workflows
TGF-β Signaling in Neurite Outgrowth
The following diagram illustrates the key signaling pathway through which Tgfbr2 in dental pulp cells guides neurite outgrowth during tooth development, a foundational concept for understanding substrate-mediated neurite guidance [62].
Magnetic Guidance Experimental Workflow
This workflow outlines the key steps for implementing the magnetic guidance protocol for directional neurite outgrowth [57].
Solving Common Challenges and Leveraging Cutting-Edge Optimization Strategies
Frequently Asked Questions
1. Why are my cultured neurons detaching and dying, especially during mechanical stimulation? Neuronal cells have high demands for surface adhesion to grow. Detachment often occurs because the culture surface coating is suboptimal or does not match your specific cell type. This is particularly critical during mechanical stimulation, where inadequate coating leads to cell death and precludes the study of mechanical factors [18].
- Solution: Optimize your coating strategy. For example, primary rat retinal ganglion cells (RGCs) showed the best neurite growth and highest cell density with a sequential coating of poly-D-lysine (PDL) followed by laminin. In contrast, PC-12 cells performed better with a mixture of PDL and laminin applied together. The optimal coating is highly cell-type-dependent [18].
2. My neurons are surviving but show poor electrical activity and synaptic function. What is wrong? Classic basal culture media like DMEM/F12 and Neurobasal, while supporting survival, can strongly impair fundamental neurophysiological functions. These media can depolarize the resting membrane potential, abolish synaptic communication, and reduce voltage-gated sodium and potassium currents, silencing neuronal firing [63].
- Solution: Switch to a physiological medium designed to support neuronal activity, such as BrainPhys. This medium adjusts concentrations of inorganic salts, neuroactive amino acids, and energetic substrates to better mimic the brain's environment, leading to improved action potential firing and synaptic activity [63].
3. What are the advantages of using serum-free media over serum-containing media for neuronal cultures? Serum-containing media, like those with Fetal Bovine Serum (FBS), pose several problems:
- Xenogenic Risk: Potential for immunogenic reactions and viral contamination.
- Variability: Inconsistent composition between batches affects experimental reproducibility.
- Impaired Function: Serum can acutely impair action potential generation and synaptic communication [63] [64] [65]. Serum-free media (SFM) provide a defined, controlled environment that enhances proliferation, supports neuronal differentiation of stem cells, and ensures biosafety for clinical applications [64] [65].
4. How can I culture ultra-low-density neurons for morphological studies without a glial feeder layer? Glial feeder layers are time-consuming and can confound the study of neuron-specific mechanisms. A simplified method uses a "neuron-sandwich" co-culture system.
- Solution: Plate ultra-low-density neurons (~2,000 neurons/cm²) on PDL-coated coverslips and flip them over a layer of high-density neurons in a separate well. This provides essential trophic support from the high-density neurons, enabling long-term survival (>3 months) of low-density cultures in a serum-free, defined medium without glia [66].
Troubleshooting Guides
Problem: Poor Cell Attachment and Survival
| Investigation Area | Key Considerations & Actions | Recommended Formulations (from literature) |
|---|---|---|
| Substrate Coating | • Confirm coating is appropriate for your specific neuronal cell type.• Test combinatorial and sequential coatings. A mixture or sequence of substrates often works better than a single one.• Ensure coating concentration and incubation time are sufficient. | • For PC-12 cells: 10 μg/mL PDL mixed with 2 or 50 μg/mL laminin [18].• For primary RGCs: Sequential coating of 10 μg/mL PDL then 2 μg/mL laminin [18].• For primary hippocampal neurons: 0.1 mg/mL (100 μg/mL) Poly-D-lysine [66]. |
| Serum Quality | • Serum charges can cause non-specific cell attachment.• Consider switching to a defined serum-free alternative to eliminate batch-to-b serum variability and improve attachment consistency. | • Use GMP-formulated, clinically-oriented SFM that supports high cell activity and proliferative capacity [65]. |
Problem: Inadequate Neuronal Activity and Network Formation
| Investigation Area | Key Considerations & Actions | Recommended Solutions |
|---|---|---|
| Culture Medium | • Avoid classic basal media like DMEM/F12 and Neurobasal for functional studies. They contain neuroactive components that silence electrical activity.• Use a physiologically optimized medium designed for neuronal function. | • BrainPhys basal medium: Supports functional action potential firing and synaptic communication comparable to artificial cerebrospinal fluid (ACSF) [63]. |
| Trophic Support | • Low-density cultures require external trophic support. This is traditionally supplied by a glial feeder layer.• Use a neuron-only co-culture system to study cell-autonomous mechanisms without glia. | • "Sandwich" co-culture: Flip coverslips with low-density neurons onto a feeder layer of high-density neurons [66]. |
The Scientist's Toolkit: Research Reagent Solutions
| Item | Function / Rationale |
|---|---|
| Poly-D-Lysine (PDL) | A synthetic polymer that provides a positively charged surface to which negatively charged neuronal membranes can adhere strongly. A foundational coating for many neuronal cultures [18] [66]. |
| Laminin | A natural extracellular matrix (ECM) protein that promotes not only attachment but also neurite outgrowth and cell differentiation by interacting with integrin receptors on the neuronal surface [18]. |
| BrainPhys Basal Medium | A neuromedium with adjusted concentrations of inorganic salts, neuroactive amino acids, and energetic substrates to support neuronal activity and synaptic functions, reducing the gap between in vitro and in vivo conditions [63]. |
| Serum-Free Media (SFM) | A chemically defined medium without animal serum, eliminating variability and safety concerns of FBS while supporting robust expansion and neuronal differentiation of stem cells like MSCs [64] [65]. |
| Ultra-Low Density Co-culture System | A method to maintain sparse neurons long-term by co-culturing them with a feeder layer of high-density neurons, providing necessary trophic support without the use of glial cells [66]. |
Experimental Protocols & Data
Table 1: Quantitative Comparison of Coating Strategies for Neuronal Attachment under Mechanical Stimulation [18]
| Cell Type | Coating Strategy | Coating Formulation | Performance Outcome (Cell Density, Morphology) |
|---|---|---|---|
| PC-12 Cell Line | Mixture | 10 μg/mL PDL + 2 or 50 μg/mL laminin | Highest cell density, with and without mechanical stimulation. |
| Primary Rat Retinal Ganglion Cells (RGCs) | Sequential | First 10 μg/mL PDL, then 2 μg/mL laminin | Best neurite growth and highest cell density. |
Table 2: Impact of Customized Serum-Free Media on hUC-MSC Characteristics (Representative Data) [65]
| Medium Type | Proliferative Capacity | Phenotype (Surface Markers) | Functional Output |
|---|---|---|---|
| Serum-Free Media (SFM) | Superior proliferative capacity, higher stability over passages. | Consistent with ISCT criteria (CD90, CD73, CD105 positive). | Variations in paracrine capacity and support for hematopoiesis. |
| Serum-Containing Media (SCM) | Lower proliferative capacity compared to SFM. | Consistent with ISCT criteria (CD90, CD73, CD105 positive). | Functional output may be less consistent or tailored. |
Detailed Protocol: Ultra-Low Density, Long-Term Primary Hippocampal Neuron Culture without Glial Support [66]
Surface Preparation:
- Etch two parallel grooves (~1 mm long) on the bottom of a 24-well plate using an 18G needle. This creates a microspace when coverslips are placed on top.
- Clean 12-mm glass coverslips in 70% ethanol for 1-2 hours, then rinse thoroughly with sterile water.
- Coat both the etched wells and the coverslips with 300 μL of 0.1 mg/mL poly-D-lysine solution for at least 1 hour.
- Aspirate the PDL solution and rinse the surfaces 3 times with sterile water. Allow to air dry completely.
Neuron Plating and "Sandwich" Co-culture Setup:
- Prepare dissociated hippocampal neurons from E16.5-E17.5 mouse embryos.
- Plate high-density neurons (~250,000 cells/mL) directly into the PDL-coated, etched wells.
- Plate ultra-low-density neurons (~10,000 neurons/mL) onto the PDL-coated coverslips placed in a separate 24-well plate.
- Wait 2 hours for the low-density neurons to attach to the coverslips.
- Carefully flip each coverslip and place it onto the well containing the high-density neurons. The etched grooves will hold the coverslip ~150-200 μm above the high-density layer, creating a confined microenvironment.
Maintenance:
- Maintain the co-culture in a serum-free neuronal medium, changing half of the medium every 5-7 days. This system can support ultra-low-density neurons for over three months in vitro.
Experimental Workflow Diagrams
Diagram 1: A logical workflow for troubleshooting poor neuronal attachment.
Diagram 2: Impact of culture medium selection on neuronal function.
Preventing Neurite Misrouting and Overgrowth with Steep-Angle Microchannels
A significant obstacle in constructing reliable in vitro neuronal networks for research and drug development is the control of neurite outgrowth. Traditional microprinting and microfluidic techniques, while useful for initial guidance, often rely on static, pre-designed patterns. A common failure mode in these systems is neurite misrouting and over-extension, where neurites grow beyond their intended connection points, leading to unintended neural connections that compromise network integrity and experimental validity [67] [68]. This technical guide explores a novel method to overcome this challenge by utilizing steep-bending confinement microchannel patterns, providing researchers with the protocols and troubleshooting knowledge to implement this technique effectively.
Frequently Asked Questions (FAQs)
What is the fundamental principle behind using steep-angle microchannels to control growth?
This method is a form of physical guidance that exploits the inherent biomechanical limitations of neurite extension. When a growing neurite encounters a sharp bend in its microchannel path, the growth cone must reorient to continue advancing. Research has established a critical bending angle of approximately 90 degrees, beyond which neurites cannot successfully turn. By fabricating microchannels with bending angles greater than this threshold (e.g., 120 degrees), neurite outgrowth is consistently arrested at the bend point, preventing over-extension and enabling precise termination of growth for controlled neurite-to-neurite connections [67] [68].
What is the critical bending angle, and how was it determined?
The critical bending angle is the maximum angle at which a neurite can successfully turn and continue elongating through a bending microchannel. Through systematic experimentation with various microchannel angles, researchers have quantified this maximum bending angle to be 90 degrees [67] [68]. The table below summarizes the key experimental findings related to bending angles.
| Bending Angle | Neurite Behavior | Experimental Outcome |
|---|---|---|
| ≤ 90° | Successful turning | Neurite growth cones reorient and continue elongation through the bend. |
| 120° | Growth arrest | Neurites stop elongating upon reaching the bend point; no further extension observed. |
| 120° (in arrays) | Controlled contact | Outgrowths from two neurites stop and make contact at the bend without crossover. |
Can this technique be integrated with dynamic, real-time network modifications?
Yes. While initial studies used static designs, the agarose-based substrate central to this method is compatible with real-time, constructive neuroengineering. An infrared (IR) laser can be used to melt and fabricate new microchannels in the agarose layer during active culture. This allows researchers to observe neurite outgrowth and dynamically add new channels or cell chambers, enabling stepwise construction and modification of neuronal networks without pre-designing the entire architecture [69] [70].
How does this method improve upon existing microfluidic devices for neuronal culture?
Traditional microfluidic devices often use long, narrow channels to guide axons but can suffer from miswiring as free neurites may over-extend through connection passages. The steep-angle method provides an "open-end" control mechanism. Instead of merely guiding direction, it actively controls and terminates neurite length at a predefined location, offering a more robust solution for creating precise point-to-point connections in minimal neuronal networks [67] [68].
Troubleshooting Guide
| Problem | Potential Cause | Solution |
|---|---|---|
| Neurites bypassing the steep-angle bend. | Bending angle is at or below the 90° critical threshold. | Redesign and fabricate microchannels with a confirmed angle greater than 90° (e.g., 120°). |
| Poor neuronal adhesion or viability in agarose microstructures. | Agarose surface is not sufficiently bio-compatible for cell adhesion. | Ensure the culture dish is properly coated with Poly-D-Lysine (PDL) prior to agarose layer application [67] [68]. |
| Lack of necessary trophic support for long-term culture. | Incorporate a glial co-culture in a feeder layer configuration to enhance neuronal health, adhesion, and neurite outgrowth [69]. | |
| Inconsistent microchannel fabrication. | Inconsistent laser power or stage translation speed during photothermal etching. | Calibrate the infrared (1480 nm) laser system to use the minimal power required for consistent agarose melting (e.g., 0.16 W for translation, 0.25 W for spot melting) to minimize thermal stress [69] [70]. |
| Low success rate in forming neurite-neurite connections. | Neurites are stopping but not making stable contact. | Use bending microchannel arrays designed so that neurite endings from two cells are guided to stop and directly oppose each other at the same bend point [67]. |
Detailed Experimental Protocol
Agarose Microfabrication and Microchannel Patterning
This protocol details the creation of steep-angle microchannels using a photo-thermal etching system [67] [68].
Materials & Reagents:
- Substrate: 35 mm tissue culture dish (e.g., AGC Technoglass Co., Ltd.)
- Coating Solution: Poly-D-Lysine (PDL), 1 mg/mL (e.g., Sigma-Aldrich, P0899)
- Micropattern Material: 3.5% Agarose (e.g., BM-BIO BM Equipment Co., Ltd., E-3126-25)
- Fabrication System: 1480-nm infrared laser photo-thermal etching system (e.g., RLM-1-1480, IPG Laser) integrated with a phase-contrast microscope and motorized X-Y stage.
Methodology:
- Dish Preparation: Make the culture dish hydrophilic using a plasma ion bombarder.
- PDL Coating: Immerse the dish bottom in 100 µL of 1 mg/mL PDL for 15 minutes. Rinse three times with sterilized water and dry for 15 minutes.
- Agarose Layer Spin-Coating:
- Add 1 mL of sterilized water to the dish and remove 650 µL.
- Spread 85 µL of 3.5% agarose onto the dish.
- Spin-coat using a two-step program: 500 rpm for 3 seconds, followed by 3000 rpm for 18 seconds.
- Add 2 mL of water to the dish and chill to set the agarose layer.
- Photothermal Etching of Microchannels:
- Focus the 1480 nm laser spot onto the agarose layer.
- Using the automated X-Y stage, move the dish to trace the desired microchannel pattern. A pattern should include a 20 µm microchamber for cell placement, connected to a 3 µm wide microchannel that incorporates a 120° bend [67] [68].
- The laser locally melts and removes the agarose, creating an open channel down to the PDL-coated glass surface.
Cell Cultivation and Outgrowth Analysis
Materials & Reagents:
- Cells: Rat hippocampal neurons (e.g., isolated from 18-day-old Wister rat embryos).
- Dissociation Solution: Neuron Dissociation Solutions (e.g., FUJIFILM Wako Pure Chemical Co., 291-78001).
- Culture Medium: Neuron culture medium (e.g., FUJIFILM Wako Pure Chemical Co., 148-09671).
Methodology:
- Cell Seeding: Using a fire-polished glass pipette, place a single neuron into the microchamber of the fabricated pattern.
- Culture: Maintain the culture at 37°C under 5% CO₂ at saturated humidity.
- Observation: Use phase-contrast optical microscopy (e.g., 20x objective) to observe and record neurite outgrowth over time. The neurite will extend through the straight section of the microchannel and should arrest upon reaching the 120° bend.
- Immunostaining (Optional for Differentiation): To confirm the identity of axons or dendrites after fixation, use primary antibodies like Anti-Tau-1 (for axons) and Anti-MAP2 (for dendrites), with appropriate fluorescent secondary antibodies [67] [68].
Research Reagent Solutions
The table below lists key materials used in the featured experiments for reliable replication.
| Item | Function/Application | Example Product / Source |
|---|---|---|
| Poly-D-Lysine (PDL) | Promotes neuronal attachment to the glass substrate beneath the agarose layer. | Sigma-Aldrich, P0899 [67] [68] |
| Agarose | Forms a biocompatible, laser-etchable layer for creating guidance microchannels. | BM-BIO BM Equipment Co., Ltd., E-3126-25 [67] [68] |
| Neuron Culture Medium | Provides essential nutrients and support for primary neuronal survival and growth. | FUJIFILM Wako Pure Chemical Co., 148-09671 [67] [68] |
| Anti-Tau-1 Antibody | Immunostaining marker for identifying axons. | Sigma-Aldrich, MAB3420 [67] [68] |
| Anti-MAP2 Antibody | Immunostaining marker for identifying dendrites. | Sigma-Aldrich, M4403 [67] [68] |
| Infrared Laser (1480 nm) | Key component for photothermal etching of microchannels in agarose. | IPG Laser, RLM-1-1480 [67] [68] |
Diagrams and Workflows
Neurite Response to Microchannel Geometry
Experimental Workflow for Steep-Angle Microchannel Assay
Infrared Laser-Mediated Microfabrication for On-Demand Pathway Modification
Technical Support Center: Troubleshooting Guides and FAQs
This technical support center is designed for researchers working at the intersection of laser microfabrication and neuroscience, specifically for projects aimed at improving neuronal attachment and guiding neurite outgrowth on engineered substrates. The following guides address common experimental challenges.
Laser System Troubleshooting
Q1: The laser system powers on but produces no output or inconsistent output during neurite guidance patterning.
This issue can halt experiments by failing to create precise microfeatures for neuronal growth. The following table outlines common causes and solutions.
| Problem | Possible Cause | Solution |
|---|---|---|
| No Laser Output | - Loose power connections or circuit faults [71] [72].- Faulty laser tube or power supply [71].- Attenuated laser source (e.g., depleted gas in RF lasers) [72]. | - Check and secure all power connections; verify input voltage [71].- If power is normal, the laser tube or power supply is likely faulty and requires professional service [71] [72]. |
| Inconsistent Output | - Misaligned or dirty optical components (mirrors, lenses) [73].- Unstable galvo motor lock-up [71].- Software marking speed set too high [71]. | - Clean lenses with 99% alcohol and degreasing cotton; replace if scratched [71].- Realign the optical path to ensure beam travels correctly from source to substrate [73].- Check galvo motor connections and listen for startup sounds; cross-test with intact components [71]. |
| Discharge Sounds/Arc Light | - Dust, water accumulation, or high humidity causing electrical discharge [72]. | - Inspect in a dark room to locate discharge points; clean dust and water; improve lab environment [72]. |
Q2: The fabricated patterns are misaligned or lack definition, compromising their ability to guide neurite extension.
This problem often stems from the beam delivery system. Use this checklist to diagnose the issue.
| Problem | Possible Cause | Solution |
|---|---|---|
| Pattern Misalignment | - Galvo motor swinging failure or reversed signal wires [71].- Mechanical issues: loose belts, misaligned rails, or bearing failures [73]. | - Check control signal output and galvo signal connections [71].- Perform routine mechanical checks; tighten belts, and realign rails [73]. |
| Poor Feature Definition | - Unstable laser power output [73].- Contaminated or damaged galvanometer mirror [71].- Incorrect laser parameters (speed, power, pulse frequency) [71]. | - Ensure power supply is stable and laser source is functioning correctly [73].- Clean or replace the galvanometer mirror [71].- Optimize parameters on a test substrate before actual experiments. |
Q3: How can I safely clean the optical components of the laser system?
Contaminated optics scatter light and reduce patterning quality. Always turn off and unplug the laser first. Gently wipe the optical surface with a lens tissue or degreasing cotton moistened with 99% alcohol [71]. Use a circular motion from the center outwards. Avoid touching the coated surface with fingers. If a contaminant larger than ~1 mm² cannot be removed, the mirror should be replaced [71].
Biological Integration and Experimental Troubleshooting
Q4: Neuronal attachment is poor on the laser-fabricated substrate.
This failure negates the purpose of creating guided pathways. Consider these potential issues.
| Problem | Possible Cause | Solution |
|---|---|---|
| Low Cell Adhesion | - Substrate material is inherently non-adhesive for neurons.- Laser process introduced toxic residues or altered surface chemistry negatively. | - Use substrates pre-coated with adhesion-promoting molecules like poly-L-lysine or laminin [57] [58].- Ensure fabrication is followed by thorough sterilization (e.g., UV exposure, ethanol wash). |
| Incorrect Feature Dimensions | - Patterned grooves or ridges are too large/small for effective contact guidance.- Feature edges are too sharp, preventing stable adhesion. | - Consult literature for effective dimensions; typical guidance cues are on the micro-scale. Redesign and recalibrate the laser patterning protocol.- Use laser parameters that create smoother topographies. |
Q5: Neurites show no preference for growing along the laser-patterned pathways.
This indicates a failure in directional guidance. The solution often lies in optimizing both the pattern and the cellular environment.
- Verify Pattern Fidelity: Use microscopy (e.g., SEM, AFM) to confirm that the intended physical and chemical patterns are present and accurate.
- Enhance Guidance Cues: Combine physical patterning with biochemical functionalization. Adsorb extracellular matrix proteins (e.g., laminin, fibronectin) onto the patterns to make them more "recognizable" to the growth cone [74].
- Check Cell Health and Type: Ensure neurons are healthy and at an appropriate density. Use primary neurons or well-characterized cell lines like PC12 or SH-SY5Y, which are standard models for neurite outgrowth studies [57] [74].
- Consider Advanced Methods: For complex goals like bridging long distances (e.g., substantia nigra to striatum), integrated approaches like incorporating magnetic nanoparticles in cells with an external magnetic field may be necessary to provide additional directional force [57].
Experimental Protocols & Data
Detailed Methodology: Magnetic Nanoparticle-Enhanced Directional Neurite Outgrowth
This protocol is adapted from studies that successfully directed neurite growth using magnetic forces, a complementary approach to laser-guided growth [57].
1. Cell Culture and MNP Labelling
- Cell Line: Use PC12 cells (ATCC CRL-1721) or primary rat embryonic ventral midbrain dopaminergic precursor cells [57].
- Culture: Maintain PC12 cells in suspension in Dulbecco’s Modified Eagle's Medium (DMEM) supplemented with 10% heat-inactivated horse serum, 10% fetal bovine serum, 1% penicillin-streptomycin, and 1% L-glutamine at 37°C and 5% CO₂ [57].
- MNP Labelling: 24 hours prior to seeding, label cells in suspension with rhodamine-fluorescent Fe₂O₃-PAA2K Magnetic Nanoparticles (MNPs) at a concentration of 2 mM (iron) in complete basal medium [57].
2. Substrate Preparation and Seeding
- Coat glass-bottom dishes with 1% poly-L-lysine for at least 1 hour.
- Add a further coating of 10 µg/µl laminin to promote neurite outgrowth [57].
- Seed MNP-labelled PC12 cells at a density of 20,000 cells cm¯² onto the coated dishes 24 hours before initiating differentiation [57].
3. Differentiation and Magnetic Guidance
- Replace growth medium with differentiation medium: DMEM supplemented with 5% heat-inactivated horse serum, 1% penicillin-streptomycin, 1% L-glutamine, and 100 ng/µl nerve growth factor (NGF) [57].
- Place the culture dish within the static magnetic field gradient (e.g., >20 T m⁻¹) generated by a custom NdFeB permanent magnet array [57].
- Culture cells for 8 days, replenishing the differentiation medium every 2 days.
4. Analysis
- Fix cells and immunostain for neuronal markers (e.g., β-III-tubulin) and image.
- Quantify neurite length, branch points, and directionality using automated software like IncuCyte NeuroTrack or ImageJ with NeuronJ plugin [58].
Table 1: Key Parameters for MNP-Mediated Neurite Guidance [57]
| Parameter | Value / Specification | Unit |
|---|---|---|
| MNP Type | Iron-Oxide (Fe₂O₃), PAA-coated, Rhodamine-tagged | - |
| MNP Diameter (Core) | 8.4 ± 1.9 | nm |
| MNP Labelling Concentration | 2 (iron) | mM |
| Saturation Magnetization | 55.7 | emu g⁻¹ |
| Magnetic Susceptibility (χ) | 4.27 | dimensionless |
| Magnetic Field Gradient | >20 | T m⁻¹ |
| Differentiation Period | 8 | days |
| Key Differentiation Factor | Nerve Growth Factor (NGF), 100 | ng µl⁻¹ |
The Scientist's Toolkit: Research Reagent Solutions
Table 2: Essential Materials for Neurite Outgrowth Experiments
| Item | Function / Application | Example / Source |
|---|---|---|
| PC12 Cell Line | A standard neuronal model that differentiates and extends neurites upon NGF treatment [57]. | ATCC (CRL-1721) |
| Poly-L-Lysine | A synthetic polymer coating that promotes neuronal attachment to the substrate [57]. | Sigma-Aldrich |
| Laminin | An extracellular matrix protein coating that strongly promotes neurite outgrowth and guidance [57]. | Sigma-Aldrich (L2020) |
| Nerve Growth Factor (NGF) | A neurotrophic factor that triggers differentiation and neurite extension in PC12 cells [57]. | Peprotech (450-01) |
| Magnetic Nanoparticles | Internalized by cells to act as force carriers for magnetic guidance of growth cones [57]. | Fe₂O₃-PAA2K [57] |
| IncuCyte NeuroTrack | Automated live-cell analysis system for kinetic quantification of neurite length and branching inside an incubator [58]. | Sartorius (Cat. No. 9600-0010) |
| Neurotrophic Factors (BDNF, NT-3) | Secreted signaling proteins that promote neuronal survival, differentiation, and neurite outgrowth via Trk receptors [74]. | Various suppliers |
Signaling Pathways and Experimental Workflows
Neurite Outgrowth Signaling Pathway
This diagram illustrates the key molecular pathways activated by neurotrophic factors (e.g., NGF) that lead to cytoskeletal remodeling and neurite extension, a process that can be guided by laser-patterned substrates.
Experimental Workflow for Pathway Modification
This flowchart outlines the complete integrated process, from substrate fabrication using an infrared laser to the analysis of guided neurite outgrowth.
FAQs: Troubleshooting Common Experimental Challenges
FAQ 1: My stem cells show poor adhesion and viability after seeding on the biomaterial scaffold. What could be the cause?
Poor cell adhesion often stems from suboptimal scaffold surface properties or inadequate pre-conditioning.
- Solution A: Check Surface Charge and Protein Adsorption. Biomaterials with cationic charges, like chitosan, can enhance the adsorption of adhesion proteins (e.g., fibronectin), which promotes integrin binding and focal adhesion maturation [75] [76]. Ensure your scaffold has not been processed in a way that neutralizes these beneficial charges.
- Solution B: Verify Scaffold Porosity and Stiffness. The scaffold must be highly porous with interconnected pores to allow for cell infiltration, nutrient exchange, and waste removal. Ideal pore sizes for neural tissue engineering are often in the 80-100 μm range [77] [78]. Furthermore, substrate stiffness should mimic the native neural tissue microenvironment to promote correct cell behavior [79].
- Solution C: Pre-treat Scaffolds with Adhesion Molecules. For synthetic polymers that are inherently inert, coating with natural adhesion peptides like poly-D-lysine or extracellular matrix (ECM) components such as laminin can significantly improve initial cell attachment [80] [79].
FAQ 2: Differentiating stem cells on my scaffolds exhibit robust cell bodies but minimal neurite outgrowth. How can I enhance neurite extension?
Insufficient neurite outgrowth indicates a lack of necessary trophic support or inappropriate mechanical/electrical cues.
- Solution A: Incorporate Neurotrophic Factors. Supplement your culture medium with key neurotrophic factors such as Nerve Growth Factor (NGF), Brain-Derived Neurotrophic Factor (BDNF), or Glial cell line-Derived Neurotrophic Factor (GDNF). These can also be loaded into the scaffold for sustained, localized release [81].
- Solution B: Utilize Conductive or Piezoelectric Biomaterials. Neurites are guided by endogenous bioelectric fields. Conductive polymers (e.g., polypyrrole, PEDOT) and piezoelectric materials (e.g., PVDF, PLLA) can deliver electrical cues that enhance neurite outgrowth and maturation. Piezoelectric scaffolds generate electrical potentials in response to mechanical stress, such as from physiological movement, providing dynamic stimulation [81] [75].
- Solution C: Optimize 3D Scaffold Architecture. A three-dimensional porous collagen scaffold has been shown to significantly enhance neurite outgrowth compared to traditional 2D cultures. The 3D environment more accurately mimics the in vivo ECM, providing superior physical guidance cues for extension [78].
FAQ 3: The stem cells on my scaffold are differentiating into multiple, unintended lineages. How can I improve neuronal differentiation specificity?
Uncontrolled differentiation is frequently caused by undefined culture conditions or inhibitory signals from the scaffold itself.
- Solution A: Employ Chemically Defined Media. Replace serum-containing media with serum-free, chemically defined media supplemented with specific neuronal differentiation inductors like retinoic acid. This removes unknown differentiation factors present in serum [78] [79].
- Solution B: Functionalize Scaffolds with Guidance Cues. Covalently link specific neuronal adhesion peptides (e.g., IKVAV from laminin) to your scaffold. This provides explicit biochemical signals that promote neuronal commitment while suppressing glial differentiation pathways [81] [82].
- Solution C: Modulate Signaling Pathways with Small Molecules. Inhibit pathways that promote alternative lineages. For example, adding SMAD inhibitors (e.g., SB431542, Noggin) can effectively direct stem cells toward a neuronal fate by blocking transforming growth factor-β (TGF-β) and bone morphogenetic protein (BMP) signaling [81].
Key Experimental Protocols for Evaluating Neuronal Attachment and Outgrowth
Protocol 1: Quantifying Neurite Outgrowth on 3D Collagen Scaffolds
This protocol is adapted from a study demonstrating enhanced neurite outgrowth in neuron cancer stem cells (NCSCs) on a 3D porous collagen scaffold [78].
1. Scaffold Preparation:
- Synthesis: Prepare a 7% (w/v) solution of Type I bovine collagen in 0.5 M acetic acid. Pour the solution into molds and lyophilize to create a porous scaffold with a target pore size of 80 μm. Crosslink the scaffold using dehydrothermal treatment or a chemical crosslinker like EDC/NHS to stabilize its structure and control degradation [78].
- Sterilization: Sterilize the scaffolds under UV light for 1 hour per side or immerse in 70% ethanol followed by extensive washing with sterile phosphate-buffered saline (PBS).
- Pre-conditioning: Equilibrate scaffolds in the culture medium for at least 2 hours before cell seeding to allow for protein adsorption.
2. Cell Seeding and Differentiation:
- Use a validated neuronal cell model, such as SH-SY5Y neuroblastoma cells or primary neural stem cells (NSCs).
- Seed cells onto the pre-conditioned scaffold at a high density (e.g., 5x10^5 cells/scaffold) to ensure good initial contact.
- Induce neuronal differentiation 24 hours post-seeding by switching to a serum-free medium supplemented with 10 µM retinoic acid. Refresh the medium every 2-3 days.
3. Data Collection and Analysis (After 7-9 days in differentiation media):
- Immunostaining: Fix cells/scaffolds with 4% paraformaldehyde. Permeabilize with 0.1% Triton X-100 and stain for neuronal markers (e.g., β-III-tubulin for neurons, NeuN for mature neuronal nuclei) and a nuclear counterstain (e.g., DAPI).
- Imaging: Use confocal microscopy or scanning electron microscopy (SEM) to capture high-resolution z-stack images of the 3D scaffold.
- Quantification: Use image analysis software (e.g., ImageJ with NeuriteTracer plugin) to measure parameters including:
- Average Neurite Length: The mean length of neurites extending from the cell body.
- Percentage of Cells with Neurites: The ratio of neurite-bearing cells to the total number of cells.
- Number of Branching Points: The degree of neurite arborization.
Protocol 2: Assessing the Impact of Electrical Stimulation via Piezoelectric Scaffolds
This protocol leverages the ability of piezoelectric materials to provide electrical stimulation for enhanced neurite outgrowth [75].
1. Scaffold Setup:
- Use a piezoelectric polymer scaffold, such as a polarized poly(L-lactic acid) (PLLA) or polyvinylidene fluoride (PVDF) nanofiber mat.
- Integrate the scaffold into a custom bioreactor that applies controlled mechanical stimulation (e.g., cyclic stretching, ultrasound) to generate electrical potentials, or connect to an external electrical stimulation system.
2. Stimulation Regimen:
- Apply a defined stimulation protocol 24-48 hours after cell seeding. A common parameter set is: a low-frequency (1-10 Hz) mechanical stimulus, or a direct electrical stimulus of 50-100 mV/cm, for 60 minutes per day.
- Maintain an unstimulated control group with the same scaffold material under identical culture conditions.
3. Functional Readouts:
- Calcium Imaging: Load cells with a fluorescent calcium indicator (e.g., Fluo-4 AM) after the stimulation period. Measure intracellular calcium flux in response to depolarizing agents (e.g., KCl) to assess neuronal functionality and network activity.
- Analysis of Focal Adhesions: Immunostain for focal adhesion kinase (FAK) and vinculin. Piezoelectric stimulation typically leads to larger, more mature focal adhesions, indicating stronger cell-scaffold integration [75].
Table 1: Performance of Natural Polymer Scaffolds in Neuronal Culture [81] [77] [78]
| Biomaterial | Key Characteristics | Impact on Neurite Outgrowth | Typical Porosity |
|---|---|---|---|
| Collagen (Type I) | Bioactive, high cell-adhesion, biodegradable | Significantly enhanced outgrowth in 3D vs. 2D; up to 2-fold increase in neurite length reported [78] | 80-100 μm |
| Chitosan | Cationic, promotes protein adsorption, antimicrobial | Improves initial cell attachment and supports neurite extension [81] [76] | >90% |
| Silk Fibroin | Excellent mechanical strength, slow degradation | Provides robust structural support for long-term neurite growth [81] [77] | Adjustable, high porosity |
| Hyaluronic Acid | Major component of CNS ECM, hydrophilic | Can be modified with peptides to be permissive for neurite outgrowth [81] | Varies with formulation |
Table 2: Impact of Physical Cues on Stem Cell Behavior and Neuronal Outcomes [75] [79]
| Cue Type | Experimental Parameter | Effect on Stem Cells | Downstream Neuronal Outcome |
|---|---|---|---|
| Substrate Stiffness | 0.1 - 1 kPa (mimicking brain tissue) | Promotes neural lineage commitment and self-renewal in NSCs [79] | Enhanced neuronal differentiation and neurite branching |
| Electrical Stimulation | 50 - 100 mV/cm (DC field) | Guides directional migration (electrotaxis) and increases proliferation [75] | Directed neurite outgrowth towards the cathode; increased neurite length and density |
| Piezoelectric Stimulation | Mechanical vibration (e.g., 1 Hz) | Activates integrin/FAK and calcium signaling pathways [75] | Enhanced adhesion strength and accelerated neurite extension |
The Scientist's Toolkit: Essential Research Reagents & Materials
Table 3: Key Reagent Solutions for Biomaterial-Stem Cell Neural Experiments
| Reagent / Material | Function / Application | Example Use Case |
|---|---|---|
| Type I Collagen | Natural polymer for creating 3D porous scaffolds that mimic the ECM. | Fabrication of scaffolds for enhanced neurite outgrowth, as in [78]. |
| Laminin | ECM glycoprotein; coating for scaffolds to improve cell adhesion via integrin binding. | Pre-coating synthetic polymer scaffolds to boost initial stem cell attachment [80]. |
| Retinoic Acid | Small molecule inducer of neuronal differentiation. | Switching culture media to initiate and promote neuronal lineage commitment in stem cells [78]. |
| Nerve Growth Factor (NGF) | Neurotrophic factor critical for neuronal survival, development, and function. | Supplementing culture medium to support neuronal maturation and neurite extension [81]. |
| Polyvinylidene Fluoride (PVDF) | Piezoelectric polymer for creating smart scaffolds that provide electrical cues. | Fabricating electroactive nanofiber scaffolds that stimulate neurite growth upon mechanical deformation [75]. |
| Rho-Associated Kinase (ROCK) Inhibitor (Y-27632) | Small molecule that inhibits RhoA/ROCK pathway, reducing actin contractility. | Improving survival of dissociated stem cells after seeding and promoting neurite initiation by overcoming inhibition [80]. |
Signaling Pathways and Experimental Workflows
Diagram 1: Signaling in Biomaterial-Guided Neuronal Differentiation. This diagram illustrates the core signaling pathways activated by biomaterial scaffolds (physical and electrical cues) and biochemical factors, which converge to direct stem cell adhesion, neuronal differentiation, and neurite outgrowth.
Diagram 2: Neurite Outgrowth Experiment Workflow. This flowchart outlines the key steps for a standard experiment evaluating the effects of a biomaterial scaffold on stem cell neuronal differentiation and neurite outgrowth, from scaffold preparation to final quantitative analysis.
Troubleshooting Guide: Common Experimental Challenges
This section addresses specific, high-impact problems researchers encounter when studying neuronal development and electrophysiology.
Table 1: Troubleshooting Common Experimental Issues
| Problem Area | Specific Issue | Potential Cause | Recommended Solution |
|---|---|---|---|
| Neuronal Culture Health | Neurons piling into clumps, poor attachment [11] | Degraded coating substrate [11] | Switch from Poly-L-lysine (PLL) to the more enzyme-resistant Poly-D-lysine (PDL). For persistent issues, consider dPGA, a degradation-resistant alternative [11]. |
| Neuronal Culture Health | Unhealthy cultures post-dissection [11] | Cell damage during dissection or dissociation [11] | For rat models, use embryonic (E17-19) tissue. Use papain instead of trypsin for digestion and ensure gentle mechanical trituration [11]. |
| Neuronal Culture Health | Glial cell overgrowth [11] | Proliferation of non-neuronal cells [11] | Use serum-free Neurobasal medium with B27 supplement. If necessary, apply low-concentration cytosine arabinoside (AraC) judiciously, mindful of potential neurotoxicity [11]. |
| MEA Recordings | High contamination rates [83] | Open culture systems [83] | Culture MEA chips inside a sealed chamber with a permeable membrane to maintain sterility [83]. |
| MEA Recordings | High data variability post-feeding [83] | Activity fluctuations after media change [83] | Standardize recording schedule: feed cultures at 9:00 AM and record no earlier than 1:00 PM (4+ hours later) [83]. |
| Neurite Outgrowth | Reduced neurite branching [51] | Disruption of spontaneous electrical activity [51] | Avoid hyperpolarizing neurons during active growth phases. Ensure culture conditions support innate bursting activity [51]. |
| Calcium Signaling | Uncontrolled propagation of calcium waves [84] | Agonist diffusion to adjacent cells during stimulation [84] | Employ microfluidic devices with laminar flows for localized chemical stimulation of single cells within a network [84]. |
Frequently Asked Questions (FAQs)
Q1: What are the key characteristics of a healthy primary neuron culture? A healthy primary cortical or hippocampal culture should show neuron adherence within one hour of seeding. Within the first two days, minor processes and axon outgrowth should be visible, with dendritic outgrowth apparent by day four. A mature network typically forms within one week, and cultures should be maintainable beyond three weeks [11].
Q2: How does spontaneous neuronal activity influence development? Spontaneous electrical activity is a key regulator of neuronal growth patterns. Research on Lymnaea neurons shows that the pattern of bursting activity is correlated with the extent of neurite branching. Neurons exhibiting bursts with a higher number of spikes (≥10 per burst) developed significantly more elaborate branching compared to those with fewer spikes [51]. Artificially blocking this activity via hyperpolarization results in neurons with minimal branching [51].
Q3: What is the "Ca2+ window" hypothesis in neurite outgrowth? This classic hypothesis proposes that intracellular calcium concentration ([Ca2+]) must be maintained within a specific, optimal range to support neurite outgrowth. Fluctuations in [Ca2+] that fall below or rise above this "window" are detrimental to growth [51]. This highlights the critical need for precise calcium homeostasis during development.
Q4: What are the primary routes of calcium entry in developing neurons? Two major pathways are:
- Voltage-Gated Calcium Channels (VGCCs): A primary route that converts electrical activity (membrane depolarization) into intracellular calcium elevations, coupling activity to processes like transcription [85].
- Store-Operated Calcium Entry (SOCE): Activated upon depletion of endoplasmic reticulum (ER) calcium stores. It is mediated by STIM proteins and ORAI channels and represents a key pathway for calcium influx in response to extracellular signals [85].
Q5: How can I improve the reproducibility of my Multi-Electrode Array (MEA) experiments? Consistency is paramount. Key tips include:
- Seeding Precision: Use a strict, staggered timeline for substrate application and cell thawing to ensure consistent handling for all conditions [83].
- Environmental Control: Culture chips in a sealed, humidified chamber to reduce contamination and variability [83].
- Long-Term Handling: Adhere to a fixed feeding and recording schedule (e.g., Monday/Wednesday/Friday feeding), and ideally, assign long-term culture maintenance to a single individual to minimize technical variation [83].
Data Presentation: Key Quantitative Findings
Table 2: The Impact of Neuronal Activity Patterns on Growth Morphology [51]
| Neuronal Group | Bursting Pattern | Spikes per Burst (Mean ± SD) | Inter-Burst Interval (IBI) | Observed Neurite Branching (Relative Extent) |
|---|---|---|---|---|
| Group A | Robust, synchronized bursts | 15.88 ± 3.357 | 6.750 ± 3.327 | Elaborate, with thinner and finer neurites |
| Group B | Weaker bursts with single spikes | 6.625 ± 1.923 | 5.250 ± 1.909 | Less elaborate branching |
| Group C | Activity blocked (Hyperpolarized) | N/A | N/A | Minimal branching, fewer and thinner primary neurites |
Experimental Protocols
Protocol 1: Investigating Activity-Dependent Neurite Outgrowth
This protocol is adapted from studies using identified Lymnaea neurons [51].
Objective: To directly test the role of intrinsic electrical activity on neurite outgrowth and branching patterns.
Key Materials:
- Individually identified neurons (e.g., LPeD1 from Lymnaea stagnalis)
- Brain Conditioned Medium (CM)
- Poly-L-Lysine coated culture substrate
- Intracellular electrophysiology setup (sharp microelectrodes, amplifier, recorder)
- Time-lapse imaging system
Methodology:
- Cell Culture: Isolate and plate identified neurons in CM onto the coated substrate [51].
- Experimental Groups: After 4-6 hours of plating, impale neurons with sharp electrodes.
- Simultaneous Recording: Conduct intracellular recordings of electrical activity concomitantly with time-lapse imaging of neuronal growth over 48+ hours [51].
- Quantitative Analysis:
- Electrophysiology: Analyze spike patterns, bursts per minute, and spikes per burst.
- Morphology: Quantify the number of primary neurites and total neurite tips. Calculate a branching ratio (tips/primary neurites) for comparison between groups [51].
Protocol 2: Analyzing Gap Junction-Mediated Calcium Signaling
This protocol utilizes a microfluidic approach for high-resolution analysis [84].
Objective: To study the propagation of intercellular calcium waves (ICW) via gap junctions between contacting cells.
Key Materials:
- Microfluidic device with a Y-shaped channel design
- Cell line of interest (e.g., NIH-3T3 cells)
- Fluo-3/AM calcium indicator dye
- Agonist (e.g., ATP)
- Inhibitor (e.g., octanol for gap junctions)
- Fluorescence microscope with imaging capabilities
Methodology:
- Cell Seeding: Load cells with Fluo-3/AM dye. Use negative pressure pulses to seed adjacent cells in close contact (~300 μm downstream) within the microchannel [84].
- Laminar Flow Setup: Establish two adjacent laminar flows (e.g., buffer and ATP solution) at a controlled total flow rate (e.g., 20 μL/min) to limit lateral diffusion [84].
- Localized Stimulation: Position the laminar flow interface so that only a single target cell is exposed to the agonist stream, while contacting neighbors remain in the buffer stream [84].
- Imaging & Analysis: Record fluorescence in real-time to monitor the increase in intracellular calcium ([Ca2+]i) in the stimulated cell and its subsequent propagation to neighboring cells.
- Pharmacological Block: To confirm the role of gap junctions, repeat the experiment after pre-treating cells with a gap junction blocker like octanol [84].
Signaling Pathway Diagrams
The Scientist's Toolkit: Essential Research Reagents & Materials
Table 3: Key Reagents for Neuronal Microenvironment Research
| Item | Function/Application | Key Considerations |
|---|---|---|
| Poly-D-Lysine (PDL) | Coating substrate for neuron culture; provides a positively charged surface for cell adhesion [11]. | More resistant to enzymatic degradation than Poly-L-Lysine (PLL), leading to more stable cultures [11]. |
| Neurobasal Medium | Serum-free medium optimized for neuronal culture [11]. | Supports long-term neuronal health with minimal glial cell growth when supplemented with B27 [11]. |
| Cytosine Arabinoside (AraC) | Antimitotic agent used to inhibit glial cell proliferation [11]. | Use at low concentrations due to potential neurotoxic off-target effects [11]. |
| Biomimetic PEDOTs | Electrically conducting polymers for bioelectronic devices and interfaces [56]. | Surfaces can be modified (e.g., with EDOT-PC) to resist protein/cell fouling and enhance neurite outgrowth [56]. |
| Voltage-Gated Ca2+ Channel Blockers | Pharmacological tools to perturb calcium influx (e.g., nifedipine for L-type channels) [51]. | Used to experimentally test the "Ca2+ window" hypothesis and the role of activity in growth [51]. |
| Microfluidic Device (Y-channel) | Platform for localized chemical stimulation of single cells within a network [84]. | Enables high-resolution study of contact-dependent intercellular calcium signaling without agonist diffusion [84]. |
Ensuring Robust Data: Quantification, Standardization, and Comparative Analysis
The Scientist's Toolkit: Essential Reagents & Software
Table 1: Research Reagent Solutions for Neurite Outgrowth Studies
| Item | Function | Example Context |
|---|---|---|
| Poly-D-lysine | A synthetic coating agent used to promote neuronal attachment to culture surfaces by enhancing surface adhesion [86]. | Standard substrate for culturing various primary neurons, such as those from the hippocampus [86]. |
| Beta-III-Tubulin Antibody (e.g., TUJ1) | Immunofluorescence stain used to specifically label neuronal cells and their neurites, enabling clear visualization for analysis [87]. | Standard marker for identifying and quantifying neurites in fixed neuronal cultures [87]. |
| Nocodazole | A microtubule-destabilizing drug used as a negative control in outgrowth assays; it inhibits neurite outgrowth and induces retraction [87]. | Pharmacological validation of assay sensitivity; used to calculate IC50 values for neurite inhibition [87]. |
| DAPI | DNA-binding fluorescent dye used to stain cell nuclei, aiding in the identification and counting of neuronal cell bodies (somas) [87]. | Standard nuclear counterstain in multiplexed fluorescence imaging of neuronal cultures [87]. |
| P19 Cells | Embryonal carcinoma cell line capable of differentiating into neurons; a common model system for in vitro studies of neurite outgrowth [87]. | Used for high-content screening of pharmacological compounds that affect neuronal differentiation and neurite elongation [87]. |
Gold-Standard Metrics for Neurite Quantification
Table 2: Core Morphometric Metrics for Neurite Analysis [88]
| Metric | Definition & Measurement | Biological Significance |
|---|---|---|
| Longest Neurite (Path Length) | The path length of the longest individual neurite extending from a soma, measured by summing the internode distances along its central line [88]. | Indicator of a neuron's maximum exploratory capacity and polarization. |
| Total Branching (No. of Branches) | The total count of all branches (also called paths) within a neuronal arbor [88]. | Measures the overall complexity and branching density of the neuronal network. |
| Cable Length | The total combined path length of all neurites in a neuron or population, i.e., the sum of all internode distances [88]. | Represents the total investment in neuronal wiring material. |
| No. of Branch Points | The total count of points where a single neurite splits into two or more branches (also called fork points) [88]. | A direct measure of the arbor's branching complexity. |
| Branch Order | A hierarchical number assigned to each branch, indicating its position relative to the soma (e.g., 1 for primary branches originating from the soma, 2 for secondary, etc.) [88]. | Describes the topological structure and maturation of the arbor. |
| Convex Hull Size | The area (2D) or volume (3D) of the smallest convex polygon/polyhedron that encloses the entire neuronal arbor [88]. | Quantifies the spatial territory occupied by the neuron. |
Frequently Asked Questions & Troubleshooting
Q1: My automated analysis results are inconsistent and cannot be trusted. How can I improve reproducibility?
A: Inconsistent measurements often stem from subjective manual steps, lack of calibration, and user-to-user variability [89]. To fix this:
- Standardize and Lock Protocols: Use analysis software that allows you to save, lock, and reuse the exact same processing and measurement settings across all images and users [89].
- Implement Global Calibration: Ensure your system uses consistent calibration settings for all instruments and sessions [89].
- Adopt AI-Powered Segmentation: Leverage built-in or trainable deep learning models in tools like Image-Pro to reduce reliance on subjective manual input for steps like object outlining, leading to more consistent results across large datasets and teams [89].
Q2: How can I distinguish a true branch from a crossing event in a tangled neurite network?
A: This is a non-trivial problem in image analysis [90]. The core of the issue is that a simple intersection of two neurites can be mistakenly identified as a single, branching neurite.
- Use 3D Information: If using confocal or other 3D microscopy, analyze the image stack in three dimensions. A crossing will show neurites passing over/under one another at different Z-planes, while a true branch exists in a continuous Z-plane.
- Leverage Advanced Metrics: Some specialized tools can use local information to make an educated guess. As suggested on the ImageSC forum, one potential method is to "use the intensity measurements on the neurites to profile them. Whenever you have a crossing, connect those branches that are most similar" [90].
- Software Capability: Be aware that not all automated tools can reliably make this distinction. You may need to use software with advanced graph analysis or be prepared for manual correction. The
MeasureNeuronsmodule in CellProfiler, for instance, has been noted to not always provide this information, and its development is ongoing [90].
Q3: My images have a lot of background speckles and debris that are mistakenly identified as neurites. How do I remove them without erasing real neurites?
A: This is a common frustration that can lead to overestimation of branches [90].
- Biological Clean-up: The first and best option is to minimize debris during sample preparation before imaging, if possible [90].
- Morphological Filtering: Use filtering tools to suppress objects the size of typical spots. The
EnhanceOrSuppressFeaturesmodule in CellProfiler can be tuned to suppress speckles based on their size, though this may risk erasing thin neurites of a similar scale [90]. - Advanced Shape Detection: Try a Circular Hough filter (available in CellProfiler's
EnhanceOrSuppressFeatures), which is designed to identify round objects. You can then create a mask from the detected circles and subtract it from your primary image before proceeding with neurite detection [90]. - AI Segmentation: Deep learning models can be trained to recognize and ignore debris based on their shape and texture, which is often more robust than simple size-based filtering [89].
Q4: What is the best negative control to validate that my analysis pipeline is correctly detecting inhibited neurite outgrowth?
A: A well-known pharmacological control is Nocodazole. This microtubule-destabilizing drug is a known inhibitor of neurite outgrowth and induces neurite retraction [87]. Treating your neuronal cultures with a range of nocodazole concentrations (e.g., 10-1000 nM for 24 hours) should produce a dose-dependent decrease in metrics like longest neurite and total branching, allowing you to calculate an IC50 value and confirm your assay's sensitivity [87].
Experimental Protocol: Validating Outgrowth with Nocodazole
This protocol is adapted from a study that used NeurphologyJ for high-content screening [87].
1. Cell Culture and Transfection:
- Culture P19 embryonic carcinoma cells in MEM medium supplemented with glutamine, sodium pyruvate, and 10% fetal bovine serum.
- Seed cells at a density of 16,000 cells per well in a 96-well plate pre-coated with your substrate of choice (e.g., Poly-D-lysine).
- Transfert cells with a proneural gene (e.g., MASH1) plasmid to induce neuronal differentiation. Maintain cells in differentiation medium for 72 hours.
2. Drug Treatment and Staining:
- Prepare a dilution series of Nocodazole in DMSO (e.g., 10, 50, 100, 200, and 1000 nM). Include a DMSO-only well as a vehicle control.
- Treat the differentiated P19 neurons with the drug solutions for 24 hours.
- Fix cells with 3.6% formaldehyde for 10 minutes at 37°C.
- Permeabilize with 0.25% Triton X-100 for 5 minutes.
- Block with 10% BSA for 1 hour.
- Incubate with a primary antibody against Beta-III-tubulin (TUJ1, 1:4000 dilution) for 1 hour at 37°C to stain neurites.
- Incubate with a DyLight 488-labeled secondary antibody (1:1000) and DAPI (5 μg/mL) for 1 hour at 37°C in the dark to visualize neurites and nuclei, respectively.
3. Image Acquisition and Analysis:
- Acquire fluorescence images using an automated inverted microscope with a 10x or 20x objective. Ensure you capture multiple fields per well to sample a sufficient number of cells.
- Load the images into your chosen analysis software (e.g., NeurphologyJ, SNT, or a commercial high-content analysis platform).
- Run your standardized analysis pipeline to segment neurons and quantify the Longest Neurite and Total Branching for each well.
4. Data Analysis and IC50 Calculation:
- Normalize the average longest neurite length and total branching in the drug-treated wells to the DMSO control (set to 100%).
- Plot the dose-response curve (Percent Outgrowth vs. Log[Nocodazole]) and fit a sigmoidal curve to calculate the IC50 value.
Table 3: Expected Results from Nocodazole Validation Experiment [87]
| Nocodazole Concentration | Expected Effect on Longest Neurite | Expected Effect on Total Branching |
|---|---|---|
| 0 nM (DMSO Control) | Baseline outgrowth (100%) | Baseline branching (100%) |
| 10 nM | Slight reduction | Slight reduction |
| 50-200 nM | Significant, dose-dependent decrease | Significant, dose-dependent decrease |
| 1000 nM | Strong inhibition (>80% reduction) | Strong inhibition (>80% reduction) |
Automated Neurite Analysis Workflow
The following diagram illustrates the key stages of a robust workflow for analyzing neurite outgrowth, from image preparation to quantitative results.
In research focused on improving neuronal attachment and neurite outgrowth, the precise visualization of neuronal cells and their complex morphology is a critical step. Immunostaining for neuron-specific cytoskeletal proteins, primarily β-III Tubulin and Microtubule-Associated Protein 2 (MAP2), serves as a cornerstone for evaluating the success of these experiments. β-III Tubulin is a key component of the microtubule cytoskeleton expressed almost exclusively in neurons and is a definitive marker for neuronal identity and differentiation [91] [92]. MAP2, which stabilizes microtubules, is predominantly localized to the cell body and dendrites, making it an essential marker for neuronal polarity and dendritic arborization [93] [94]. This technical support center provides detailed protocols and troubleshooting guides to ensure the accurate and reliable detection of these markers, thereby supporting the advancement of biomaterials and therapeutic strategies for neural repair.
Troubleshooting FAQs for Immunostaining Neuronal Markers
Q1: My β-III Tubulin staining shows high background noise. What could be the cause and how can I resolve it? High background is often due to non-specific antibody binding or insufficient blocking.
- Primary Causes:
- Insufficient blocking: The blocking serum may not adequately saturate non-specific binding sites.
- Antibody concentration too high: An excessively high concentration of the primary or secondary antibody amplifies non-specific signals.
- Inadequate washing: Unbound antibodies remain on the sample.
- Solutions:
- Optimize blocking: Extend the blocking incubation time (e.g., from 1 hour to 2-3 hours) or try different blocking reagents like Bovine Serum Albumin (BSA), normal serum, or commercial protein-free blockers [95].
- Titrate your antibodies: Perform a dilution series for your primary and secondary antibodies. For β-III Tubulin, a starting point for a rabbit polyclonal antibody could be 1:500 for ICC/IF [96].
- Increase wash stringency: Add mild detergents like 0.05% Tween-20 to your wash buffer and increase the number and duration of wash steps.
Q2: I am not getting any signal for MAP2 in my differentiated neuronal cultures. What might be wrong? A lack of signal can be a result of antigen masking or issues with antibody penetration.
- Primary Causes:
- Antigen masking: The cross-linking nature of paraformaldehyde (PFA) fixation can mask epitopes, preventing antibody binding [95].
- Insufficient permeabilization: If the intracellular target is not accessible, the antibody cannot bind.
- Antibody incompatibility: The antibody may not be suitable for the specific application (e.g., IHC-P vs. ICC/IF) or species.
- Solutions:
- Implement antigen retrieval: For PFA-fixed samples, a heat-induced epitope retrieval (HIER) step using a citrate-based buffer and a microwave or steamer can unmask the MAP2 epitope [93].
- Verify permeabilization: Ensure the use of an effective permeabilization agent like Triton X-100 (e.g., 0.1-0.5%) after fixation [95].
- Check antibody specifications: Confirm that the anti-MAP2 antibody is validated for your application and species. For example, a monoclonal antibody like AP-20 has been used for IHC on rat tissues at 1:200 dilution [93].
Q3: The neuronal morphology in my stained samples looks distorted. How can I preserve cell structure better? This typically points to issues with the fixation process.
- Primary Causes:
- Fixation time too long: Over-fixation can make cells brittle and distort their architecture.
- Fixative concentration: An incorrect concentration can damage cells.
- Solutions:
Detailed Immunostaining Protocols for Key Experiments
Protocol: Indirect Immunofluorescence for β-III Tubulin and MAP2 in Cultured Neurons
This protocol is adapted for staining cultured neurons grown on coverslips, a common scenario in neurite outgrowth studies [95] [92].
Materials:
- Cells: Primary cortical or hippocampal neurons, or neuronal cell lines (e.g., SK-N-SH, PC12).
- Fixative: 4% Paraformaldehyde (PFA) in PBS.
- Permeabilization Buffer: PBS with 0.1% Triton X-100.
- Blocking Buffer: PBS with 5% normal serum (from the host species of the secondary antibody) and 1% BSA.
- Primary Antibodies: Rabbit anti-β-III Tubulin [96] and Mouse anti-MAP2 [94].
- Secondary Antibodies: Fluorophore-conjugated anti-rabbit and anti-mouse antibodies (e.g., Alexa Fluor 488 and 568).
- Nuclear Stain: DAPI (4',6-diamidino-2-phenylindole).
- Mounting Medium: Antifade mounting medium.
Method:
- Fixation: Aspirate the culture medium and rinse cells gently with warm PBS. Add 4% PFA to cover the cells and incubate for 15 minutes at room temperature.
- Permeabilization: Remove PFA and wash cells 3 x 5 minutes with PBS. Apply permeabilization buffer (0.1% Triton X-100 in PBS) for 10 minutes.
- Blocking: Remove permeabilization buffer and wash once with PBS. Incubate cells with blocking buffer for 1 hour at room temperature to prevent non-specific binding.
- Primary Antibody Incubation: Prepare primary antibodies in blocking buffer. For β-III Tubulin, a dilution of 1:500 is recommended for immunocytochemistry; for MAP2, follow the manufacturer's datasheet (e.g., 1:200) [96] [93]. Apply the antibody solution to the coverslips and incubate in a humidified chamber overnight at 4°C.
- Secondary Antibody Incubation: Retrieve samples and wash 3 x 5 minutes with PBS to remove unbound primary antibody. Prepare fluorophore-conjugated secondary antibodies in blocking buffer (typical dilution 1:1000). Apply to the coverslips and incubate for 1-2 hours at room temperature, protected from light.
- Counterstaining and Mounting: Wash 3 x 5 minutes with PBS. Incubate with DAPI (e.g., 1:1000 dilution in PBS) for 5-10 minutes to stain nuclei. Perform a final wash with PBS. Mount the coverslip onto a glass slide using antifade mounting medium.
- Imaging: Once the mounting medium has set, visualize the stained neurons using a fluorescence or confocal microscope.
Workflow Diagram: Immunostaining Process
The following diagram outlines the key steps of the immunostaining protocol.
Quantitative Data and Reagent Specifications
Antibody Dilution and Application Table
The table below summarizes validated dilution ranges for β-III Tubulin and MAP2 antibodies in different applications, compiled from manufacturer datasheets and research literature [96] [93].
| Marker | Host & Clonality | ICC/IF Dilution | IHC-P Dilution | Western Blot Dilution | Key Applications in Research |
|---|---|---|---|---|---|
| β-III Tubulin | Rabbit Polyclonal | 1:100 - 1:1000 [96] | 1:100 - 1:1000 [96] | 1:500 - 1:50000 [96] | Marker for neuronal differentiation and axon guidance [91] [92]. |
| MAP2 | Mouse Monoclonal | Not Specified | 1:200 [93] | Not Specified | Marker for neuronal cell body and dendrites; indicates polarization [93] [94]. |
Research Reagent Solutions
This table lists essential reagents and their functions for immunostaining in neuronal research.
| Reagent / Material | Function / Description | Example Use in Protocol |
|---|---|---|
| Poly-D-Lysine | Positively charged polymer coating for substrates. | Enhances neuronal attachment to glass or plastic coverslips prior to plating [46] [97]. |
| Paraformaldehyde (PFA) | Cross-linking fixative. | Preserves cellular architecture (4% solution, 15 min fixation) [95] [92]. |
| Triton X-100 | Detergent for cell permeabilization. | Creates pores in the membrane (0.1-0.5% solution) allowing antibodies to access intracellular targets like β-III Tubulin and MAP2 [95] [92]. |
| Bovine Serum Albumin (BSA) | Protein-based blocking agent. | Reduces non-specific background staining when used in blocking buffers (1-5% concentration) [95]. |
| Normal Serum | Serum-based blocking agent. | Used in blocking buffers (e.g., from goat, donkey) to minimize non-specific binding of secondary antibodies [95]. |
The Scientist's Toolkit: Functional Insights and Experimental Design
Functional Roles of Neuronal Markers Diagram
Understanding the biological context of your targets is crucial for interpreting staining results. The following diagram illustrates the functional roles of β-III Tubulin and MAP2 in a neuron.
Notes on Experimental Design
- Choosing the Right Marker: For general neuronal identification and axonal outgrowth measurements, β-III Tubulin is an excellent choice. To specifically study dendritic development and neuronal polarization, MAP2 is the preferred marker. Many studies use double staining with both to get a complete picture of neuronal morphology [94].
- Controls are Critical: Always include the appropriate controls in your experiments. This includes a no-primary-antibody control (only secondary antibody) to check for non-specific binding of the secondary antibody, and a positive control (e.g., a known neuronal sample) to confirm the staining protocol is working.
- Biomaterial Considerations: When working with engineered substrates for neurite outgrowth, the staining protocol may require optimization. For example, 3D scaffolds might need longer fixation and permeabilization times than standard 2D cultures [97]. The choice of substrate coating (e.g., poly-D-lysine, laminin) itself is a critical variable that directly impacts neuronal attachment and the subsequent quality of the staining [46] [98] [97].
Comparative Analysis of Growth on Promoting vs. Inhibitory Substrates
Troubleshooting Guide: Common Experimental Challenges
Problem: Poor Neuronal Attachment to Coated Substrates
- Potential Cause & Solution: Degraded or improperly applied coating substrate. Uneven coating or using a substrate that has dried out can prevent cell adhesion [11] [99]. Ensure poly-D-lysine (PDL) or poly-L-lysine (PLL) is applied evenly and the surface is kept hydrated until plating. PDL is more resistant to enzymatic degradation than PLL [11]. For persistent issues, consider alternative substrates like dendritic polyglycerol amine (dPGA), which is highly resistant to degradation [11].
Problem: Insufficient or Aberrant Neurite Outgrowth
- Potential Cause & Solution 1: Sub-optimal culture medium. Use a serum-free medium optimized for neurons, such as Neurobasal Plus Medium supplemented with B-27 Plus, to provide essential nutrients and hormones [100] [11]. Ensure supplemented medium is fresh and used within its stability period (e.g., within 4 weeks for Neurobasal Plus with B-27 Plus) [100].
- Potential Cause & Solution 2: Blocked neuronal electrical activity. Intrinsic electrical activity is crucial for neurite branching. Experimentally blocking this activity (e.g., via hyperpolarization) significantly reduces branching complexity without completely preventing initial sprouting [29].
- Potential Cause & Solution 3: Inappropriate cell density. Neurons cultured at excessively low densities may not thrive. Follow recommended plating densities, for example, 25,000 - 60,000 cells/cm² for rat hippocampal neurons for histology [11].
Problem: Excessive Glial Cell Contamination in Culture
- Potential Cause & Solution: Uncontrolled proliferation of non-neuronal cells. To suppress glial growth, use CultureOne Supplement at the start of culture or a low concentration of cytosine arabinoside (AraC) [100] [11]. Note that AraC may have off-target neurotoxic effects and should be used cautiously [11].
Problem: Cells Forming Clumps Instead of Adhering Evenly
- Potential Cause & Solution: This is often related to the coating substrate or plating technique. Ensure an even coating and avoid plating cells at too high a density [100]. Using a wide-bore pipette tip during trituration and resuspending cells gently before plating can help achieve a homogeneous cell mixture and prevent clumping [99].
Frequently Asked Questions (FAQs)
Q1: Which media system is recommended for long-term culture of primary hippocampal neurons? We recommend using Neurobasal Plus Medium with B-27 Plus Supplement for long-term culture of mixed hippocampal cells. This system has been shown to support improved electrophysiological activity and maintain primary rat hippocampal neurons for up to 4 weeks [100].
Q2: My neurons have sprouted but show very little branching. What could be the reason? Your neurons may be exhibiting spontaneous activity, but the pattern might not be conducive to elaborate branching. Research shows that neurons firing bursts with a higher number of spikes (e.g., ≥10 spikes per burst) develop more elaborate branching, whereas those with fewer spikes per burst show less branching [29]. Furthermore, experimentally blocking neuronal activity via hyperpolarization severely perturbs branching, indicating that specific patterns of electrical activity are critical [29].
Q3: Are there any bioactive compounds known to promote neurite outgrowth? Yes, several compounds have been identified. For example, the marine-derived compound 9-Methylfascaplysin (9-MF) promotes neurite outgrowth at nanomolar concentrations by inhibiting the ROCK2 pathway and upregulating GAP-43 expression [101] [102]. Another compound, Methylone, has been shown to stimulate neurite outgrowth in cortical neurons, specifically increasing branch number and the length of the longest neurite [103].
Q4: How does the physical scaffold architecture influence neuronal growth? Fiber orientation in electrospun scaffolds significantly guides neural cell behavior. Studies using SH-SY5Y cells show that random fiber orientation leads to significantly higher cell coverage, while aligned fibers guide the formation of larger pseudospheroids and influence the expression of differentiation markers like doublecortin and connexin 31 [104]. This highlights that scaffold architecture is a critical design parameter for neuroregenerative applications.
Table 1: Impact of Neuronal Activity Patterns on Branching
| Experimental Group | Description | Spikes per Burst (mean ± SD) | Extent of Neuritic Branching (mean ± SD) |
|---|---|---|---|
| Group A | Elaborate branching | 15.88 ± 3.36 | 22.30 ± 3.53 |
| Group B | Less extensive branching | 6.63 ± 1.92 | 9.55 ± 1.76 |
| Group C | Activity blocked (Hyperpolarized) | N/A | 5.34 ± 1.38 |
| Group D | Control (Electrode inserted, not hyperpolarized) | N/A | 13.30 ± 6.01 |
Data derived from studies on LPeD1 neurons, where branching was quantified as the ratio of neurite tips to primary neurites [29].
Table 2: Effects of Pro-Growth Compounds on Neurite Outgrowth
| Compound / Treatment | Model System | Key Effects on Neurite Outgrowth | Proposed Primary Mechanism |
|---|---|---|---|
| 9-Methylfascaplysin (9-MF) | PC12 Cells | Promoted outgrowth; Increased GAP-43 expression & mitochondrial area [101] [102]. | Inhibition of ROCK2 [101] [102]. |
| Methylone | Primary Cortical Neurons | Increased number of branches and length of the longest neurite [103]. | Branching: Monoamine transporters (NET/SERT/DAT). Longest neurite: trkB/mTor signaling [103]. |
| Retinoic Acid (Positive Control) | PC12 Cells | Increased outgrowth and GAP-43 expression [102]. | Well-known differentiation agent. |
Detailed Experimental Protocols
Protocol 1: Investigating Activity-Dependent Neurite Outgrowth Using Intracellular Recording
This protocol is adapted from studies on individually identified Lymnaea neurons [29].
- Neuron Culture: Individually isolate and plate neurons (e.g., LPeD1) in Brain Conditioned Medium (CM) on a poly-L-lysine-coated substrate.
- Electrophysiology Setup: Impale neurons with sharp intracellular electrodes during active growth phases (e.g., 4-6 hours post-plating). Record spontaneous activity (e.g., bursting patterns) concomitantly with time-lapse imaging of growth.
- Activity Manipulation (Experimental Group): To test the effect of blocking activity, inject hyperpolarizing current (e.g., 0.2-0.3 nA) to prevent spontaneous firing after confirming a successful impalement.
- Fixation and Analysis: After a set period (e.g., 48 hours post-plating), fix cells. Quantify neurite outgrowth by counting primary neurites and neurite tips to calculate a branching ratio.
Protocol 2: Evaluating Pro-Growth Compounds in PC12 Cells
This protocol is based on methods used to test 9-Methylfascaplysin [102].
- Cell Culture and Plating: Maintain PC12 cells in an appropriate basal medium. Plate cells at a standard density for differentiation assays.
- Compound Treatment: On the day after plating (DIV1), treat cells with the test compound (e.g., 3-10 nM 9-MF). Include a positive control (e.g., 5 µM retinoic acid) and vehicle control.
- Incubation and Fixation: Incubate cells with the compound for a defined period (e.g., 48 hours). Fix cells (e.g., with 4% PFA or methanol).
- Immunostaining and Imaging: Stain fixed cells for neuronal markers (e.g., β-III tubulin) and outgrowth-associated proteins (e.g., GAP-43). Capture images using fluorescence microscopy.
- Image Analysis: Use image analysis software (e.g., ImageJ with NeuriteJ plugin) to quantify total neurite length, number of branches, and mean neurite length per cell. Analyze GAP-43 expression intensity and mitochondrial area.
The Scientist's Toolkit: Research Reagent Solutions
Table 3: Essential Materials for Neuronal Growth Substrate Research
| Item | Function/Benefit | Example Use Case |
|---|---|---|
| Poly-D-Lysine (PDL) | Positively charged polymer coating that promotes neuronal attachment [11]. | Standard substrate for coating culture surfaces for primary neurons [100] [11]. |
| B-27 Plus Supplement | Serum-free supplement designed to support the long-term survival of mature primary neurons [100]. | Used with Neurobasal Plus Medium for maintaining low glial cell growth in hippocampal and cortical cultures [100] [11]. |
| CultureOne Supplement | Supplements used to minimize glial cell proliferation in primary neuronal cultures [100]. | Added at day 0 with B-27 Plus to fully suppress astrocytes and oligodendrocytes [100]. |
| ROCK2 Inhibitor (e.g., Fasudil) | A tool compound that inhibits ROCK2 kinase activity, leading to promotion of neurite outgrowth [102]. | Used as a positive control in experiments investigating Rho/ROCK pathway inhibition on neurite growth [102]. |
| Electrospun PCL Scaffolds | Biocompatible, fibrous 3D scaffolds that mimic the extracellular matrix, providing topographical cues [104]. | Used to study the effects of fiber alignment (random vs. aligned) on neural cell guidance and pseudospheroid formation [104]. |
Signaling Pathways and Experimental Workflows
ROCK2 Inhibition Promotes Neurite Outgrowth
Neurite Outgrowth Assay Workflow
Benchmarking Novel Biomaterials Against Classical Natural and Synthetic Polymers
Within the context of a thesis focused on improving neuronal attachment and neurite outgrowth, benchmarking novel biomaterials against classical options is a fundamental step in experimental design. Biomaterials provide the physical and biochemical scaffold that influences critical cellular behaviors, including cell adhesion, polarization, and the extension of neurites—the foundational processes of neural circuit formation and regeneration. The ideal substrate must not only be biocompatible but must also actively support and guide neuronal growth by mimicking key aspects of the native extracellular matrix. This technical support center provides targeted troubleshooting guides, detailed protocols, and comparative data to assist researchers in selecting, testing, and optimizing polymers for neuronal applications, thereby accelerating progress in neural tissue engineering and therapeutic development.
Frequently Asked Questions (FAQs)
Q1: What are the primary advantages of using synthetic polymers over natural polymers for neuronal cell culture? Synthetic polymers, such as PLA, PCL, and PEEK, offer significant advantages including tunable mechanical properties, controlled degradation rates, and high batch-to-batch consistency. [105] [106] Their mechanical strength makes them suitable for long-term load-bearing applications and they allow for precise functionalization with bioactive peptides. However, a key disadvantage is their inherent lack of natural bioactivity, which often requires surface modification or blending with natural polymers to promote optimal cell attachment and neurite outgrowth. [105]
Q2: Why is my neuronal culture showing poor attachment on a synthetic polymer like PCL? Poor neuronal attachment on synthetic polymers is a common issue due to their inherent hydrophobicity and lack of natural cell-adhesion motifs. To troubleshoot, consider these steps:
- Surface Functionalization: Covalently link bioactive peptides like RGD (Arg-Gly-Asp) or IKVAV (Ile-Lys-Val-Ala-Val) to the polymer surface to mimic the extracellular matrix and promote integrin-mediated adhesion. [56]
- Protein Pre-coating: Pre-coat the substrate with natural proteins such as laminin, fibronectin, or collagen before plating cells. These proteins provide a familiar landscape for neuronal integrins. [107]
- Plasma Treatment: Use oxygen or ammonia plasma treatment to increase the surface energy and hydrophilicity of the polymer, which improves protein adsorption and subsequent cell attachment. [107]
Q3: How can I control the degradation rate of a bioresorbable scaffold to match my experiment's timeline? The degradation rate of bioresorbable polymers like PLA, PGA, and their copolymers (PLGA) is influenced by several factors that you can control: [105]
- Crystallinity: Polymers with higher crystallinity (e.g., PLLA) degrade more slowly than their amorphous counterparts.
- Molecular Weight: Higher molecular weight polymers generally have slower degradation rates.
- Copolymer Composition: Adjusting the ratio of monomers in a copolymer (e.g., the LA:GA ratio in PLGA) allows for precise tuning of the degradation profile.
- Environmental Conditions: Degradation accelerates in elevated temperature and humidity. The presence of catalysts or specific enzymes can also increase the rate significantly. [105]
Q4: What are the benefits of using conductive polymers in neural tissue engineering? Conductive polymers like PEDOT, polypyrrole, and polythiophene are invaluable for neural applications because they can conduct both electrons and ions, facilitating effective electron–ion transitions over device–tissue boundaries with low impedance. [56] They allow for the delivery of electrical stimulation, which has been shown to greatly enhance neurite outgrowth and guide neuronal differentiation. [107] [56] Furthermore, electrical stimulation delivered via these substrates can trigger functional responses, such as the electrically stimulated secretion of proteins from Schwann cells, which is crucial for nerve regeneration. [56]
Troubleshooting Guides
Problem: Inconsistent Neurite Outgrowth Between Batches
Potential Causes and Solutions:
Cause 1: Variability in Polymer Surface Topography.
- Solution: Implement rigorous quality control using atomic force microscopy (AFM) to characterize surface roughness. For natural polymers, ensure standardized purification protocols. For synthetic polymers,严格控制 electrospinning or mold fabrication parameters to ensure consistent nanofiber alignment or surface features. [107]
Cause 2: Uncontrolled Biofunctionalization.
- Solution: When functionalizing with peptides, use quantitative methods (e.g., spectrophotometry, ELISA) to verify the density and activity of conjugated biomolecules. Ensure that the conjugation chemistry does not negatively impact the bioactivity of the peptide ligand. [56]
Cause 3: Fluctuating Mechanical Stiffness.
- Solution: Use thermogravimetric analysis (TGA) and differential scanning calorimetry (DSC) to verify the polymer's thermal and mechanical properties batch-to-batch. [105] The stiffness of the substrate should match that of native neural tissue (~0.1-1 kPa for brain, ~1-10 kPa for peripheral nerves) to provide optimal mechanical cues. [107]
Problem: Excessive Inflammatory Response or Glial Scarring on Implanted Scaffolds
Potential Causes and Solutions:
Cause 1: Nonspecific Protein Binding.
- Solution: Utilize "stealth" biomaterials that resist nonspecific fouling. Biomimetic polymers, such as those incorporating a zwitterionic phosphorylcholine functional group (inspired by cell membranes), have demonstrated high resistance to nonspecific binding of proteins and cells, which can minimize immunogenic reactions and scar formation. [56]
Cause 2: Material Stiffness Mismatch.
- Solution: Optimize the polymer's elastic modulus to match the host tissue. Excessively stiff materials can promote fibrotic encapsulation. Using softer, more compliant materials can help reduce the activation of astrocytes and the ensuing glial scar. [107]
Cause 3: Degradation By-Products.
- Solution: Select polymers whose degradation products are non-acidic and biocompatible. For example, the degradation of PLA can create a local acidic environment that provokes inflammation. Using blends or copolymers, or incorporating buffering agents, can help mitigate this issue. [105]
Quantitative Biomaterial Data
Table 1: Benchmarking Key Properties of Classical and Novel Polymers for Neuronal Applications
| Polymer | Type | Key Properties | Neurite Outgrowth Performance | Degradation Time | Tensile Strength (MPa) | Key Applications |
|---|---|---|---|---|---|---|
| Collagen [81] [105] | Natural | Excellent biocompatibility, contains RGD sites | High, promotes strong attachment and growth | Weeks-Months (enzyme-dependent) | Low (0.5-10) | Neural guides, 3D hydrogels, drug delivery |
| Chitosan [81] [105] | Natural | Antimicrobial, biocompatible, cationic | Moderate to High | Months (enzyme-dependent) | Moderate (10-50) | Nerve conduits, wound dressings |
| PLA (Polylactic Acid) [108] [105] | Synthetic (Biodegradable) | Tunable degradation, good strength | Moderate (requires coating) | 12-24 months (hydrolytic) | High (50-70) | Resorbable sutures, 3D scaffolds, implants |
| PCL (Polycaprolactone) [81] [105] | Synthetic (Biodegradable) | Slow degradation, flexible | Moderate (requires coating) | 2-4 years (hydrolytic) | Moderate (20-40) | Long-term implants, electrospun scaffolds |
| PEEK [106] | Synthetic (Non-biodegradable) | High mechanical strength, inert | Low (requires surface modification) | Non-degradable | Very High (90-100) | Permanent spinal implants, dental devices |
| PEDOT-based Conductive Polymers [56] | Synthetic (Conductive) | Low impedance, can be functionalized | Very High with electrical stimulation | Can be designed for stability | Varies with formulation | Neural electrodes, bioelectronic interfaces |
| Polyurethane [81] [109] | Synthetic | High elasticity, toughness | Moderate | Varies (can be biodegradable) | Moderate to High (25-50) | Neural tubing, flexible coatings |
Table 2: Global Market and Usage Trends for Polymer Biomaterials (Data sourced from market reports) [108] [109]
| Segment | Market Size (2024) | Projected CAGR (2025-2029) | Dominant Polymer Types | Primary Application in Neurology |
|---|---|---|---|---|
| Natural Polymers | Part of overall $79.06 Bn market | ~15.6% (Overall Market) | Collagen, Chitosan, Hyaluronan | Nerve guides, hydrogel scaffolds for SCI* |
| Synthetic Biodegradable | Part of overall $79.06 Bn market | ~15.6% (Overall Market) | PLA, PCL, PLGA, PGA | 3D-printed scaffolds, resorbable implants |
| Synthetic Non-biodegradable | Part of overall $79.06 Bn market | ~15.6% (Overall Market) | PEEK, PMMA, Silicone Rubber | Permanent implants, electrode substrates |
| Overall Polymer Biomaterial Market | $79.06 Billion | 15.6% | Nylon, Silicone, PE, PVC | Tissue engineering, neurological disorders |
*Spinal Cord Injury
Detailed Experimental Protocols
Protocol 1: Evaluating Neuronal Attachment and Neurite Outgrowth on Polymer Films
Objective: To quantitatively assess and compare the ability of different polymer substrates to support neuronal attachment and promote neurite outgrowth.
Materials:
- Polymer substrates (e.g., PLA, PCL, PEDOT-PC films) prepared in 24-well plates.
- Primary neurons (e.g., rat hippocampal or DRG neurons) or a neuronal cell line (e.g., PC-12 cells).
- Appropriate neuronal cell culture medium.
- Phosphate Buffered Saline (PBS).
- Paraformaldehyde (4% in PBS).
- Triton X-100.
- Blocking solution (e.g., Bovine Serum Albumin or normal serum).
- Primary antibodies: Anti-β-III-tubulin (neuronal marker) and Anti-MAP2 (mature neuronal marker).
- Secondary antibodies: conjugated with fluorescent dyes.
- Phalloidin (for F-actin staining).
- DAPI (for nuclear staining).
- Fluorescence microscope with a camera and image analysis software (e.g., ImageJ with NeuronJ plugin).
Methodology:
- Substrate Preparation: Sterilize polymer films under UV light for 30 minutes per side. For synthetic polymers, pre-coat with poly-D-lysine (10 µg/mL) followed by laminin (5-10 µg/mL) for 2 hours at 37°C to enhance attachment.
- Cell Seeding: Seed neurons at a defined density (e.g., 50,000 cells/well for primary neurons) in complete medium. Incubate at 37°C with 5% CO₂.
- Fixation: After 24-72 hours, carefully aspirate the medium and wash wells with warm PBS. Fix cells with 4% PFA for 15-20 minutes at room temperature.
- Immunocytochemistry: Permeabilize cells with 0.1% Triton X-100 for 10 minutes. Block with 3% BSA for 1 hour. Incubate with primary antibodies (diluted in blocking solution) overnight at 4°C. Wash and incubate with secondary antibodies and phalloidin for 1 hour at room temperature in the dark. Finally, counterstain nuclei with DAPI.
- Image Acquisition and Analysis: Capture at least 5-10 random images per well using a 20x objective. Use image analysis software to:
- Count Cell Attachment: Count DAPI-positive nuclei.
- Measure Neurite Length: Trace the length of the longest neurite for each neuron.
- Analyse Neurite Branching: Count the number of branches per neuron.
- Calculate Percentage of Neurite-bearing Cells: Determine the ratio of cells with neurites longer than the cell body diameter to the total number of cells.
Protocol 2: Functionalization of Synthetic Polymers with Bioactive Peptides
Objective: To covalently attach the IKVAV peptide to a PCL surface to enhance specific neuronal interactions.
Materials:
- PCL films or scaffolds
- IKVAV peptide sequence (e.g., Cys-IKVAV)
- Ȧmino-silane linker (e.g., (3-Aminopropyl)triethoxysilane, APTES)
- Crosslinker: Sulfo-SMCC (Sulfosuccinimidyl 4-(N-maleimidomethyl)cyclohexane-1-carboxylate)
- Ethanol, DMSO, and various buffers.
Methodology:
- Surface Activation: Treat PCL surfaces with oxygen plasma to generate surface carboxyl and hydroxyl groups.
- Silanization: Incubate activated PCL with 2% APTES in ethanol for 2 hours to introduce primary amine groups onto the surface. Rinse thoroughly.
- Crosslinker Coupling: React the aminated surface with Sulfo-SMCC (2 mM in PBS) for 1 hour. Sulfo-SMCC reacts with surface amines via its NHS ester, leaving a maleimide group exposed.
- Peptide Conjugation: Dissolve the C-terminus cysteine-containing IKVAV peptide in degassed PBS. Incubate the maleimide-activated PCL surface with the peptide solution for 4 hours at room temperature. The maleimide group will specifically and covalently bind to the thiol group on the cysteine residue.
- Validation: Verify successful conjugation using X-ray Photoelectron Spectroscopy (XPS) to detect the nitrogen and sulfur signature of the peptide.
Signaling Pathways and Experimental Workflows
Biomaterial Cues in Neuronal Signaling
Biomaterial Benchmarking Workflow
The Scientist's Toolkit: Research Reagent Solutions
Table 3: Essential Materials for Neuronal Biomaterial Research
| Reagent/Material | Function/Description | Example Use-Case |
|---|---|---|
| Poly-L-lysine (PLL) | A synthetic polycation that promotes cell attachment by increasing surface charge and adhesion. | Pre-coating tissue culture plastic and glass coverslips to provide a baseline adhesive surface for neuronal cultures. |
| Laminin | A key natural glycoprotein of the basement membrane, rich in IKVAV and RGD motifs. | Pre-coating synthetic polymer surfaces (PCL, PLA) to provide a bioactive layer that significantly enhances neuronal attachment and neurite outgrowth. |
| RGD Peptide | A short synthetic peptide (Arginine-Glycine-Aspartic acid) that mimics cell adhesion sites in ECM proteins. | Covalently conjugating to synthetic polymer surfaces to create bio-instructive interfaces that specifically promote integrin-mediated neuronal adhesion. |
| IKVAV Peptide | A laminin-derived peptide (Isoleucine-Lysine-Valine-Alanine-Valine) that promotes neuronal differentiation. | Functionalizing 3D hydrogel scaffolds (e.g., PEG-based) to create a pro-neurigenic microenvironment that guides stem cell differentiation and neurite extension. |
| Nerve Growth Factor (NGF) | A neurotrophic factor essential for the survival, development, and function of neurons. | Incorporating into polymer microspheres or directly into scaffolds for the controlled, sustained release to support long-term neuronal cultures in vitro or regeneration in vivo. |
| Sulfo-SMCC Crosslinker | A heterobifunctional crosslinker that reacts with amine and sulfhydryl groups. | Creating covalent bonds between aminated polymer surfaces (e.g., after plasma + APTES treatment) and cysteine-terminated bioactive peptides (e.g., Cys-IKVAV). |
| EDOT-PC Monomer | A zwitterionic, phosphorylcholine-functionalized EDOT monomer for creating cell membrane-mimicking conductive polymers. [56] | Electropolymerizing onto neural electrode surfaces to create a bio-inert, low-impedance coating that resists glial scarring and enables stable electrical communication with neurons. |
Conclusion
The strategic enhancement of neuronal attachment and neurite outgrowth hinges on a multifaceted approach that integrates sophisticated substrate engineering with a deep understanding of neuronal biology. Key takeaways include the critical importance of precisely characterized surface chemistries, the transformative potential of dynamic and modifiable culture platforms, and the necessity of glial and trophic support for long-term network stability. Moving forward, the convergence of these strategies with advanced biomaterials, stem cell technology, and high-content analysis will be pivotal for creating more physiologically relevant in vitro models. These advancements promise to accelerate drug discovery for neurodegenerative diseases and improve the efficacy of neural interface technologies, ultimately bridging the gap between laboratory research and clinical application.
References
- 1. A fibronectin mimetic motif improves integrin mediated cell ... [https://www.sciencedirect.com/science/article/abs/pii/S0142961215008170]
- 2. Advantages of RGD peptides for directing cell association with ... [https://pmc.ncbi.nlm.nih.gov/articles/PMC3091033/]
- 3. Identification of a Neurite Outgrowth-Promoting Motif within the ... [https://pmc.ncbi.nlm.nih.gov/articles/PMC6762977/]
- 4. on a Neurite isoform expressed during... outgrowth fibronectin [https://bmcneurosci.biomedcentral.com/articles/10.1186/1471-2202-8-44]
- 5. Nerve growth factor, laminin , and fibronectin promote neurite ... | Scilit [https://www.scilit.com/publications/7c10c68ac0608cc3f6cfea924a5b96d1]
- 6. , Neurite -dependent, and outgrowth -independent adhesion... RGD RGD [https://pubmed.ncbi.nlm.nih.gov/9552165/]
- 7. The RGD motif in fibronectin is essential for development but ... [https://pmc.ncbi.nlm.nih.gov/articles/PMC2064432/]
- 8. The Role of Extracellular Matrix (ECM) Adhesion Motifs in ... [https://www.mdpi.com/1420-3049/28/12/4616]
- 9. Topography, Cell Response, and Nerve Regeneration - PMC [https://pmc.ncbi.nlm.nih.gov/articles/PMC3016849/]
- 10. Controlling the morphology and outgrowth of nerve and ... [https://www.sciencedirect.com/science/article/abs/pii/S1742706117300235]
- 11. Tips for Keeping Primary Neuron Cultures Healthy [https://dendrotek.ca/blogs/posts/tips-for-keeping-primary-neuron-cultures-healthy]
- 12. Stiff substrates enhance cultured neuronal network activity [https://www.nature.com/articles/srep06215]
- 13. The role of elasticity on adhesion and clustering ... - Nature [https://www.nature.com/articles/s42003-024-06329-9]
- 14. The influence of substrate stiffness on the behavior and ... [https://www.sciencedirect.com/science/article/abs/pii/S0142961212006424]
- 15. Exploration of the Effects of Substrate Stiffness on Biological ... [https://pmc.ncbi.nlm.nih.gov/articles/PMC7726759/]
- 16. Neuronal adhesion and differentiation driven by nanoscale ... [https://www.sciencedirect.com/science/article/abs/pii/S0142961210001316]
- 17. Chitosan suitability to adhesion, neuronal differentiation ... [https://www.sciencedirect.com/science/article/pii/S2666893925000258]
- 18. The Importance of Coating Surface and Composition for ... [https://pubmed.ncbi.nlm.nih.gov/40285752/]
- 19. Extracellular matrix stiffness facilitates neurite outgrowth by ... [https://www.sciencedirect.com/science/article/abs/pii/S0304416524001740]
- 20. Isolation of Primary Brain Cells: Challenges and Solutions [https://pmc.ncbi.nlm.nih.gov/articles/PMC12320896/]
- 21. Stimulation of neurite outgrowth using an electrically ... [https://pmc.ncbi.nlm.nih.gov/articles/PMC22977/]
- 22. Hybrid conducting polymer films promote neural outgrowth ... [https://www.sciencedirect.com/science/article/abs/pii/S156753942500088X]
- 23. Bioengineering an improved three-dimensional ... [https://www.sciencedirect.com/science/article/pii/S2452199X25004141]
- 24. A simple, yet versatile, co-culture method for examining ... [https://www.sciencedirect.com/science/article/pii/016502709390027O]
- 25. Modeling neuroinflammatory interactions between microglia ... [https://pmc.ncbi.nlm.nih.gov/articles/PMC12181861/]
- 26. A co-culture system to study the effects of Poly I:C-activated ... [https://link.springer.com/article/10.1007/s11626-025-01091-6]
- 27. The Effects of Co-Culturing ND7/23 Sensory Neuron-like Cells ... [https://pmc.ncbi.nlm.nih.gov/articles/PMC12472592/]
- 28. A Simple Three-Dimensional Compartmentalized Co ... [https://www.mdpi.com/2079-7737/14/9/1238]
- 29. Neuronal growth patterns and synapse formation are ... [https://www.nature.com/articles/s41598-025-00806-9]
- 30. A Neuron‐Glia Co‐culture System for Studying Intercellular ... [https://pmc.ncbi.nlm.nih.gov/articles/PMC9285924/]
- 31. PC12 Cell Line: Cell Types, Coating of Culture Vessels, Differentiation and Other Culture Conditions - PMC [https://pmc.ncbi.nlm.nih.gov/articles/PMC7227003/]
- 32. Responses of Neurons and Glial Cells to Somatosensory ... [https://www.sciencedirect.com/science/article/abs/pii/S030645221830681X]
- 33. PC12 Cell Line - an overview [https://www.sciencedirect.com/topics/immunology-and-microbiology/pc12-cell-line]
- 34. PC12 cell protocols [http://www.whitelabs.org/Lab%20Protocols/Mammalian%20Cell%20culture%20and%20manipulations/PC12%20cell%20protocols.htm]
- 35. PC-12 Cell Line as a Neuronal Cell Model for Biosensing ... [https://pmc.ncbi.nlm.nih.gov/articles/PMC9313070/]
- 36. Protocol to isolate dorsal root ganglion neurons from ... [https://www.sciencedirect.com/science/article/pii/S2666166725002424]
- 37. Electrophysiologic Characteristics of Large Neurons in Dorsal ... [https://pmc.ncbi.nlm.nih.gov/articles/PMC3013352/]
- 38. A simple preservation method for human dorsal root ... [https://pubmed.ncbi.nlm.nih.gov/40964376/]
- 39. A simple method for poly-D-lysine coating to enhance ... [https://pubmed.ncbi.nlm.nih.gov/37416506/]
- 40. A simple method for poly-D-lysine coating to enhance ... [https://pmc.ncbi.nlm.nih.gov/articles/PMC10320290/]
- 41. A simple method for poly-D-lysine coating to enhance ... [https://www.frontiersin.org/journals/cellular-neuroscience/articles/10.3389/fncel.2023.1212097/full]
- 42. Systematic Evaluation of Extracellular Coating Matrix on the ... [https://pmc.ncbi.nlm.nih.gov/articles/PMC11720352/]
- 43. Pharmacological Modulation of Neurite Outgrowth in ... [https://www.frontiersin.org/journals/cell-and-developmental-biology/articles/10.3389/fcell.2021.719636/full]
- 44. Protocol for the derivation, culturing, and differentiation of ... [https://pmc.ncbi.nlm.nih.gov/articles/PMC8121988/]
- 45. Adhesive Micropatterns for Cells: A Microcontact Printing ... [https://zenodo.org/records/13592]
- 46. Controlling Neurite Outgrowth with Patterned Substrates - PMC [https://pmc.ncbi.nlm.nih.gov/articles/PMC3088767/]
- 47. Chemically modifying glass surfaces to study substratum ... [https://www.sciencedirect.com/science/article/abs/pii/S0165027096000520]
- 48. Generation of Micropatterned Substrates Using Micro ... [https://pmc.ncbi.nlm.nih.gov/articles/PMC2936246/]
- 49. An Open-source Python Tool for Traction Force Microscopy ... [https://en.bio-protocol.org/en/bpdetail?id=5156&type=0]
- 50. Teach your microscope how to print: low-cost and rapid ... [https://pmc.ncbi.nlm.nih.gov/articles/PMC12257287/]
- 51. Neuronal growth patterns and synapse formation are ... [https://pmc.ncbi.nlm.nih.gov/articles/PMC12089460/]
- 52. AXIS™ Axon Isolation Device | Life Science Research [https://www.merckmillipore.com/INTL/en/life-science-research/cell-culture-systems/cell-analysis/axis-axon-isolation-device/iZab.qB.5PkAAAFBMRNb3.r5,nav]
- 53. AXIS Axon Isolation Device, 150 µm [https://www.sigmaaldrich.com/US/en/product/mm/ax15010tc?srsltid=AfmBOoo78gZnEKsDq9kfn8HMv8bWXLTHqCcQHOjYB-I8cis7_EhCwCgx]
- 54. AXIS Axon Isolation Device, 450 µm, Plasma Bonded [https://www.sigmaaldrich.com/US/en/product/mm/ax45005pb?srsltid=AfmBOopDyDc7hePsTrQljX3KS5qknWJtiG9DSXHmBwE9olHVcSq9SGev]
- 55. How to Perform a Microfluidic Cultivation Experiment—A ... [https://www.mdpi.com/2079-6374/11/12/485]
- 56. Large enhancement in neurite outgrowth on a cell ... [https://www.nature.com/articles/ncomms5523]
- 57. Directional control of neurite outgrowth - PubMed Central - NIH [https://pmc.ncbi.nlm.nih.gov/articles/PMC9653228/]
- 58. Neurite Outgrowth [https://www.sartorius.com/en/applications/life-science-research/live-cell-assays/neurite-outgrowth]
- 59. Protocol Guide: Neuron and Microglia Co-Culture Assay [https://www.sigmaaldrich.com/US/en/technical-documents/protocol/cell-culture-and-cell-culture-analysis/stem-cell-culture/protocol-guide-neuron-microglia-co-culture-assay?srsltid=AfmBOoqj0FyvtPCnU6be-XRjwnZIPVvvhfU-7bp6neKHgr6k_YfTiJUl]
- 60. Protocol for recording and analyzing neuronal network ... [https://pmc.ncbi.nlm.nih.gov/articles/PMC12357157/]
- 61. [DOCS] Dynamic Anisotropy Control in ACF via Stochastic Pulse... [https://gist.github.com/freederia-research/6c384935ca35a79daa71dd2956e8d840]
- 62. Tgfbr2 in Dental Pulp Cells Guides Neurite Outgrowth in ... [https://www.frontiersin.org/journals/cell-and-developmental-biology/articles/10.3389/fcell.2022.834815/full]
- 63. Neuronal medium that supports basic synaptic functions and activity of human neurons in vitro - PMC [https://pmc.ncbi.nlm.nih.gov/articles/PMC4443325/]
- 64. Serum-Free Cultures: Could They Be a Future Direction to ... [https://pmc.ncbi.nlm.nih.gov/articles/PMC9223839/]
- 65. Evaluation of the impact of customized serum-free culture ... [https://stemcellres.biomedcentral.com/articles/10.1186/s13287-024-03949-0]
- 66. A Simplified Method for Ultra-Low Density, Long-Term Primary Hippocampal Neuron Culture - PMC [https://pmc.ncbi.nlm.nih.gov/articles/PMC4828221/]
- 67. Open-End Control of Neurite Outgrowth Lengths with Steep ... [https://www.mdpi.com/2072-666X/15/11/1374?]
- 68. Open-End Control of Neurite Outgrowth Lengths with Steep ... [https://pmc.ncbi.nlm.nih.gov/articles/PMC11596160/]
- 69. Constructive Neuroengineering of Crossing Multi-Neurite ... [https://pmc.ncbi.nlm.nih.gov/articles/PMC12192150/]
- 70. Constructive Neuroengineering of Crossing Multi-Neurite ... [https://www.mdpi.com/2310-2861/11/6/419]
- 71. Common Problems and Solutions for Galvo Laser [https://www.scanneroptics.com/common-problems-and-solutions-for-galvo-laser.html]
- 72. CO2 Laser Marking Machine Common Troubleshooting ... [https://www.leadtech.ltd/co2-laser-marking-machine-common-troubleshooting-and-solutions.html]
- 73. Troubleshooting Common Laser Machine Issues [https://lttcorp.com/common-laser-machine-issues/]
- 74. Neurite Outgrowth - an overview [https://www.sciencedirect.com/topics/neuroscience/neurite-outgrowth]
- 75. Bioelectric cues from piezoelectric materials in stem-cell ... [https://pmc.ncbi.nlm.nih.gov/articles/PMC12631758/]
- 76. Biomaterials and stem cells targeting the microenvironment for ... [https://pubs.rsc.org/en/content/articlehtml/2025/bm/d4bm01521e]
- 77. The biomaterialist's task: scaffold biomaterials and ... [https://pmc.ncbi.nlm.nih.gov/articles/PMC4295700/]
- 78. Enhancement of neurite outgrowth in neuron cancer stem ... [https://www.sciencedirect.com/science/article/abs/pii/S0006291X12019316]
- 79. Biomaterial Strategies for Stem Cell Maintenance During In ... [https://pmc.ncbi.nlm.nih.gov/articles/PMC4123465/]
- 80. Outgrowth of Neurites from NIE-115 Neuroblastoma Cells Is ... [https://pmc.ncbi.nlm.nih.gov/articles/PMC1140584/]
- 81. Exploration of biomaterial and stem cell-based strategies for ... [https://pmc.ncbi.nlm.nih.gov/articles/PMC12574274/]
- 82. Cell–scaffold interactions in tissue engineering for oral and ... [https://www.sciencedirect.com/science/article/pii/S2452199X22004637]
- 83. Expert Tips for Reproducible Neuronal Research [https://www.technologynetworks.com/neuroscience/how-to-guides/expert-tips-for-reproducible-neuronal-research-401478]
- 84. Analysis of intercellular calcium signaling using ... [https://www.sciencedirect.com/science/article/abs/pii/S0003267012002097]
- 85. Calcium and activity-dependent signaling in the developing ... [https://pmc.ncbi.nlm.nih.gov/articles/PMC9578689/]
- 86. Primary Spinal Cord Neurons Better Attach to Non-Coated ... [https://brieflands.com/journals/ans/articles/99771]
- 87. NeurphologyJ: An automatic neuronal morphology quantification ... [https://bmcbioinformatics.biomedcentral.com/articles/10.1186/1471-2105-12-230]
- 88. SNT › Metrics [https://imagej.net/plugins/snt/metrics]
- 89. 5 Image Analysis Frustrations (and How to Fix Them) [https://mediacy.com/blog/frustrating-realities-image-analysis/]
- 90. Neurite analysis [https://forum.image.sc/t/neurite-analysis/12527]
- 91. Beta Tubulin III and neurogenesis [https://www.novusbio.com/antibody-news/antibodies/beta-tubulin-iii-and-neurogenesis?srsltid=AfmBOoohxmpb8VdfFxU8O84FbaycgJVFNyjD1qfFPoyYA9Zm5-6uP50g]
- 92. The β isotypes of tubulin in neuronal differentiation - PMC [https://pmc.ncbi.nlm.nih.gov/articles/PMC2905799/]
- 93. Microtubule-Associated Protein-2 and Class III β-Tubulin ... [https://www.nature.com/articles/3880790]
- 94. Immunocytochemical localization of tubulin and microtubule ... [https://pubmed.ncbi.nlm.nih.gov/3514816/]
- 95. Immunostaining and Immunofluorescence [https://www.stainsfile.com/theory/methods/immunostaining-immunofluorescence/]
- 96. Anti-Neuron specific beta III Tubulin antibody [https://www.abcam.com/en-us/products/primary-antibodies/neuron-specific-beta-iii-tubulin-antibody-neuronal-marker-ab229590]
- 97. Microenvironments Designed to Support Growth and ... [https://www.frontiersin.org/journals/materials/articles/10.3389/fmats.2018.00062/full]
- 98. Neurite outgrowth on well-characterized surfaces [https://www.sciencedirect.com/science/article/abs/pii/S0142961204001255]
- 99. Primary Cell Culture Support—Troubleshooting [https://www.thermofisher.com/us/en/home/technical-resources/technical-reference-library/cell-culture-support-center/primary-cell-culture-support/primary-cell-culture-support-troubleshooting.html]
- 100. B-27™ Plus Neuronal Culture System - FAQs [https://www.thermofisher.com/store/v3/products/faqs/A3653401]
- 101. 9-Methylfascaplysin, a Marine-Derived Bioactive ... [https://pubmed.ncbi.nlm.nih.gov/41304993/]
- 102. 9-Methylfascaplysin, a Marine-Derived Bioactive ... [https://www.mdpi.com/1424-8247/18/11/1751]
- 103. Methylone promotes neurite outgrowth and has long ... [https://www.nature.com/articles/s41386-025-02206-z]
- 104. Neural growth patterns: how random and aligned fibers ... [https://www.frontiersin.org/journals/bioengineering-and-biotechnology/articles/10.3389/fbioe.2025.1659965/full]
- 105. Advanced Biocompatible and Biodegradable Polymers [https://pmc.ncbi.nlm.nih.gov/articles/PMC12611034/]
- 106. Comparing Biocompatible Polymers: Properties and ... [https://www.octexgroup.com/blog/comparing-biocompatible-polymers-properties-and-performance/]
- 107. Biomaterials for Enhancing Neuronal Repair [https://www.frontiersin.org/journals/materials/articles/10.3389/fmats.2018.00021/full]
- 108. Global Bio-based Polymers Market Report 2025-2035, with ... [https://www.businesswire.com/news/home/20250422585969/en/Global-Bio-based-Polymers-Market-Report-2025-2035-with-Profiles-of-620-Companies-across-the-Bio-based-Polymer-Value-Chain-from-Feedstock-Suppliers-to-Polymer-Producers-and-End-product-Manufacturers---ResearchAndMarkets.com]
- 109. Polymer Biomaterial Global Market Report 2025 [https://www.thebusinessresearchcompany.com/report/polymer-biomaterial-global-market-report]