How to Detect Yeast Contamination in Cell Culture: A Complete Guide for Researchers
This article provides a comprehensive guide for researchers, scientists, and drug development professionals on detecting yeast contamination in cell cultures.
How to Detect Yeast Contamination in Cell Culture: A Complete Guide for Researchers
Abstract
This article provides a comprehensive guide for researchers, scientists, and drug development professionals on detecting yeast contamination in cell cultures. It covers foundational knowledge of contamination signs and sources, detailed methodological protocols for identification from basic microscopy to advanced molecular techniques, troubleshooting for complex scenarios and prevention strategies, and a comparative analysis of method validation. The content synthesizes current best practices to ensure data integrity, experimental reproducibility, and therapeutic product safety in biomedical research.
Understanding Yeast Contamination: Signs, Sources, and Risks to Your Research
Yeast contamination represents a significant challenge in cell culture laboratories, capable of compromising research integrity and biomanufacturing product quality. As biological contaminants, yeasts are unicellular eukaryotic fungi that can be introduced through lapses in aseptic technique or contaminated reagents [1] [2]. Unlike bacterial contaminants that typically cause rapid pH shifts, yeast contamination presents more subtle macroscopic changes in its early stages, making detection challenging without careful observation [3] [2]. Understanding these initial indicators is crucial for researchers to implement timely corrective actions and prevent the loss of valuable cell lines or bioproduction batches.
The insidious nature of yeast contamination lies in its moderate growth rate—faster than mammalian cells but slower than most bacteria—allowing it to evade immediate detection while gradually overwhelming the culture [1]. Within the context of a comprehensive yeast detection strategy, macroscopic indicators serve as the first line of defense, alerting trained personnel to potential issues before contamination progresses to advanced stages. This technical guide examines the specific macroscopic changes associated with yeast contamination, provides methodologies for systematic monitoring, and presents advanced techniques for confirmation, equipping researchers with the knowledge needed to safeguard their cell culture systems.
Macroscopic Indicators of Yeast Contamination
Turbidity Changes in Culture Medium
Turbidity development is the most reliable macroscopic indicator of yeast contamination in cell culture systems. As yeast cells proliferate, they transform the characteristic clarity of cell culture medium into a cloudy or hazy appearance that becomes progressively more noticeable [3] [2]. This cloudiness results from light scattering as millions of suspended yeast cells create a colloidal suspension within the medium [4]. The onset and progression of turbidity follows a predictable pattern that experienced researchers can recognize through regular visual inspection.
The timing and appearance of turbidity provides valuable diagnostic information. In advanced contamination stages, the medium becomes overtly cloudy, sometimes accompanied by a thin surface film [2]. However, in initial phases, the turbidity may be subtle and easily mistaken for normal cell growth or precipitation. The table below summarizes the progression of turbidity relative to contamination severity:
Table 1: Turbidity Progression in Yeast-Contaminated Cultures
| Contamination Stage | Appearance of Medium | Observation Notes |
|---|---|---|
| Early/Initial | Slight haze; minimal cloudiness | Easily overlooked without careful observation; may require comparison against uncontaminated control |
| Intermediate | Noticeably cloudy; milky appearance | Clearly visible without comparison; medium remains translucent |
| Advanced | Opaque; milky or turbid appearance | Significant light scattering; possible surface film formation |
Unlike bacterial contamination which typically causes rapid turbidity development within 24-48 hours, yeast contamination may require 2-3 days to become macroscopically evident due to a slower replication rate [1]. This delayed manifestation underscores the importance of maintaining consistent observation protocols across multiple passages.
Subtle pH Shifts and Color Changes
pH monitoring through color changes in phenol red-containing media provides another macroscopic indicator, though one that requires careful interpretation for yeast contamination. The characteristic subtlety of pH shifts with yeast contamination distinguishes it from bacterial contamination, where rapid acidification typically occurs [3] [2].
Phenol red, the most common pH indicator in cell culture media, transitions from red/orange at physiological pH (7.0-7.4) to yellow with acidification and purple/pink with alkalization. With yeast contamination, the pH remains relatively stable in initial stages, showing little to no color change despite increasing turbidity [3]. As the contamination advances to heavy levels, the pH typically increases, causing the medium to transition toward purple/pink tones [2]. This alkalization pattern contrasts sharply with bacterial contamination, where metabolic acid production typically drives rapid yellowing of the medium.
Table 2: pH Indicator Patterns in Contaminated Cell Cultures
| Contaminant Type | Initial Stage pH Change | Advanced Stage pH Change | Phenol Red Color Progression |
|---|---|---|---|
| Yeast | Minimal to no shift | Increased pH (alkalinization) | Red/Orange → Purple/Pink |
| Bacteria | Rapid decrease | Significant decrease | Red/Orange → Yellow |
| Uncontaminated | Stable | Graduate acidification from cell metabolism | Slow transition to yellow over time |
The disconnection between obvious turbidity and minimal pH change in early yeast contamination creates a distinctive diagnostic pattern that trained researchers can recognize. This apparent contradiction between visual cloudiness and stable pH should trigger suspicion of fungal contamination rather than bacterial.
Detection Methodologies and Experimental Protocols
Visual Assessment Protocols
Systematic macroscopic evaluation requires standardized protocols to ensure consistent detection of early contamination indicators. The following methodology provides a framework for reliable visual assessment:
Daily Observation Routine: Examine all cultures against a white background with consistent lighting prior to manipulation. Note medium clarity/color and compare against uncontaminated control cultures when possible [2].
Turbidity Assessment Technique: Gently swirl the culture vessel to resuspend any settled cells and observe through the medium depth. True turbidity remains dispersed throughout the medium, distinguishing it from settled debris or precipitates that accumulate at the bottom.
pH Evaluation Protocol: Assess phenol red color against a color reference chart under consistent lighting conditions. Document any deviations from the expected gradual acidification pattern of healthy cultures.
Progression Monitoring: Track suspected contamination through sequential passages, noting changes in turbidity and pH patterns over 2-3 days as yeast populations expand [1].
Culture Handling: If contamination is suspected, maintain the culture separately from other cell lines and perform all manipulations at the end of the day's work to prevent cross-contamination [2].
This systematic approach enhances detection sensitivity and provides documentation for investigating contamination sources and patterns.
Microscopic Confirmation Methods
When macroscopic indicators suggest possible yeast contamination, microscopic examination provides definitive confirmation. The following protocol enables reliable identification:
Sample Preparation: Aseptically remove a small volume (100-200 μL) from the potentially contaminated culture and prepare a wet mount slide [3] [1].
Microscopy Parameters:
- Use phase contrast microscopy at 100x-400x magnification for optimal visualization [3]
- Initially scan at lower magnification (100x-200x) to identify potential contamination areas
- Increase to higher magnification (400x) for detailed morphological assessment
Yeast Identification Criteria:
- Search for ovoid or spherical particles significantly smaller than mammalian cells [1] [2]
- Note bright, refractive appearance under phase contrast [3]
- Identify budding forms where smaller daughter cells remain attached to parent cells [2]
- Observe individual cells, chains, or clusters distributed between mammalian cells [3]
Morphological Documentation: Capture digital images of representative fields for comparison with established yeast morphology references and for inclusion in contamination records.
This confirmatory method typically requires less than 30 minutes to perform and provides immediate verification of yeast contamination, enabling prompt decision-making regarding culture disposition and laboratory response.
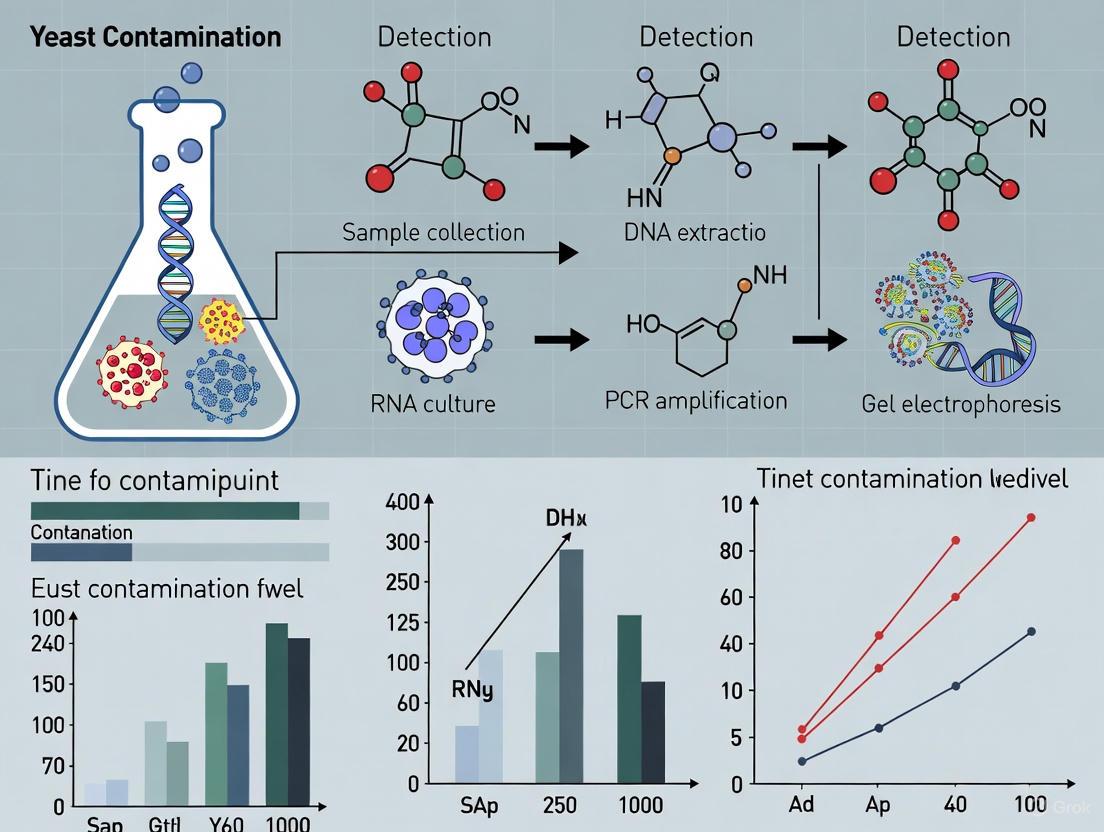
Diagram 1: Yeast contamination detection workflow
Advanced Detection Techniques
Flow Cytometry Applications
Flow cytometry offers a high-resolution, quantitative approach for yeast detection and analysis in cases where sensitive quantification or specific characterization is required. This method enables researchers to distinguish yeast populations from mammalian cells based on size, granularity, and fluorescence parameters [5] [6]. The application of flow cytometry is particularly valuable for detecting low-level contamination that may evade macroscopic and microscopic detection.
Specialized staining protocols enhance detection sensitivity and provide viability information. The LIVE/DEAD FungaLight Yeast Viability Kit utilizes SYTO 9 green-fluorescent nucleic acid stain and red-fluorescent propidium iodide to differentiate between live yeast cells with intact membranes (green fluorescence) and dead cells with compromised membranes (red fluorescence) [5]. Alternatively, the FungaLight CFDA, AM/Propidium Iodide Vitality Kit combines a cell-permeable esterase substrate with a membrane integrity indicator to assess metabolic activity alongside structural integrity [5].
Table 3: Flow Cytometry Reagents for Yeast Detection
| Reagent Kit | Primary Mechanism | Live Cell Signal | Dead Cell Signal | Application Context |
|---|---|---|---|---|
| LIVE/DEAD FungaLight Yeast Viability Kit | Membrane integrity assessment with FRET-based signal differentiation | SYTO 9: Green fluorescence (ex/em 480/500 nm) | Propidium Iodide: Red fluorescence (ex/em 490/635 nm) | General yeast viability assessment in suspected contamination |
| FungaLight CFDA, AM/Propidium Iodide Vitality Kit | Combined metabolic activity and membrane integrity measurement | CFDA, AM: Green fluorescence (ex/em 492/517 nm) | Propidium Iodide: Red fluorescence (ex/em 490/635 nm) | Enhanced detection sensitivity for low-level contamination |
The implementation of flow cytometry for routine contamination screening provides objective, quantitative data that can be incorporated into quality control systems for biomanufacturing and critical research applications. While requiring specialized equipment and expertise, this approach offers unparalleled sensitivity for early detection and characterization of yeast contaminants.
Enzymatic and ELISA-Based Detection
Molecular detection methods provide additional specificity for yeast identification and quantification, particularly in biopharmaceutical applications where yeast-based expression systems are employed. Enzymatic treatments can enhance detection resolution by modifying cell wall permeability and enabling better dye penetration [7]. Research demonstrates that cytometric resolution of yeast is significantly affected by both enzymatic conditions and culture media composition, with Proteinase K treatment particularly effective for improving detection sensitivity [7].
For bioprocess monitoring, Host Cell Protein (HCP) ELISA kits specifically designed for yeast systems enable detection of residual yeast proteins in recombinant protein products. These assays can identify HCP impurities at low parts per million (ppm) levels in the presence of milligram-level active pharmaceutical ingredients (APIs) [8] [9]. The Pichia Yeast Host Cell Protein ELISA Kit exemplifies this approach, with a detection limit of 1.56 ng/mL and quantitation limit of 12.5 ng/mL, providing sensitivity adequate for monitoring downstream purification process efficiency [9].
These specialized methods, while not typically employed for routine cell culture contamination screening, offer critical solutions for specific contexts such as biopharmaceutical manufacturing quality control and investigation of persistent contamination issues in research laboratories.
The Scientist's Toolkit: Research Reagent Solutions
Table 4: Essential Reagents for Yeast Contamination Detection and Analysis
| Reagent/Kit | Primary Function | Application Context | Technical Notes |
|---|---|---|---|
| Phenol Red-containing Media | Visual pH monitoring through color changes | Routine culture maintenance and macroscopic screening | Provides initial indication of metabolic abnormalities; subtle with yeast |
| Phase Contrast Microscopy | Morphological identification of contaminants | Suspected contamination confirmation | Optimal at 100x-400x magnification; reveals ovoid, budding yeast cells |
| LIVE/DEAD FungaLight Yeast Viability Kit | Membrane integrity-based viability assessment | Flow cytometric detection and quantification | Uses SYTO 9 and propidium iodide with FRET; 488 nm laser compatible |
| FungaLight CFDA, AM/Propidium Iodide Kit | Metabolic activity and membrane integrity assessment | Enhanced sensitivity detection via flow cytometry | Combines esterase substrate with DNA stain; 488 nm laser compatible |
| Yeast HCP ELISA Kits | Residual host cell protein detection | Bioprocess monitoring and quality control | High sensitivity (ppm range); specific to yeast expression systems |
| Proteinase K | Enzymatic pre-treatment for enhanced resolution | Sample preparation for advanced detection methods | Improves dye penetration; particularly effective for cytometric applications |
Macroscopic indicators comprising turbidity development and subtle pH shifts provide critical initial signals of yeast contamination in cell culture systems. The distinctive pattern of increasing cloudiness without corresponding pH changes in early contamination stages represents a key diagnostic combination that trained researchers can recognize through systematic observation protocols. While these macroscopic methods serve as valuable first-line detection tools, their limitations necessitate confirmation through microscopic examination and, for specialized applications, advanced techniques such as flow cytometry and ELISA-based detection.
Implementation of a comprehensive detection strategy that integrates macroscopic monitoring with appropriate confirmatory methods enables researchers to identify yeast contamination promptly, implement effective containment measures, and protect valuable cell cultures and bioprocesses from the detrimental effects of fungal contamination. This multi-layered approach, supported by proper documentation and regular review of contamination events, forms the foundation of robust cell culture practice and contributes significantly to research reproducibility and biomanufacturing quality assurance.
The integrity of cell culture research is paramount, and microbial contamination represents a significant threat to experimental validity and reproducibility. Among these contaminants, yeasts such as Saccharomyces cerevisiae are a common concern. Unlike bacterial contamination, which often causes rapid turbidity, yeast contamination can be more insidious, potentially leading to misinterpreted results and wasted resources [10]. Phase contrast microscopy emerges as a first-line, non-destructive technique for the rapid identification of these eukaryotic contaminants. This guide provides an in-depth technical framework for researchers and drug development professionals to accurately identify yeast cells in contaminated cultures, detailing visual characteristics, comparative analysis, and advanced confirmation protocols.
Visual Characteristics of Yeast Under Phase Contrast
Under phase contrast microscopy, yeast cells exhibit distinct morphological features that differentiate them from common mammalian cell lines and bacteria.
Basic Morphology and Size
Yeast cells are typically spherical to ovoid in shape, with a thick, rigid cell wall. A critical diagnostic feature is the process of budding, where a smaller daughter cell forms and grows from the mother cell. This is a key differentiator from bacterial binary fission. Under phase contrast, the bud emerges as a distinct protrusion, connected to the mother cell by a visible neck [11]. The size of yeast cells is another distinguishing factor; they generally have a diameter of approximately 3 to 5 micrometers, which is smaller than most mammalian cells but larger than most bacteria [11].
Internal Architecture and Organelles
Phase contrast microscopy reveals the internal architecture of cells through variations in refractive index. Yeast cells often display intracellular compartments that appear as regions of differing contrast. Notably, the vacuole, a large membrane-bound organelle, is frequently visible as a dark, phase-dark or bright, spherical structure within the cytoplasm [12]. The cytoplasm itself typically has a granular appearance. These structures are not present in bacterial contaminants and have a different organization compared to mammalian cells.
Table 1: Key Visual Characteristics of Yeast Under Phase Contrast
| Characteristic | Description | Significance for Identification |
|---|---|---|
| Cell Shape | Spherical, ovoid, or elongated; non-pleomorphic. | Distinguishes from rod-shaped bacteria and the varied, spreading morphology of mammalian cells. |
| Budding | Presence of a smaller daughter cell attached to a mother cell. | A definitive indicator of yeast; not seen in bacteria or mammalian cells. |
| Cell Wall | A thick, bright boundary clearly defining the cell's edge. | Contrasts with the flexible membranes of mammalian cells and the different wall structure of bacteria. |
| Vacuole | A prominent, dark or bright, spherical intracellular organelle. | A common feature in yeast; not found in bacterial contaminants. |
| Cytoplasmic Granularity | Uniform, fine to moderate granularity. | Differs from the more complex organelle structure of mammalian cells. |
Distinguishing Yeast from Mammalian Cells and Other Contaminants
Accurate identification requires a comparative approach. The following diagram and table outline the decision-making workflow and key differentiators.
Diagram 1: Identification workflow for yeast versus mammalian cells.
Table 2: Comparative Analysis: Yeast vs. Mammalian Cells in Contaminated Culture
| Feature | Yeast Cells | Mammalian Cells (e.g., Fibroblasts) |
|---|---|---|
| Overall Size | 3–5 µm [11] | 10–30 µm (highly variable by type) [13] |
| Cell Boundary | Thick, bright, and rigid cell wall. | Thin, flexible plasma membrane; less distinct boundary. |
| Shape | Uniformly spherical or ovoid. | Variable; can be spindle-shaped (fibroblasts), polygonal, or irregular. |
| Intracellular Structures | Prominent vacuole; granular, homogeneous cytoplasm. | Distinct nucleus, nucleoli, complex cytoskeleton, various organelles. |
| Growth & Division | Budding: asymmetric, with daughter cell formation. | Mitosis: complex process involving nuclear envelope breakdown and cytokinesis. |
| Culture Pattern | Cells remain individual or form small clusters; may sediment. | Cells attach and spread on substrate; form monolayers. |
Experimental Protocols for Identification and Confirmation
Core Protocol: Phase Contrast Microscopy for Yeast Identification
This protocol is adapted from established methods for imaging yeast and human cells [13].
Materials and Equipment:
- Phase contrast microscope (e.g., Nikon Eclipse Ci-L) [13]
- 100x oil immersion objective (e.g., Nikon MRH11902) and 10x objective [13]
- Microfluidic device or chamber slide for immobilization [11]
- Cell culture sample
Procedure:
- Sample Preparation: For liquid cultures, place a small drop (e.g., 5-10 µL) on a clean microscope slide and carefully lower a coverslip. For adherent mammalian cultures grown on coverslips, the coverslip can be mounted directly. For immobilized imaging, load the sample into a microfluidic device [11].
- Microscope Setup: Switch to the 10x phase contrast objective to locate the area of interest. Engage the corresponding phase ring (e.g., Ph1 for 10x, Ph3 for 100x).
- Initial Observation: Systematically scan the slide at 10x and 40x magnification. Look for small, round, highly refractile cells that may be free-floating or associated with the mammalian cell layer.
- High-Magnification Analysis: Switch to the 100x oil immersion objective for detailed inspection. Apply a small drop of immersion oil to the coverslip and carefully bring the objective into contact.
- Identification: Focus on individual suspect cells. Identify key characteristics from Table 1: thick cell wall, vacuoles, and crucially, any budding events.
- Documentation: Capture images and/or video recordings for further analysis and documentation of contamination.
Advanced Confirmatory Techniques
While phase contrast provides rapid identification, these techniques offer confirmation and deeper insight.
A. Flow Cytometry with Fluorescent Staining: This method allows for quantitative analysis and detection of yeast based on internal enzyme activity [12] [6].
- Procedure: Incubate a sample of the culture with 10 µM CarboxyDichloroFluorescein Diacetate (CDCFDA) in a suitable buffer (e.g., YPD at pH 5.0) for 1 hour. CDCFDA is non-fluorescent and cell-permeant. Upon entry, intracellular esterases hydrolyze the compound, releasing the fluorescent CDCF, which is trapped inside cells with intact membranes. Analyze the sample using a flow cytometer (e.g., Bryte-HS system) [12]. A distinct population of small, fluorescent particles confirms the presence of viable yeast.
B. Machine-Learning Aided Image Analysis: For high-throughput or complex samples, deep learning models can automate the segmentation and tracking of yeast cells.
- Procedure: Acquire time-lapse phase contrast images (e.g., every 3 minutes for several hours) [11]. Use a pre-trained pipeline that separates segmentation and tracking. The segmentation model identifies individual cells in each frame, while the tracking model uses the spatio-temporal neighborhood across frames to maintain cell identities, effectively recognizing yeast based on their morphology and behavior over time [11].
The Scientist's Toolkit: Key Research Reagent Solutions
Table 3: Essential Materials and Reagents for Yeast Identification and Contamination Management
| Reagent/Equipment | Function/Application | Example/Reference |
|---|---|---|
| Phase Contrast Microscope | Non-destructive, real-time visualization of cell morphology for initial contamination screening. | Nikon Eclipse Ci-L with 100x oil objective [13] |
| CDCFDA / CFDA | Fluorescent vital dye; hydrolyzed by intracellular esterases in live yeast for confirmation via flow cytometry or fluorescence microscopy. | Molecular Probe C-369; Sigma C-5041 [12] |
| Microfluidic Device | Immobilizes cells for long-term, high-resolution time-lapse imaging without physical perturbation. | Used in budding yeast division studies [11] |
| Ilastik Software | Open-source tool for machine-learning-based segmentation of yeast cells from microscopy images. | Used in sporulation efficiency quantification [14] |
| scCamAge Docker Container | Pre-configured computational environment for advanced image analysis and cellular age prediction. | Applied in yeast and human fibroblast studies [13] |
| YPD Medium | Rich growth medium for the cultivation and propagation of Saccharomyces cerevisiae. | 1% yeast extract, 2% peptone, 2% glucose [13] [14] |
The rapid and accurate microscopic identification of yeast contamination is an essential skill in cell culture-based research and development. By systematically applying the phase contrast characteristics and confirmation protocols outlined in this guide—focusing on size, rigid cell wall, budding division, and prominent vacuoles—researchers can swiftly diagnose contamination events. Integrating these classical techniques with modern tools like flow cytometry and machine-learning-based image analysis creates a robust defense, safeguarding the integrity of experimental data and ensuring the quality and safety of biopharmaceutical products.
Contamination represents one of the most persistent and costly challenges in cell culture research, capable of compromising experimental integrity, jeopardizing reproducibility, and invalidating months of dedicated work [15]. For researchers and drug development professionals, maintaining aseptic conditions is not merely a technical requirement but a fundamental cornerstone of scientific validity. This technical guide examines the three primary vectors of biological contamination—lab personnel, equipment, and reagents—within the specific context of yeast contamination in cell culture systems.
Yeast contamination poses a particular challenge due to its resilience and potential to cause significant economic and scientific losses [10]. As unicellular eukaryotic microorganisms, yeasts can compete with cultured cells for nutrients, alter pH levels, and secrete metabolites that interfere with experimental outcomes [16]. Understanding the precise pathways through which contamination occurs enables the implementation of targeted detection and prevention strategies, forming the first line of defense in protecting valuable cell lines and ensuring the generation of reliable, publication-quality data.
Contamination Source Analysis
Biological contaminants can infiltrate cell culture systems through multiple pathways, each requiring specific monitoring and intervention strategies. The table below summarizes the primary sources, detection methods, and preventive measures for the most common contamination types relevant to yeast contamination contexts.
Table 1: Common Contamination Sources and Characteristics in Cell Culture
| Contamination Source | Common Contaminants | Detection Indicators | Primary Prevention Methods |
|---|---|---|---|
| Lab Personnel | Bacteria, Yeast, Mold, Mycoplasma [17] | Turbidity, pH changes, unusual morphology [15] [16] | Strict aseptic technique, proper gowning, comprehensive training [10] |
| Equipment | Yeast, Mold, Bacteria [17] [10] | Visible colonies, filamentous structures, turbidity [15] [16] | Regular decontamination, HEPA filtration, validated sterilization [17] [10] |
| Reagents | Mycoplasma, Viruses, Yeast [15] [17] | Unexplained cell morphology changes, altered metabolism [15] | Use of certified reagents, filtration, quarantine of new cell lines [15] |
Lab Personnel as a Contamination Vector
Laboratory personnel represent one of the most significant contamination sources, continuously shedding microorganisms including yeast cells from skin, hair, and respiratory tracts [17]. Human activity in cell culture facilities generates airborne particles and aerosols that can settle in open media and culture vessels. Specific personnel-related risks include:
- Improper Aseptic Technique: Failure to maintain strict sterile workflows during media changes, cell passaging, or experimental manipulations provides direct pathways for microbial introduction [15] [10].
- Inadequate Personal Protective Equipment (PPE): Insufficient gowning with lab coats, gloves, and eye protection facilitates the transfer of skin and environmental yeasts into culture systems [10].
- Insufficient Training: Lack of comprehensive training in contamination control principles and emergency response procedures increases contamination risk [10].
Cell culture equipment presents multiple contamination risk points if not properly maintained and decontaminated:
- Incubators: Humidified CO₂ incubators provide ideal growth conditions for yeast contaminants, particularly when water pans are not regularly cleaned and replaced [15] [17].
- Biosafety Cabinets: Compromised HEPA filters, contaminated work surfaces, and overcrowded work areas can introduce yeast and other contaminants during culture manipulations [17].
- Vessels and Liquid Handling Equipment: Reusable culture vessels with residual organic material and improperly sterilized pipettes can harbor yeast populations [10].
- Cleaning Equipment: Ironically, tools like sponges and cloths used for cleaning can themselves become reservoirs for yeast contamination if not regularly decontaminated or replaced [15].
Reagent-Associated Contamination
Reagents and consumables introduce contamination risks throughout the cell culture workflow:
- Sera and Media: Fetal bovine serum and other biological media components can contain yeast contaminants if not properly screened and sterilized [15] [10].
- Contaminated Cell Stocks: Master and working cell banks can harbor latent yeast infections that manifest after thawing and expansion [10].
- Water and Buffer Solutions: Imperfectly purified water systems can introduce environmental yeasts into reagent preparations [16].
- Trypsin and Other Enzymes: Natural-sourced enzymes may contain yeast contaminants without proper filtration and quality control [15].
Yeast Contamination: Specific Characteristics and Detection
Identifying Yeast Contamination
Yeast contamination presents with distinctive characteristics that trained researchers can identify through routine monitoring:
- Visual and Microscopic Indicators: Unlike bacterial contamination which often causes general turbidity, yeast contamination typically appears as individual ovoid or spherical particles that may bud off smaller particles [16]. Under microscopy, yeast cells are typically larger than bacteria (ranging from a few micrometers up to 40μm) and reproduce through budding, which may be visible as smaller particles forming on parent cells [16].
- Culture Medium Changes: The growth medium may become turbid or cloudy, particularly in advanced contamination stages [16] [18]. The pH typically remains stable initially but usually increases as contamination progresses [16], which may be visualized by a color change to pink in phenol red-containing media [18].
- Cell Behavior Impacts: Contaminated cultures often exhibit slowed cell growth, unusual morphology, or reduced viability as yeasts compete for nutrients and alter the culture environment [15].
Table 2: Comparative Analysis of Contamination Types in Cell Culture
| Contaminant Type | Size Range | Visual Culture Signs | pH Change | Microscopic Appearance |
|---|---|---|---|---|
| Yeast | 3-40 μm [16] | Turbidity, suspended particles [16] | Increases (alkaline) [16] [18] | Ovoid/spherical, budding particles [16] |
| Bacteria | 0.5-5 μm [15] | Cloudy medium, thin surface film [16] | Decreases (acidic) [16] [18] | Tiny, moving granules, various shapes [16] |
| Mold | Hyphae >10 μm | Filamentous structures, fuzzy colonies [15] [16] | Stable then increases [16] | Thin, wispy filaments (hyphae) [16] |
| Mycoplasma | 0.3 μm [15] | No visible signs [15] | No consistent change | Not visible by standard microscopy [15] |
Advanced Yeast Detection Methodologies
While basic visual and microscopic identification provides initial detection, several advanced methodologies offer more sensitive and specific yeast identification:
- Microbiological Culture: Suspicious samples can be streaked onto selective microbiological media such as Sabouraud Dextrose Agar to isolate and confirm yeast contaminants [18]. This method allows for further characterization and identification of specific yeast species.
- Gram Staining: Yeast cells typically appear as Gram-positive organisms when subjected to Gram stain protocols, appearing purple under microscopy [18]. This differentiates them from many bacterial contaminants.
- Molecular Techniques: PCR-based methods and DNA sequencing provide definitive identification of yeast species, especially valuable when contamination is suspected but not visually confirmed [19]. These methods are particularly useful for detecting low-level contamination.
- Novel Detection Platforms: Emerging technologies include machine learning-aided UV absorbance spectroscopy, which can provide label-free, non-invasive detection of microbial contamination in under 30 minutes [20]. This approach measures ultraviolet light absorbance of cell culture fluids and uses machine learning to recognize patterns associated with contamination.
Experimental Protocols for Detection and Control
Routine Monitoring Protocol for Yeast Contamination
Implementing systematic monitoring protocols enables early detection and intervention for yeast contamination:
- Daily Visual Inspection: Examine all cultures for signs of turbidity, unusual sediment, or pH changes indicated by phenol red color shifts [16] [18].
- Microscopic Examination:
- Observe cultures under phase contrast microscopy at 100-400x magnification.
- Scan entire well or flask, paying special attention to areas between cells and medium clarity.
- Document any suspicious particles or budding cells with imaging systems.
- Culture Sampling for Suspicious Cases:
- Confirmation Testing:
Decontamination Protocol for Contaminated Equipment
When yeast contamination is confirmed, implement this comprehensive decontamination protocol:
- Initial Containment:
- Immediately isolate contaminated cultures and equipment from clean areas.
- Label all contaminated items clearly with biohazard tape.
- Surface Decontamination:
- Prepare fresh 10% bleach solution or appropriate laboratory disinfectant.
- Apply to all potentially contaminated surfaces in biosafety cabinets, incubators, and work areas.
- Allow recommended contact time (typically 10-15 minutes) before wiping clean [17].
- Incubator Decontamination:
- Remove and autoclave all shelves, racks, and water pans.
- Wipe interior surfaces with 70% ethanol followed by sterile water.
- Replace HEPA filters if scheduled maintenance indicates reduced efficiency [17].
- Equipment Validation:
- After decontamination, place sterile media in equipment for 24-48 hours.
- Check for contamination signs before returning to service.
Yeast Contamination Detection Workflow: This diagram outlines the systematic protocol for identifying and confirming yeast contamination in cell cultures, from initial suspicion through definitive confirmation.
Prevention-Focused Laboratory Practices
Implementing rigorous preventive measures significantly reduces yeast contamination incidence:
- Aseptic Technique Reinforcement:
- Limit conversation and movement during critical procedures.
- Work quickly but methodically within biosafety cabinets.
- Always disinfect gloves and surfaces between manipulations.
- Equipment Maintenance Schedule:
- Weekly: Decontaminate incubators, clean water pans, validate cabinet airflow.
- Monthly: Perform full cabinet decontamination, replace HEPA filters as needed.
- Quarterly: Validate sterilizing equipment, service critical instruments.
- Reagent Quality Control:
- Implement first-in-first-out inventory systems.
- Quarantine and test new cell lines before integration.
- Use validated, endotoxin-tested reagents for critical applications.
The Scientist's Toolkit: Essential Reagents and Materials
Successful detection and management of yeast contamination requires specific reagents and equipment. The following table details essential items for establishing effective contamination control protocols.
Table 3: Essential Research Reagents and Materials for Yeast Contamination Management
| Reagent/Material | Specific Function | Application Notes |
|---|---|---|
| Sabouraud Dextrose Agar | Selective isolation and cultivation of yeasts [21] | Contains antibiotics to suppress bacterial growth; ideal for contamination confirmation |
| 20% Glycerol Solution | Cryopreservation of yeast isolates [21] | Maintains viability for long-term storage; must be sterile-filtered |
| Gram Staining Kit | Differentiation of yeast from bacterial contaminants [18] | Yeast typically appear Gram-positive; requires crystal violet solution |
| Antimycotic Agents | Suppression of fungal/yeast growth in cultures [15] [18] | Amphotericin B and Nystatin are commonly used; avoid continuous use |
| Hoechst 33258 Stain | Detection of mycoplasma and other contaminants [17] | Binds DNA; useful when co-contamination is suspected |
| PCR Reagents | Molecular identification of yeast species [19] | Requires species-specific primers; provides definitive identification |
| Laboratory Disinfectants | Surface decontamination [17] | 70% ethanol, 10% bleach; must be prepared fresh regularly |
Vigilance against yeast contamination requires understanding its specific sources, characteristics, and detection methodologies. Laboratory personnel, equipment, and reagents represent the primary contamination vectors, each demanding targeted control strategies. By implementing systematic monitoring protocols, maintaining rigorous aseptic technique, and utilizing appropriate detection technologies, researchers can significantly reduce contamination incidence and safeguard their valuable cell cultures. In an era of increasing emphasis on reproducibility and data integrity, robust contamination control practices form the foundation of reliable cell culture research and successful drug development programs.
The Critical Impact on Data Integrity and Product Safety
Yeast contamination represents a significant and often underestimated threat in mammalian cell culture, with profound implications for data integrity and product safety. As true fungi of the phylum Ascomycetes Hemiascomycetes, yeasts are ubiquitous in environments including plant leaves, soil, water, and even the skin surface and digestive tract of mammals [22]. In cell culture systems, their introduction can compromise years of research or render entire production batches unusable, presenting substantial financial, regulatory, and safety risks. Unlike bacterial contamination, which often manifests quickly through visible turbidity and pH shifts, yeast contamination can be more insidious in early stages, evading immediate detection while fundamentally altering experimental outcomes [15] [22]. This technical guide examines the critical impact of yeast contamination, provides detailed methodologies for detection and prevention, and establishes a framework for maintaining the integrity of both research data and biopharmaceutical products.
Detection and Characterization of Yeast Contamination
Visual and Microscopic Identification
The accurate identification of yeast contamination begins with recognizing its characteristic manifestations in cell culture:
- Macroscopic Observations: In early stages, yeasts may not cause immediate pH changes. As infection progresses, the culture medium typically becomes cloudy to the naked eye, and the pH may become basic [22].
- Microscopic Characteristics: At 100x magnification, yeasts appear as separate round or ovoid particles typically ranging from 3-10 µm in diameter, or in chains of two to four or more particles, sometimes multi-branched [22]. The appearance of chains results from their most common replication method called budding [22].
- Comparative Sizing: Yeasts are notably larger than bacteria but smaller than typical mammalian cells, providing a key distinguishing characteristic during microscopic examination [22].
Advanced Detection Methodologies
Flow Cytometry with Fluorescent Staining
The International Organisation of Vine and Wine (OIV) has established a standardized method for yeast cell counting using flow cytometry, which provides rapid quantification of viable, stressed, and dead yeast cells [23]. This method employs double fluorescent labeling with precise analytical interpretation:
Table 1: Fluorochrome Response Interpretation in Yeast Detection
| Quadrant | IP(-) | IP(+) |
|---|---|---|
| cFDA(-) | Not interpretable in this method | Dead cells |
| cFDA(+) | Viable and active cells | Active cells with altered plasma membrane (stressed) |
Key Reagents and Principles:
- Propidium Iodide (PI): An intercalating agent for nucleic acids that only penetrates cells with permeable plasma membranes, primarily identifying dead cells or those exhibiting membrane stress. Excitation peak: 520-550 nm; emission maximum: 610-630 nm [23].
- 5(6)-Carboxyfluorescein Diacetate (cFDA): A cell-permeant esterase substrate that acts as a probe of metabolic activity. During hydrolysis by intracellular esterases, it produces carboxyfluorescein (excitation: 498 nm; emission maximum: 516 nm) [23].
The method can be applied to analysis of selected yeast preparations, with quantification limits dependent on equipment performance and sample preparation methods [23].
UV Absorbance Spectroscopy with Machine Learning
Researchers from the Singapore-MIT Alliance for Research and Technology (SMART) have developed a novel method combining UV absorbance spectroscopy with machine learning for label-free, noninvasive, real-time detection of microbial contamination in cell therapy products [20].
This approach offers significant advantages:
- Rapid Results: Provides definitive yes/no contamination assessment within 30 minutes [20]
- Non-invasive Methodology: Eliminates the need for cell staining or invasive extraction processes [20]
- Automation Potential: Enables continuous monitoring through automated cell culture sampling at designated intervals [20]
- Cost Effectiveness: Requires no specialized equipment beyond standard UV spectroscopy capabilities [20]
The machine learning algorithm is trained to recognize specific ultraviolet light absorption patterns associated with microbial contamination, allowing for early detection during the manufacturing process when corrective actions can still be implemented [20].
Fluorescence Microscopy with FUN 1 and Calcofluor White Staining
Thermo Fisher Scientific's LIVE/DEAD Yeast Viability Kit provides a standardized protocol for distinguishing live and dead yeast using a two-color fluorescent probe [24]:
Experimental Protocol:
- Yeast Preparation: Grow yeast to late log phase (10⁷-10⁸ cells/mL), then add 50 µL of culture to 1 mL of wash buffer (e.g., 10 mM Na-HEPES with 2% D-glucose) [24].
- Centrifugation: Centrifuge at 10,000 × g for 5 minutes, remove supernatant, and resuspend pellet in 1 mL wash buffer [24].
- Staining: Add 1 µL of Component A (FUN 1 cell stain) and 5 µL of Component B (Calcofluor white M2R) to 1 mL of yeast suspension, achieving final concentrations of 10 µM and 25 µM, respectively [24].
- Incubation: Incubate at 30°C in the dark for 30 minutes [24].
- Visualization: Place 5 µL of stained suspension on a glass slide, cover with coverslip, and image with appropriate filters [24].
Staining Mechanism:
- FUN 1 Cell Stain: Requires both plasma membrane integrity and metabolic function to convert yellow-green fluorescent intracellular staining into red-orange intravacuolar structures [24].
- Calcofluor White M2R: Labels cell-wall chitin with blue fluorescence regardless of metabolic state [24].
Detection Workflows
The following diagram illustrates the integrated methodology for detecting yeast contamination in cell culture systems:
Critical Impacts on Research and Production
Compromised Data Integrity and Experimental Reproducibility
Yeast contamination fundamentally undermines research validity through multiple mechanisms:
- Altered Cellular Metabolism: Yeasts compete with mammalian cells for nutrients, fundamentally changing the metabolic environment and inducing stress responses that skew experimental results [10] [15].
- Unrecognized Variable Introduction: In early stages without visible turbidity, researchers may continue experiments unaware that yeast is introducing confounding variables, leading to false conclusions about cellular behavior [22].
- Cross-Contamination Risks: Yeasts can readily "colonize" incubators and spread to other cultures through contaminated flask surfaces during cell culture manipulation, potentially compromising entire research programs [22].
- Misinterpretation of Results: The presence of yeast can lead researchers to attribute observed effects to experimental treatments rather than contamination, particularly problematic in studies of cytotoxicity, metabolism, or gene expression [10].
Product Safety Risks in Biopharmaceutical Manufacturing
In GMP manufacturing environments, yeast contamination presents serious patient safety concerns and regulatory challenges:
- Batch Failure: Contaminated biopharmaceutical products must be discarded, resulting in substantial financial losses and potential drug shortages for patients [10].
- Therapeutic Efficacy Compromise: Yeast contamination can alter the biological properties of cell therapy products (CTPs), potentially rendering them less effective or unpredictable in clinical applications [20].
- Patient Safety Hazards: Administration of contaminated products to immunocompromised patients could lead to serious infections or unpredictable immune responses [10].
- Regulatory Non-Compliance: Contamination events trigger mandatory reporting, investigations, and potential regulatory actions including production halts [10].
Table 2: Impact Comparison - Research vs. GMP Manufacturing
| Impact Category | Research Setting | GMP Manufacturing |
|---|---|---|
| Primary Concern | Data integrity, reproducibility | Patient safety, batch consistency |
| Financial Impact | Wasted resources, grant funding | Batch failure, regulatory fines |
| Timeline Effect | Experimental delays, repetition | Production halts, supply chain disruption |
| Long-term Consequences | Publication retractions, reputation damage | Regulatory violations, product recalls |
Prevention and Control Strategies
Source Control and Aseptic Technique
Effective contamination management begins with preventive measures targeting common introduction routes:
- Airborne Contamination Control: Implement HEPA filtration in culture rooms and biosafety cabinets to capture airborne yeast spores [15].
- Surface Decontamination: Regularly disinfect incubators, including shelves, door gaskets, and water trays, using appropriate sporicidal agents [15].
- Aseptic Technique Reinforcement: Maintain strict handling procedures, including proper gowning, glove changes between manipulations, and minimized exposure of open vessels [10].
- Single-Use Systems: Utilize pre-sterilized disposable pipettes, flasks, and closed processing systems where possible to reduce contamination opportunities [10].
Antibiotic and Antimycotic Strategies
Strategic use of antifungal agents requires understanding their appropriate applications:
- Targeted Antimycotics: The two most common agents effective against yeasts are Amphotericin B (Fungizone) at 0.25-2.5 µg/mL and Mycostatin (Nystatin) at 100-250 U/mL [22].
- Antibiotic Limitations: Routinely used antibiotics such as penicillin/streptomycin, gentamicin, and kanamycin are NOT effective against yeasts [22].
- Usage Considerations: Fungizone can be toxic in cell culture systems and should be used conservatively. Nystatin appears as crystal-like particles in medium and requires thorough mixing before use [22].
- Prophylactic Approach Concerns: Routine antibiotic use can mask low-level contamination and promote antibiotic resistance; preference should be given to strict aseptic technique over chemical prophylaxis [15].
Research Reagent Solutions
Table 3: Essential Research Reagents for Yeast Contamination Management
| Reagent / Material | Function | Application Notes |
|---|---|---|
| Propidium Iodide (PI) | Nucleic acid intercalating agent identifying membrane-compromised cells | Penetrates only cells with permeable membranes; excitation: 520-550 nm, emission: 610-630 nm [23] |
| cFDA | Esterase activity probe indicating metabolic function | Requires intracellular esterases for activation; excitation: 498 nm, emission: 516 nm [23] |
| FUN 1 Cell Stain | Metabolic viability indicator for yeast | Converts from yellow-green to red-orange in metabolically active yeast [24] |
| Calcofluor White M2R | Chitin-binding cell wall stain | Labels cell-wall chitin regardless of metabolic state; blue fluorescence [24] |
| Amphotericin B | Antifungal agent for yeast contamination control | Use at 0.25-2.5 µg/mL; can be toxic to mammalian cells [22] |
| Nystatin | Polyene antifungal for yeast treatment | Use at 100-250 U/mL; forms colloidal suspension requiring thorough mixing [22] |
| HEPA Filtration | Airborne contamination control | Critical for removing yeast spores from cell culture environments [15] |
Corrective Actions and Contamination Management
Response Protocols for Confirmed Contamination
When yeast contamination is identified, immediate and decisive action is required:
In Research Laboratories:
- Identify Contamination Type: Confirm using microscopy, pH assessment, or molecular methods like qPCR [10].
- Immediate Disposal: Discard contaminated cultures following biosafety guidelines to prevent cross-contamination [10].
- Comprehensive Decontamination: Thoroughly clean all lab surfaces, incubators, and media storage areas [10].
- Practice Reevaluation: Assess aseptic techniques and provide additional training to personnel as needed [10].
- Stock Verification: Confirm that stock cell lines and reagents remain uncontaminated before restarting cultures [10].
In GMP Manufacturing:
- Immediate Quarantine: Isolate affected batches and equipment to prevent further spread [10].
- Root Cause Analysis: Conduct thorough investigation to identify contamination source [10].
- Comprehensive Decontamination: Perform validated cleaning and sterilization procedures [10].
- Regulatory Compliance: Document deviations, update SOPs, and report findings to appropriate regulatory bodies [10].
- Process Enhancement: Implement improved contamination control strategies to prevent recurrence [10].
Integrated Contamination Control Framework
The following diagram illustrates the comprehensive approach required for effective yeast contamination management across research and production environments:
Yeast contamination in cell culture systems presents a multifaceted challenge with direct consequences for research validity and biopharmaceutical product safety. The critical impact on data integrity and product safety demands rigorous detection methodologies, comprehensive prevention strategies, and systematic corrective actions. By implementing the technical approaches outlined in this guide—including advanced detection methods like flow cytometry with double fluorescent staining, UV spectroscopy with machine learning analysis, and standardized fluorescence microscopy protocols—researchers and manufacturers can significantly reduce risks associated with yeast contamination. Furthermore, the integration of strict aseptic techniques, environmental controls, and regular monitoring creates a robust framework for maintaining both data integrity throughout the research lifecycle and product safety in therapeutic applications. As cell culture technologies continue to advance, particularly in the realm of cell therapy products and personalized medicine, the imperative for effective yeast contamination management becomes increasingly critical to both scientific progress and patient welfare.
A Step-by-Step Guide to Yeast Detection Methods: From Microscopy to Molecular Assays
Yeast contamination is a persistent and detrimental issue in mammalian cell culture research, capable of altering metabolic profiles, depleting nutrients, and compromising experimental integrity. Direct visualization via manual hemocytometer counting provides a rapid, cost-effective method for detecting and quantifying such contamination. This technique, which has been a cornerstone of cell biology for over a century, allows researchers to directly observe yeast cells based on their distinctive morphology and staining characteristics, enabling immediate corrective action [25] [26]. This guide details the protocols and quantitative frameworks for using manual hemocytometry to identify yeast contamination, providing scientists and drug development professionals with a critical first-line defense for safeguarding their cell cultures.
Staining Techniques for Yeast Viability and Identification
Different staining techniques allow researchers to not only identify the presence of yeast but also assess their physiological state, which is crucial for diagnosing contamination sources and understanding their potential impact. Viability stains are particularly valuable as they can indicate whether a contaminant is actively proliferating.
Table 1: Staining Dyes for Yeast Identification and Viability Assessment
| Dye Name | Working Principle | Viable Cells | Non-Viable/Stressed Cells | Key Considerations |
|---|---|---|---|---|
| Methylene Blue [27] [28] [29] | Metabolically active cells reduce the dye to a colorless form; dead cells retain the blue color. | Unstained (Colorless) | Blue | Viability under 90% may be inaccurate due to metabolic dependence; read within 1-5 minutes to prevent over-staining [27] [28]. |
| Trypan Blue [25] [30] | Penetrates cells with compromised membranes (dye exclusion principle). | Unstained (Clear) | Blue | Prolonged exposure can kill cells; universal dye also stains dead mammalian cells [30]. |
| Crystal Violet [29] | Stains nuclei after cell wall digestion with citric acid. | Violet (Total Nuclei) | Violet | Used for total yeast cell counting by staining nuclei, not for viability [29]. |
The workflow for sample preparation and staining, culminating in hemocytometer analysis, is outlined below.
Manual Counting Methodology Using a Hemocytometer
The Improved Neubauer hemocytometer is the standard chamber for this application, featuring a precise grid that defines the counting volume [25]. For yeast cells, which are typically 5-10 μm in size, counting is performed in the central 25 small squares of the large central square, as these dimensions are better suited to their smaller size and higher potential concentrations in a contamination event [27].
Step-by-Step Counting Protocol
- Prepare the Hemocytometer: Clean the chamber and specialized coverslip with 70% ethanol. Moisten the coverslip and affix it to the hemocytometer. The appearance of Newton's rings (rainbow patterns) indicates proper contact and is essential for correct volume definition [25] [30].
- Load the Sample: Using a pipette, gently mix the stained yeast suspension and carefully dispense approximately 10 μL at the edge of the coverslip. The liquid should be drawn into the chamber by capillary action without overflowing or forming bubbles. Allow the chamber to sit undisturbed for about one minute for the cells to settle onto the grid [25] [28].
- Count the Cells: Place the hemocytometer on the microscope stage. Using a 40x objective, locate the large central square, which is subdivided into 25 smaller squares.
- Systematically count the yeast cells in five of these smaller squares, typically the four corners and the center one [27].
- Establish and consistently apply a convention for counting cells on the boundary lines. A common rule is to count cells touching the top and right lines, but not those touching the bottom and left lines, to avoid double-counting [25].
- For viability assessment, count unstained (viable) and blue-stained (dead) yeast cells separately.
- A key differentiator from mammalian cells is the treatment of budding yeast. It is common practice to count a mother cell and its bud as one cell if the bud is less than 50% the size of the mother. If the bud is over 50%, count them as two separate, living cells [27] [28].
Table 2: Hemocytometer Grid Specifications and Counting Rules
| Parameter | Specification for Yeast Counting | Notes |
|---|---|---|
| Primary Counting Area | Central 25 squares of the large central square [27] | Each small square is 0.2 mm x 0.2 mm. |
| Recommended Squares to Count | 5 squares (e.g., four corners and center) [27] | Ensures a representative sample. |
| Chamber Depth (Height) | 0.1 mm [25] | Defines the volume of liquid above the grid. |
| Volume of One Small Square | 0.2 mm x 0.2 mm x 0.1 mm = 0.000004 mL [27] | This is 4 x 10⁻⁶ mL. |
| Boundary Line Rule | Count cells on top and right lines; exclude bottom and left [25] | Prevents double-counting. |
| Budding Yeast Rule | Count as one cell if bud is <50% mother's size; as two if >50% [28] | Critical for accurate yeast quantification. |
Calculations and Data Interpretation
Converting raw cell counts into meaningful concentration and viability data is a critical final step. The calculations are based on the known dimensions of the hemocytometer grid.
Formulas for Determining Contamination
Yeast Cell Concentration (cells/mL) = (Average Count per Small Square × Dilution Factor) / Volume of One Small Square [25] [27]
Percentage Viability = (Number of Unstained Cells / Total Number of Cells Counted) × 100 [25] [30]
Worked Calculation Example
Assume you diluted a contaminated cell culture sample 1:1 with methylene blue (final dilution factor = 2) and counted an average of 30 yeast cells per small square across five squares in the central grid.
- Total Yeast Concentration = 30 cells/square × 2 × 250,000 = 15,000,000 cells/mL
- If, within that count, an average of 27 cells per square were unstained (viable):
- Viability = (27 / 30) × 100 = 90%
This result indicates not only the presence of a significant yeast contaminant (15 million cells per mL) but also that the population is largely viable and therefore capable of proliferating and further impacting the culture.
The Scientist's Toolkit: Key Research Reagent Solutions
Table 3: Essential Materials and Reagents for Yeast Detection
| Item | Function/Application |
|---|---|
| Improved Neubauer Hemocytometer | The standard counting chamber with a defined grid and volume for quantitative cell analysis [25] [30]. |
| Methylene Blue (0.01%) | A metabolic viability stain; dead yeast cells stain blue, live cells remain colorless [27] [28] [29]. |
| Trypan Blue (0.4%) | A membrane integrity stain; penetrates dead cells with compromised membranes, staining them blue [25] [30]. |
| Crystal Violet Solution | A nuclear stain used for total yeast cell counting after cell wall digestion with citric acid [29]. |
| Microscope (40x Objective) | Essential for visualizing and distinguishing small (5-10 μm) yeast cells from mammalian cells based on morphology [27] [28]. |
| 70% Ethanol | For cleaning and disinfecting the hemocytometer and coverslip before and after use to prevent cross-contamination [25] [29]. |
Quality Control and Best Practices
To ensure reliable and reproducible results, adhere to the following quality control measures:
- Count in Duplicate: Always load and count both chambers of the hemocytometer as a minimum. Report the average value to improve accuracy [25] [28].
- Aim for Ideal Density: A countable number of cells per square is critical. Target 25-80 cells per square at 400x magnification to ensure statistical significance while avoiding overcrowding [28].
- Maintain Consistency: Use the same counting rules (e.g., for boundary lines and budding cells) throughout an experiment and across users to minimize variability [30].
- Timing with Viability Dyes: Read methylene blue-stained samples within 1-5 minutes of mixing to prevent over-staining, which can lead to false positives for dead cells [28]. For trypan blue, avoid prolonged exposure as it can be toxic to cells [30].
In mammalian cell culture research, yeast is an unwelcome biological contaminant that can compromise experimental integrity and lead to significant scientific and financial setbacks [16] [22]. Yeasts are true fungi that propagate as single cells dividing by budding, allowing them to grow rapidly in contaminated cultures with doubling times sometimes under 12 hours [22]. Unlike bacterial contamination, early-stage yeast contamination typically causes little to no change in the medium's pH, making macroscopic detection difficult until infections become heavy and the medium turns cloudy [16] [31]. Under microscopy, yeasts appear as separate round or ovoid particles, sometimes forming chains or branches due to budding replication [22] [31].
The Colony Forming Unit (CFU) assay on solid media provides a fundamental, quantitative method to detect and quantify yeast contamination. This culture-based approach allows researchers to enumerate viable yeast cells by counting distinct colonies arising from individual cells or cell clusters, providing both confirmation of contamination and assessment of its severity [32]. For drug development professionals and researchers, CFU analysis offers a accessible, cost-effective method that requires no sophisticated equipment and provides both qualitative and quantitative data on contamination levels [32].
Fundamentals of Colony Forming Unit (CFU) Analysis
Core Principle and Quantitative Application
The CFU assay operates on the fundamental principle that a single viable yeast cell, when plated on appropriate solid growth media and incubated under suitable conditions, will multiply to form a discrete, visible colony [32]. By performing serial dilutions of a contaminated cell culture sample and plating these dilutions onto agar plates, researchers can quantify the original concentration of yeast contaminants in the sample. The combination of spot assays with CFU efficiency estimation provides both qualitative visualization of contamination and rigorous quantitative data [32].
This method is particularly valuable for testing yeast sensitivity to antimycotic agents. By comparing CFU counts on plates with and without antifungal drugs, researchers can determine the effectiveness of decontamination protocols and identify appropriate concentrations for eliminating yeast contaminants without excessive toxicity to the cultured cells [16] [32].
Advantages and Limitations in Contamination Detection
CFU analysis provides several key advantages for monitoring yeast contamination in research settings. The method offers direct quantification of viable contaminants, is highly accessible requiring no specialized equipment, and enables both qualitative and quantitative assessment of contamination [32]. Furthermore, it facilitates sensitivity testing to various antimycotic agents, providing crucial information for decontamination protocols [32].
However, researchers should also recognize several limitations. The method typically requires 2-3 days to complete, has a detection threshold that may miss very low-level contamination, and provides retrospective data rather than real-time monitoring [32]. Additionally, it cannot detect non-viable contaminants or certain other biological contaminants like viruses that require different detection methods [16].
Experimental Protocol: CFU Assay for Yeast Detection
Materials and Equipment
Table 1: Essential Reagents and Equipment for CFU Analysis of Yeast Contamination
| Category | Specific Items | Application/Function |
|---|---|---|
| Growth Media | YPD (Yeast Extract Peptone Dextrose) Broth [32], YPD Agar [32], Other appropriate cell culture media | Supports yeast growth; solid medium for colony formation |
| Labware | Sterile Petri dishes (100 mm × 15 mm) [32], Sterile 1.5 mL microcentrifuge tubes [32], Round U-bottom 96-well plate (optional) [32] | Sample processing, dilution, and plating |
| Special Equipment | Laminar airflow biosafety cabinet [32], Refrigerated incubator [32], Spectrophotometer [32] | Maintains sterile conditions, provides controlled growth environment, measures culture density |
| Consumables | Sterile pipette sets [32], Sterile spreader [32] | Accurate liquid handling, even distribution of inoculum on agar |
Step-by-Step Procedure
- Sample Collection and Preparation: Under sterile conditions in a laminar flow biosafety cabinet, collect an aliquot from the potentially contaminated cell culture. For adherent mammalian cells, this would be from the culture supernatant [16] [22].
- Serial Dilution Preparation
- Agar Plate Preparation: Pour approximately 25 mL of freshly autoclaved YPD agar or other appropriate medium into sterile Petri dishes. Allow the agar to cool and solidify completely [32].
- Plating and Spreading
- Incubation: Invert the plates and incubate at the appropriate temperature (commonly 30°C for many yeasts) for 2-3 days [32].
- Colony Counting and Calculation
- After incubation, count the number of distinct colonies on plates that contain between 30 and 300 colonies.
- Calculate the CFU/mL using the formula: CFU/mL = (Number of colonies counted / (Volume plated in mL × Dilution factor))
Workflow Visualization
CFU Assay Workflow for Yeast Detection
Complementary Method: Spot Assay for Qualitative Analysis
For a more comprehensive sensitivity profile, the CFU assay can be effectively combined with a spot assay [32]. This qualitative method involves spotting small volumes of serially diluted yeast culture onto agar plates with or without antimycotic agents.
Table 2: Comparison of Spot Assay and CFU Analysis for Yeast Detection
| Characteristic | Spot Assay | CFU Analysis |
|---|---|---|
| Nature of Data | Qualitative (growth/no growth) and semi-quantitative based on spot density [32] | Fully quantitative (CFU/mL) [32] |
| Throughput | High; multiple strains/conditions on a single plate [32] | Moderate; requires multiple plates for accurate counting [32] |
| Key Advantage | Rapid visual assessment of multiple conditions; cost-effective [32] | Provides precise enumeration of viable contaminants [32] |
| Best Application | Initial screening and comparative sensitivity testing [32] | Accurate quantification and definitive confirmation of contamination levels [32] |
Advanced Detection Technologies
While CFU analysis remains a fundamental technique, recent technological advances offer alternative approaches for yeast detection. Molecular sensors on the membrane surface of mother yeast cells (MOMS) represent a cutting-edge technology enabling ultrasensitive, large-scale analysis of yeast extracellular secretion with a detection limit of 100 nM and the capacity to screen over 10⁷ single cells per run [33]. Additionally, deep learning approaches combining Fuzzy Automatic Contrast Enhancement (FACE) with the You Only Look Once (YOLOv5) framework have been successfully applied to automatic yeast cell detection within microscopic images, significantly improving detection accuracy in low-contrast conditions [34]. Bayesian Optimization-based iterative experimental design has also been employed to accelerate cell culture media development, which could indirectly affect yeast growth dynamics and detection [35].
Decontamination Strategies Following Yeast Detection
When CFU analysis confirms yeast contamination, several decontamination strategies can be employed. Antimycotic agents such as Amphotericin B (Fungizone) and Mycostatin (Nystatin) are effective against yeasts, unlike routine antibiotics like penicillin/streptomycin [22]. However, antibiotics and antimycotics should not be used routinely, as continuous use can encourage resistant strains and hide low-level contamination; they should be used as a last resort and for short durations [16]. For irreplaceable contaminated cultures, a detailed decontamination procedure involves determining antibiotic toxicity levels, treating cultures for 2-3 passages at sub-toxic concentrations, and then verifying elimination of contamination after culturing in antibiotic-free medium [16].
Yeast Decontamination Decision Pathway
Culture-based CFU analysis on solid media remains an essential, reliable, and accessible method for detecting and quantifying yeast contamination in cell culture research. When combined with spot assays for comprehensive sensitivity profiling, this approach provides both qualitative and quantitative data crucial for maintaining research integrity [32]. For researchers and drug development professionals, mastering these fundamental techniques provides a critical foundation for ensuring cell culture purity, while emerging technologies offer promising avenues for future advancements in detection sensitivity and throughput.
Yeast contamination presents a significant and persistent challenge in cell culture research, potentially compromising experimental integrity, skewing data, and leading to costly losses of precious samples. Traditional detection methods often lack the speed, sensitivity, or specificity required for modern laboratories. Advanced fluorescence assays address these limitations by providing rapid, quantitative, and high-throughput solutions. These techniques move beyond simple viability counts to deliver nuanced information on cell physiology, leveraging fluorescent probes that report on critical cellular characteristics such as plasma membrane integrity and metabolic activity. This guide details the implementation of these powerful assays, framed specifically for the detection and analysis of contaminating yeast in cell cultures, equipping researchers with the tools to safeguard their research.
Core Principles of Fluorescence-Based Yeast Detection
Fluorescence-based assays for yeast detection primarily operate on two fundamental physiological principles: membrane integrity and enzymatic (metabolic) activity. The choice between them depends on the specific information required.
Membrane Integrity is a definitive marker for cell death. An irreversible loss of plasma membrane integrity is considered the "point of no return" [36]. Assays based on this principle use nucleic acid stains that are normally excluded from healthy cells. Propidium Iodide (PI) is a classic example; it is a red-fluorescent dye that only enters cells with compromised membranes and intercalates with nucleic acids [36] [23] [5].
Metabolic Activity serves as an indicator of cell vitality, probing for active physiological processes. A common target is intracellular esterase activity. 5(6)-Carboxyfluorescein diacetate (cFDA) is a cell-permeant substrate that is hydrolyzed by these esterases in live, active cells. The enzymatic reaction produces a green-fluorescent product, carboxyfluorescein, which is retained in cells with intact membranes [23].
Advanced assays often combine these principles in a single workflow to distinguish between multiple subpopulations: viable, metabolically active, dead, and stressed.
Table 1: Core Fluorescence Assays for Yeast Detection
| Assay Principle | Target | Representative Dye(s) | Live Cell Signal | Dead Cell Signal | Key Information |
|---|---|---|---|---|---|
| Membrane Integrity | Nucleic acids (in permeable cells) | Propidium Iodide (PI) | None | Red Fluorescence | Distinguishes dead cells with compromised membranes. |
| Membrane Integrity (Dual Stain) | Nucleic acids | SYTO 9 & PI | Green Fluorescence | Red Fluorescence (PI quenches SYTO 9) | Enhanced resolution between live/dead; can identify damaged cells [36]. |
| Metabolic Activity | Intracellular Esterases | cFDA (or CFDA-AM) | Green Fluorescence | None | Identifies vital, metabolically active cells [23]. |
| Combined Vitality | Esterases & Membrane | cFDA & PI | Green Fluorescence | Red Fluorescence | Simultaneously reports on metabolic activity and membrane integrity [23] [5]. |
Optimized Protocols for Yeast Detection
The following protocols are optimized for the specific task of identifying and quantifying yeast contamination from cell culture samples.
LIVE/DEAD Staining with SYTO 9 and Propidium Iodide
This protocol uses the differential permeability of two nucleic acid stains to identify yeast with intact and damaged membranes [36].
Sample Preparation:
- Collect Sample: Take a small aliquot (e.g., 1 mL) from the suspect cell culture.
- Pellet Cells: Centrifuge at 3,000 × g for 5 minutes to pellet both mammalian and yeast cells. Note: Optimization may be needed to ensure efficient yeast pelleting.
- Wash: Remove supernatant and resuspend the cell pellet in 1 mL of sterile 0.85% saline buffer. Using saline buffer, rather than water or growth media, minimizes staining artifacts [36].
- Standardize Concentration: Measure OD600 and adjust with saline buffer to a standardized OD600 of ~1 for consistent staining.
Staining Procedure:
- Prepare Dye Working Stocks:
- Stain Sample: Add the appropriate volume of SYTO 9 and PI working stocks to your standardized sample. The commercial FungaLight kit (Thermo Fisher, L34952) provides pre-optimized dye concentrations [5].
- Incubate: Protect from light and incubate at room temperature for 10-15 minutes [36].
Flow Cytometry Analysis:
- Use a 488 nm laser for excitation.
- Detect SYTO 9 (green) fluorescence at ~530 nm (e.g., FL1 channel) and PI (red) fluorescence at ~610-635 nm (e.g., FL2 or FL3 channel) [36] [23].
- Apply necessary fluorescence compensation to account for spectral overlap.
- Gate the yeast population based on Forward Scatter (FSC) and Side Scatter (SSC), then analyze fluorescence to distinguish populations [5].
Figure 1: Workflow for yeast detection using SYTO 9 and PI staining.
Metabolic Activity Staining with cFDA and Propidium Iodide
This protocol provides a vitality assessment by combining metabolic activity with membrane integrity [23].
Sample Preparation:
- Follow the same sample preparation steps as in Section 3.1 (collect, pellet, wash, standardize).
Staining Procedure:
- Prepare Dye Stocks:
- Stain Sample: To 980 µL of diluted sample, add 10 µL of cFDA solution and 10 µL of PI solution. Final concentrations are approximately 1 µg/mL for cFDA and 10 µg/mL for PI [23].
- Incubate: Protect from light and incubate at room temperature for approximately 10 minutes [23].
Flow Cytometry Analysis:
- Use a 488 nm laser for excitation.
- Detect cFDA (green) fluorescence at ~516/530 nm (FL1 channel) and PI (red) fluorescence at ~610-635 nm (FL2/FL3 channel).
- The resulting subpopulations are interpreted as follows [23]:
- cFDA(+)/PI(-): Viable and metabolically active yeast.
- cFDA(+)/PI(+): Active cells with altered permeable membrane (stressed).
- cFDA(-)/PI(+): Dead yeast.
Table 2: Interpretation of cFDA/PI Dual Staining
| cFDA Staining (Metabolic) | PI Staining (Membrane) | Interpretation |
|---|---|---|
| Positive (+) | Negative (-) | Viable & Active: Live, metabolically active yeast. |
| Positive (+) | Positive (+) | Stressed/Damaged: Metabolically active but with compromised membrane. |
| Negative (-) | Positive (+) | Dead: Metabolically inactive yeast with compromised membrane. |
| Negative (-) | Negative (-) | Not interpretable by this method (may require other markers). |
Data Analysis and Interpretation
Accurate interpretation of flow cytometry data is critical. The following table summarizes the expected outcomes for the different staining methods and how to distinguish yeast from cultured mammalian cells.
Table 3: Analysis and Differentiation of Yeast Contamination
| Parameter | SYTO 9/PI Assay | cFDA/PI Assay | Utility for Differentiation |
|---|---|---|---|
| Live Yeast | Green fluorescence (SYTO 9+) | Green fluorescence (cFDA+) | Yeast typically shows higher FSC/SSC than mammalian cells. Gating can separate populations [37]. |
| Dead Yeast | Red fluorescence (PI+) | Red fluorescence (PI+) | Distinct fluorescence pattern confirms eukaryotic (yeast) contamination versus bacterial. |
| Damaged/Stressed Yeast | Intermediate fluorescence (dim green/red) | Dual fluorescence (cFDA+/PI+) | Identifying stressed yeast can predict potential contamination outbreaks before they become severe. |
| Mammalian Cells | Will be stained, but morphology (FSC/SSC) differs. | Staining varies by cell health; cFDA may not be optimal. | Key strategy: Use morphological gating on FSC vs. SSC plot to first isolate the yeast population for analysis [37]. |
The Scientist's Toolkit: Essential Reagents and Materials
Successful implementation requires the right tools. The following table lists key reagents and their functions.
Table 4: Essential Research Reagent Solutions
| Item | Function / Application | Example / Comment |
|---|---|---|
| SYTO 9 Stain | Green-fluorescent nucleic acid stain labeling all yeast cells. | Part of LIVE/DEAD FungaLight Yeast Viability Kit (L34952) [5]. |
| Propidium Iodide (PI) | Red-fluorescent stain for nucleic acids in membrane-compromised cells. | Available separately or in kits (e.g., L34952, F34953) [5]. |
| cFDA / CFDA-AM | Cell-permeant substrate for intracellular esterase activity (vitality stain). | Component of the FungaLight CFDA, AM/Propidium Iodide Vitality Kit (F34953) [5]. |
| Saline Buffer (0.85% NaCl) | Resuspension buffer for staining; minimizes artifacts. | Preferred over water or growth media for more reproducible results [36]. |
| Flow Cytometer | Instrument for high-throughput, quantitative analysis of stained samples. | Requires a 488 nm laser and filters for ~530 nm (green) and >610 nm (red) [23]. |
Figure 2: Data analysis logic for identifying and quantifying yeast contamination.
Yeast contamination represents a significant and persistent challenge in cell culture research, capable of compromising experimental integrity, invalidating research findings, and causing substantial financial losses. Yeasts are unicellular eukaryotic fungi that can thrive in cell culture media, competing with cultured cells for nutrients and altering the biochemical environment [38]. Unlike bacterial contamination, which often causes rapid turbidity, yeast contamination may develop more slowly and can be easily mistaken for cellular debris by untrained observers [39]. The problem is particularly insidious because yeasts are not controlled by standard antibacterial antibiotics like penicillin and streptomycin, allowing low-level contamination to persist undetected through multiple passages [38].
Traditional methods for identifying yeast contamination include visual inspection for turbidity, monitoring pH shifts (often indicated by phenol red color changes), and direct microscopic observation of characteristic ovoid or spherical particles that may bud off smaller particles [16]. While these methods provide initial detection, they lack the specificity and sensitivity required for definitive identification of yeast species, which is crucial for implementing targeted eradication strategies and preventing recurrence. Molecular approaches, including PCR, qPCR, and sequencing, have therefore become essential tools for accurate yeast identification in modern cell culture facilities, offering unprecedented specificity, sensitivity, and speed compared to conventional culture-based techniques.
Polymerase Chain Reaction (PCR)
Standard PCR provides a fundamental molecular tool for amplifying specific DNA sequences from yeast contaminants, enabling their detection even at low contamination levels. This technique involves repeated thermal cycling to denature DNA, anneal sequence-specific primers, and extend DNA strands using a thermostable polymerase. For yeast identification, primers target conserved regions such as the internal transcribed spacer (ITS) regions of ribosomal DNA, which provide species-specific signature sequences [19]. The amplified products can then be visualized using gel electrophoresis, indicating the presence of yeast contamination.
PCR is particularly valuable for detecting yeasts that may be present in low abundances or that grow slowly in culture. Its utility extends beyond basic detection to species differentiation, which is critical for identifying contamination sources in the laboratory environment. For instance, distinguishing between Saccharomyces cerevisiae and Candida species can help trace whether contamination originated from laboratory yeast work or from human sources [19]. The method's primary limitation is its qualitative nature—while it confirms presence and can identify species through subsequent sequencing, it does not typically provide quantitative data about the level of contamination.
Quantitative Polymerase Chain Reaction (qPCR)
qPCR, also known as real-time PCR, expands upon standard PCR by enabling simultaneous amplification and quantification of target DNA sequences. This methodology employs fluorescent reporters that increase in direct proportion to the amount of amplified product in each cycle, allowing calculation of the initial template concentration. For yeast detection in cell culture, qPCR offers significant advantages including rapid turnaround time, high sensitivity, and the ability to quantify contamination levels [40].
The quantitative nature of qPCR makes it particularly valuable for monitoring contamination progression and assessing the effectiveness of decontamination protocols. It can detect extremely low levels of yeast DNA, potentially identifying contamination before it becomes visually apparent under microscopy [40]. Furthermore, multiplex qPCR assays can be designed to detect multiple yeast species simultaneously, along with internal controls that validate DNA extraction efficiency and reaction integrity. This multi-target approach is crucial for comprehensive screening programs in cell culture facilities where multiple yeast species may pose contamination risks.
Sequencing-Based Approaches
DNA sequencing provides the most definitive identification of yeast contaminants by generating precise nucleotide sequence data for phylogenetic analysis. The most common approach involves Sanger sequencing of PCR-amplified target regions, particularly the D1/D2 domain of the large subunit (26S) ribosomal DNA or the ITS regions [19]. These genomic regions contain sufficient sequence variation to discriminate between closely related yeast species while maintaining conserved regions that permit broad-range primer design.
Next-generation sequencing (NGS) technologies offer a more comprehensive approach by enabling metagenomic analysis of entire microbial communities in contaminated cell cultures. This method is particularly valuable when dealing with mixed yeast contaminations or when the contaminating species is unculturable. While NGS is more complex and costly than targeted approaches, it provides unparalleled resolution for tracking contamination sources and understanding population dynamics in contaminated cultures [19]. For most routine applications, Sanger sequencing of amplified ITS or D1/D2 regions remains the gold standard for definitive yeast species identification.
Table 1: Comparison of Molecular Methods for Yeast Identification
| Method | Detection Principle | Time to Result | Sensitivity | Quantification | Primary Applications |
|---|---|---|---|---|---|
| Conventional PCR | DNA amplification with electrophoretic detection | 4-6 hours | Moderate (10-100 cells) | No | Qualitative detection, species identification via sequencing |
| qPCR | Fluorescence-based real-time amplification | 2-3 hours | High (1-10 cells) | Yes | Quantitative monitoring, high-throughput screening |
| Sanger Sequencing | Nucleotide sequencing of amplified targets | 1-2 days | Varies with pre-amplification | No | Definitive species identification, phylogenetic analysis |
| Next-Generation Sequencing | Massively parallel sequencing | 2-5 days | High with sufficient coverage | Yes | Complex contaminations, microbiome analysis |
Experimental Protocols for Yeast Detection
Sample Processing and DNA Extraction Protocol
Proper sample preparation is critical for successful molecular detection of yeast contaminants. The following protocol outlines an effective approach for processing cell culture samples:
Sample Collection: Aseptically collect 1-2 mL of cell culture supernatant, focusing on the turbid areas if visible cloudiness is present. For adherent cells, scrape a small portion of the monolayer if yeast appears intracellular or associated with cells.
Cell Lysis: Transfer 200 μL of sample to a sterile microcentrifuge tube. Add 20 μL of proteinase K and 200 μL of lysis buffer from a commercial DNA extraction kit. Mix thoroughly by vortexing.
Incubation: Incubate the mixture at 56°C for 1 hour to ensure complete digestion of proteins and efficient lysis of yeast cell walls [40]. The rigid structure of yeast cell walls requires extended incubation compared to bacterial or mammalian cells.
DNA Purification: Follow manufacturer instructions for DNA binding, washing, and elution. The QIAamp DNA Blood Mini Kit has demonstrated effectiveness for yeast DNA extraction in validation studies [40]. Elute DNA in 50-100 μL of elution buffer.
Quality Assessment: Measure DNA concentration using a spectrophotometer (NanoDrop) or fluorometer (Qubit). Assess purity via A260/A280 ratio, with acceptable values ranging from 1.8-2.0. Store purified DNA at -20°C until analysis.
This protocol consistently yields high-quality DNA suitable for PCR, qPCR, and sequencing applications. Including appropriate controls at each extraction batch is essential—a known yeast DNA sample as positive control, nuclease-free water as negative control, and potentially an internal amplification control to detect inhibitors.
qPCR Detection Workflow
The following qPCR protocol provides specific detection of yeast contaminants with quantification capabilities:
Primer Design: Design primers targeting conserved yeast-specific sequences. The ITS region primers ITS1 (5'-TCCGTAGGTGAACCTGCGG-3') and ITS4 (5'-TCCTCCGCTTATTGATATGC-3') provide broad-spectrum detection of diverse yeast species [19]. For more specific identification, design primers targeting species-specific genes.
Reaction Setup: Prepare 20-25 μL reactions containing:
- 1X qPCR master mix (including DNA polymerase, dNTPs, MgCl₂)
- 0.2-0.5 μM of each primer
- Fluorescent probe (if using probe-based chemistry) or DNA-binding dye
- 2-5 μL of template DNA
- Nuclease-free water to volume
Thermal Cycling: Program the qPCR instrument with the following parameters:
- Initial denaturation: 95°C for 3-5 minutes
- 40 cycles of:
- Denaturation: 95°C for 15-30 seconds
- Annealing: 55-60°C for 30 seconds (optimize based on primer Tm)
- Extension: 72°C for 30-45 seconds
- Fluorescence acquisition at the end of each extension step
Data Analysis: Determine quantification cycle (Cq) values using the instrument software. Establish a standard curve using known concentrations of target DNA for absolute quantification, or use the comparative Cq method for relative quantification when appropriate references are available [40].
This protocol enables detection of yeast contamination within 3 hours from sample collection, significantly faster than traditional culture methods which require 2-3 days for visible growth [38]. The high sensitivity of qPCR allows detection at the earliest stages of contamination, potentially saving valuable cell lines and research materials.
Yeast Identification Workflow: This diagram illustrates the decision pathway for molecular identification of yeast contamination, highlighting the key steps from sample collection through to species identification.
Sequencing and Data Analysis Protocol
For definitive species identification, sequencing provides the highest resolution:
PCR Amplification for Sequencing: Amplify target regions using the protocol in section 3.2, but with 35 cycles to ensure sufficient product. Verify amplification success by running 5 μL of product on an agarose gel.
PCR Cleanup: Purify amplification products using a commercial PCR purification kit to remove primers, enzymes, and dNTPs that could interfere with sequencing.
Sequencing Reaction: Prepare sequencing reactions using the BigDye Terminator kit according to manufacturer instructions. Typically use 1-5 ng of purified PCR product per 100 base pairs of sequence length.
Sequence Analysis: Analyze resulting chromatograms using software such as Geneious or MEGA. Perform BLAST searches against curated databases like the NCBI GenBank or specialized yeast databases for species assignment.
This protocol enables precise identification of yeast species, which is crucial for determining contamination sources and implementing effective prevention strategies. For example, identifying Saccharomyces cerevisiae may suggest cross-contamination from laboratory yeast work, while Candida species typically indicate human sources [19].
Research Reagent Solutions for Yeast Detection
Table 2: Essential Reagents and Kits for Molecular Yeast Identification
| Reagent/Kit | Function | Application Notes |
|---|---|---|
| QIAamp DNA Blood Mini Kit | DNA extraction from cell culture samples | Effective for breaking tough yeast cell walls with extended proteinase K digestion [40] |
| ITS1/ITS4 Primers | Amplification of ITS regions for yeast identification | Broad-spectrum detection; targets the variable ITS region between conserved rRNA genes [19] |
| TaqMan Probe Master Mix | Probe-based qPCR detection | Provides specific detection with reduced risk of false positives from non-specific amplification |
| BigDye Terminator v3.1 | Sanger sequencing | Standard chemistry for capillary-based sequencing of amplified yeast targets |
| External RNA Controls Consortium (ERCC) Sequences | Process controls | Engineered control sequences spiked into samples to monitor extraction and amplification efficiency [40] |
Advanced Applications and Method Integration
The integration of multiple molecular methods provides a powerful approach for comprehensive yeast contamination management. For instance, qPCR can serve as an initial high-throughput screening tool, with positive results confirmed by sequencing for species identification [40]. This combined approach balances speed with definitive identification, enabling rapid response to contamination events while generating data for preventative measures.
Emerging methodologies show particular promise for enhancing yeast detection capabilities. Gas chromatography with ion mobility spectrometry (GC-IMS) represents a novel approach for detecting volatile organic compounds (VOCs) produced by microbial contaminants [41]. While not a molecular identification method per se, GC-IMS can provide rapid (20 minutes per sample) indication of contamination that can trigger targeted molecular analysis. This technology has demonstrated sensitivity as low as 10 colony-forming units (CFU) for various microbes and could be integrated with PCR-based approaches for comprehensive contamination monitoring [41].
For laboratories requiring process validation, engineered strains like Saccharomyces cerevisiae NE095, which contains a unique DNA insert (ERCC-00095), provide valuable reference materials for evaluating complete detection workflows from DNA extraction through final detection [40]. These validated reference materials are particularly important for quality assurance in regulated environments such as biopharmaceutical production and clinical diagnostics.
Molecular identification methods have revolutionized the detection and characterization of yeast contaminants in cell culture systems. PCR provides accessible detection, qPCR adds quantitative capabilities for monitoring contamination dynamics, and sequencing delivers definitive species identification crucial for source tracking and prevention. The protocols and methodologies outlined in this technical guide provide researchers with robust tools for maintaining cell culture integrity, ensuring experimental reproducibility, and safeguarding valuable research investments. As molecular technologies continue to advance, their integration into routine cell culture practice will become increasingly essential for controlling yeast contamination and maintaining the highest standards of research quality.
Solving Complex Detection Challenges and Optimizing Prevention Protocols
Overcoming Interference from Lignocellulosic Particles and Auto-fluorescence
Detecting yeast contamination in cell culture is a critical quality control step in biomedical research and drug development. However, this process can be compromised by two significant sources of interference: auto-fluorescence from culture components and the presence of lignocellulosic particles from certain biomass-based materials. This technical guide provides researchers with methodologies to overcome these challenges, ensuring accurate and reliable yeast contamination detection.
Understanding Yeast Contamination in Cell Culture
Detection and Identification
Yeast contamination presents distinct characteristics that facilitate identification. Macroscopically, culture medium often shows increased turbidity or cloudiness. Unlike bacterial contamination that typically causes rapid acidification and yellowing of phenol red-containing media, yeast contamination results in only slight pH changes initially, making early detection difficult without microscopic examination [31] [42].
Under phase contrast microscopy at 100-400× magnification, yeasts appear as ovoid, bright particles existing as single cells or in chains and branches between cultured cells [31]. Their round or oval shapes, sometimes with budding smaller particles, provide definitive identification features [42].
Table 1: Characteristics of Yeast Contamination in Cell Culture
| Characteristic | Manifestation | Detection Method |
|---|---|---|
| Macroscopic Appearance | Increased turbidity/cloudiness; medium may remain clear initially then turn yellow | Visual inspection |
| pH Changes | Slight changes initially; little to no color change in phenol red media | pH monitoring/indicator |
| Microscopic Appearance | Ovoid, bright particles; single cells or chains; budding forms | Phase contrast microscopy (100-400×) |
| Size Reference | Approximately 10 µm | Comparative microscopy |
Auto-fluorescence Interference in Fluorescence-Based Detection
Auto-fluorescence presents a significant challenge for fluorescence-based detection methods, potentially masking specific signals and reducing assay sensitivity. Multiple components in cell culture systems contribute to background fluorescence:
- Phenol Red: Common pH indicator in culture media exhibits substantial auto-fluorescence [43].
- Serum Components: Foetal bovine serum (FBS) contains molecules with aromatic side chains that fluoresce [43].
- Cellular Components: Intracellular elements including aromatic amino acids, NADH, and collagen generate non-specific signals, particularly in blue to green emission ranges up to 600 nm [43] [44].
- Fixation Artifacts: Aldehyde-based fixatives like formalin create Schiff bases that auto-fluoresce across blue, green, and red spectra [44].
- Endogenous Pigments: Heme in red blood cells, lipofuscin accumulating with age, and metabolic compounds contribute broad-spectrum interference [44].
This background fluorescence substantially reduces the signal-to-blank (S/B) ratio, diminishing an assay's dynamic range and ability to distinguish smaller differences between samples [43].
Table 2: Common Sources of Auto-fluorescence in Cell Culture Systems
| Source | Spectral Range | Impact Level |
|---|---|---|
| Phenol Red | Broad spectrum | High |
| Serum Components (FBS) | Broad spectrum | Medium-High |
| Cellular Components (NADH, collagen) | Blue-Green (300-450 nm) | Medium |
| Aldehyde Fixation | Blue, Green, Red | High |
| Endogenous Pigments (heme, lipofuscin) | Broad spectrum | Variable |
| Lignocellulosic Particles | Multiple wavelengths | Context-dependent |
Strategies to Reduce Auto-fluorescence
Media and Measurement Optimization
- Phenol-Free Media: Use phenol red-free alternatives or specialized media like FluoroBrite optimized for fluorescence detection [43].
- Reduced Serum: Minimize serum supplementation to necessary levels (≤5%) [43].
- Buffer Replacement: For fixed-cell assays, replace media with low-fluorescence buffers like phosphate-buffered saline (PBS) [43].
- Bottom Reading: Utilize bottom optics for adherent cells to avoid exciting fluorescent medium components above cells, significantly improving S/B ratios with auto-fluorescent media [43].
Fluorophore Selection
Emphasize red-shifted fluorophores (emitting above 600 nm) to avoid the blue-green spectrum where cellular auto-fluorescence is most pronounced. Compared to green fluorescent protein (GFP), red fluorescent protein (RFP) evaluation provides more than 5 times higher S/B ratios under similar conditions [43].
Chemical and Physical Treatments
- Sudan Black B: Effectively reduces lipofuscin and formalin-induced auto-fluorescence through lipophilic dye interactions [45] [44].
- UV Bleaching: Exposure to powerful UV point sources can reduce auto-fluorescence by 61.7-92.5% in various commercial polymers used in culture systems [45].
- Sodium Borohydride: Reduces aldehyde-induced fluorescence with variable effectiveness [44].
- Specialized Reagents: Commercial products like TrueVIEW (VectorLabs) can mitigate multiple auto-fluorescence sources [44].
Interference from Lignocellulosic Particles
Lignocellulosic materials from wood-based products, energy crops, and agricultural residues contain complex polymers including cellulose, hemicellulose, and lignin [46] [47]. These particles can introduce multiple interference mechanisms in cell culture systems:
- Physical Interactions: Insoluble solids produce shear stress and induce cell wall damage in yeast [48].
- Chemical Inhibition: Thermal or chemical pretreatment of lignocellulosic biomass generates inhibitory compounds including furans (furfural, 5-HMF), carboxylic acids (acetic acid, formic acid), and phenolics (vanillin, syringaldehyde) [47] [48].
- Analytical Interference: Particulates can scatter light in spectroscopic measurements and contribute to background signals.
Impact on Yeast Detection and Cell Robustness
Lignocellulosic inhibitors impair yeast metabolism and growth, complicating contamination detection and assessment. The presence of water-insoluble solids (WIS) at 5-10% (w/v) concentrations exacerbates yeast sensitivity to these inhibitors [48]. This is particularly relevant in high-gravity processes using concentrated substrates.
Adaptive laboratory evolution (ALE) strategies have successfully enhanced yeast robustness against these combined stresses. Evolved Saccharomyces cerevisiae strains show fivefold increased bioethanol yields in high-inhibitor environments with 10% (w/v) WIS, primarily through upregulated genes related to cell wall integrity (SRL1, CWP2, WSC2, WSC4) and general stress response [48].
Methodologies for Overcoming Interference
Experimental Protocols
Protocol 1: Minimizing Auto-fluorescence in Fluorescence-Based Yeast Detection
Cell Preparation
Pre-treatment for Auto-fluorescence Reduction
Microscopy and Analysis
Protocol 2: Detecting Yeast Contamination in Lignocellulosic-Rich Environments
Sample Preparation
- For cultures with visible lignocellulosic particles, centrifuge at 500 × g for 5 minutes to separate heavier particulates [48].
- Collect supernatant and examine for suspended yeast cells.
Selective Staining
Microscopic Examination
Protocol 3: Membrane-Based Separation for Yeast Detection
Membrane Filtration
Analysis
- Resuspend retentate in clean buffer for microscopic or fluorescence analysis.
- This process effectively removes furans, phenolic compounds, and carboxylic acids that interfere with detection [47].
Research Reagent Solutions
Table 3: Essential Reagents for Overcoming Detection Interference
| Reagent/Category | Function/Application | Examples/Specifications |
|---|---|---|
| Phenol Red-Free Media | Reduces medium-derived auto-fluorescence | FluoroBrite, custom formulations |
| Red-Shifted Fluorophores | Minimize interference from cellular auto-fluorescence | CoraLite594, CoraLite647, RFP tags |
| Auto-fluorescence Quenchers | Chemical reduction of background signals | Sudan Black B, Eriochrome black T |
| Specialized Fixatives | Alternative to aldehyde-based fixatives | Chilled ethanol (-20°C) |
| Membrane Filters | Separation of yeast from inhibitors | Ultrafiltration (10-50 kDa), Nanofiltration (150-300 Da) |
| Detoxification Reagents | Adsorption or transformation of inhibitors | Activated charcoal, laccase enzymes |
| Cell Wall Stains | Specific labeling of yeast cells | Calcofluor White, Uvitex |
| Antifungal Agents (Control) | Positive control for yeast susceptibility | Amphotericin B, Fluconazole |
Visualizing Experimental Workflows
Experimental Workflow for Yeast Detection Amidst Interference
Interference Mechanisms in Yeast Detection
Accurate yeast contamination detection amidst interference from lignocellulosic particles and auto-fluorescence requires a multifaceted approach combining media optimization, sample pretreatment, advanced detection methodologies, and appropriate reagent selection. By implementing the protocols and strategies outlined in this guide, researchers can significantly improve detection reliability, thereby safeguarding experimental integrity in cell culture-based research and drug development applications.
Validating Methods for Complex Fermentation and 3D Culture Systems
The adoption of three-dimensional (3D) cell culture and complex fermentation systems represents a paradigm shift in biological research and biomanufacturing, enabling more physiologically relevant models for drug screening and therapeutic development. However, these advanced systems introduce significant analytical challenges for detecting contaminants like yeast, which can compromise experimental integrity and product safety. Unlike traditional two-dimensional (2D) cultures where contaminants often cause easily visible turbidity or pH changes, the inherent complexity and structural density of 3D systems such as spheroids, organoids, and scaffold-based cultures can mask early signs of contamination [50]. Yeast contamination poses a particular threat due to its ability to rapidly proliferate and outcompense mammalian cells for nutrients, while its detection in particle-rich environments like lignocellulosic fermentations or dense extracellular matrices remains notoriously difficult [51]. This technical guide outlines validated methodologies and emerging technologies for detecting yeast contamination within these complex systems, providing researchers with a framework for ensuring data reliability and reproductiveity in both research and Good Manufacturing Practice (GMP) environments.
Yeast Contamination: Unique Challenges in Complex Systems
Characteristics and Impact of Yeast Contamination
Yeast species, including Candida albicans, C. tropicalis, and C. parapsilosis, present distinct challenges as contaminants in biological systems. Unlike bacterial contamination that often causes rapid media turbidity, yeast contamination may develop more gradually while still exceeding mammalian cell proliferation rates [10] [15]. Key indicators of yeast contamination include suspended filamentous structures or "fuzzy" aggregates in culture media, visible colonies exhibiting white, green, or dark pigmentation on vessel surfaces, changes in medium clarity and surface tension, and a characteristic fermented odor [15]. Microscopically, yeast contaminants appear as budding cells approximately 10 µm in size, though detection becomes significantly more challenging within the dense, 3D architecture of advanced culture systems [15].
The biological impact of undetected yeast contamination is substantial, ranging from nutrient depletion and altered pH in research cultures to complete batch failure in biomanufacturing settings. Perhaps most insidiously, yeast contamination can induce subtle changes in cellular metabolism and gene expression that lead to misleading experimental results without obvious culture collapse [10] [15]. In fermentation processes, yeast contamination can directly compete with production strains, reducing yields and compromising product purity [51] [52].
System-Specific Detection Challenges
The transition from 2D to 3D culture systems introduces multiple analytical barriers for contamination monitoring. Diffusional limitations within dense 3D constructs prevent uniform penetration of dyes and detection reagents, creating concentration gradients that yield false-negative results in peripheral sampling [50]. The structural complexity of scaffold-based cultures and organoids interferes with optical detection methods, while particulate matter in lignocellulosic fermentation media scatters light and absorbs dyes meant to label contaminant cells [51]. Additionally, the cellular heterogeneity in co-culture systems can mask contamination-induced morphological changes that would be apparent in monocultures [50] [53].
Table 1: Challenges for Yeast Detection in Different Culture Systems
| System Type | Primary Detection Challenges | Impact on Sensitivity |
|---|---|---|
| 3D Spheroids & Organoids | Reagent penetration limitations; light scattering in dense cores | Reduced ability to detect internal contamination |
| Scaffold-Based Cultures | Physical trapping of contaminants within matrix; autofluorescence | False negatives due to uneven distribution |
| Lignocellulosic Fermentations | Particulate interference; media turbidity; non-specific dye binding | Significant overestimation or underestimation of viable cells |
| Co-culture Systems | Difficulty distinguishing contaminants from system components | Delayed detection until contamination reaches advanced stages |
Validation Frameworks and Methodologies
Reference Methodologies for Yeast Detection and Quantification
Manual Hemocytometry
Despite being considered a traditional approach, manual counting using a hemocytometer remains a validated reference method for yeast quantification in complex media, particularly in fermentation systems with high particulate content [51]. The protocol involves appropriate sample dilution followed by microscopic enumeration in a defined grid chamber. Systematic validation in lignocellulosic fermentation samples has demonstrated that manual hemocytometry produces statistically significant calibration models (R² = 0.997, Q² = 0.996) even in challenging matrices, with minimal interference from media components [51]. The critical validation parameters include demonstration of linearity across expected concentration ranges (10² to 10⁸ cells mL⁻¹), reproducibility with relative standard deviation (RSD) <10% across replicate measurements, and robustness against variations in media composition including water-insoluble solids content, osmolality, and conductivity [51].
Colony Forming Units (CFU) Enumeration
The CFU assay provides a direct measure of viable yeast cells through their capacity to form visible colonies on solid media. The standardized protocol involves serial dilution of samples in sterile saline or buffer, spreading onto appropriate agar plates (typically YEPD or RPMI-1640 for yeast species), and incubation at 37°C for 24-48 hours followed by colony counting [51] [54]. While considered a gold standard for viability assessment, CFU enumeration in complex 3D systems requires additional validation for extraction efficiency from matrices, as the dissociation process may not liberate all viable cells [50] [51]. For Candida species, validation studies have shown approximately 9% RSD across replicate measurements, with demonstrated independence from interfering media components when proper dilution schemes are employed [51].
High-Throughput Densitometric Assay
For research and industrial settings requiring rapid, multi-sample processing, a high-throughput densitometric assay has been validated for yeast quantification across a remarkable dynamic range (10² to 10⁸ cells mL⁻¹) [54]. This method utilizes optical density measurements at 405 nm in 96-well plates with continuous incubation and monitoring. The validation approach incorporates algorithmic detection of growth kinetics metrics, specifically the Apparent Lag Phase Extent (ALPE), which correlates with initial inoculum size [54]. The critical innovation is the use of growth curve kinetics to determine low-density inocula, while higher densities are quantified through standard turbidometric calibration. For Candida species, this method has demonstrated correlation coefficients of approximately 0.98 between predicted and actual cell densities, with species-specific equations providing optimal accuracy [54].
Emerging and Advanced Detection Technologies
Machine Learning-Enhanced UV Absorbance Spectroscopy
A novel method combining UV absorbance spectroscopy with machine learning algorithms has demonstrated potential for rapid, label-free detection of microbial contamination in cell therapy products, with applicability to yeast detection in complex cultures [20]. This approach analyzes the unique "fingerprint" patterns of UV light absorption by cell culture fluids, with machine learning classifiers trained to distinguish contaminated from sterile samples. The protocol involves direct sampling of culture supernatant, measurement of UV absorbance spectra, and application of a pre-trained classification model to provide a definitive contamination assessment within 30 minutes [20]. This represents a significant advancement over traditional sterility testing that requires 7-14 days. Validation studies must focus on model specificity for yeast versus other contaminants, matrix effects from different culture media, and limit of detection establishment for low-level contamination.
Dielectric Spectroscopy
Dielectric spectroscopy, implemented through in situ probes, enables real-time monitoring of viable cell concentration based on the intrinsic electrical properties of cells [51]. This method measures the permittivity of the culture medium, which correlates with viable cell concentration as intact cell membranes act as electrical capacitors. The technology requires sophisticated pre-calibration but provides continuous, non-invasive monitoring capability [51]. For yeast detection in fermentation systems, validation must address signal specificity in mixed cultures, calibration drift over extended operations, and correlation with reference methods across the entire production cycle.
qPCR-Based Detection
Quantitative PCR (qPCR) offers species-specific detection and quantification of yeast contaminants by targeting conserved genomic regions. The standard protocol involves DNA extraction from culture samples, amplification with yeast-specific primers (often targeting ITS or LSU regions), and quantitative analysis against standard curves [15] [51]. While offering exceptional sensitivity and specificity, qPCR validation in complex systems must carefully address extraction efficiency from difficult matrices, inhibition by media components, and the crucial distinction between viable and non-viable cells [51]. In lignocellulosic fermentation systems, inconsistent DNA extraction has been identified as a significant limitation, requiring rigorous validation of recovery rates [51].
Table 2: Method Comparison for Yeast Detection in Complex Systems
| Method | Detection Range | Time Requirement | Key Advantages | Primary Limitations |
|---|---|---|---|---|
| Manual Hemocytometry | 10⁴-10⁸ cells mL⁻¹ | 15-30 minutes | Robust to particulate interference; minimal equipment needs | Labor intensive; subjective; requires significant dilution for high densities |
| CFU Enumeration | 10¹-10⁸ cells mL⁻¹ | 24-48 hours | Direct viability measurement; high sensitivity | Time延迟; potential matrix interference; difficult with non-culturable strains |
| High-Throughput Densitometry | 10²-10⁸ cells mL⁻¹ | 5-24 hours | Excellent dynamic range; amenable to automation | Requires culture growth; media-specific calibration |
| UV Spectroscopy with ML | Not specified | <30 minutes | Extreme rapidity; label-free; non-destructive | Early development stage; limited validation in diverse systems |
| Dielectric Spectroscopy | 10⁵-10⁹ cells mL⁻¹ | Real-time continuous | In-line capability; real-time monitoring | Requires extensive calibration; signal interference in conductive media |
| qPCR | 10¹-10⁷ cells mL⁻¹ | 2-4 hours | Species specificity; high sensitivity | DNA extraction challenges; cannot distinguish viable/non-viable |
Experimental Protocols for Method Validation
Protocol: Validation of Yeast Detection in 3D Culture Systems
Purpose: To establish and validate a methodology for detecting and quantifying yeast contamination in three-dimensional cell culture systems, including spheroids and scaffold-based cultures.
Materials:
- Decellularized human liver 3D scaffolds or alternative 3D matrix [53]
- Test yeast strains (e.g., Candida albicans CMC1968, C. tropicalis CMC1839) [54]
- Mammalian cell lines relevant to research focus (e.g., HepG2, LX2) [53]
- YEPD medium: Yeast Extract 1%, Peptone 1%, Dextrose 1% [54]
- RPMI-1640 or appropriate mammalian cell culture medium [54] [53]
- Phosphate-buffered saline (PBS)
- Triton X-100 solution (0.1% v/v)
- DNase I solution (100 µg/mL)
Procedure:
- 3D Culture Establishment:
- Seed mammalian cells into decellularized human liver 3D scaffolds at optimal density (e.g., 1×10⁶ cells per 125 mm³ scaffold) [53]
- Maintain cultures in appropriate medium for 5-7 days to establish mature 3D architecture
Contamination Modeling:
- Inoculate test yeast strains at defined concentrations (e.g., 10²-10⁶ cells mL⁻¹) to simulate contamination levels
- Include uncontaminated controls and media-only blanks
Sample Processing:
- For dissociation: Transfer 3D constructs to digestion buffer (PBS with 0.1% Triton X-100 and 100 µg/mL DNase I)
- Incubate with agitation at 37°C for 45-60 minutes
- Pass through 40 µm cell strainer to obtain single-cell suspension
- Centrifuge at 500 × g for 5 minutes and resuspend in PBS
Parallel Detection Method Application:
- Perform manual hemocytometer counts in triplicate
- Plate serial dilutions for CFU enumeration on YEPD agar
- Analyze samples by qPCR with yeast-specific primers
- Assess by high-throughput densitometry in 96-well format
Validation Parameters:
- Accuracy: Compare recovery rates against spiked samples
- Precision: Calculate inter-assay and intra-assay coefficients of variation
- Linearity: Establish across 4-6 orders of magnitude
- Limit of Detection: Determine by progressive dilution
- Robustness: Test against variations in dissociation protocol
Protocol: Validation in Lignocellulosic Fermentation Systems
Purpose: To validate yeast detection methods in complex particulate-rich fermentation media representative of industrial bioprocessing conditions.
Materials:
- Lignocellulosic slurry (e.g., steam-exploded wheat straw at 5-15% WIS) [51]
- Production yeast strain (e.g., Saccharomyces cerevisiae)
- Contaminant yeast strains (e.g., Candida species)
- Synthetic lignocellulosic media mimetic
- Central Composite Design (CCD) template for experimental design [51]
Procedure:
- Experimental Design:
- Implement Central Composite Design with factors: actual cell concentration, WIS content, osmolality, conductivity [51]
- Include center point replicates for precision assessment
Sample Preparation:
- Prepare mimicked lignocellulose slurry samples with known cell concentrations
- Independently vary WIS (0-15%), osmolality (200-800 mOsm kg⁻¹), conductivity (5-25 mS cm⁻¹)
- Spike with defined ratios of production to contaminant yeast strains
Method Comparison:
- Apply manual hemocytometry with appropriate dilution schemes
- Perform CFU enumeration on selective media
- Utilize dielectric spectroscopy with pre-calibrated probes
- Implement qPCR with species-specific primers
Data Analysis:
- Develop Multiple Linear Regression (MLR) models for each method
- Evaluate significant factors affecting measurement accuracy
- Establish correlation between methods using Pearson coefficients
- Validate models with independent test samples
Acceptance Criteria:
- Precision: RSD <15% for replicate measurements
- Accuracy: 80-120% recovery of spiked contaminants
- Specificity: Ability to distinguish contaminant from production strains
- Linearity: R² >0.95 across target concentration range
Research Reagent Solutions Toolkit
Table 3: Essential Reagents and Materials for Yeast Detection Validation
| Reagent/Material | Function | Application Notes |
|---|---|---|
| Decellularized Human Liver Scaffolds [53] | Physiologically relevant 3D culture matrix | Retains architectural, biochemical, and biomechanical properties of native tissue; enables modeling of tissue-specific contamination |
| YEPD Medium [54] | Growth medium for yeast cultivation and detection | Standardized formulation (Yeast Extract 1%, Peptone 1%, Dextrose 1%) supports robust yeast growth for CFU assays |
| RPMI-1640 Medium [54] [53] | Defined medium for mammalian cell culture | Enables co-culture systems; minimal interference with spectroscopic detection methods |
| Synthetic Lignocellulosic Media Mimetic [51] | Particulate-rich test matrix for fermentation systems | Represents challenging detection environment; validates method robustness to interference |
| Triton X-100 & DNase I [53] | Matrix dissociation reagents | Liberates embedded cells from 3D structures; optimized concentration critical for viability maintenance |
| Species-Specific PCR Primers [51] [54] | Targeted genomic detection | ITS or LSU region targets provide species discrimination; requires validation against non-target species |
| 96-Well Plates with Optical Bases [54] | High-throughput screening format | Enables densitometric growth curve analysis; compatible with automated monitoring systems |
Data Analysis and Interpretation
Statistical Validation Framework
Method validation requires rigorous statistical analysis to establish performance characteristics. For quantitative methods, develop multiple linear regression models that account for matrix effects and process variables [51]. Key parameters include R² values indicating proportion of variance explained, standard errors of calibration (SEC) representing average distance between predicted and actual values, and cross-validation statistics (Q²) assessing model predictive capability [51] [55]. For contamination screening methods, calculate sensitivity (true positive rate), specificity (true negative rate), and ROC curves to establish optimal decision thresholds.
Trend Analysis and Continuous Monitoring
Implement statistical process control (SPC) methodologies for ongoing monitoring of yeast contamination risks in established processes [55]. Control charts tracking detection method performance indicators enable identification of deviations from validated states before they impact product quality or research outcomes. For fermentation systems, establish quantitative correlations between different monitoring modalities (e.g., between in situ permittivity and offline cell counts) to enable real-time contamination risk assessment [51].
Visualizing Experimental Workflows and Method Selection
Figure 1: This decision workflow guides researchers in selecting appropriate yeast detection methodologies based on their specific culture system characteristics and monitoring requirements.
The strategic application of antimycotics and antibiotics is a critical component in managing contamination in cell culture research. Within the specific context of a broader thesis on detecting yeast contamination, this guide examines the advantages and disadvantages of using these antimicrobial agents as a countermeasure. Yeast contamination presents a significant threat to cellular integrity and experimental reproducibility, complicating research and drug development efforts [42] [15]. This in-depth technical review provides researchers, scientists, and drug development professionals with a structured framework for making informed decisions on antimicrobial use, supported by current data, detailed protocols, and strategic visualizations.
Yeast Contamination in Cell Culture: Detection and Impact
Identification and Characteristics of Yeast Contamination
Yeast, a unicellular fungus, is a common contaminant in cell culture laboratories. Its rapid growth rate can quickly overrun a culture, consuming nutrients and altering the environment [15]. Key indicators of yeast contamination include:
- Visual and Microscopic Signs: The culture medium may remain clear initially but often turns yellowish over time. Under microscopy, yeast appears as single, round, or oval cells, approximately 10 µm in size, sometimes observed in the process of budding into smaller particles [42].
- Impact on Cells: Yeast contamination competes with cultured cells for nutrients and space, leading to slowed cell growth, abnormal morphology, and eventual cell death [10].
Consequences for Research and Development
Undetected or poorly managed yeast contamination compromises data integrity and reproducibility. It can lead to:
- False Experimental Results: Altered cellular metabolism and viability skew experimental outcomes [10].
- Resource Depletion: Wasted time, reagents, and cell lines, potentially compromising entire research projects or biopharmaceutical production batches [15] [10].
Table 1: Standard Methods for Detecting Yeast Contamination
| Method | Principle | Key Steps | Sensitivity & Notes |
|---|---|---|---|
| Direct Microscopy | Visual identification of yeast morphology using light microscopy. | 1. Aseptically remove a sample from culture.2. Place on slide with coverslip.3. Observe at 200x-400x magnification. | Low-tech, rapid. Identifies budding, round/oval cells. Confirmation may require other methods [42]. |
| Culture Turbidity/pH Monitoring | Monitoring medium for changes indicative of microbial growth. | 1. Visually inspect for turbidity.2. Note color change of phenol red indicator to yellow (acidic shift). | Simple, low cost. Color change and turbidity are late signs [42] [15]. |
| PCR-Based Detection | Amplification of fungal-specific DNA sequences (e.g., ITS regions). | 1. Extract DNA from culture supernatant.2. Perform PCR with pan-fungal or yeast-specific primers.3. Analyze amplicons via gel electrophoresis. | High sensitivity, specific. Can detect low-level contamination; requires specialized equipment and skills [15]. |
Antimicrobial Agents: Mechanisms and Clinical Context
Classes of Antimycotics and Their Applications
Antifungal drugs (antimycotics) are classified based on their mechanism of action and chemical structure. Understanding these classes is vital for selecting an appropriate agent for decontamination attempts, though their use in a research setting differs from clinical therapy [56] [57].
- Azoles (e.g., Fluconazole): Inhibit the synthesis of ergosterol, a key component of the fungal cell membrane. They are fungistatic and widely used [56] [57]. In cell culture, fluconazole is sometimes used at 150-300 µg/mL to attempt rescuing valuable cultures from yeast [42].
- Polyenes (e.g., Amphotericin B): Bind directly to ergosterol in the fungal cell membrane, creating pores that lead to cell death. They are fungicidal but can be highly toxic to cells [56].
- Echinocandins (e.g., Caspofungin): Inhibit the synthesis of β-(1,3)-D-glucan, a critical component of the fungal cell wall. This class represents a more recent development in antifungal therapy [56] [57].
- Antimetabolites (e.g., Flucytosine): Interfere with fungal DNA and RNA synthesis. Resistance can develop rapidly if used alone [56].
The Global Challenge of Antimicrobial Resistance
The strategic use of antimicrobials cannot be discussed without acknowledging the pervasive threat of antimicrobial resistance (AMR), a silent pandemic affecting both antibiotics and antimycotics.
- Antibiotic Resistance: A 2025 WHO report analyzing data from over 100 countries found that one in six bacterial infections is resistant to antibiotics. Resistance is rising in over 40% of monitored antibiotics, with an average annual increase of 5-15% [58]. Specific threats include a more than 460% surge in NDM-CRE (New Delhi metallo-β-lactamase-producing Carbapenem-Resistant Enterobacterales) in the U.S. between 2019 and 2023 [59].
- Antifungal Resistance: The clinical utility of current antifungals is significantly hindered by the emergence of drug resistance [57] [60]. Key pathogens like Candida auris and Aspergillus fumigatus are flagged by the WHO as "critical priority" due to their significant resistance profiles and high associated mortality rates (20-40% for C. albicans, 50-90% for A. fumigatus) [57] [60]. This resistance narrows therapeutic options and complicates treatment.
Table 2: Pros and Cons of Using Antimycotics and Antibiotics in Cell Culture
| Aspect | Pros (Advantages) | Cons (Disadvantages/Risks) |
|---|---|---|
| Contamination Control | - Can salvage unique/irreplaceable cell lines [42].- Provides a short-term solution to contain a contamination event. | - Masking: Antibiotics can hide low-level contamination, leading to silent spread [15].- Promotes the development of resistant microbial strains in the lab environment [15]. |
| Impact on Cells | - Prevents total culture loss and cell death from overgrowth. | - Cytotoxicity: Many antimycotics (e.g., Amphotericin B) are toxic to mammalian cells and can alter cell physiology [42] [56].- Can induce unintended cellular stress responses. |
| Experimental Integrity | - Allows for the completion of a time-critical experiment. | - Biological Effects: Antimicrobials can interfere with cellular processes (e.g., mitochondrial function, gene expression), skewing experimental data [15] [10].- Compromises the definition of a "clean" culture system. |
| Operational & Economic | - Perceived as a cost-effective insurance policy. | - Cost of Resistance: Managing resistant contaminants is more costly in the long run [15].- Eradication failure leads to wasted reagents and time. |
| Broader Impact | - Ensures continuity in research and production. | - Contributes to the global AMR crisis if resistant organisms escape the lab [58] [59].- Conflicts with antimicrobial stewardship principles. |
A Strategic Framework for Antimicrobial Use
Decision Workflow: To Treat or Not to Treat?
The following diagram outlines a strategic decision-making workflow for managing suspected yeast contamination, integrating detection and intervention options. The process prioritizes prevention and validation, reserving antimicrobial use for exceptional circumstances.
Experimental Protocol for Managing Yeast Contamination
For situations where rescue of a contaminated culture is deemed necessary, the following detailed protocol for using fluconazole can be employed.
Protocol: Rescue of a Yeast-Contaminated Cell Culture Using Fluconazole
Objective: To eliminate yeast contamination from a valuable cell culture while minimizing toxicity to the mammalian cells.
Reagents and Materials:
- Antimycotic: Fluconazole stock solution (e.g., 10 mg/mL in DMSO or water)
- Sterile Phosphate-Buffered Saline (PBS)
- Complete cell culture medium
- Trypsin-EDTA or other dissociation reagent
- Culture flasks/plates
Methodology:
- Confirmation and Isolation: Confirm yeast contamination via microscopy. Move the contaminated culture to a quarantined incubator and workspace to prevent cross-contamination.
- Washing:
- Aspirate and discard the contaminated medium.
- Gently rinse the cell monolayer with 5-10 mL of sterile PBS to remove loosely adherent yeast cells.
- Aspirate and discard the PBS wash. Repeat this wash step two more times.
- High-Dose Treatment:
- Add fresh complete medium supplemented with a high concentration of fluconazole (300 µg/mL).
- Incubate the culture for 24-48 hours. Visually inspect for medium color and clarity.
- Passage and Medium-Dose Treatment:
- After 24-48 hours, trypsinize and subculture the cells as usual.
- Plate the cells into a new flask with fresh complete medium containing a lower concentration of fluconazole (150 µg/mL).
- Maintenance and Validation:
- Maintain the cells in 150 µg/mL fluconazole for 2-3 full passages.
- Mycoplasma Testing: After the third passage in the lower dose, test the culture for mycoplasma, as stressed cells are more susceptible to other contaminants [15]. Products like the
MycAway Plus-Color One-Step Mycoplasma Detection Kitcan be used for this purpose [42].
- Cessation and Monitoring:
- If the culture appears healthy and no yeast is detected microscopically over 2-3 passages, passage the cells into antibiotic- and antimycotic-free medium.
- Monitor closely for any recurrence of contamination for several subsequent passages.
Critical Notes:
- This protocol is a temporary rescue attempt and is not guaranteed to work. Fluconazole is toxic to some cell types [42].
- The "clean" status of the rescued cell line should be viewed with caution. It is strongly recommended to re-authenticate the cell line post-rescue using STR profiling [15].
The Scientist's Toolkit: Essential Reagents for Contamination Management
Table 3: Research Reagent Solutions for Contamination Control
| Reagent / Kit | Primary Function | Specific Example(s) |
|---|---|---|
| Antimycotics | To inhibit or kill fungal contaminants like yeast in culture media. | Fluconazole, Amphotericin B [42] [56]. |
| Antibiotics | To inhibit or kill bacterial contaminants. | Penicillin/Streptomycin mixture [42]. |
| Mycoplasma Detection Kits | To detect the presence of mycoplasma, a common and invisible contaminant. | MycAway Plus-Color One-Step Mycoplasma Detection Kit [42]. |
| Mycoplasma Removal Reagents | To treat mycoplasma-contaminated cultures. | MycAway-Pro Mycoplasma Removal Reagent [42]. |
| Cell Line Authentication Services | To verify cell line identity and detect cross-contamination via DNA analysis. | STR (Short Tandem Repeat) Profiling [15]. |
| Sterile Filtration Units | To sterilize heat-labile solutions (e.g., certain media components) via membrane filtration. | 0.22 µm Pore Size Filters [10]. |
The strategic use of antimycotics and antibiotics in cell culture is a double-edged sword. While they offer a potential lifeline for salvaging critical research materials, their cons—including cytotoxic effects, compromised data, and the contribution to antimicrobial resistance—are significant. The most robust strategy for ensuring the integrity of cell culture research is a relentless focus on prevention through strict aseptic technique, regular environmental monitoring, and systematic cell line authentication. Antimicrobials should be viewed not as a routine safeguard but as a last-resort intervention for exceptional circumstances, applied judiciously within a clear decision-making framework that acknowledges both the immediate research context and the broader public health challenge of AMR.
Implementing Rigorous Aseptic Technique and Environmental Monitoring
Within cell culture research, the silent threat of microbial contamination, particularly from yeast, poses a significant risk to data integrity and experimental reproducibility. This guide details the implementation of rigorous aseptic technique and environmental monitoring, specifically framed within the context of a broader thesis on yeast contamination detection. Yeast contamination is a persistent challenge; these fungi multiply faster than mammalian cells and can be introduced through errors in aseptic technique or from environmental sources, with increased incidence often noted in spring and summer months [1]. Unlike bacteria, yeasts are unaffected by common antibiotics like penicillin and streptomycin, making prevention and early detection paramount [1]. For researchers and drug development professionals, a systematic approach combining strict procedures, constant environmental surveillance, and precise detection methodologies is fundamental to ensuring the validity of their scientific findings.
Core Principles of Aseptic Technique
Aseptic technique is the first and most crucial line of defense against all microbial contaminants, including yeast. Its goal is to create a sterile field and utilize practices that prevent the introduction of contaminants from the environment, the researcher, or equipment.
Foundational Practices
- Proper Personal Protective Equipment (PPE): Always wear a lab coat, gloves, and safety goggles. Gloves should be disinfected with 70% ethanol frequently during the procedure and whenever non-sterile surfaces are touched.
- Biosafety Cabinet (BSC) Management: The BSC must be turned on and allowed to run for at least 15 minutes before use. All interior surfaces, including the walls and work area, should be thoroughly wiped down with 70% ethanol before and after work. All materials should be placed in the cabinet in a logical order to minimize clutter and movement over sterile areas.
- Ethanol Use: A spray bottle of 70% ethanol should be used to disinfect all items before introducing them into the BSC, including gloves, media bottles, and pipette controllers.
- Handling Tubes and Plates: The caps of tubes and lids of plates should not be placed face-down on non-sterile surfaces. When needed, they should be held in a sterile manner, facing away from the palm. Work should be performed quickly and efficiently, but never rushed, as stress can lead to errors [1].
Procedural Rigor
- Flaming and Sterile Instrument Use: When using glass serological pipettes, the ends must be passed through a Bunsen burner flame before use if not in a BSC. For other instruments, using pre-sterilized, single-use plasticware is highly recommended to eliminate this variable.
- Limiting Workload and Cross-Contamination: Researchers should handle only one cell line at a time within the BSC to prevent cross-contamination between cell lines [1]. While antibiotics are common in media, their use can mask low-level contamination. Periodically cultivating cells without antibiotics is advised to reveal any underlying contamination issues [1].
- Documentation and Training: Every contamination event should be documented and classified as far as possible. This record-keeping is invaluable for identifying recurring sources and implementing targeted corrective actions [1].
Environmental Monitoring Systems
While aseptic technique focuses on the immediate procedures, environmental monitoring ensures the broader cell culture ecosystem—the incubator, the lab air, and the reagents—remains within specified parameters. Deviations in these conditions can stress cells, making them more susceptible to contamination and compromising experimental outcomes.
Key Parameters and Their Impact
Maintaining stable environmental conditions is critical not only for preventing contamination but also for ensuring cellular health and the biological relevance of research data. Cells are highly sensitive to their physicochemical environment, and parameters like dissolved gas concentrations can drift significantly from setpoints during standard batch culture, potentially leading to misleading experimental results [61].
The table below summarizes the four key parameters that require continuous monitoring and control.
Table 1: Key Environmental Parameters for Cell Culture Monitoring
| Parameter | What It Measures | Impact on Cell Culture & Relevance to Yeast | Optimal Range (General) |
|---|---|---|---|
| Temperature | Thermal energy of the culture environment. | Critical for enzymatic activity and cell proliferation. Yeast also have optimal growth temperatures, so deviations can affect competition. | 37°C for mammalian cells [62]. |
| Dissolved Oxygen (DO) | Concentration of oxygen dissolved in the medium. | Essential for aerobic energy production. Low DO limits cell growth; high DO can generate toxic ROS. Yeast can be facultative anaerobes. | 30-80% saturation [63]. |
| pH | Acidity or alkalinity of the culture medium. | Drastically affects protein stability and enzyme function. Yeast metabolism can acidify media, creating a favorable environment for them. | 6.8-7.4 for mammalian cells [63]. |
| CO₂ | Carbon dioxide concentration in the incubator atmosphere. | Dissolves to form carbonic acid, which regulates pH. Typically maintained at 5-10% for bicarbonate-buffered mammalian cultures [63]. | 5-10% for most mammalian cells [63]. |
Monitoring and Control Strategies
An effective Environmental Monitoring System (EMS) is not passive; it involves continuous data collection, real-time alerts, and scheduled reviews to proactively maintain stability.
- Sensor Technology: Utilize high-precision, regularly calibrated sensors for pH, DO, and CO₂. Modern systems employ non-invasive optical sensors for dissolved gases [61] [63] and semiconductor-based sensors for volatile compounds that can indicate contamination [64].
- Real-Time Alerts and Data Logging: The EMS should be configured to trigger immediate alerts for any parameter deviation outside pre-set limits. This allows for rapid corrective action, such as checking an incubator door seal if CO₂ levels drop. Furthermore, continuous data logging provides a documented record of environmental conditions, which is crucial for validating experimental integrity and for regulatory compliance [62].
- Reporting and Maintenance: Generate weekly reports at 1-hour intervals to track all critical parameters. At a minimum, reports should be reviewed monthly to identify long-term trends or drift in equipment performance. Regular preventative maintenance and calibration of all monitoring equipment are essential to ensure data accuracy [62].
Detection of Yeast Contamination
Despite rigorous techniques, contamination can occur. For yeast, early and accurate identification is key to preventing the loss of cultures and experiments.
Macroscopic and Microscopic Identification
The initial signs of yeast contamination can often be observed with the naked eye and confirmed under a microscope.
- Macroscopic Detection: The most common sign is a sharp increase in the turbidity or cloudiness of the culture medium [65]. Unlike bacterial contamination, which often causes rapid acidification and a yellow color change in phenol-red-containing media, the pH shift in yeast-contaminated cultures may be slight or initially absent, making visual cloudiness the primary indicator [65].
- Microscopic Detection: Yeast cells can be visualized using phase-contrast microscopy at 100x to 400x magnification. Phase contrast is particularly helpful for detecting low-level contamination. Yeasts typically appear as individual ovoid, bright particles or may be found in chains or branches between the larger mammalian cells [65]. They are significantly smaller than mammalian cells but larger than most bacteria, providing a key distinguishing feature.
Advanced and Rapid Detection Methods
While microscopy is a vital first step, advanced methods offer greater sensitivity, specificity, and speed, which is critical in a GMP manufacturing context or for validating cell banks.
- Novel Spectroscopy and Machine Learning: A groundbreaking method from MIT researchers uses ultraviolet (UV) absorbance spectroscopy on cell culture fluids combined with machine learning. This approach can recognize light absorption patterns unique to microbial contamination, providing a definitive "yes/no" assessment in under 30 minutes. It is label-free, non-invasive, and automatable, making it ideal for preliminary, continuous safety testing during manufacturing [20].
- Volatile Organic Compound (VOC) Sensing: Another emerging technology involves using semiconductor-based sensors to detect total volatile organic compounds (TVOC) produced by metabolizing microbes. A 2026 study demonstrated the feasibility of using TVOC sensors for real-time monitoring inside incubators, potentially detecting bacterial contamination within a 2-hour window from onset [64]. While shown for bacteria, this principle holds promise for detecting volatile metabolites from yeast.
- Traditional Sterility Testing and RMMs: Traditional sterility tests based on culture can take up to 14 days, while Rapid Microbiological Methods (RMMs) can reduce this to about 7 days [20]. These are often required for batch release in GMP but are too slow for early intervention. The novel methods above are designed to be used as a preliminary step to trigger these more complex, official tests only when potential contamination is flagged.
The Scientist's Toolkit
This table details essential reagents, materials, and equipment for implementing the aseptic techniques and monitoring strategies discussed in this guide.
Table 2: Essential Research Reagents and Materials for Aseptic Technique and Monitoring
| Item Name | Function / Application |
|---|---|
| 70% Ethanol | Primary disinfectant for gloves, biosafety cabinet surfaces, and all items introduced into the sterile field. |
| Pre-sterilized Single-Use Pipettes | To ensure sterility during liquid handling and prevent cross-contamination; eliminates the need for flaming. |
| Optical Dissolved Oxygen Sensor | For precise, real-time monitoring of dissolved oxygen levels in bioreactors or culture vessels. |
| CO₂ Sensor | For monitoring and controlling the CO₂ levels within incubators to maintain physiological pH. |
| UV-Vis Spectrophotometer | For performing optical density (OD) measurements to track cell growth and for use in advanced UV absorbance contamination screens [20]. |
| Phase-Contrast Microscope | Essential for the routine microscopic examination of cells to check for signs of contamination, including yeast. |
| Mycoplasma Detection Kit (PCR-based) | For routine screening of master cell banks and cultures for mycoplasma, a common and invisible contaminant. |
| Cell Culture Media without Antibiotics | For periodic cultivation of cells to reveal any low-level, antibiotic-suppressed bacterial or yeast contaminants [1]. |
Experimental Workflow for Contamination Prevention and Detection
The following diagram illustrates the integrated, continuous cycle of prevention, monitoring, and detection required to safeguard cell cultures, with a specific focus on yeast.
Comparative Method Analysis: Selecting and Validating the Right Detection Strategy
Accuracy and Reliability Assessment Across Detection Platforms
The accurate and reliable detection of yeast contamination is a critical quality control imperative in cell culture research and biopharmaceutical production. Yeast contamination can compromise experimental integrity, lead to erroneous scientific conclusions, and pose significant risks to the safety and efficacy of cell therapy products [15] [66]. The challenge is multifaceted: yeasts are ubiquitous in the environment, can evade visual detection in early stages, and certain species exhibit inherent resistance to common antibiotics [15]. The push towards personalized medicine and automated bioprocessing further underscores the need for robust, rapid, and reliable detection platforms. This guide provides a comprehensive technical assessment of available detection methodologies, evaluating their accuracy, reliability, and applicability within a modern cell culture laboratory. We frame this assessment within the broader thesis that a multi-faceted, context-dependent strategy—combining classical gold standards with emerging high-throughput technologies—is essential for ensuring the integrity of biological research and manufacturing.
Comparative Analysis of Yeast Detection Platforms
The selection of a detection platform depends on the required balance between speed, sensitivity, specificity, and throughput. The table below summarizes the key performance characteristics of major platforms discussed in this guide.
Table 1: Performance Comparison of Yeast Detection and Identification Methods
| Method Category | Example Platform/Assay | Time to Result | Approximate Sensitivity | Key Advantages | Key Limitations |
|---|---|---|---|---|---|
| Culture-Based | Hemocytometer Counting | 10-30 mins | N/A (Total cells) | Low cost; Direct enumeration; Robust to particles [51] | Does not distinguish viability; Prone to operator error [51] |
| Colony Forming Units (CFU) | 2-5 days | 1 viable cell | Confirms viability; Inexpensive; Gold standard [51] | Long time-to-result; Labor-intensive; Affected by clumping [51] | |
| Molecular | Pyrosequencing (e.g., ITS2) | Hours | Species-dependent | High species-level accuracy; Identifies mixtures [67] | Requires specialized equipment and expertise [67] |
| qPCR | 2-4 hours | High (fg-pg DNA) | High sensitivity and specificity; Quantitative potential [51] | DNA extraction inefficiency in complex media [51] | |
| Automated & Advanced | Automated Cell Counters | Minutes | N/A (Total cells) | High throughput; Consistency in clear media [51] | Limited applicability in complex, particulate media [51] |
| Dielectric Spectroscopy | Real-time | ~106 cells/mL | Real-time, in-situ monitoring of viable cell density [51] | Requires pre-calibration; Sensitive to medium conductivity [51] | |
| UV Absorbance + Machine Learning | ~30 minutes | Early detection | Label-free, non-invasive; Rapid; Simple workflow [20] | Emerging technology; Validation across contaminants ongoing [20] |
Detailed Methodologies and Protocols
Culture-Based Quantitative Assays
3.1.1 Manual Hemocytometer Counting for Complex Media
This protocol is adapted for reliable cell concentration quantification in challenging lignocellulosic media, which share characteristics with other complex, particulate cell culture environments [51].
Materials and Reagents:
- Hemocytometer (e.g., Improved Neubauer)
- Microscope
- Cuvettes and spectrophotometer
- Dilution tubes and pipettes
- Sterile ddH2O or appropriate buffer
Step-by-Step Protocol:
- Sample Preparation: Harvest a representative sample of the yeast-contaminated cell culture. For adherent mammalian cells, this would first require detachment.
- Dilution: Perform appropriate serial dilutions in sterile diluent to achieve a countable concentration (typically 1-2 x 10⁶ cells/mL for yeasts). Vigorous vortexing is recommended to disrupt yeast clumps.
- Loading: Carefully load a small volume (~10-20 µL) of the diluted sample into the chambers of the hemocytometer, ensuring no overflow or air bubbles.
- Enumeration: Place the hemocytometer under a microscope and use a 20x or 40x objective. Count the cells in the large central 1 mm2 area, which is subdivided into 25 smaller squares. Count cells touching the top and left boundaries of a square, but not those touching the bottom and right boundaries.
- Calculation: Calculate the cell concentration using the formula:
Cell concentration (cells/mL) = (Average count per large square) x Dilution Factor x 10^4
3.1.2 Quantitative Spotting Assay for Growth Assessment
This protocol allows for reproducible quantification of yeast growth and survival, useful for assessing contamination levels or testing antifungal agents [68].
Materials and Reagents:
- Yeast strains (contaminant)
- Liquid media (e.g., YPD)
- 96-well plates (round-bottom recommended)
- 48-pin spotter (or "frogger")
- Dry agar plates (containing selective media if needed)
- 70% ethanol for sterilization
- Imaging system (e.g., gel doc) or high-quality digital camera
- ImageJ software
Step-by-Step Protocol:
- Culture and Dilution:
- Inoculate yeast in 3 mL liquid media and grow overnight (e.g., 12-16 hrs at 30°C with shaking).
- Dilute cultures 1:10 and measure OD600.
- Normalize all cultures to OD600 = 1.0 in a final volume of 200 µL in row A of a 96-well plate.
- Perform a 1:5 serial dilution across the plate (rows B-F) using a multichannel pipette.
- Spotting:
- Use a sterilized (70% ethanol, flamed) 48-pin spotter to transfer cultures from the 96-well plate onto dry agar plates.
- Allow spots to absorb fully before incubating plates for 2-5 days at the appropriate temperature.
- Image Acquisition and Analysis:
- Acquire high-quality, evenly lit images of the plates, avoiding glare.
- Open the image in ImageJ and convert it to an 8-bit image (
Image > Type > 8-bit). - Use the straight-line tool to measure the diameter of a representative spot in pixels.
- Set a circular region of interest (ROI) with this diameter using the oval tool and the
measurefunction. - Measure the mean gray value for each spot.
- Normalize the gray values of test spots to the control spot on the same plate for quantitative comparison of growth density.
- Culture and Dilution:
Molecular Identification Protocol: Pyrosequencing for Species-Level Identification
For definitive identification of contaminating yeast species, molecular methods are required. Pyrosequencing of the ITS2 region offers high accuracy [67].
Materials and Reagents:
- Purified yeast colonies (from a streak plate)
- DNA extraction kit (e.g., enzymatic lysis with zymolyase followed by column purification)
- PCR reagents: primers targeting the ITS2 region, dNTPs, polymerase
- Pyrosequencing platform and associated reagents (sequencing primer, enzymes, substrates)
Step-by-Step Protocol:
- Sample Purity and DNA Extraction:
- Ensure a pure culture by streaking the contaminated sample on chromogenic agar (e.g., CHROMagar) and/or cornmeal-Tween 80 agar to isolate single colonies and check for morphological details [67].
- Pick a single colony and subject it to DNA extraction following the manufacturer's protocol.
- PCR Amplification:
- Amplify the ITS2 region using specific biotinylated primers in a standard PCR reaction.
- Verify successful amplification via gel electrophoresis.
- Pyrosequencing:
- Prepare the single-stranded DNA template from the biotinylated PCR product using streptavidin-coated beads.
- Anneal the sequencing primer to the template.
- Load the prepared template into the pyrosequencer and run the sequencing reaction. The instrument sequentially dispenses nucleotides, and light is emitted upon incorporation (pyrogram).
- Data Analysis:
- The resulting DNA sequence is automatically compared to a curated database (e.g., GenBank) for species-level identification. This method can also reveal the presence of mixed yeast species in a single sample [67].
- Sample Purity and DNA Extraction:
Signaling Pathways and Experimental Workflows
The following diagrams illustrate a classical yeast signaling pathway exploited in biosensors and a generalized workflow for assessing detection platform accuracy.
GPCR Signaling in Engineered Yeast Biosensors
Diagram Title: Yeast GPCR Biosensor Pathway
- Description: This diagram depicts the engineered signaling pathway used in advanced yeast biosensor platforms like the SCASA system. An extracellular ligand (e.g., a small molecule) binds to a heterologously expressed human G Protein-Coupled Receptor (GPCR) [69] [70]. This activates the yeast's native Pheromone Response Pathway (PRP), which ultimately leads to the activation of a PRP-controlled promoter (e.g., PFUS1) [69]. This promoter drives the expression of a reporter module, which can be a surface-displayed protein (like CD19 for immune cell interaction) or an enzyme for detection, allowing the signal to be quantified [69] [70].
Workflow for Platform Assessment
Diagram Title: Detection Platform Validation Workflow
- Description: This workflow outlines a robust approach for validating a new detection platform against established methods. The process begins with preparing controlled samples with a known concentration of yeast. These samples are then analyzed in parallel using the platform under evaluation and one or more reference methods (e.g., CFU for viability, sequencing for identity) [67] [51]. The resulting data is correlated to determine accuracy, sensitivity, and specificity. In complex media, statistical modeling, such as Multiple Linear Regression (MLR), can be used to understand how background media components affect the platform's readout and to correct for these interferences [51].
The Scientist's Toolkit: Essential Research Reagents and Materials
Table 2: Key Reagents and Materials for Yeast Contamination Studies
| Item | Function/Application | Example/Notes |
|---|---|---|
| Chromogenic Agar | Differential identification of yeast species based on colony color [67]. | CHROMagar Candida; allows preliminary ID of C. albicans, C. glabrata, C. krusei. |
| Cornmeal Agar with Tween 80 | Morphological analysis; induces and visualizes pseudohyphae and chlamydospores [67]. | Dalmau plate culture; critical for distinguishing similar species. |
| Selective Media & Antibiotics | Selective isolation of yeasts from mixed bacterial cultures. | Can contain chloramphenicol or gentamicin to inhibit bacteria. Use antibiotics judiciously to avoid masking contamination [15]. |
| DNA Extraction Kits | Preparing template for molecular identification (PCR, sequencing). | Must include protocols for breaking robust yeast cell walls (e.g., enzymatic lysis). |
| ITS2 Region Primers | PCR amplification for sequencing and identification. | Universal fungal primers; target for pyrosequencing and other sequencing-based ID methods [67]. |
| Hemocytometer | Manual total cell counting. | Improved Neubauer type; remains reliable in complex, particulate media where automated systems fail [51]. |
| 48-Pin Spotter ("Frogger") | High-throughput, reproducible spotting of serial dilutions on agar plates [68]. | Ensures spots are equal in size and spacing for quantitative growth assays. |
| qPCR Reagents | Quantitative detection and quantification of yeast DNA. | Requires species-specific primers/probes for precise identification. |
| UV Spectrophotometer | For use with machine learning-based contamination screening. | Measures absorbance spectra of cell culture media as a label-free detection input [20]. |
The accurate detection and identification of yeast in cell culture is a non-negotiable component of reliable biomedical research. As this guide demonstrates, no single platform is universally superior; each offers a unique set of trade-offs between speed, cost, sensitivity, and informational depth. The classical methods of culture and microscopy provide a foundational, robust, and accessible approach. In contrast, molecular techniques deliver definitive species-level resolution crucial for understanding contamination sources and clinical implications. The most significant advancements are emerging from the integration of novel sensor technologies, such as dielectric spectroscopy and UV absorbance, with machine learning algorithms, promising a future of real-time, automated, and highly sensitive monitoring. A proactive, layered strategy—combining rigorous aseptic technique, routine monitoring with appropriate technologies, and definitive identification when needed—is the most effective defense against the costly and scientifically damaging consequences of yeast contamination.
Yeast contamination is a significant concern in cell culture research, capable of compromising experimental integrity, degrading valuable cell lines, and leading to substantial financial losses and project delays. Selecting the appropriate detection method is a critical decision that balances the competing demands of speed, cost, and specificity. This guide provides a comprehensive technical overview of available yeast detection methodologies, enabling researchers and drug development professionals to implement effective contamination control strategies tailored to their specific operational constraints and quality requirements.
The table below provides a comparative overview of the primary yeast detection methods, highlighting their key operational characteristics to guide initial selection.
Table 1: Comparison of Yeast Detection and Identification Methods
| Method | Time to Result | Approximate Cost | Specificity | Key Advantages | Primary Limitations |
|---|---|---|---|---|---|
| Traditional Plate Culture | 3–5 days [71] | Low | Genus/Species level [72] | Standardized, detects viable cells | Time-consuming, misses VBNC state [71] |
| Flow Cytometry (FCM) | ~20 minutes [71] | Medium | Viability status (live/dead) [71] | Rapid, high-throughput, quantifies viability | Requires specialized equipment, dyes |
| MALDI-TOF MS | Minutes after isolate obtained [73] | High | Species level [74] | High-throughput, excellent for identification | Requires pure culture, database-dependent [73] [75] |
| Chromogenic Media | 24–72 hours [72] | Low-Medium | Species level for common yeasts [74] | Visual differentiation of species, detects mixed cultures | Limited to known color patterns, less specific for rare yeasts [72] |
| Molecular (qPCR) | Several hours [76] | Medium-High | Species level [76] | High sensitivity and specificity, detects non-culturable yeasts | Cannot distinguish live/dead with DNA templates, complex sample prep [76] |
| UV Spectrometry with ML | <30 minutes [20] | Low (after model development) | Contamination yes/no [20] | Label-free, non-invasive, potential for automation | Early research stage, identifies contamination not specific yeast [20] |
Detailed Methodologies and Experimental Protocols
Flow Cytometry with Fluorescent Staining
This method allows for the rapid quantification and viability assessment of yeast cells in a heterogeneous sample by measuring light scattering and fluorescence characteristics.
Detailed Protocol [71]:
- Staining Solution Preparation: Prepare a working solution of fluorescein diacetate (FDA) and propidium iodide (PI) in an appropriate buffer. FDA is taken up by viable cells and cleaved by esterases to produce fluorescent fluorescein, while PI only enters cells with compromised membranes, staining dead cells.
- Sample Preparation: Take a 1 mL aliquot from the cell culture suspension. Centrifuge gently if the sample contains high levels of particulate matter. Resuspend the pellet in 1 mL of sterile PBS or a similar buffer.
- Staining: Add the FDA/PI staining solution to the sample at a predetermined optimal concentration. Incubate in the dark for 5-15 minutes at room temperature.
- Analysis: Analyze the sample using a flow cytometer. Set up the instrument using unstained and single-stained controls to define the fluorescence thresholds for viable (FDA-positive) and dead (PI-positive) populations. The analysis can be completed in approximately 20 minutes.
- Data Interpretation: Viable yeasts are FDA-positive/PI-negative; dead yeasts are PI-positive; and the subpopulation of viable but non-culturable (VBNC) cells may be detected based on differential staining.
Densitometric (Turbidometric) Assay
This high-throughput method estimates cell density by measuring optical density and analyzing growth kinetics, suitable for a wide range of cell densities.
Detailed Protocol [54]:
- Sample Inoculation: Prepare serial dilutions of the yeast suspension in a transparent, flat-bottomed 96-well plate. Include a blank with sterile medium. The final volume in each well should be 100 µL.
- Data Acquisition: Place the plate in a plate reader (e.g., Tecan Infinite F200) and incubate at the required temperature (e.g., 37°C). Measure the optical density at 405 nm (OD405) every 5 minutes for 24 hours.
- Apparent Lag Phase Extent (ALPE) Calculation: Use one of three algorithms to determine the ALPE, which correlates with the initial inoculum size [54]:
- Algorithm A: Calculates the time at the intersection of the regression curves for the lag and exponential phases.
- Algorithm B: Defines the ALPE as the time when the optical density exceeds a predetermined threshold multiple of the initial OD.
- Algorithm C: Identifies the ALPE as the point of maximum incremental rate of increase in OD.
- Cell Density Calculation: For samples with a long ALPE, use a calibration curve of log cell density versus ALPE. For samples with high initial density (short ALPE), use a standard curve of cell density versus initial OD405.
Direct Identification from Positive Cultures using MALDI-TOF MS
This method enables rapid microbial identification directly from positive blood culture bottles, bypassing the need for subculture.
Detailed Protocol [73]:
- Sample Processing: Take 4.0 mL from a flag-positive blood culture bottle. Transfer it to a tube containing a plasma separation gel and centrifuge at 3000 × g for 10 minutes.
- Pellet Washing: Discard the supernatant and resuspend the pellet in 1.0 mL of deionized water to lyse residual blood cells and dilute inhibitors.
- Target Spotting: Spot 1 µL of the suspension in triplicate onto a MALDI-TOF MS target plate and allow to air dry completely.
- Matrix Application:
- MS Analysis and Interpretation: Insert the target plate into the MALDI-TOF MS instrument (e.g., Vitek MS). Acquire mass spectra and compare them against a reference database. A confidence score of 95-99.9% indicates identification to the species level, while a score of 90-94% typically identifies the genus [73].
Visual Workflow for Method Selection
The diagram below outlines a logical decision-making workflow to guide the selection of the most appropriate yeast detection method based on key operational questions.
The Scientist's Toolkit: Key Research Reagent Solutions
The following table details essential reagents and materials used across the featured yeast detection methods.
Table 2: Essential Reagents and Materials for Yeast Detection
| Reagent/Material | Function/Application | Example Use in Protocol |
|---|---|---|
| Fluorescein Diacetate (FDA) | Viability stain for flow cytometry. Converted to fluorescent fluorescein by metabolically active cells [71]. | Staining solution for distinguishing viable yeast cells [71]. |
| Propidium Iodide (PI) | Membrane integrity stain for flow cytometry. Enters and stains cells with compromised membranes [71]. | Used in combination with FDA to label non-viable cells [71]. |
| CHROMagar Candida | Chromogenic culture medium. Enzymatic reactions yield species-specific colony colors [72] [74]. | Primary culture and presumptive identification of common Candida species [74]. |
| Alpha-Cyano-4-Hydroxycinnamic Acid (CHCA) | Matrix solution for MALDI-TOF MS. Facilitates desorption and ionization of microbial proteins [73]. | Applied over microbial spots on the target plate for protein analysis [73]. |
| Formic Acid (FA) | Protein extraction solvent for MALDI-TOF MS. Breaks down cell walls to release proteins for analysis [73]. | Added to yeast spots on the target plate prior to matrix application [73]. |
| Vitek MS-CHCA Matrix | Quality-controlled matrix for Vitek MS systems. Ensures consistency in spectral acquisition [73]. | Used as per manufacturer's instructions for routine identification. |
| SYBR Green / TaqMan Probes | Detection chemistry for qPCR. Binds to or fluoresces upon amplification of target DNA/RNA [76]. | Enables real-time monitoring of PCR amplification for quantification. |
| Triton X-100 | Detergent for sample preparation. Lyses blood cells in positive blood cultures to reduce background [75]. | Added to positive blood culture fluid before centrifugation and filtration. |
No single yeast detection method is universally superior; the optimal choice is a deliberate compromise shaped by specific experimental goals and resource constraints. For the fastest preliminary contamination screening, UV spectroscopy with machine learning and flow cytometry offer results within minutes. When species-level identification is paramount for root cause analysis, MALDI-TOF MS is the current gold standard, provided a pure isolate is available. For comprehensive viability assessment, including detection of VBNC cells, mRNA-based qPCR and flow cytometry are particularly powerful. Traditional and chromogenic methods remain cost-effective and reliable for routine monitoring where a delay of several days is acceptable. A robust contamination control strategy often involves implementing a combination of these techniques, utilizing rapid methods for early warning and slower, more specific methods for definitive identification and investigation.
Yeast contamination poses a significant risk to the integrity of cell culture research, potentially compromising experimental data, leading to erroneous conclusions, and incurring substantial financial costs. Effective detection and identification of these contaminants are therefore paramount in maintaining the highest standards of laboratory practice, particularly for researchers, scientists, and drug development professionals. Among the various techniques available, chromogenic media and molecular methods represent two fundamental approaches with distinct advantages and limitations. Chromogenic media offer a phenotypic, culture-based method for presumptive identification, while molecular techniques provide genotypic, DNA-based confirmation. This whitepaper provides a direct comparison of these methodologies, framing the analysis within the critical context of detecting and managing yeast contamination in cell culture systems. The evaluation encompasses performance metrics, detailed experimental protocols, and practical workflow integration to guide informed methodological selection.
Core Principles of the Two Methodologies
Chromogenic Media: Phenotypic Identification
Chromogenic media are specialized culture formulations that exploit species-specific enzymatic activities within yeast cells. These media contain chromogenic substrates—colorless compounds that are cleaved by specific enzymes produced by the growing yeast. This enzymatic cleavage releases a colored moiety, which accumulates within or around the colony, resulting in distinctive, species-characteristic colors [77]. This mechanism allows for the presumptive identification of different yeast species based on visual inspection of colony morphology and color after a standard incubation period, typically 24-48 hours [77]. For example, on various commercial chromogenic media, Candida albicans often forms green colonies, while Candida tropicalis may appear as blue or metallic blue [77]. This visual differentiation provides a rapid and cost-effective initial screening tool.
Molecular Methods: Genotypic Identification
Molecular identification methods bypass the need for phenotypic expression by directly analyzing the genetic material of the yeast. These techniques target specific, standardized genomic regions that exhibit sufficient sequence variation to distinguish between species. The primary DNA barcode markers used for yeast identification are the internal transcribed spacer (ITS) regions of the nuclear rRNA gene and the D1/D2 domain of the large subunit (LSU) rRNA gene [78]. The ITS region is the official fungal barcode and offers high variability, while the LSU D1/D2 domain is often considered a gold standard for yeast species delineation due to its robust resolution and comprehensive reference sequences [78]. Techniques such as DNA barcoding (for isolated strains) and DNA metabarcoding (for complex communities) provide high accuracy and reliability by comparing obtained sequences to curated, high-quality reference databases [78].
Performance Comparison and Data Analysis
A head-to-head evaluation of chromogenic media and molecular methods reveals critical differences in their performance characteristics, which are summarized in the table below.
Table 1: Direct Comparison of Chromogenic Media and Molecular Methods for Yeast Identification
| Performance Characteristic | Chromogenic Media | Molecular Methods (e.g., DNA Barcoding) |
|---|---|---|
| Time to Identification | 24 - 48 hours [77] | Several hours to a day (post-DNA extraction) [78] |
| Analytical Specificity | Presumptive species-level identification; can misidentify uncommon species or variants [77] | High species-level specificity; can distinguish closely related species [78] |
| Key Limiting Factor | Relies on enzyme expression; subjective color interpretation [77] | Dependent on quality and completeness of reference databases [78] |
| Quantitative Data | Provides colony-forming units (CFUs) | Can provide relative or absolute quantification (e.g., via qPCR) |
| Throughput | Suitable for low-to-moderate throughput | High-throughput capability (e.g., metabarcoding) [78] |
| Ease of Use | Simple, requires no specialized equipment | Requires specialized equipment and technical expertise |
| Cost | Low per-sample cost; minimal capital investment | Higher per-sample cost; requires significant capital investment |
A recent 2025 study evaluating five commercial chromogenic media using 175 strains of Candida demonstrated that while morphological features for most species were consistent with manufacturers' claims, some species exhibited reproducible but previously undescribed morphological traits, complicating interpretation [77]. A critical finding was that the multidrug-resistant Candida auris could not be reliably identified on three of the five media tested [77]. This underscores the need for diagnostic caution. Molecular methods, while highly accurate, face their own challenges, primarily the limited availability of high-quality, type-derived reference sequences in public databases, which can lead to misidentification or failed matches [78].
Table 2: Performance of Specific Chromogenic Media Against Key Candida Species
| Chromogenic Medium (Manufacturer) | C. albicans | C. tropicalis | C. krusei | C. auris |
|---|---|---|---|---|
| BD CHROMagar Candida | Green | Blue | Pale, Pink | Not reliably identified [77] |
| CHROM ID Candida (bioMérieux) | Green | Blue | Pink, Halo | Not reliably identified [77] |
| CHROMAgar Candida Plus (CHROMagar) | Green | Metallic Blue | Pink, Halo | Improved detection [77] |
| Brilliance Candida Agar (OXOID) | Green | Blue | Pink, Halo | Not reliably identified [77] |
Experimental Protocols for Yeast Identification
Protocol for Identification Using Chromogenic Media
This protocol is designed for the presumptive identification of yeast contaminants isolated from cell culture samples.
1. Sample Inoculation:
- Take a suspect cell culture sample (e.g., from a contaminated flask or a routine check).
- If the medium appears turbid or yellowish, or if microscopic examination reveals oval, budding cells, proceed with subculturing [42].
- Using a sterile loop, streak the sample onto the surface of a pre-poured chromogenic medium plate (e.g., CHROMagar Candida Plus) to obtain isolated colonies.
2. Incubation:
- Invert the plate and incubate aerobically at 30°C or an appropriate temperature for the suspected yeast for 24-48 hours [77].
3. Colony Morphology Assessment:
- After incubation, examine the plates for growth and colony color.
- Record the color, size, and any unique morphological characteristics of the colonies.
- Compare the observed colony appearance to the manufacturer's reference guide for presumptive identification (e.g., green for C. albicans, metallic blue for C. tropicalis) [77].
4. Interpretation and Confirmation:
- Note that subtle differences in colony shade can complicate interpretation.
- Presumptive identification should be confirmed with a molecular method, especially for emerging or less common species like C. auris or if the result dictates a critical therapeutic or containment decision [77].
Protocol for Identification Using DNA Barcoding
This protocol outlines the steps for species-level identification of a purified yeast isolate via sequencing of the ITS region.
1. DNA Extraction:
- Transfer a pure colony of the yeast isolate to a microcentrifuge tube.
- Use a commercial fungal DNA extraction kit to isolate high-quality genomic DNA. This typically involves cell lysis (enzymatic and/or mechanical), protein removal, and DNA purification.
- Quantify the extracted DNA using a spectrophotometer or fluorometer.
2. PCR Amplification:
- Prepare a PCR master mix containing:
- Taq DNA polymerase, buffer, and MgCl₂.
- Deoxynucleotide triphosphates (dNTPs).
- Forward and reverse primers targeting the ITS region (e.g., ITS1 and ITS4 primers).
- Add the template DNA to the master mix and run the PCR in a thermal cycler using a standard cycling program: initial denaturation (95°C for 5 min); 35 cycles of denaturation (95°C for 30s), annealing (55°C for 30s), and extension (72°C for 1 min); final extension (72°C for 7 min).
3. Sequencing and Data Analysis:
- Purify the PCR amplicon to remove excess primers and dNTPs.
- Submit the purified product for Sanger sequencing in both directions using the same PCR primers.
- Assemble the forward and reverse sequences to obtain a high-quality consensus sequence.
- Perform a BLAST search against a curated, high-quality reference database, such as the Westerdijk Institute's dataset or NCBI's RefSeq, using sequence similarity cutoffs established for yeast taxonomic groups [78].
Workflow Visualization
The following diagram illustrates the logical workflow for detecting and identifying yeast contamination in cell culture, integrating both chromogenic and molecular methods.
Essential Research Reagent Solutions
The following table details key reagents and materials essential for implementing the yeast identification methods discussed in this whitepaper.
Table 3: Key Research Reagent Solutions for Yeast Identification
| Item | Function/Application | Example Product/Specification |
|---|---|---|
| Chromogenic Media | Selective growth and presumptive identification of yeast species via colony color. | CHROMAgar Candida Plus, BD CHROMagar Candida, Brilliance Candida Agar [77]. |
| DNA Extraction Kit | Isolation of high-quality, PCR-ready genomic DNA from yeast cells. | Commercial fungal DNA extraction kits. |
| PCR Master Mix | Amplification of target DNA barcode regions (e.g., ITS, LSU). | Contains Taq polymerase, dNTPs, buffer, and MgCl₂. |
| Barcoding Primers | Specific primers for PCR amplification of standard fungal barcode regions. | ITS1/ITS4 for the ITS region; NL1/NL4 for the LSU D1/D2 domain [78]. |
| Sanger Sequencing Kit | Generation of nucleotide sequence data from PCR amplicons. | Dye-terminator sequencing chemistry. |
| Mycoplasma Detection Kit | Routine monitoring for mycoplasma, a common co-contaminant. | MyAway Plus Mycoplasma Detection Kit [42]. |
| Antifungal Agents | Potential rescue of contaminated cultures (use with caution). | Amphotericin B, Fluconazole [42]. |
Chromogenic media and molecular methods are not mutually exclusive but are instead complementary tools in the fight against yeast contamination in cell culture. Chromogenic media serve as an excellent frontline defense, providing a rapid, cost-effective, and accessible means for presumptive identification, which is crucial for initiating immediate containment procedures. However, their limitations in specificity necessitate confirmation with molecular techniques. Molecular methods, particularly DNA barcoding, provide the definitive, species-level identification required for understanding contamination sources, selecting appropriate antifungals, and validating the sterility of critical cell lines. The optimal strategy for a modern research laboratory is to integrate both approaches: using chromogenic media for routine screening and rapid triage, and molecular methods for confirmation and critical identifications. This synergistic approach ensures the highest level of confidence in cell culture quality control, thereby safeguarding research integrity and supporting robust, reproducible scientific discovery.
Establishing Lab-Specific Validation Protocols for Regulatory Compliance
Yeast contamination represents a persistent and significant threat to the integrity of cell-based research and biomanufacturing. As eukaryotic microorganisms, yeasts can compete with cell lines for nutrients, alter the microenvironment by shifting pH, and secrete metabolites that interfere with experimental outcomes, ultimately compromising data quality and rendering products like vaccines or drugs unusable [16] [17]. The establishment of lab-specific validation protocols is not merely a best practice but a fundamental requirement for regulatory compliance in drug development and preclinical research. Such protocols ensure the reliability, reproducibility, and safety of biological products, providing a formalized framework for detecting contamination before it can impact critical experiments or production batches.
The challenge in detecting yeast contamination lies in its subtlety; in initial stages, the medium may show little change in pH, and visual turbidity can be minimal, allowing low-level contamination to persist undetected [15] [31]. Without robust, validated detection methods, laboratories risk the validity of their entire research portfolio. This guide provides a comprehensive technical framework for developing, implementing, and validating rigorous yeast detection protocols tailored to a laboratory's specific cell culture workflows, ensuring compliance with regulatory standards from agencies such as the FDA and EMA.
Yeasts are unicellular fungi that range in size from a few micrometers up to 40 µm [15]. In cell culture, they reproduce by budding, a process where a smaller daughter cell forms off of a mother cell [16]. This rapid replication allows them to quickly overtake a culture. The primary impacts of yeast contamination include:
- Nutrient Depletion: Yeasts rapidly consume nutrients from the culture medium, starving the intended mammalian cells [79].
- pH Shift: In advanced stages of contamination, yeast metabolism can cause a sharp increase in the pH of the culture medium, indicated by a color change in phenol-red containing media from red/orange to purple [16] [15].
- Cellular Stress and Death: The combined effects of nutrient starvation and metabolic byproduct accumulation induce stress on cultured cells, leading to altered morphology and eventual cell death [17].
- Compromised Data and Product Loss: Biological data and assay results become unreliable, and valuable cell lines and biopharmaceutical products may be lost permanently [17].
Establishing the Validation Framework
A validated protocol must demonstrate several key performance characteristics to meet regulatory scrutiny. The framework should be built upon the following pillars:
- Specificity: The protocol must reliably distinguish yeast cells from other particulates, cell debris, and common contaminants (e.g., bacteria, mycoplasma) in the specific cell culture matrix. This involves microscopic confirmation and cross-testing against other common contaminants [51].
- Sensitivity and Limit of Detection (LOD): The LOD is the lowest number of yeast cells per unit volume that can be reliably detected by the method. Validation requires repeatedly testing spiked samples with known, low concentrations of yeast to establish the threshold at which detection is consistent (e.g., 95% detection rate) [51].
- Accuracy and Precision: Accuracy measures how close the test result is to the true value, while precision (repeatability and reproducibility) measures the consistency of results across multiple tests of the same sample, different operators, and different days [51].
- Robustness: The protocol should yield consistent results despite minor, deliberate variations in method parameters, such as incubation times, dye concentrations, or different lots of culture media [51].
Core Methodologies for Yeast Detection and Identification
A multi-faceted approach to detection is critical for comprehensive monitoring. The following table summarizes the key quantitative attributes of common yeast detection methods.
Table 1: Quantitative Comparison of Yeast Detection Methods
| Method | Approximate Time to Result | Estimated Limit of Detection (Cells/mL) | Key Measurable Output |
|---|---|---|---|
| Direct Microscopy | 10-30 minutes | ( 1 \times 10^4 ) to ( 1 \times 10^5 ) [51] | Cell count via hemocytometer |
| Culture-based (CFU) | 2-5 days | ( 1 ) to ( 10 ) [51] | Colony-Forming Units (CFU) |
| qPCR | 4-8 hours | ( 10 ) to ( 100 ) [17] | Cycle threshold (Ct) value |
| Dielectric Spectroscopy | Real-time (on-line) | Varies with biomass [51] | Permittivity (pF/cm) |
Macroscopic and Microscopic Examination
Macroscopic and microscopic examination serves as the first line of defense due to its speed and ease of use.
- Macroscopic Indicators: The earliest sign is often a slight increase in turbidity or cloudiness in the culture medium under gentle swirling [31]. Unlike bacterial contamination, which rapidly acidifies the medium, the pH in yeast-contaminated cultures remains stable initially but can increase sharply (become alkaline) in heavily contaminated cultures [16] [15].
- Microscopic Identification: Yeast contamination can be visualized using phase-contrast microscopy at 100x to 400x magnification. Yeasts appear as bright, ovoid, or spherical particles between the mammalian cells. A key diagnostic feature is the observation of budding, where a smaller, nascent cell is attached to a larger one [16] [31]. They may exist as single cells or in chains.
Culture-Based Methods: Colony Forming Units (CFU) Assay
The CFU assay is a gold standard for quantifying viable yeast cells, as it only counts cells capable of reproduction.
- Principle: A serially diluted sample of the cell culture is plated onto a solid nutrient agar plate (e.g., Sabouraud Dextrose Agar). Each viable yeast cell will grow and multiply to form a distinct colony that is visible to the naked eye after incubation. Counting these colonies allows for back-calculation of the original concentration of yeast in the sample.
- Detailed Protocol:
- Sample Preparation: Aseptically withdraw a sample (e.g., 1 mL) from the culture vessel. For adherent cells, include both medium and a brief trypsinization if necessary to dislodge any adherent microbes.
- Serial Dilution: Prepare a logarithmic dilution series (e.g., ( 10^{-1} ), ( 10^{-2} ), ( 10^{-3} ), ( 10^{-4} )) in sterile phosphate-buffered saline (PBS) or another appropriate diluent.
- Plating: Spread a fixed volume (e.g., 100 µL) of each dilution onto the surface of pre-poured agar plates in duplicate.
- Incubation: Invert and incubate plates at a temperature conducive to yeast growth (e.g., 20-30°C) for 2-5 days.
- Enumeration and Calculation: Count the plates containing 30-300 discrete colonies. Calculate the CFU/mL using the formula: ( CFU/mL = \frac{\text{Number of colonies}}{\text{Volume plated (mL)} \times \text{Dilution factor}} ) This method has been validated even in complex, particle-rich media like lignocellulosic slurries, demonstrating its robustness [51].
Molecular and Advanced Detection Methods
For higher sensitivity and faster results, molecular and advanced physical methods are employed.
Quantitative Polymerase Chain Reaction (qPCR):
- Principle: This method targets and amplifies yeast-specific DNA sequences (e.g., from the ITS region). The point in the reaction (Cycle threshold or Ct) at which the amplification signal crosses a predefined threshold is proportional to the starting quantity of yeast DNA in the sample.
- Protocol Considerations: DNA extraction must be efficient and consistent from the complex cell culture matrix. The use of an internal amplification control is critical to rule out PCR inhibition. The primer and probe sets must be meticulously validated for specificity against the host cell DNA and other common contaminants [17] [79]. Studies note that DNA extraction can be a challenge in certain complex media, potentially affecting quantification [51].
Dielectric Spectroscopy:
- Principle: This label-free, on-line technique measures the permittivity of the culture broth, which is proportional to the volume fraction of intact, viable cells with intact plasma membranes. As yeast cells are typically smaller than mammalian cells, sophisticated calibration is required to distinguish their signal.
- Application: It is most valuable in bioprocessing for real-time monitoring. A statistically significant calibration model must be developed to correlate permittivity signals with viable yeast concentration, a process that has been demonstrated in complex media [51].
Designing a Lab-Specific Validation Protocol
Integrating the above methods into a coherent, scheduled protocol is key to compliance.
The Testing Workflow
A robust lab-specific protocol should incorporate routine screening and definitive confirmation.
Protocol Validation Experiments
To formally validate the chosen method(s), the following experiments must be documented:
- Specificity Testing: Test the method against pure cultures of your cell lines, known yeast strains, and other potential contaminants (bacteria, mycoplasma, other fungal species). The result should be positive only for yeast and negative for all other samples.
- Limit of Detection (LOD) Determination: Spike a known, low number of yeast cells (e.g., 10-100 CFU) into sterile culture medium and your cell culture. Process the sample through your detection method. Repeat this process at least 5-10 times. The LOD is the lowest concentration at which 95% of the spiked samples test positive.
- Precision Assessment: Perform repeatability (same operator, same day, same equipment) and intermediate precision (different operator, different day) testing on samples spiked with low, mid, and high concentrations of yeast. Calculate the coefficient of variation (%CV) for the results at each level.
Table 2: Essential Research Reagents for Yeast Detection Protocols
| Reagent / Material | Function / Application | Technical Considerations |
|---|---|---|
| Phase-Contrast Microscope | Visualization of yeast morphology and budding. | Essential for routine screening. Magnification of 100x-400x is sufficient [31]. |
| Hemocytometer | Manual enumeration of yeast cell density. | Requires experience to distinguish yeast from debris; good for semi-quantitative estimates [51]. |
| Sabouraud Dextrose Agar | Selective growth medium for fungi/yeast. | Supports yeast growth while inhibiting some bacteria; used for CFU assays [51]. |
| Yeast-Specific qPCR Assay | Detection and quantification of yeast DNA. | Must include primers/probes for conserved yeast genes (e.g., ITS) and a validated DNA extraction protocol [17] [51]. |
| Dielectric Spectroscope | On-line, real-time monitoring of viable cell biomass. | Requires instrument-specific calibration models to differentiate yeast from culture cells [51]. |
Contamination Prevention and Corrective Action
Prevention is always more effective than remediation. Key strategies include:
- Rigorous Aseptic Technique: This is the cornerstone of contamination control. Always work in a properly maintained laminar flow hood, disinfect all surfaces and equipment with 70% ethanol or a validated disinfectant, and use sterile pipette tips and reagents [16] [15] [17].
- Judicious Use of Antibiotics: Avoid the routine use of antibiotics and antimycotics in culture media. Their continuous use can promote resistant strains and mask low-level contamination, allowing it to persist cryptically [16] [15]. They should be used only as a short-term last resort.
- Environmental Control: Regularly clean and decontaminate CO₂ incubators, including shelves, door gaskets, and water trays, as these are common sources of fungal spores [15] [17]. Ensure HEPA filters in hoods and incubators are replaced as per schedule.
- Quarantine for New Cell Lines: All new cell lines introduced into the facility should be quarantined and tested for yeast (and other contaminants like mycoplasma) before being integrated into the main cell culture space [15].
When contamination is confirmed, the standard and safest practice is to discard the culture by autoclaving [16] [79]. For irreplaceable cultures, attempts to decontaminate with high concentrations of antimycotics can be made, but this is risky. Such treatments can be toxic to the cells and may not fully eradicate the contamination, and the rescued cell line must be thoroughly characterized afterward [16].
Documentation and Compliance
Meticulous documentation is the evidence required for regulatory compliance.
- The Quality Control Plan: This master document should outline the entire validation strategy, including the rationale for chosen methods, sampling plans, acceptance criteria for all validation parameters, and the schedule for routine monitoring.
- Standard Operating Procedures (SOPs): Write detailed, step-by-step SOPs for every detection method employed. These should be written clearly enough for any trained technician to follow reproducibly.
- Data Recording and Reporting: Maintain bound notebooks or electronic lab notebooks with records of all testing. Data should include sample identification, date, analyst, method used, raw data, calculations, and final conclusion. Any deviation from the SOP must be documented and justified.
- Change Control: Implement a formal process for managing any changes to the validated methods. Even minor changes (e.g., new lot of media, new reagent supplier) may require re-validation or at least documented verification to ensure the method's performance remains unaffected.
By implementing this comprehensive, validated framework for yeast detection, laboratories can confidently assure the quality of their cell cultures, protect their research investments, and generate data that meets the stringent demands of regulatory authorities in the drug development pipeline.
Conclusion
Effective yeast detection requires a multifaceted strategy, combining rapid macroscopic observation with confirmatory microscopic and molecular techniques. As research progresses toward more complex culture systems like 3D models and industrial bioreactors, reliance on single detection methods becomes insufficient. The future of contamination control lies in implementing tiered detection strategies that match method sensitivity to application criticality. This proactive, validated approach is fundamental to ensuring the reliability of preclinical data, the safety of biopharmaceutical products, and the successful translation of biomedical research into clinical applications. Emerging technologies including improved automated counters for complex media and refined molecular diagnostics will further enhance detection capabilities.
References
- 1. InCelligence - Contamination -bacteria- yeast -funghi [https://www.incelligence.de/en/cell-culture/cell-culture-contamination/bacteria-yeast-fungi]
- 2. | Thermo Fisher Scientific - UK Cell Culture Contamination [https://www.thermofisher.com/uk/en/home/references/gibco-cell-culture-basics/biological-contamination.html]
- 3. How to detect a yeast in your contamination - Eppendorf... cell culture [https://www.eppendorf.com/hu-en/lab-academy/life-science/cell-biology/how-to-detect-a-yeast-contamination-in-your-cell-culture/]
- 4. 4.4: Turbidity - Biology LibreTexts [https://bio.libretexts.org/Learning_Objects/Laboratory_Experiments/Microbiology_Labs/Microbiology_Labs_II/04%3A_Enumeration_of_Microorganisms/4.04%3A_Turbidity]
- 5. Yeast Viability and Vitality Assays for Flow Cytometry [https://www.thermofisher.com/us/en/home/life-science/cell-analysis/flow-cytometry/flow-cytometry-assays-reagents/flow-cytometry-microbiology-assays/flow-cytometry-yeast-viability-vitality-assays.html]
- 6. A flow cytometry method for quantitative measurement and ... [https://www.nature.com/articles/s41598-024-72030-w]
- 7. Flow cytometric resolution of yeast is affected by enzymatic ... [https://pmc.ncbi.nlm.nih.gov/articles/PMC9433820/]
- 8. Yeast HCP ELISA Kits [https://qbd.creative-diagnostics.com/products/yeast-hcp-elisa-kits.html]
- 9. Pichia Yeast Host Cell Protein ELISA Kit(96T) [https://m.sunlongbiotech.com/goods.php?id=165765]
- 10. Cell culture challenges: Contamination & prevention [https://greenelephantbiotech.com/blog/cell-culture-challenges-contamination-prevention/]
- 11. Enhancing yeast cell tracking with a time-symmetric deep ... [https://www.nature.com/articles/s41540-024-00466-x]
- 12. Efficient Detection of Labeled Yeasts by Flow Cytometry [https://pmc.ncbi.nlm.nih.gov/articles/PMC106380/]
- 13. Protocol for cellular age prediction in yeast and human ... [https://pmc.ncbi.nlm.nih.gov/articles/PMC12357082/]
- 14. Machine learning driven semi-automated framework for ... [https://www.sciencedirect.com/science/article/abs/pii/S1087184525000659]
- 15. Cell Culture Contamination: 5 Common Sources and How ... [https://www.capricorn-scientific.com/knowledge-center/cell-culture-contamination]
- 16. Cell Culture Contamination | Thermo Fisher Scientific - US [https://www.thermofisher.com/us/en/home/references/gibco-cell-culture-basics/biological-contamination.html]
- 17. Cell Culture Contamination: How to Prevent Fungal, Yeast, ... [https://www.corning.com/worldwide/en/products/life-sciences/resources/stories/at-the-bench/how-to-control-bacterial-contamination-and-other-unwelcome-micro.html]
- 18. How to Detect Cell Culture Contamination [https://www.goldbio.com/blogs/articles/how-to-detect-cell-culture-contamination?srsltid=AfmBOoqrxnWGx7FShnDBSfNgXw6OWbJFQNa5ctWgJa9xyRJx6Ewh_Uft]
- 19. Detection and Identification of Food-Borne Yeasts [https://www.mdpi.com/2076-2607/13/5/981]
- 20. Novel method detects microbial contamination in cell cultures [https://news.mit.edu/2025/novel-method-detects-microbial-contamination-smart-0425]
- 21. Preserving Yeast and Mold Isolates | Fungal Diseases [https://restoredcdc.org/www.cdc.gov/fungal/hcp/laboratories/preserving-yeast-and-mold-isolates-1.html]
- 22. Yeast [https://unclineberger.org/tissueculture/contaminant/yeastcontam/]
- 23. Yeast cell counting using flow cytometry in yeast cultures [https://www.oiv.int/node/4090]
- 24. LIVE/DEAD Yeast Viability Kit Protocol [https://www.thermofisher.com/us/en/home/references/protocols/cell-and-tissue-analysis/protocols/live-dead-yeast-viability-protocol.html]
- 25. Cell counting with a hemocytometer (including calculations) [https://www.integra-biosciences.com/united-states/en/blog/article/cell-counting-hemocytometer-including-calculations]
- 26. Cell Cytometry: Review and Perspective on Biotechnological ... [https://pmc.ncbi.nlm.nih.gov/articles/PMC6591278/]
- 27. Counting yeast with a hemocytometer [https://www.hemocytometer.org/counting-yeast-with-a-hemocytometer/]
- 28. Cell Counting Your Yeast Culture - All Things Fermentation Blog [https://blog.whitelabs.com/cell-counting-your-yeast-culture]
- 29. Counting Yeast Cells Using a Hemocytometer [https://www.revvity.com/ask/counting-yeast-cells-using-a-hemocytometer]
- 30. Counting cells using a hemocytometer [https://www.abcam.com/en-us/technical-resources/protocols/counting-cells-using-a-haemocytometer]
- 31. How to detect a yeast contamination in your cell culture [https://www.eppendorf.com/us-en/lab-academy/life-science/cell-biology/how-to-detect-a-yeast-contamination-in-your-cell-culture/]
- 32. Spot Assay and Colony Forming Unit (CFU) Analyses– ... [https://pmc.ncbi.nlm.nih.gov/articles/PMC10632158/]
- 33. Sensitive, high-throughput, metabolic analysis by ... [https://www.nature.com/articles/s41467-025-63964-4]
- 34. Yeast cell detection using fuzzy automatic contrast ... [https://www.nature.com/articles/s41598-023-43452-9]
- 35. Accelerating cell culture media development using ... [https://www.nature.com/articles/s41467-025-61113-5]
- 36. An Optimized LIVE/DEAD Assay Coupled with Flow ... [https://pmc.ncbi.nlm.nih.gov/articles/PMC12453624/]
- 37. Flow Cytometric Evaluation of Yeast-Bacterial Cell- ... [https://pmc.ncbi.nlm.nih.gov/articles/PMC10072783/]
- 38. Cell culture contaminations: bacteria, yeast, fungi - InCelligence [https://incelligence.de/en/cell-culture/cell-culture-contamination/bacteria-yeast-fungi]
- 39. Fungal Contamination in Cell Culture & Other [https://www.akadeum.com/blog/cell-culture-contamination-identifying-mycoplasma-fungus-and-bacteria-in-a-growth-medium/?srsltid=AfmBOooxEoaB5xJDFl7oJgsvEHJnfSYlYQry1ST0P31JYcW3PgI_GZz7]
- 40. Evaluation of microbial qPCR workflows using engineered ... [https://pmc.ncbi.nlm.nih.gov/articles/PMC4827694/]
- 41. VOC analysis for rapid, early detection of bacteria, mold ... [https://www.sciencedirect.com/science/article/pii/S2472555225000759]
- 42. Troubleshooting Cell Culture Contamination: A Practical ... [https://www.yeasenbio.com/blogs/cell/troubleshooting-cell-culture-contamination-a-practical-solution-guide]
- 43. How to reduce autofluorescence in cell-based assays [https://www.bmglabtech.com/en/howto-notes/how-to-reduce-autofluorescence-in-cell-based-assays/]
- 44. How to reduce autofluorescence [https://www.ptglab.com/news/blog/how-to-reduce-autofluorescence/?srsltid=AfmBOoqM-fQwjFGihd8zGjYZZgMeg3hovqMhcO2AY6CAOG7N-YGp8poY]
- 45. Suppression of auto-fluorescence from high-resolution 3D ... [https://www.sciencedirect.com/science/article/pii/S2590007223000187]
- 46. Evaluation of the inter-particle interference of cellulose and ... [https://pubmed.ncbi.nlm.nih.gov/31982518/]
- 47. Lignocellulosic Particle - an overview [https://www.sciencedirect.com/topics/engineering/lignocellulosic-particle]
- 48. Insights into cell robustness against lignocellulosic ... [https://www.nature.com/articles/s41598-021-04554-4]
- 49. How to Detect Cell Culture Contamination [https://www.goldbio.com/blogs/articles/how-to-detect-cell-culture-contamination?srsltid=AfmBOorKGP6T8ThlZl_h5Uw38isRwvi0eCGa_bqyrlcCzW5rBebnjRCi]
- 50. Current strategies with implementation of three- ... [https://pmc.ncbi.nlm.nih.gov/articles/PMC9372643/]
- 51. Analysis of methods for quantifying yeast cell concentration ... [https://www.nature.com/articles/s41598-021-90703-8]
- 52. Precision Fermentation and the Future of Biomanufacturing [https://www.pharmaadvancement.com/manufacturing/precision-fermentation-and-the-future-of-biomanufacturing/]
- 53. Optimization and Validation of a Novel Three-Dimensional ... [https://www.mdpi.com/2072-6694/13/19/4936]
- 54. High-Throughput Rapid and Inexpensive Assay for ... [https://pmc.ncbi.nlm.nih.gov/articles/PMC6406537/]
- 55. Quality Control in Fermentation Processes [https://editverse.com/quality-control-in-fermentation-processes/]
- 56. Antifungal Agents - StatPearls - NCBI Bookshelf - NIH [https://www.ncbi.nlm.nih.gov/books/NBK538168/]
- 57. New antifungal strategies and drug development against ... [https://pmc.ncbi.nlm.nih.gov/articles/PMC12507853/]
- 58. WHO warns of widespread resistance to common ... [https://www.paho.org/en/news/13-10-2025-who-warns-widespread-resistance-common-antibiotics-worldwide]
- 59. CDC Report Finds Sharp Rise in Dangerous Drug ... [https://www.cdc.gov/media/releases/2025/2025-cdc-report-finds-sharp-rise-in-dangerous-drug-resistant-bacteria.html]
- 60. New antifungal strategies and drug development against ... [https://www.frontiersin.org/journals/cellular-and-infection-microbiology/articles/10.3389/fcimb.2025.1662442/full]
- 61. In situ monitoring reveals cellular environmental ... [https://pmc.ncbi.nlm.nih.gov/articles/PMC8826360/]
- 62. The Importance of Environmental Monitoring Systems in Labs [https://reesscientific.com/blog/importance-enviromental-monitoring-labs]
- 63. 4 Key Cell Culture Parameters Explained - Essential guide [https://www.tecnic.eu/4-key-cell-culture-parameters-explained/]
- 64. Real-time monitoring of cell culture contamination via ... [https://www.sciencedirect.com/science/article/pii/S0039914025014493]
- 65. How to detect a yeast in your contamination - Eppendorf... cell culture [https://www.eppendorf.com/rs-en/lab-academy/life-science/cell-biology/how-to-detect-a-yeast-contamination-in-your-cell-culture/]
- 66. A Beginner's Guide to Cell Culture: Practical Advice for ... [https://pmc.ncbi.nlm.nih.gov/articles/PMC10000895/]
- 67. Assessment of Accuracy of Identification of Pathogenic ... [https://pmc.ncbi.nlm.nih.gov/articles/PMC3421536/]
- 68. A Quantitative Imaging-Based Protocol for Yeast Growth ... [https://pmc.ncbi.nlm.nih.gov/articles/PMC7757406/]
- 69. A yeast surface display platform for characterizing CAR T ... [https://www.nature.com/articles/s41467-025-65236-7]
- 70. Yeast-based screening platforms to understand and ... [https://www.sciencedirect.com/science/article/abs/pii/S0167779924000957]
- 71. Monitoring viable yeast populations using flow cytometry in ... [https://link.springer.com/article/10.1007/s00217-025-04792-0]
- 72. A Comprehensive Review of Identification Methods for ... [https://pmc.ncbi.nlm.nih.gov/articles/PMC10492613/]
- 73. Rapid and cost - effective identification of microorganisms from positive... [https://bmcinfectdis.biomedcentral.com/articles/10.1186/s12879-025-11129-5]
- 74. Chromogenic, Biochemical and Proteomic Identification of ... [https://www.mdpi.com/2309-608X/10/3/218]
- 75. Direct identification and antimicrobial susceptibility testing of ... [https://bmcmicrobiol.biomedcentral.com/articles/10.1186/s12866-025-04337-1]
- 76. Quantitative PCR: An appropriate tool to detect viable but ... [https://www.sciencedirect.com/science/article/abs/pii/S016816051200503X]
- 77. Usefulness of Chromogenic Media in the Identification ... [https://pmc.ncbi.nlm.nih.gov/articles/PMC12452300/]
- 78. Advancing Yeast Identification Using High‐Throughput DNA ... [https://pmc.ncbi.nlm.nih.gov/articles/PMC12649295/]
- 79. Cell Culture: Fungal Contamination in Cell Culture & Other [https://www.akadeum.com/blog/cell-culture-contamination-identifying-mycoplasma-fungus-and-bacteria-in-a-growth-medium/]