Fungal Contamination in Cell Culture: Complete Guide to Sources, Identification, and Prevention for Researchers
This comprehensive guide addresses the critical challenge of fungal contamination in cell culture laboratories, a pervasive threat that compromises experimental validity, product safety, and research reproducibility.
Fungal Contamination in Cell Culture: Complete Guide to Sources, Identification, and Prevention for Researchers
Abstract
This comprehensive guide addresses the critical challenge of fungal contamination in cell culture laboratories, a pervasive threat that compromises experimental validity, product safety, and research reproducibility. Targeting researchers, scientists, and drug development professionals, the article systematically explores the foundational biology of fungal contaminants and their primary sources—from personnel and environmental factors to equipment and seasonal variations. It provides methodological guidance for accurate detection through visual, microscopic, and culture-based techniques, alongside robust troubleshooting protocols for contamination events. The content further validates prevention strategies through comparative analysis of antimycotic agents, facility design considerations, and quality control measures, offering a complete framework for maintaining aseptic conditions and protecting valuable cell lines.
Understanding Fungal Contaminants: Biology, Sources, and Impact on Cell Culture Systems
What Are Fungal Contaminants? Defining Molds, Yeasts, and Their Life Cycles
In the context of cell culture laboratories, fungal contaminants represent a significant threat to experimental integrity and reproducibility. These eukaryotic microorganisms, comprising primarily molds and yeasts, can persistently invade culture systems, leading to compromised research outcomes and substantial economic losses [1]. Fungal contamination is particularly challenging due to the resilience of fungal spores and their ability to thrive in conditions commonly found in cell culture environments, such as the nutrient-rich media and controlled temperatures of incubators [2] [3]. Understanding the fundamental biology, life cycles, and identification methods for these contaminants is paramount for researchers and drug development professionals aiming to safeguard their cellular models.
Fungi are heterotrophic organisms that absorb nutrients directly from their environment, a characteristic that enables them to effectively utilize cell culture media as a food source [4]. This metabolic versatility, combined with their widespread environmental distribution, makes them formidable adversaries in maintaining sterile culture conditions. The following sections provide a technical examination of the defining characteristics, life cycles, and detection methodologies for the principal fungal contaminants encountered in biomedical research settings.
Defining Molds and Yeasts: Core Characteristics
Molds: Multicellular Filamentous Fungi
Molds are multicellular, thread-like fungi characterized by their filamentous growth pattern [5] [6]. The fundamental structural unit of a mold is the hypha (plural: hyphae), which is a tubular, branching cell. A collective mass of hyphae forms a mycelium, which constitutes the vegetative body of the mold and is primarily responsible for nutrient absorption [3] [4]. Molds reproduce through the production of spores, which are specialized reproductive units that can be either sexual or asexual in origin [3]. These spores are typically airborne, making them a common source of contamination in laboratory environments [2].
Yeasts: Unicellular Fungi
Yeasts, in contrast, are defined as unicellular, non-filamentous fungi [5] [6]. They typically exist as solitary cells that reproduce asexually through a process called budding, where a daughter cell forms as an outgrowth from the parent cell [4]. Some yeast species can also reproduce by binary fission. Unlike molds, yeasts are generally not spore-forming species of fungi [5]. Their unicellular nature and smaller size can sometimes make initial visual detection in cell cultures more challenging compared to mold mycelia.
Table 1: Fundamental Characteristics of Molds and Yeasts
| Characteristic | Molds | Yeasts |
|---|---|---|
| Cellularity | Multicellular [5] [6] | Unicellular [5] [6] |
| Growth Form | Filamentous hyphae forming a mycelium [3] | Single, solitary cells [4] |
| Primary Reproduction | Production of spores (sexual or asexual) [3] | Budding (asexual) [4] |
| Sporing | Yes, sporing fungi [5] | No, non-sporing species [5] |
| Colony Morphology | Fuzzy, filamentous appearance [5] [6] | Soft, opaque, and cream-colored [5] |
Comparative Biology: Molds vs. Yeasts
A side-by-side comparison of the biological and growth properties of molds and yeasts reveals critical differences that influence their behavior as contaminants. The table below summarizes key distinguishing factors essential for identification and handling in a research context.
Table 2: Biological and Growth Properties of Molds and Yeasts
| Property | Molds | Yeasts |
|---|---|---|
| Hyphae | Possess true, multicellular filaments [5] | Do not have true hyphae; may form pseudo-hyphae [5] |
| Colony Color | Often colorful (e.g., green, black, pink, orange) [5] [6] | Generally less colorful (white, pale yellow, cream) [5] [6] |
| Oxygen Requirement | Obligate aerobes [3] | Aerobic or facultative anaerobic [5] [3] |
| Optimal pH Range | Wider pH range [5] | Limited to pH ~4.0-4.5 [5] |
| Growth Rate in Culture | Slower growth after inoculation [5] | Rapid growth, usually visible within 24-36 hours [5] |
| Common Examples | Aspergillus, Penicillium, Mucor [5] [6] | Saccharomyces cerevisiae, Cryptococcus neoformans [5] [6] |
Life Cycles and Reproductive Strategies
Life Cycle of Molds
The life cycle of molds involves both vegetative growth and reproductive phases, centered on the development and dissemination of spores. The following diagram illustrates the core life cycle and its relation to laboratory contamination.
Molds propagate through the production of spores, which can be either asexual or sexual [3]. Asexual spores, such as sporangiospores (formed inside a sac-like structure called a sporangium) and conidia (formed externally on specialized hyphae), are genetically identical to the parent and are the primary agents for rapid colonization in a culture environment [3] [4]. Sexual spores, including zygospores, ascospores, and basidiospores, result from the fusion of genetic material from two parent strains and contribute to genetic diversity [3]. These spores are remarkably resilient and can survive harsh, inhospitable conditions in a dormant state, only to become activated upon encountering the favorable growth conditions of a cell culture incubator [7].
Life Cycle of Yeasts
The life cycle of yeasts is predominantly characterized by asexual reproduction, which allows for rapid population expansion in a suitable environment like cell culture media.
The most common mode of reproduction in yeasts is budding [6] [4]. In this process, a small bud, or protrusion, forms on the parent cell (the mother cell). The nucleus of the mother cell divides, and one nucleus migrates into the bud. The bud continues to grow until it reaches a size similar to the mother cell, after which it pinches off to become an independent, genetically identical daughter cell [4]. Under certain conditions, some yeasts can also form pseudo-hyphae, which are chains of elongated budding cells that fail to detach, but this is distinct from the true hyphae seen in molds [5].
Detection and Identification in Cell Culture
Visual and Microscopic Identification
Early detection of fungal contamination is critical for managing its impact in a cell culture lab. The initial signs can often be observed macroscopically and confirmed microscopically.
- Macroscopic Signs of Mold Contamination: In early stages, the culture medium may show little change, but as contamination progresses, it often becomes cloudy or turbid. Visible, fuzzy colonies in white, green, black, or other colors may appear on the surface of flasks or in the medium [2] [8]. The pH of the medium typically increases (becomes more alkaline) as the contamination becomes heavy [7].
- Macroscopic Signs of Yeast Contamination: A culture contaminated with yeast will often become turbid, similar to bacterial contamination. A key differentiator is that the pH usually remains stable initially and only increases when the contamination becomes severe [7]. A fermented odor is sometimes noted [2].
- Microscopic Identification: Under low-power microscopy, mold contamination presents as thin, wispy filaments (hyphae) or denser clumps of spores [7]. Yeast cells appear as individual, ovoid, or spherical particles that may be observed in the process of budding off smaller particles [7] [8].
Methodological Workflow for Contamination Diagnosis
The following diagram outlines a systematic experimental workflow for diagnosing suspected fungal contamination in a cell culture setting, incorporating both simple and advanced techniques.
Beyond visual inspection, specific experimental protocols are employed to confirm and characterize fungal contaminants.
- Microscopy: The first-line protocol for contamination troubleshooting involves daily observation of cultures under an inverted phase-contrast microscope [7] [9]. For higher-resolution analysis of morphology, staining techniques such as lactophenol cotton blue can be used to visualize hyphal structures and spores from culture plates.
- Culture-Based Identification: Contaminated medium or a sample from a contaminated cell culture can be streaked onto selective fungal media like Sabouraud Dextrose Agar (SDA) or Potato Dextrose Agar (PDA). These media are optimized for fungal growth and inhibit bacteria. The plates are incubated at 25-30°C and observed for colony formation over several days. Colony morphology, color, and the microscopic features of the resulting growth are key to identification [5].
- Molecular Techniques: For definitive identification, especially with slow-growing or atypical contaminants, polymerase chain reaction (PCR) using pan-fungal primers targeting conserved genomic regions (e.g., the Internal Transcribed Spacer - ITS region) is highly effective [2]. This method provides high sensitivity and specificity and can detect low-level contamination that might be missed by other methods.
Impact and Prevention in Cell Culture Research
Consequences of Fungal Contamination
The introduction of molds or yeasts into cell cultures can have severe consequences for research and development. Fungal contaminants compete with cultured cells for nutrients, leading to nutrient depletion and altered pH of the medium, which in turn results in reduced cell viability, slowed growth, and eventual cell death [1] [9]. Furthermore, fungi can release metabolites and mycotoxins into the culture environment, which can have direct cytotoxic effects or induce unexpected and confounding cellular responses, thereby compromising experimental data and rendering results irreproducible [1] [3]. In biopharmaceutical production, a single contamination event can lead to the loss of an entire production batch, incurring significant financial costs and regulatory complications [1].
Essential Prevention Strategies and the Researcher's Toolkit
Preventing fungal contamination is fundamentally more effective than attempting to eradicate it. A rigorous, multi-layered approach is required, focusing on aseptic technique, environmental control, and routine quality checks.
Table 3: The Scientist's Toolkit: Key Reagents and Materials for Fungal Contamination Prevention
| Tool/Reagent | Function | Application Note |
|---|---|---|
| HEPA-Filtered Biosafety Cabinet | Provides a sterile, particulate-free workspace for all culture manipulations. | Check certification regularly; surface decontaminate with 70% ethanol before and after use [2] [1]. |
| 70% Ethanol | A broad-spectrum disinfectant for surfaces, equipment, and gloves. | Primary agent for decontaminating work surfaces, incubator interiors, and external vessel surfaces [2]. |
| Antimycotics (e.g., Amphotericin B) | Antifungal agents that can be added to media to suppress fungal growth. | Use as a short-term solution, not routinely, as it can mask low-level contamination and may be toxic to some cell lines [7] [8]. |
| Copper Sulfate | Added to incubator water pans to inhibit fungal growth in humidified environments. | A common practice to prevent the water pan from becoming a source of airborne spores [8]. |
| Mycoplasma Detection Kit | Essential for routine screening. | Critical because mycoplasma contamination can coincide with fungal issues; use PCR or fluorescence-based kits every 1-2 months [2] [8]. |
| Sterile, Single-Use Pipettes | Pre-sterilized, disposable tools to prevent cross-contamination. | Avoid reuse of disposables; use separate pipettes for different cell lines [2] [1]. |
Core prevention strategies include:
- Strict Aseptic Technique: This is the cornerstone of contamination control. Researchers must be thoroughly trained and adhere to protocols that minimize the introduction of airborne spores and other contaminants during handling [7] [1].
- Environmental Control: Regular cleaning and maintenance of incubators (including water trays), biosafety cabinets, and other equipment are non-negotiable. Maintaining clean lab environments and controlling access to cell culture areas reduces contamination vectors [2] [8].
- Quality Reagents: Using high-quality, sterile reagents and media from reputable suppliers is essential. Aliquotting sera and media into single-use volumes can prevent the introduction and spread of contaminants from a single source bottle [2] [9].
- Routine Monitoring: Implementing a schedule for routine mycoplasma and microbial testing of all cell lines and culture reagents helps catch cryptic contaminations early [1]. Visual inspection of cultures should be a daily practice.
In the controlled environment of a cell culture laboratory, fungal spores represent a pervasive and resilient threat. The very conditions that promote the growth of mammalian cells—nutrient-rich media, physiological temperatures, and high humidity—are equally conducive to the proliferation of contaminating fungi [10]. Unlike in vivo systems where an immune system provides defense, cell cultures are vulnerable to opportunistic pathogens, making contamination control a cornerstone of reproducible research [10]. Fungal contamination can lead to altered cell morphology, slowed growth rates, and compromised experimental data, ultimately undermining research integrity and drug development efforts [1]. This technical guide examines the common environmental sources of fungal spores in laboratories, provides quantitative data on exposure risks, and outlines robust detection and prevention methodologies essential for maintaining sterile cell culture conditions.
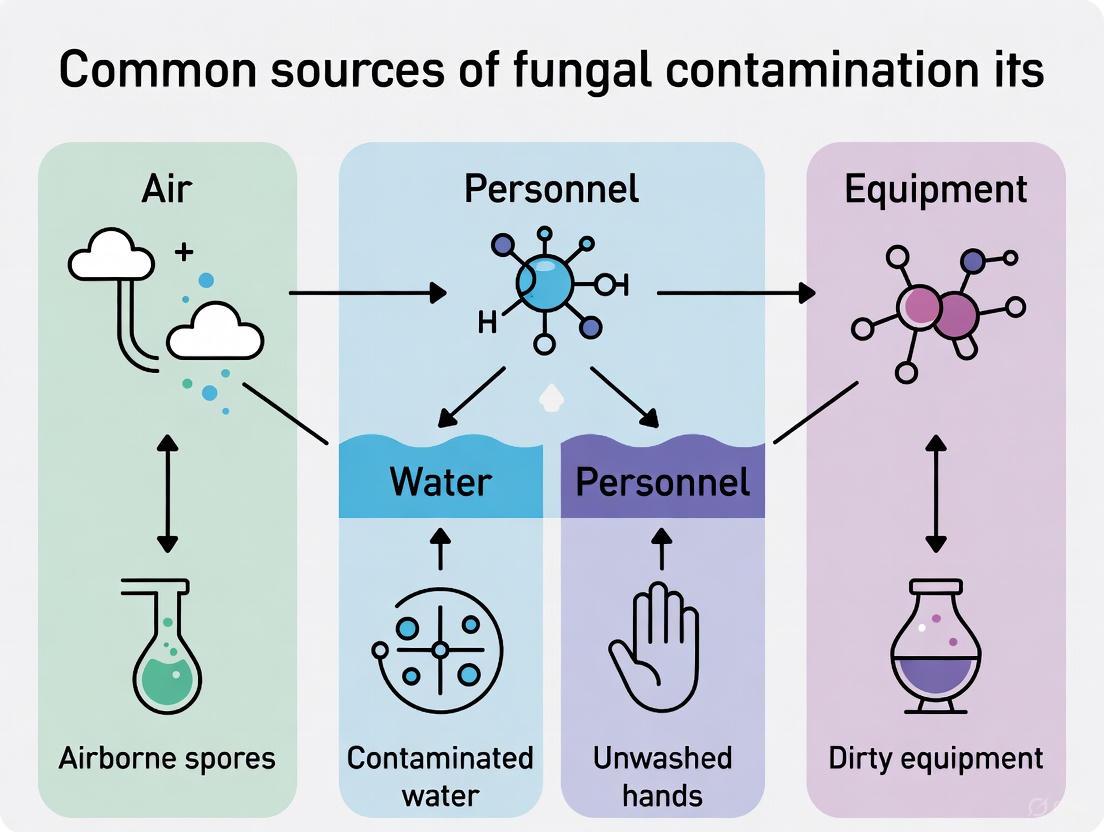
Fungal contaminants primarily enter laboratory environments through airborne transmission or via contaminated reagents and equipment. Their ubiquitous nature in most environments, combined with their ability to survive for long periods as spores, makes them particularly challenging to eliminate [10].
Airborne Transmission Pathways
Air represents the principal vector for fungal spore infiltration into cell culture systems. Spore concentrations vary significantly based on geographic location, season, and local environmental conditions [11]. Outdoor spore levels can range from 1,000 to 50,000 spores/m³ in temperate regions, with highest concentrations occurring during summer and fall months [11]. These ambient spores infiltrate laboratory interiors through ventilation systems, on clothing, or during facility access. Cladosporium is typically the most dominant fungal spore type in outdoor air, though indoor environments often show different taxonomic distributions [11] [12].
Laboratory air handling systems can either mitigate or amplify contamination risks. Improperly maintained HEPA filters or unbalanced airflow can permit spore entry, while humidified incubators and water baths can create ideal microenvironments for spore germination if spores successfully bypass initial containment measures [13]. Activities such as opening windows, frequent personnel movement, and cardboard box introduction significantly increase airborne spore loads in critical areas [13] [12].
Common Contamination Reservoirs in Laboratory Settings
Table 1: Common Fungal Contamination Sources in Laboratories
| Source Category | Specific Examples | Common Fungal Species | Transmission Mechanism |
|---|---|---|---|
| Laboratory Equipment | Humidified incubators, water baths, water trays in CO₂ incubators | Aspergillus, Penicillium | Direct contamination of culture vessels via airborne spores or water aerosols [13] [2] |
| Laboratory Consumables | Cardboard products, contaminated cell stock, non-sterile pipettes | Various filamentous fungi | Introduction during handling or through direct contact [13] [12] |
| Structural Elements | Unfiltered air, dirty HVAC systems, contaminated biosafety cabinets | Cladosporium, Aspergillus/Penicillium groups | Airborne dispersal throughout laboratory environment [13] [1] |
| External Vectors | Lab personnel, plants, fruit, insects | Yeasts (Candida species), environmental fungi | Introduction on clothing, skin, or hair [10] [13] |
| Building Materials | Water-damaged drywall, ceiling tiles, insulation | Stachybotrys, Chaetomium, Memnoniella | Airborne release of spores from degraded materials [12] |
Water-related equipment presents particularly high risks. CO₂ incubator water trays maintaining humidity can become significant fungal reservoirs if not regularly cleaned and treated with appropriate decontamination agents [14]. One study noted that handling moldy hay released up to 160 million fungal spores per gram of dry weight, demonstrating the explosive potential of spore release from contaminated materials [11].
Detection and Identification of Fungal Contamination
Visual and Microscopic Identification
Early detection of fungal contamination is critical for containment. Initial signs may include white, green, or black fuzzy dots that develop into larger furry-looking patches floating in media or attached to culture vessel surfaces [10]. Multicellular molds produce long, filamentous hyphae that form visible colonies, while unicellular yeasts appear as ovoid or spherical particles that may bud off smaller particles [10] [15].
Microscopically, mold contamination typically presents as thin, wisp-like filaments (hyphae), sometimes with denser clumps of spores [15]. Yeast contamination appears as individual ovoid particles typically smaller than cultured cells, identifiable by their characteristic budding reproduction method that forms chains of cells [10]. Unlike bacterial contamination that often causes media acidification (yellowing of phenol red indicator), fungal contamination may not immediately alter pH until reaching advanced stages [10] [15].
Advanced Detection Methodologies
Table 2: Fungal Contamination Detection Methods
| Method Type | Specific Techniques | Detection Capability | Sensitivity Considerations |
|---|---|---|---|
| Cultural Methods | Microbial cultures on appropriate media | Viable fungi, identification to genus level | Time-intensive (2-14 days), requires expertise in fungal morphology [13] |
| Molecular Techniques | PCR, qPCR with fungal-specific primers | Broad-spectrum fungal detection, species identification | High sensitivity, can detect non-viable fungi, requires specialized equipment [2] [15] |
| Microscopic Analysis | Bright-field microscopy, phase contrast | Rapid detection of hyphal structures or yeast cells | Limited to visible contamination, requires experience in fungal morphology [10] [15] |
| Air Sampling | Non-viable spore trap sampling, viable impaction sampling | Airborne spore concentrations, identification | Provides environmental baseline, requires professional interpretation [12] |
| Staining Methods | Lactophenol cotton blue, calcofluor white | Enhanced visualization of fungal elements | Improves microscopic detection, differentiates fungal structures [15] |
For airborne spore monitoring, non-viable spore trap sampling provides quantitative data on indoor spore concentrations. Professional interpretation is essential, as results vary significantly based on sampling location, time of year, and room contents [12]. The diagram below illustrates a comprehensive fungal contamination detection and management workflow.
Figure 1: Fungal contamination detection and management workflow illustrating the multi-modal approach required for effective identification and control.
Quantitative Data on Fungal Spore Concentrations
Understanding expected spore concentration ranges provides critical context for interpreting air sampling results and assessing contamination risks in laboratory environments.
Table 3: Fungal Spore Concentration Guidelines for Interpretation
| Spore Concentration (spores/m³) | Interpretation | Recommended Action |
|---|---|---|
| 0-50 spores | Trace levels, typically not an issue | No immediate action unless Stachybotrys, Chaetomium, or Fusarium are present [12] |
| 50-200 spores | Very low levels | Consider toxic species like Stachybotrys and Memnoniella potentially problematic [12] |
| 200-500 spores | Low levels | Penicillium/Aspergillus, Cladosporium typically not an issue within normal range [12] |
| 500-1,500 spores | Moderate levels | Could be normal fungal ecology depending on site conditions and spore type [12] |
| 1,500-3,000 spores | Elevated levels | Further inspection warranted; may indicate hidden mold source [12] |
| 3,000-10,000 spores | High levels | Remediation necessary without corresponding outdoor concentration [12] |
| 10,000-25,000 spores | Very high levels | Mold source usually identified; comprehensive remediation needed [12] |
| >25,000 spores | Extremely high levels | Mold issue easily identifiable; professional remediation required [12] |
In extreme contamination scenarios, such as buildings with significant water damage, spore concentrations can reach 2 × 10⁶ spores/m³ [11]. Composting facilities have reported Aspergillus fumigatus concentrations ranging from 10⁴ to 10⁷ CFU/m³ when materials are disturbed through activities like shredding and turning [11]. These extreme values highlight the explosive potential of spore release under favorable conditions.
For human health risk assessment, existing evidence suggests Lowest Observed Effect Levels (LOELs) for non-sensitized populations begin at approximately 10⁵ spores/m³ for respiratory symptoms and lung function decline [11]. Asthmatic patients allergic to specific fungi may experience reduced airway conductance at 10⁴ spores/m³ for certain species [11].
Prevention Strategies and Best Practices
Environmental Controls and Aseptic Technique
Preventing fungal contamination requires a multi-layered approach addressing all potential introduction pathways. Aseptic technique forms the foundation of contamination control, with specific practices including surface disinfection with 70% ethanol or isopropanol, proper personal protective equipment, and restricted access to cell culture areas [13] [14].
Environmental controls include:
- HEPA-filtered air in culture rooms and biosafety cabinets [2]
- Regular decontamination of CO₂ incubators including shelves, door gaskets, and water trays [13]
- Proper humidity regulation in warm environments to discourage fungal growth [2]
- Weekly emptying of used media traps and regular cleaning of water baths [13]
Personnel training should emphasize that continuous antibiotic use can mask low-level contamination and promote resistant strains, potentially hiding mycoplasma infections and other cryptic contaminants [15]. Antibiotic-free culturing periods of 2-3 weeks are recommended to reveal hidden contaminants [14].
Research Reagent Solutions for Contamination Control
Table 4: Essential Reagents and Materials for Fungal Contamination Prevention
| Reagent/Material | Function | Application Notes |
|---|---|---|
| 70% Ethanol or Isopropanol | Surface disinfection | Effective against most fungal spores; use for pre- and post-work surface decontamination [13] [14] |
| HEPA Filters | Airborne particle removal | Capture 99.97% of particles ≥0.3 μm; essential for biosafety cabinets and cleanrooms [1] [2] |
| Antimycotics | Inhibit fungal growth | Use selectively rather than routinely to avoid masking contamination; determine optimal concentration empirically [13] [15] |
| 10% Bleach Solution | Surface decontamination | Monthly cleaning of hood spaces; effective sporicidal agent [13] |
| Sterile Single-Use Consumables | Prevent cross-contamination | Pre-sterilized flasks, pipettes; eliminate cleaning validation concerns [1] |
| Fungal Testing Kits | Contamination screening | PCR or ELISA-based; implement monthly testing routine [2] [14] |
| Decontamination Additives | Water bath treatment | Prevent fungal growth in incubator water trays and water baths [14] |
Special Considerations for GMP Environments
In Good Manufacturing Practice (GMP) environments for biopharmaceutical production, contamination control extends beyond research laboratory protocols. Closed processing systems and single-use technologies reduce contamination risks from reusable equipment [1]. Real-time particle monitoring and regular sterility testing provide ongoing environmental assessment, while validated sterilization protocols using 0.1-0.2 μm filters for media and buffer preparation ensure consistent results [1]. Comprehensive batch tracking ensures full traceability during contamination investigations, with documented root cause analyses required for all deviations [1].
Fungal spores represent a persistent, ubiquitous threat to cell culture integrity, with numerous environmental reservoirs in laboratory settings. Effective contamination control requires understanding spore sources, implementing robust detection methodologies, and maintaining vigilant prevention protocols. Through consistent application of aseptic techniques, environmental monitoring, and proper reagent management, researchers can significantly reduce fungal contamination risks, ensuring data integrity and reproducibility in both research and drug development contexts. The continuous education of laboratory personnel on evolving best practices remains paramount in this ongoing challenge, as prevention consistently proves more efficient and cost-effective than remediation of established contamination events.
In the controlled environments of cell culture laboratories, fungal contamination remains a significant and persistent challenge, capable of compromising research integrity, wasting valuable resources, and halting critical experiments. While adherence to aseptic technique is universally acknowledged as a primary defense, a more insidious and often overlooked threat exists: the influence of seasonal climatic variations and the building air handling systems themselves. These external and internal environmental factors can create dynamic conditions that either promote or inhibit the proliferation of fungal contaminants such as Penicillium and Aspergillus species. This whitepaper provides an in-depth technical examination of how temperature, humidity, and air system management interact to affect contamination rates. Framed within a broader thesis on common contamination sources, this guide equips researchers, scientists, and drug development professionals with the data and protocols necessary to identify, understand, and mitigate these environmental risks, thereby safeguarding valuable cell cultures and ensuring the reliability of research outcomes.
The Biology of Fungal Contaminants and Environmental Niches
Fungal contaminants in cell culture, primarily molds and yeasts, are eukaryotic organisms that can thrive in the nutrient-rich environment of culture media. The most common fungal contaminants originate from genera such as Penicillium and Aspergillus [7]. These organisms reproduce via spores that are microscopic, resilient, and easily aerosolized, allowing them to infiltrate laboratory spaces through the air or on surfaces. Once introduced, they can form multicellular filaments (hyphae) or, in the case of yeasts, grow as unicellular particles that bud off smaller particles [7]. Visual identification of advanced contamination often reveals a thin film or turbidity in the culture medium, with fungal mycelia appearing as wisp-like filaments under microscopy [7].
Critically, the growth and reproductive cycles of these fungi are exquisitely sensitive to environmental conditions. Key parameters include:
- Temperature: Governing enzymatic activity and metabolic rates.
- Relative Humidity (RH): Influencing spore viability and hydration.
- pH: Affecting cellular processes and enzyme function.
Understanding the specific optimal ranges for these parameters is essential for predicting periods of elevated contamination risk within a facility. The following diagram illustrates the logical relationship between seasonal changes, building systems, and the resulting contamination risk in a cell culture laboratory.
Quantitative Effects of Temperature, pH, and Humidity on Fungal Growth
Recent empirical studies have precisely quantified the impact of environmental conditions on fungal pathogens relevant to laboratory settings. Research on Penicillium paneum OM1, a species isolated from pears, provides a compelling model for understanding contaminants that could colonize cell culture media. The study systematically evaluated growth and mycotoxin production under a matrix of temperatures, pH levels, and relative humidity [16].
Table 1: Optimal Environmental Conditions for Growth and Patulin Production in Penicillium paneum OM1 [16]
| Parameter | Condition for Highest Growth | Condition for Highest Patulin Production | Experimental Medium |
|---|---|---|---|
| Temperature | 25 °C | 20 °C | Pear Puree Agar Medium (PPAM) |
| pH | 4.5 | 4.5 | Pear Puree Agar Medium (PPAM) |
| Relative Humidity | 97% | 97% | Pear Puree Agar Medium (PPAM) |
This data demonstrates that while conditions for robust growth and toxin production overlap, they are not identical. Maximum growth occurred at 25°C, whereas the highest output of the mycotoxin patulin was observed at a slightly cooler 20°C, with both favoring a mildly acidic pH of 4.5 and a high relative humidity of 97% [16]. This high humidity level is critical for spore germination and hyphal growth. Supporting these findings, a separate study on fungi in stored rice grains, including Aspergillus flavus and Penicillium species, confirmed that fungal populations were significantly enhanced by increases in both temperature and relative humidity [17]. Multiple linear regression analysis further revealed that a one-unit increase in temperature had a greater effect on fungal population growth than a one-unit increase in RH [17].
Air Handling Systems as Vectors and Amplifiers
A building's air handling and water systems are not merely passive conduits for temperature control; they can actively serve as vectors for contamination and provide niches for microbial amplification if not properly designed and maintained. The fundamental operation of these systems involves drawing in outdoor air, which invariably contains fungal spores, conditioning it, and distributing it throughout the building, including laboratory spaces [18].
Key Risk Points in Air Handling Systems
- Air Intakes: The location of air intakes is critical. If placed near sources of contamination such as cooling tower exhausts, building exhaust vents, or loading docks, they can directly introduce a high load of fungal spores into the system [18] [19].
- Filters: Air filters are the first line of defense. However, if filters are of low quality, improperly installed, clogged, or not replaced regularly, their efficiency drops dramatically, allowing spores to pass through.
- Cooling Coils and Condensate Trays: As air is cooled, moisture condenses on cooling coils and collects in drain pans. These areas, if not kept clean and properly drained, provide a constant source of moisture, creating an ideal environment for fungal growth and biofilm formation [18]. This biofilm can then act as a reservoir, continuously seeding the air supply with contaminants.
- Ductwork: Dust and microbial accumulation in ductwork, particularly in sections that are damp or poorly accessible, can become a significant source of contamination [18]. The comprehensive standard AS/NZS 3666.1:2011 outlines minimum requirements for the design, installation, and commissioning of air-handling systems to facilitate microbial control, emphasizing the need for access points for inspection and cleaning [19].
- Humidifiers: Systems that use water-based humidification can aerosolize water-borne microorganisms if the water is not properly treated and maintained [18] [19].
The Role of Water Systems: Cooling Towers
Cooling towers are a potent amplifier of microbial risk, including for fungi. They function by evaporating water to reject heat, creating an aerosol in the process. The water in cooling towers is warm and nutrient-rich from airborne impurities, making it a perfect breeding ground for microbes, including the bacteria Legionella and various fungi [18]. If drift eliminators are inefficient or the tower is poorly maintained, this contaminated aerosol can be ejected into the surroundings and potentially drawn into the building's air intakes [18]. Standards such as AS3666 require that cooling towers be cleaned at least twice per year to prevent such issues, combining manual cleaning with chemical water treatment for effective control [18].
Integrated Experimental Protocols for Monitoring and Control
To effectively combat environmentally influenced fungal contamination, a proactive, evidence-based approach involving regular monitoring and validation is essential. The following protocols synthesize established methods from bioreactor operation, building management, and cell culture practice.
Protocol 1: Environmental Monitoring and Air Sampling
Objective: To quantify the fungal spore load in critical laboratory areas (e.g., biosafety cabinets, incubator rooms, media preparation areas) and within the air handling system itself.
Methodology:
- Active Air Sampling: Use a volumetric air sampler (e.g., a slit-to-agar sampler or a centrifugal sampler) containing malt extract agar (MEA) or dichloran-18% glycerol agar (DG18), the latter being selective for xerophilic fungi [17]. Sample at a defined flow rate (e.g., 28.3 L/min) for a set duration to calculate colony-forming units per cubic meter of air (CFU/m³).
- Surface Sampling: Use contact plates (RODAC plates) or swabs on non-porous surfaces within biosafety cabinets, workbenches, and near air vents. Swabs can be eluted in a sterile diluent and plated onto the same agar types.
- Sample Incubation: Incubate plates at 25-28°C for 5-7 days. Observe daily for fungal colony formation.
- Data Analysis: Identify predominant fungal morphotypes (e.g., Penicillium, Aspergillus) based on colony morphology and microscopy. Track CFU counts over time and correlate with seasonal weather data and HVAC operation logs.
Protocol 2: Validation of Air Handling System Performance
Objective: To verify that the HVAC system is operating as designed and not contributing to microbial contamination.
Methodology:
- Filter Integrity Testing: Perform aerosol challenge testing (e.g., using di-octyl phthalate DOP or similar) on HEPA filters to identify any leaks or bypasses [20].
- Surface Swab Testing: Systematically swab internal components of the air handling unit, including cooling coils, condensate drain pans, and downstream ducting, especially after filters. Use ATP bioluminescence or culture-based methods to detect microbial buildup [18].
- Condensate Drain Function Check: Verify that condensate drains are not blocked and are functioning properly to prevent water accumulation [18].
- Review of Maintenance Records: Audit logs for filter changes, coil cleaning, and system inspections against the manufacturer's recommendations and relevant standards [18] [19].
Protocol 3: Cell Culture Process Control and Contamination Triage
Objective: To implement routine surveillance of cell cultures and execute a definitive response upon contamination detection.
Methodology:
- Routine Culture Inspection: Visually inspect media for turbidity or unexpected pH shifts (e.g., color change in phenol red indicator) [7] [20]. Regularly examine cultures under phase-contrast microscopy for signs of filamentous growth or yeast-like particles.
- Mycoplasma and Fungal Testing: Perform regular PCR-based tests for mycoplasma and fungal DNA, which offer speed and sensitivity superior to traditional culture methods [21].
- Decontamination Procedure for Irreplaceable Cultures:
- Isolate: Immediately move the contaminated culture to a designated quarantine area [7].
- Identify: Determine the type of contaminant (e.g., bacteria, yeast, mold) via microscopy and culture.
- Dose Response: If considering antibiotic/antimycotic treatment, first dissociate and plate the cells in a dilution series with a range of antimycotic concentrations (e.g., Amphotericin B) to determine the level toxic to the cells [7].
- Treat: Culture the cells for 2-3 passages using the antimycotic at a concentration one- to two-fold lower than the toxic level [7].
- Verify: Culture the cells in antibiotic-free medium for 4-6 passages to confirm eradication of the contaminant [7].
The workflow for this integrated monitoring and response strategy is summarized below.
The Scientist's Toolkit: Essential Reagents and Materials
Effective management of fungal contamination risk requires a suite of specialized reagents and materials for monitoring, analysis, and prevention. The following table details key items for a research laboratory.
Table 2: Essential Research Reagents and Materials for Contamination Control
| Item | Function/Brief Explanation | Example Use Case |
|---|---|---|
| Dichloran-18% Glycerol Agar (DG18) | A selective medium for xerophilic (dry-tolerant) fungi; the glycerol creates a reduced water activity environment. | Environmental air and surface sampling to isolate and enumerate common fungal contaminants like Aspergillus and Penicillium [17]. |
| SYBR Gold Stain | A sensitive nucleic acid stain that fluoresces upon binding to DNA. | Epifluorescence microscopy for enumerating total viral abundance in environmental samples, which can inform on the overall microbial load [22]. |
| PCR Primers for Mycoplasma & Fungi | Oligonucleotides designed to bind to conserved, specific genomic regions of target microorganisms. | Rapid, sensitive molecular detection of mycoplasma contamination in cell cultures, and identification of fungal species [21]. |
| Specific Antimycotics (e.g., Amphotericin B) | Antifungal agents that target ergosterol in fungal cell membranes. | Used in decontamination protocols to rescue irreplaceable cell lines, following empirical dose-response testing to determine non-toxic levels [7]. |
| EM Stain | A heavy metal salt used for contrast enhancement in electron microscopy. | Preparing samples for Transmission Electron Microscopy (TEM) to visually confirm viral infection of prokaryotes and identify intracellular viral particles [22]. |
| HOBO Temperature/RH Data-Logger | A compact device for continuous monitoring and logging of temperature and relative humidity. | Placing in critical lab areas, incubators, and near air vents to track environmental conditions and correlate with contamination events [17]. |
The evidence clearly demonstrates that seasonal climate variations exert a significant influence on the contamination rates in cell culture laboratories by modulating the growth of environmental fungi and affecting the operation of building air handling systems. The combination of elevated temperature and high relative humidity, common in summer months or in certain geographical climates, creates conditions that are highly conducive to fungal spore proliferation and biofilm formation within HVAC systems. These contaminants are then disseminated throughout the laboratory environment, posing a constant threat to cell cultures.
To mitigate these risks, a holistic and integrated strategy is required:
- Environmental Control and Monitoring: Implement continuous monitoring of temperature and relative humidity in critical lab areas. Establish baseline and alert-level thresholds for airborne fungal spore counts through regular environmental sampling.
- HVAC System Stewardship: Adhere strictly to maintenance schedules for air handling systems, including filter replacement, coil cleaning, and condensate drain inspection, as outlined in standards like AS/NZS 3666.1 [18] [19]. Validate system performance and filter integrity periodically.
- Cultural and Procedural Rigor: Foster a culture of excellence in aseptic technique. This includes rigorous training for all personnel, limiting the simultaneous handling of multiple cell lines, and avoiding the routine use of antibiotics in culture media, which can mask low-level contamination [7] [21].
- Data-Driven Investigation: When contamination occurs, conduct thorough, blame-free investigations that consider environmental data and air system status alongside technique review [23]. This approach is key to identifying and addressing the root cause, rather than merely treating the symptom.
By recognizing the laboratory not as an isolated bubble but as a dynamic environment interconnected with building systems and external climates, researchers can move from a reactive to a proactive stance. Through diligent monitoring, systematic maintenance, and unwavering commitment to best practices, the risks posed by seasonal variations can be effectively managed, ensuring the integrity and reproducibility of vital cell culture research.
In cell culture laboratories, the fight to maintain sterile conditions is perpetual, and the most common source of compromise originates from the researchers themselves. Personnel represent the primary vector for introducing fungal contaminants into sensitive cell culture systems [13]. As walking ecosystems, humans constantly shed skin cells, hair, and respiratory droplets carrying diverse microorganisms, including fungi [24]. This review, situated within a broader thesis on common contamination sources, examines the mechanisms by which laboratory personnel introduce fungal contaminants, details detection and identification methodologies, and presents evidence-based prevention protocols essential for maintaining culture integrity in pharmaceutical and biomedical research.
Personnel as Contamination Vectors: Mechanisms and Pathways
The human body hosts a complex microbiome that readily transfers to cell cultures through direct and indirect contact. Fungal contaminants, primarily yeasts and molds, exploit multiple pathways from personnel to culture vessels [13].
- Inadequate Personal Protective Equipment (PPE): Failure to utilize sterile lab coats, gloves, masks, and hairnets provides a direct pathway for contaminants. Skin cells and hair can harbor fungal spores, which are easily dispersed into the environment and onto sterile surfaces [24].
- Improper Gloving Techniques: Contamination transfer occurs even when gloves are worn if donning or doffing procedures are incorrect. Touching non-sterile surfaces (e.g., incubator handles, microscope knobs, refrigerator doors) before handling cultures readily transfers fungal spores [24].
- Respiratory Expulsion: Talking, coughing, or sneezing near open cultures expels respiratory droplets containing microorganisms. While masks provide a barrier, brief moments of unprotected communication can introduce fungal contaminants, particularly yeast cells [24].
- Suboptimal Aseptic Technique: Rushed procedures or lapses in attention lead to critical errors, including leaving culture vessels open for extended periods, improper flaming of instruments, or working outside a sterilized laminar flow zone [24] [25].
Fungal contamination in cell culture primarily involves yeasts and molds, which can originate from various personnel-linked sources [7] [13].
Table 1: Common Fungal Contaminants and Their Sources from Personnel
| Contaminant Type | Examples | Common Personnel-Linked Sources |
|---|---|---|
| Yeast | Saccharomyces cerevisiae, Candida spp. | Hands, respiratory droplets, contaminated personal items [13] [24] |
| Mold | Various genera (e.g., Alternaria, Aspergillus) | Clothing, skin, hair, cardboard (cellulose products) [13] [26] |
The experimental workflow below outlines the pathway of personnel-mediated fungal contamination and the corresponding detection and control measures.
Detection and Identification of Fungal Contaminants
Early and accurate identification of fungal contamination is crucial for mitigating its impact. Several complementary methods are employed, ranging from simple observation to advanced molecular techniques.
Visual and Microscopic Identification
Regular visual inspection of cultures is the first line of defense. Fungal contamination often manifests as turbidity (cloudiness) in the culture medium [7] [13]. Under low-power microscopy, molds appear as thin, wispy filaments (hyphae) that may form denser clumps of spores, while yeasts are visible as individual ovoid or spherical particles that may bud off smaller particles [7]. These morphological features are key to preliminary identification.
Culture-Based and Molecular Methods
For definitive identification, microbial culture on selective agar (e.g., Sabouraud Dextrose Agar) remains a standard method [13] [27]. More recently, Volatile Organic Compound (VOC) sensing has emerged as a promising technology for real-time, non-invasive detection of mould outbreaks, with compounds like 3-Octanone identified as potential biomarkers [26]. Polymerase Chain Reaction (PCR) provides a highly sensitive and specific means to detect and identify fungal species, especially for slow-growing or uncultivable organisms [13].
Table 2: Methods for Detecting Fungal Contamination in Cell Culture
| Detection Method | Principle | Key Indicators of Fungal Contamination | Advantages | Limitations |
|---|---|---|---|---|
| Visual Inspection | Direct observation of culture medium [7] | Turbidity, thin film on surface, fungal mycelia [13] | Rapid, low-cost | Low sensitivity; late detection |
| Microscopy | Morphological analysis of cells [7] | Presence of hyphae, pseudohyphae, or yeast cells [7] | Relatively fast, provides initial identity based on morphology | Requires expertise |
| Microbial Culture | Growth on selective fungal media [13] [27] | Growth of yeast or mold colonies on agar | Gold standard, allows for further analysis | Time-consuming (days to weeks) |
| PCR | Amplification of fungal-specific DNA sequences [13] | Detection of fungal DNA | High sensitivity and specificity, rapid | Does not distinguish between viable and non-viable cells |
Experimental Protocols for Fungal Control and Decontamination
When contamination occurs in an irreplaceable culture, decontamination may be attempted. Furthermore, research into novel control methods is ongoing.
Suggested Decontamination Procedure for Contaminated Cultures
The following step-by-step protocol can be used to attempt to salvage a contaminated culture [7]:
- Identification and Isolation: First, confirm the contaminant is fungal via microscopy. Immediately isolate the contaminated culture from other cell lines to prevent spread.
- Environmental Decontamination: Thoroughly clean incubators and laminar flow hoods with a laboratory disinfectant (e.g., 70% alcohol, 10% bleach). Check HEPA filters [7] [13].
- Toxicity Test: Antimycotics can be toxic to cells. A dose-response test must be performed:
- Dissociate, count, and dilute the cells in antibiotic-free medium.
- Dispense the cell suspension into a multi-well plate. Add the antimycotic (e.g., Amphotericin B) to each well in a range of concentrations.
- Observe the cells daily for signs of toxicity (e.g., sloughing, vacuole appearance, decrease in confluency, rounding).
- Determine the toxic concentration threshold.
- Treatment Phase: Culture the cells for 2-3 passages using the antimycotic at a concentration one- to two-fold lower than the toxic concentration determined in the previous step.
- Post-Treatment Assessment: Culture the cells for one passage in antimycotic-free media. Then, culture the cells in antibiotic-free medium for 4 to 6 passages to confirm the contamination has been eliminated.
Experimental Protocol: Assessing Ozone Water as a Fungal Control Measure
Research in agricultural models provides insights into potential control methods. One study investigated ozone water for suppressing fungal contamination in barley sprouts, a method relevant to lab disinfection protocols [26].
- Objective: To evaluate the efficacy of ozone water in suppressing fungal contamination.
- Methodology:
- Sample Preparation: Barley seeds from different cultivars were surface-sterilized and germinated under controlled conditions (22°C, 85% relative humidity) [26].
- Fungal Community Analysis: High-throughput sequencing characterized the fungal communities (mycobiome) in seeds and eight-day sprouts to identify primary contaminants like Arthroderma vanbreuseghemii and Fusarium spp. [26].
- Ozone Water Treatment: Ozone water was applied to suppress the identified fungal contaminants.
- Volatile Marker Monitoring: The abundance of volatile organic compounds (VOCs), specifically 3-Octanone isomers, was measured, as it correlates with mould activity [26].
- Results and Conclusion: Ozone water treatment was effective in suppressing pathogenic fungi. A significant reduction in 3-Octanone levels was observed, suggesting its potential as a volatile marker for monitoring mould outbreak and treatment efficacy [26].
The Scientist's Toolkit: Essential Reagents and Materials
Maintaining fungal-free cell cultures requires the use of specific reagents and materials for prevention, detection, and decontamination.
Table 3: Key Research Reagent Solutions for Fungal Management
| Reagent/Material | Function | Application Notes |
|---|---|---|
| Sabouraud Dextrose Agar (SAB) | Selective culture medium for fungi [27] | Used for the cultivation and isolation of yeasts and molds. |
| Antimycotics (e.g., Amphotericin B) | Inhibits or kills fungal contaminants [7] | Use sparingly and only for short terms; can be toxic to cells and mask low-level contamination [7]. |
| 70% Ethanol | Surface and hand disinfectant [13] | Used for daily cleaning of work surfaces in laminar flow hoods and for wiping down equipment. |
| 10% Bleach Solution | Potent surface disinfectant [13] | Used for monthly or weekly deep cleaning of hoods and incubators to eliminate resistant spores. |
| 20% Glycerol | Cryopreservative [27] | Used in the preparation of sterile solutions for the long-term storage of fungal isolates at -70°C to -80°C [27]. |
| Ozone Water | Broad-spectrum antifungal agent [26] | An emerging control measure; effective for environmental decontamination and surface sterilization, leaves no toxic residue. |
| Lactophenol Cotton Blue | Microscopic stain for fungi [27] | Stains the chitin in fungal cell walls, aiding in the visualization of hyphae and spores. |
Personnel constitute the most significant and challenging variable in preventing fungal contamination in cell culture laboratories. The pathways for introduction are numerous, ranging from inadequate PPE to improper aseptic technique. A multi-layered defense strategy is therefore essential. This strategy must be founded on rigorous and continuous training in aseptic technique [25], reinforced by the consistent use of appropriate personal protective equipment, and supported by strict laboratory protocols for cleaning and disinfection. While detection methods like microscopy and microbial culture remain vital, emerging technologies like VOC sensing offer promise for earlier intervention. Ultimately, a culture of meticulousness and accountability, where researchers are aware of their role as potential vectors, is the most powerful tool in preserving the integrity of cell cultures and ensuring the reliability of scientific data.
Fungal contamination represents a persistent and formidable challenge in cell culture laboratories, capable of critically undermining experimental data and cellular viability. Within the context of a broader thesis on common contamination sources, fungal infestations stand out due to their stealthy propagation and resilient nature. This in-depth technical guide examines the mechanisms through which filamentous fungi and yeasts compromise scientific integrity, details advanced detection methodologies, and presents a robust framework for prevention and remediation tailored for researchers, scientists, and drug development professionals.
The Stealthy Onset and Destructive Impact of Fungal Contamination
Fungal contamination introduces a multifaceted threat to cell cultures, often progressing through initial subtle stages to severe, irreversible damage.
Characterization and Physiological Impact
- Initial Symptoms and Progression: Fungal contamination often begins with no visible turbidity or pH change in the culture medium, making early detection difficult [28]. Under microscopy, contaminations are characterized by filamentous hyphae or intertwined fungal clumps in the case of molds, or as ovoid, budding particles for yeasts [7]. Unlike bacterial contamination which causes rapid pH drops and turbidity, fungal contamination may only cause a pH increase in advanced stages [7].
- Mechanisms of Cellular Harm: Fungi compete with cells for essential nutrients, leading to nutrient depletion and accumulation of metabolic waste products [28]. This competition results in a noticeable decline in overall cell health, reduced cell growth, and eventual cell death [28]. The physical presence of fungal structures can also disrupt cell-to-cell contact and normal growth patterns.
Consequences for Research and Development Data
- Altered Cellular Function: Fungal contamination can significantly impact gene expression, metabolism, and cellular function, potentially leading to misleading experimental results [1]. This is particularly problematic in long-term studies where subtle changes accumulate over time.
- Compromised Reproducibility and Data Integrity: The presence of undetected fungal contaminants introduces uncontrolled variables that can invalidate experimental findings [1]. In monetary terms, cell culture contamination attributes to the loss of millions of dollars annually and can compromise the validity of past or current work [29].
Table 1: Comparative Analysis of Fungal Contamination Characteristics
| Parameter | Filamentous Fungi (Molds) | Yeasts |
|---|---|---|
| Visual/Microscopic Signs | Filamentous threads, "fuzzy" structures, visible colonies [2] | Ovoid or spherical particles, budding [7] |
| Medium Appearance | May remain clear initially, turbidity in advanced stages [2] [7] | Turbid, especially in advanced stages [7] |
| pH Changes | Stable initially, then increases with heavy contamination [7] | Stable initially, increases with heavy contamination [7] |
| Growth Rate | Slower than bacteria but faster than cell cultures [2] | Varies, but typically faster than mammalian cells |
| Common Genera in Cell Culture | Aspergillus, Penicillium [29] | Candida and others [7] |
Detection and Identification: Traditional and Advanced Methodologies
Accurate identification of fungal contaminants requires a multifaceted approach combining immediate visual inspection with sophisticated molecular techniques.
Culture-Based Morphological Identification
The conventional approach involves culturing samples on nutrient media like Sabouraud dextrose agar and identifying species based on macroscopic colony morphology and microscopic characteristics [30]. This method has significant limitations, including an inability to detect non-viable spores, difficulty culturing fastidious species, and lower limits of detection of approximately 0.5-1% relative abundances [30]. It also struggles to distinguish between sibling taxa with similar morphological characteristics [30].
Molecular Detection Techniques
- DNA Sequencing: Culture-independent DNA sequencing of the fungal internal transcribed spacer 2 (ITS2) region bypasses culturability issues [30]. This method provides a more comprehensive profile of fungal communities but suffers from biases associated with copy number variation in the target DNA marker across species and strains [30].
- Quantitative PCR (qPCR): When combined with effective sampling methods, qPCR demonstrates superior sensitivity for fungal detection. Recent studies show foam sponge sampling with qPCR detection achieved a median percent recovery of 36.2% (IQR: 25.7-78.4) for fungal contaminants, significantly outperforming culture-based methods [31].
Table 2: Performance Comparison of Fungal Detection and Sampling Methods
| Method Category | Specific Technique | Performance Metrics | Key Advantages | Limitations |
|---|---|---|---|---|
| Sampling Methods | Foam Sponges | 17.9% median recovery (culture); 36.2% (qPCR) [31] | Effective for diverse surfaces | Requires processing |
| Flocked Swabs | 3.8% median recovery (culture); 10.5% (qPCR) [31] | Convenient for small areas | Lower recovery rates | |
| RODAC Plates | 3.4% median recovery (culture) [31] | Direct culturing | Limited to flat surfaces | |
| Detection Methods | Culture-Based Morphological ID | Varies by genus [30] | Traditional, visual confirmation | Viability-dependent, biases |
| DNA Sequencing (ITS2) | Genus-dependent detection [30] | Detects non-culturable fungi | Copy number bias | |
| qPCR with FungiQuant | High sensitivity [31] | Quantitative, sensitive | Requires specialized equipment |
The following workflow diagram illustrates the critical decision points in identifying and addressing fungal contamination:
Experimental Protocols for Fungal Surveillance in Cell Culture Facilities
Implementing rigorous surveillance protocols is essential for maintaining contamination-free cell culture systems.
Surface Sampling and Processing Protocol
Based on comparative efficacy studies [31], the following protocol is recommended for environmental monitoring:
- Surface Selection: Identify critical control points including incubator shelves, biosafety cabinet surfaces, water baths, and storage areas.
- Sampling Technique:
- Use pre-moistened polyurethane sponge sticks for large, irregular surfaces.
- Apply firm pressure and use a systematic back-and-forth motion, covering the entire target area.
- Flip the sponge to ensure full contact of both sides.
- Sample Processing:
- Transfer the sponge to a stomacher bag with 45 mL of phosphate-buffered saline with 0.1% Tween 20.
- Homogenize using a stomacher at 260 RPM for 60 seconds.
- Centrifuge the homogenate at 3100 rpm for 15 minutes.
- Decant supernatant, retaining approximately 5 mL for analysis.
- Analysis:
- For culture-based quantification: Plate serial dilutions on Sabouraud dextrose agar.
- For qPCR detection: Use FungiQuant primers targeting the fungal 18S rRNA gene.
Airborne Fungal Monitoring
Active and passive air sampling should be implemented in cell culture areas:
- Active Sampling: Use volumetric air samplers with appropriate culture media.
- Passive Sampling: Place settlement plates in strategic locations during operational hours.
- Frequency: Monthly monitoring with increased frequency during high-risk operations or after facility modifications.
The Scientist's Toolkit: Essential Reagents and Materials
Table 3: Research Reagent Solutions for Fungal Contamination Management
| Reagent/Material | Function/Application | Technical Specifications | Considerations |
|---|---|---|---|
| Sabouraud Dextrose Agar | Selective isolation of fungi | Contains peptone, dextrose; pH ~5.6 | Favors fungal over bacterial growth |
| Polyurethane Sponge Sticks | Environmental surface sampling | Pre-moistened with neutralizing buffer | Superior recovery vs. swabs [31] |
| FungiQuant Primers | qPCR detection of fungal contaminants | Targets 18S rRNA gene [31] | Broad fungal detection |
| Phosphate Buffered Saline with Tween 20 | Sample processing and elution | 0.1% Tween 20 concentration | Enhances spore recovery |
| HEPA Filtration Systems | Airborne contamination control | 99.97% efficiency for 0.3μm particles | Critical for incubators and biosafety cabinets |
| Quaternary Ammonium Disinfectants | Surface decontamination | Multiple concentrations available | Effective against spores with prolonged contact |
Prevention and Containment: Building a Multi-Layered Defense
Preventing fungal contamination requires a systematic approach addressing all potential sources and transmission routes.
Environmental and Procedural Controls
- Air Quality Management: Ensure proper HEPA filtration in culture rooms and biosafety cabinets [2]. Regularly certify and maintain filtration systems to prevent airborne spore introduction.
- Incubator Maintenance: Decontaminate CO₂ incubators weekly, including shelves, door gaskets, and water trays [2]. Monitor and regulate humidity to discourage fungal growth in warm, moist environments [2].
- Aseptic Technique Rigor: Avoid opening bottles and flasks outside of laminar flow conditions [2]. Implement strict single-cell-line-at-a-time handling protocols to prevent cross-contamination.
Strategic Use of Antimycotics
The routine use of antimycotics is generally discouraged as it can promote resistant strains and hide low-level contamination [7]. When absolutely necessary for short-term rescue of irreplaceable cultures:
- Perform a dose response test to determine levels toxic to the cell line.
- Use antimycotics at concentrations one- to two-fold lower than the toxic concentration.
- Culture cells for 2-3 passages with the antimycotic.
- Return to antibiotic-free medium for 4-6 passages to verify eradication.
Response Protocol for Confirmed Fungal Contamination
When fungal contamination is detected, immediate and decisive action is required:
- Quarantine: Immediately isolate contaminated cultures from other cell lines [7].
- Identification: Determine the fungal species to understand potential sources and appropriate treatment options.
- Environmental Decontamination: Thoroughly clean incubators and laminar flow hoods with appropriate disinfectants [7]. Consider formaldehyde or ozone fumigation for severe cases [28].
- Culture Disposition: For most contaminated cultures, especially those that are replaceable, autoclaving and disposal is the safest option [2].
- Documentation and Investigation: Record the incident, identify the root cause, and implement corrective actions to prevent recurrence.
Fungal contamination represents a critical threat to cell culture integrity, with the capacity to compromise data quality, experimental reproducibility, and cell health through multiple mechanisms. The resilience of fungal spores, their ability to proliferate in culture conditions, and their frequent resistance to conventional antibiotics necessitates a vigilant, multi-pronged defense strategy. By implementing rigorous detection protocols utilizing both culture-based and molecular techniques, maintaining scrupulous environmental controls, and establishing clear response procedures, research and drug development facilities can significantly mitigate the risk and consequences of fungal contamination. In an era of increasing emphasis on data reproducibility and research quality, robust fungal contamination control is not merely a technical consideration but a fundamental component of scientific rigor.
Detection and Identification: Practical Methods for Recognizing Fungal Contamination
In cell culture laboratories, fungal contamination represents a significant threat to research integrity, data reproducibility, and biomanufacturing product safety. Within the context of a broader thesis on common sources of fungal contamination in cell culture lab research, early visual identification of contaminants serves as the first and most critical line of defense. Unlike bacterial contamination which often manifests rapidly, fungal contamination can present more gradually, with initial stages that are easily overlooked without trained observation [1]. The ability to accurately recognize visual indicators such as turbidity, mycelial growth, and color changes enables researchers to quickly isolate contaminated cultures, initiate decontamination protocols, and prevent widespread laboratory contamination that can compromise months of research and development efforts.
The economic and temporal costs of undetected fungal contamination are substantial, leading to experimental failures, wasted resources, and compromised therapeutic products in biopharmaceutical manufacturing [1]. This technical guide provides researchers, scientists, and drug development professionals with comprehensive methodologies for identifying fungal contamination through visual indicators, supported by structured protocols for confirmation and remediation. By integrating these observation techniques into routine cell culture practice, laboratories can significantly reduce the impact of fungal contaminants on research outcomes and manufacturing consistency.
Visual Indicators of Fungal Contamination
Fungal contamination in cell culture manifests through distinct visual patterns that can be identified through careful observation of culture vessels, media appearance, and microscopic evaluation. These indicators vary depending on the type of fungal contaminant (yeasts or molds) and the stage of contamination progression.
Turbidity and Macroscopic Changes
Turbidity represents one of the most recognizable indicators of microbial contamination in cell culture systems. While bacteria typically cause rapid turbidity development, fungal contaminants produce a more gradual change in media clarity that requires careful monitoring to detect early.
Turbidity Progression Patterns:
- Early Stage: Subtle haziness in the culture medium, often localized to specific areas rather than uniform cloudiness
- Intermediate Stage: Increasing cloudiness throughout the medium, sometimes accompanied by particulate matter visible to the naked eye
- Advanced Stage: Dense, opaque appearance with complete loss of media transparency [7] [32]
For yeast contaminants, the turbidity pattern resembles bacterial contamination but develops at a slower rate, eventually appearing as a homogeneous cloudy suspension throughout the medium [7]. Mold contamination typically presents with a more heterogeneous turbidity pattern, often with visible filamentous structures forming in the medium.
Mycelial Growth and Morphology
The appearance of mycelial structures provides definitive visual evidence of mold contamination in cell cultures. These structures represent the vegetative growth of filamentous fungi and display characteristic morphologies that can help identify the contaminant type.
Macroscopic Mycelial Characteristics:
- Surface Mycelia: Cotton-like or woolly floating mats on the media surface
- Submerged Mycelia: Fine, filamentous structures suspended throughout the medium
- Pigmentation: Varying colors including white, grey, black, green, or brown depending on the fungal species [7] [33]
Under microscopic examination, mold contamination presents with thin, wisp-like filaments (hyphae) that may form denser clumps of spores [7]. The hyphal structures typically show branching patterns and septation that distinguish them from other contaminants. As the contamination progresses, these structures develop into connected networks (mycelia) containing genetically identical nuclei [7].
Color Changes in Culture Media
Color changes in cell culture media serve as important chemical indicators of contamination, primarily driven by metabolic byproducts and pH shifts resulting from fungal growth. The pH indicator phenol red incorporated into most cell culture media provides a valuable visual signal of these changes.
Media Color Interpretation:
- Normal Culture: Red-orange color (pH ~7.4)
- Fungal Contamination: Purple-pink shift toward alkaline pH (especially with molds) [32]
- Advanced Fungal Contamination: Variable pH depending on metabolic activity and cell viability
The alkaline shift associated with mold contamination occurs as fungi metabolize media components and release basic metabolites [32]. It is important to note that in the initial stages of contamination, the pH may remain stable before rapidly increasing as the fungal load becomes more substantial [7]. Yeast contamination typically follows a different pattern, with little pH change initially until the contamination becomes heavy, at which point the pH usually increases [7].
Table 1: Visual Indicators of Fungal Contamination in Cell Culture
| Observation Type | Early Stage Indicators | Advanced Stage Indicators | Common Fungal Associations |
|---|---|---|---|
| Turbidity | Slight haziness, localized cloudiness | Dense, opaque media throughout | Yeasts (uniform), Molds (heterogeneous) |
| Mycelial Growth | Fine filaments visible under microscope | Cotton-like surface mats, submerged networks | Mold species (Aspergillus, Penicillium, etc.) |
| Color Changes | Minimal pH shift | Purple-pink alkaline shift, variable based on metabolism | Molds (alkaline shift), Yeasts (minimal then alkaline) |
| Particulate Matter | Small suspended particles | Visible clumps, spores, aggregates | Both yeasts and molds |
Detection and Experimental Protocols
Microscopic Identification Methods
Light microscopy provides the most accessible method for confirming fungal contamination in cell cultures. The procedure requires minimal equipment and delivers rapid results for initial contamination assessment.
Protocol: Microscopic Identification of Fungal Contaminants
- Sample Collection: Aseptically transfer a small aliquot (100-200 μL) from the potentially contaminated culture to a sterile microcentrifuge tube
- Slide Preparation: Place 10-20 μL of the sample on a clean glass microscope slide and carefully lower a coverslip to avoid air bubbles
- Initial Examination: Observe first under low power (10X objective) to scan for areas of interest, particularly between mammalian cells
- High-Resolution Analysis: Switch to higher magnification (40X objective) to resolve detailed structures
- Morphological Assessment: Identify characteristic fungal structures:
- Documentation: Record digital images if available for future reference and comparison
For enhanced visualization, staining techniques such as lactophenol cotton blue can be employed to better highlight fungal structures [33]. Microscopic morphology provides critical information for preliminary identification, though it should be supplemented with additional methods for definitive species identification.
Culture-Based Confirmation Methods
Culture on selective media represents the gold standard for confirming fungal contamination and enabling further characterization of the contaminating species. This approach allows for both detection and potential identification based on colonial morphology.
Protocol: Fungal Culture for Contamination Confirmation
- Media Preparation:
- Sample Inoculation:
- Using a sterile loop, streak samples from potentially contaminated cell cultures onto PDA plates
- Alternatively, place small aliquots (100 μL) of culture media onto the agar surface and spread evenly
- Incubation Conditions:
- Colonial Assessment:
- Observe daily for development of fungal colonies
- Note characteristics: color, texture, growth rate, and diffusible pigments
- Document colonial morphology for identification purposes
Table 2: Culture Media for Fungal Detection and Identification
| Media Type | Primary Application | Incubation Conditions | Typical Observation Timeline | Key Identifiable Features |
|---|---|---|---|---|
| Potato Dextrose Agar (PDA) | Fungal isolation and preservation | 25°C ± 1°C for 5-7 days [34] | 3-7 days | Colonial morphology, pigmentation, mycelial structure |
| Sabouraud Dextrose Agar | General fungal isolation | 25-30°C for 2-7 days | 2-5 days | Rapid growth of most fungi, color development |
| Candida BCG Agar | Yeast differentiation | 37°C for 24-48 hours | 1-2 days | Species-specific colonial morphology and color [33] |
Laboratory Environment Monitoring
Environmental monitoring through sterility testing provides critical data on contamination sources within the laboratory environment, particularly important for identifying persistent contamination issues.
Protocol: Sterility Testing for Laboratory Environment [34]
- Sample Collection Preparation:
- Prepare Nutrient Agar (NA) for bacteria: 28 g in 1000 mL distilled water, autoclave [34]
- Prepare Potato Dextrose Agar (PDA) for fungi as above
- Prepare sterile cotton swabs moistened with sterile water
- Surface Sampling:
- Use moistened swabs to sample equipment surfaces (incubator shelves, biosafety cabinet surfaces)
- Inoculate samples onto both NA and PDA plates by streaking
- Air Sampling (Settle Plate Method):
- Expose PDA and NA plates in the laboratory environment for 10 seconds using a waving motion [34]
- Place plates in strategic locations: biosafety cabinets, incubators, culture areas
- Incubation and Analysis:
This protocol can validate the efficiency of laboratory disinfection procedures such as fumigation and identify persistent contamination sources in the cell culture environment.
Research Reagent Solutions
The following reagents and materials represent essential components for the detection, identification, and study of fungal contamination in cell culture systems.
Table 3: Essential Research Reagents for Fungal Contamination Management
| Reagent/Material | Primary Function | Application Context | Technical Considerations |
|---|---|---|---|
| Potato Dextrose Agar (PDA) | Fungal isolation and culture | Selective isolation of fungi from contaminated cultures; environmental monitoring | Plant-based medium that enhances sporulation and typical morphological development [33] |
| Sabouraud Dextrose Agar | General fungal culture | Broad-spectrum fungal isolation; routine environmental monitoring | May cause atypical morphology in some fungi; should be supplemented with plant-based media [33] |
| Hoechst 33258 Stain | DNA staining for mycoplasma | Detection of mycoplasma contamination which can co-occur with fungal issues | Fluorescent stain requires UV microscopy; also stains fungal DNA [35] [32] |
| Antimycotic Agents | Fungal growth suppression | Treatment of contaminated cultures; prevention in critical applications | Amphotericin B and Nystatin are common choices; use sparingly to avoid resistance [32] |
| Lactophenol Cotton Blue | Fungal structure staining | Microscopic identification of fungal elements in contaminated cultures | Highlights septa, spores, and hyphal structures for morphological identification [33] |
| Gram Stain Reagents | Differential staining | Preliminary classification of contaminants | Crystal violet, safranin, and decolorizers distinguish bacterial co-contaminants [32] |
| Formaldehyde Solution | Laboratory fumigation | Environmental decontamination of tissue culture rooms and equipment | Reacts with potassium permanganate to generate fumigating fumes [34] |
Contamination Management Workflow
The following workflow outlines a systematic approach to managing suspected fungal contamination in cell culture laboratories, from initial detection through resolution and documentation.
Visual indicators including turbidity, mycelial growth, and color changes provide critical early warning signs of fungal contamination in cell culture systems. The systematic application of detection and identification protocols outlined in this technical guide enables researchers to rapidly respond to contamination events, implement appropriate containment strategies, and prevent widespread laboratory contamination. Integration of these observational techniques with routine environmental monitoring and strict aseptic technique represents the most effective approach for maintaining contamination-free cell culture systems essential for reproducible research and reliable biomanufacturing outcomes.
As fungal contamination remains a persistent challenge in both research and GMP manufacturing environments, the ability to recognize and respond to these visual indicators becomes increasingly critical to ensuring data integrity, research reproducibility, and product safety. By employing the comprehensive detection and management strategies detailed in this guide, laboratories can significantly reduce the impact of fungal contamination on their operational efficiency and research outcomes.
Fungal contamination is a pervasive challenge in cell culture laboratories, capable of compromising research integrity and derailing drug development pipelines. Fungi, including molds and yeasts, are ubiquitous environmental organisms whose spores can infiltrate cultures through airborne routes, often via laboratory air-conditioning systems or on the clothing of personnel [36]. Within the controlled environment of a cell culture lab, these contaminants can manifest as yeast, which are unicellular, or as molds, which form complex multicellular, filamentous structures called hyphae [7]. Early and accurate microscopic identification is a critical first-line defense, enabling researchers to swiftly identify contamination sources, select appropriate decontamination strategies, and validate the recovery of affected cultures. This guide provides an in-depth technical framework for the morphological identification of fungal elements, equipping scientists with the protocols and analytical tools necessary to safeguard their research.
Morphological Identification of Fungal Contaminants
The initial identification of fungal contamination often begins with macroscopic observation, such as an increase in medium turbidity or the appearance of floating, fuzzy patches [7] [36]. However, conclusive identification requires microscopic examination to distinguish specific fungal morphologies and implement targeted corrective actions.
Yeast Morphology
Yeasts are unicellular fungi that reproduce asexually through a process known as budding.
- Macroscopic Indicators: A yeast-contaminated culture often exhibits a cloudy or turbid medium. Unlike bacterial contamination, the pH typically remains stable in the early stages, showing little to no color change in phenol-red containing media [37].
- Microscopic Identification: Under phase-contrast microscopy at 100x to 400x magnification, yeast cells appear as individual, ovoid, or spherical bright particles situated between the mammalian cells. They may exist as single cells or in clusters, chains, or branches. A key identifying feature is the presence of smaller buds forming from larger mother cells [7] [37] [38].
Hyphae and Mycelial Network Morphology
Molds are characterized by the growth of filamentous structures known as hyphae, which collectively form a network called a mycelium.
- Macroscopic Indicators: In advanced stages, mold contamination can appear as whiteish, yellowish, or black fuzzy patches visible to the naked eye within the culture vessel [36].
- Microscopic Identification: Under microscopy, the mycelia of contaminating molds typically appear as thin, wispy filaments. These hyphae may be septate (with cross-walls) or non-septate, and they can form denser clumps of spores [7] [39]. In its early stages, this type of contamination does not typically alter the medium's pH nor show significant toxicity to mammalian cells, often growing unattached in the medium [36].
Fungal Spore Morphology
Spores are the reproductive units of fungi and can be either sexual or asexual. In contamination contexts, asexual spores are more commonly observed.
- Asexual Spores: These include sporangiospores, which are formed within a sac-like structure called a sporangium (e.g., in Rhizopus), and conidiospores (conidia), which are formed in chains at the end of specialized hyphae without an enclosing sac (e.g., in Penicillium and Aspergillus) [38].
- Visualization: Spores can be observed under microscopy using staining techniques. For example, a wet mount prepared with lactophenol cotton blue stain allows for clear visualization of spore structures and their arrangement [38].
The table below summarizes the key morphological features of these fungal elements for easy comparison and rapid diagnosis during routine culture inspection.
Table 1: Key Morphological Features of Common Fungal Contaminants in Cell Culture
| Fungal Element | Macroscopic Culture Appearance | Microscopic Morphology (Phase Contrast) | Common Examples |
|---|---|---|---|
| Yeast | Cloudy, turbid medium; little initial pH change [7] [37] | Ovoid or spherical particles; may show budding [7] [37] [38] | Saccharomyces, Candida |
| Hyphae/Mold | Thin, wispy filaments; fuzzy patches (advanced stage) [7] [36] | Thin, wispy filaments (hyphae); may form dense mycelial networks [7] | Penicillium, Aspergillus, Rhizopus |
| Spores | Often not directly visible macroscopically | Sporangia with internal spores (e.g., Rhizopus); chains of conidia (e.g., Penicillium) [38] | Asexual spores of various molds |
Quantitative Analysis of Fungal Growth
Moving beyond qualitative identification, quantitative analysis allows for precise measurement of fungal growth dynamics, which is crucial for assessing the severity of contamination, monitoring its progression, and evaluating the efficacy of antimycotic treatments.
Manual Microscopic Measurement Techniques
Basic quantitative data can be acquired using standard laboratory microscopy and image analysis software like ImageJ [40]. This involves capturing images of the fungal elements and using software tools to manually measure parameters such as hyphal length, branching frequency, and spore count. While straightforward, this method can be time-consuming for large sample sets.
Automated Analysis with Fungal Feature Tracker (FFT)
To overcome the limitations of manual techniques, the Fungal Feature Tracker (FFT) software provides a powerful, user-friendly platform for the automated quantification of various fungal features [41]. FFT can analyze standard microscope images to objectively measure a wide range of phenotypic characteristics.
The following table summarizes key quantitative parameters that can be extracted using tools like FFT, providing a data-driven approach to characterizing contamination.
Table 2: Key Parameters for the Quantitative Analysis of Fungal Contaminants
| Quantitative Parameter | Description | Application in Contamination Analysis |
|---|---|---|
| Spore Count | Automated enumeration of spores/conidia in an image [41] | Assessing the reproductive capacity and spread of the contaminant. |
| Spore Morphology | Measurement of spore length, width, area, and circularity [41] | Differentiating between fungal species based on spore shape and size. |
| Total Hyphal Length | The sum length of all hyphal filaments in a sample [41] | Quantifying the total biomass of a mold contaminant. |
| Number of Hyphal Tips | Count of the growing ends of hyphae [41] | Indicating the growth activity and invasive potential of the mycelium. |
| Mycelial Growth Area | The two-dimensional area covered by the mycelial network [41] | Measuring the colonization and spread of the fungus in the culture vessel. |
Correlative Models for Growth Quantification
Advanced methods have been developed to correlate simple image data with fungal biomass. One study established a Microscopic Image Intensity (MII) model that demonstrates a statistically significant correlation (R² = 0.941, p < 0.001) between the intensity of a microscopic image of Cordyceps mycelium and its dry cell weight (DCW) [42]. This model, formulated as Y (DCW) = 70.095 + 5.982X (Intensity), allows for rapid, non-destructive estimation of fungal biomass from basic image data, achieving prediction accuracies of over 89% in validation tests [42]. This approach is particularly useful for monitoring contamination progression over time without repeatedly sacrificing culture samples.
Experimental Protocols for Identification and Analysis
This section provides detailed methodologies for the core techniques used in the identification and quantitative analysis of fungal contaminants.
Direct Microscopy for Fungal Identification
Direct microscopy is a rapid and essential technique for diagnosing fungal contamination from cell culture samples [39].
Protocol:
- Sample Collection: Aseptically extract a small volume (e.g., 100-200 µL) of medium from the potentially contaminated culture. For adherent cells, sample the medium above the cell layer.
- Wet Mount Preparation: Place a 10-20 µL droplet of the sample onto a clean microscope slide. Gently lower a coverslip onto the droplet, avoiding air bubbles.
- Staining (Optional): For enhanced contrast, especially for spores, mix the sample with an equal volume of lactophenol cotton blue stain before adding the coverslip. The stain highlights chitin in the fungal cell walls [38].
- Microscopy:
- Begin observation under low power (10x objective) to locate fungal structures.
- Switch to higher magnifications (40x or 100x) for detailed morphological analysis.
- Use phase-contrast microscopy to improve the visibility of unstained live samples, such as yeast cells and hyphae [37].
- Interpretation: Identify the presence of yeast cells, hyphal filaments, or spores based on the morphological characteristics outlined in Table 1. The visualization of fungal elements from a sterile culture is proof of contamination [39].
Fungal Feature Tracker (FFT) Workflow
For quantitative phenotypic characterization, FFT software can be employed [41].
Protocol:
- Image Acquisition: Capture digital images of the contaminated culture using a microscope-mounted camera. Ensure consistent lighting and magnification across all samples.
- Software Setup: Launch the FFT application and upload the acquired images.
- Parameter Calibration: Use the calibration tab within FFT to adjust detection parameters (e.g., size threshold, intensity).` This is a critical step. Test different parameter combinations and visually examine the results to ensure the software correctly identifies the fungal features of interest (e.g., spores vs. hyphae) [41].
- Automated Analysis: Execute the appropriate FFT function (e.g., "spore morphology," "mycelial growth") using the calibrated parameters.
- Data Export: The software will automatically generate and output quantitative data, including counts, sizes, lengths, and other morphological measurements for the detected features [41].
The workflow for identifying and analyzing fungal contamination, from initial suspicion to data-driven decision-making, is summarized in the following diagram.
Advanced Molecular Identification
In cases where morphological identification is inconclusive or for precise speciation, molecular methods offer high specificity.
Protocol: PCR-Enzyme Immunoassay (PCR-EIA) for Fungal DNA [43]
- DNA Extraction: Isolate genomic DNA from the contaminated cell culture sample using a commercial fungal DNA extraction kit.
- PCR Amplification: Amplify the fungal DNA using universal fungal primers (e.g., ITS1 and ITS4) that target conserved regions of the ribosomal RNA gene.
- Hybridization: Hybridize the PCR amplicons with biotinylated universal probes and digoxigenin-labeled species-specific oligonucleotide probes.
- Colorimetric Detection: The hybridized amplicons are detected colorimetrically in an enzyme immunoassay format. A color change indicates a positive match with a specific fungal probe, allowing for precise identification [43].
The Scientist's Toolkit: Essential Research Reagents and Materials
Successfully identifying and managing fungal contamination relies on a suite of specific reagents and tools. The following table details the essential components of a fungal analysis toolkit.
Table 3: Research Reagent Solutions for Fungal Identification and Management
| Tool/Reagent | Function/Application | Example & Notes |
|---|---|---|
| Phase-Contrast Microscope | Visualization of live, unstained fungal elements in cell culture [37]. | Core equipment for routine contamination screening. |
| Lactophenol Cotton Blue | Staining solution that highlights fungal chitin, aiding in spore and hyphal identification [38]. | A standard stain for mycology; prepares wet mounts. |
| Image Analysis Software | Quantitative measurement of fungal features from microscope images. | Fungal Feature Tracker (FFT) [41] or ImageJ [40]. |
| Antimycotics | Therapeutic agents used to decontaminate infected cultures. | Amphotericin B (Fungizone) or Nystatin [36]. Note: Routine antibiotics like Pen/Strep are ineffective. |
| Universal Fungal Primers | Molecular identification of fungi via PCR amplification. | ITS1 & ITS4 primers target the rRNA gene for broad fungal detection [43]. |
Fungal contamination represents a significant risk to the fidelity and reproducibility of cell culture-based research and drug development. A systematic approach that combines traditional microscopic techniques with modern quantitative tools and a clear understanding of fungal morphology is paramount for effective laboratory management. By integrating the protocols and analytical frameworks outlined in this guide—from direct microscopy and FFT analysis to molecular confirmation—researchers can transition from merely detecting contamination to comprehensively understanding and mitigating it. This proactive and data-driven stance is essential for maintaining the health of cell cultures, ensuring the validity of experimental data, and ultimately safeguarding the pipeline of scientific discovery.
Within the context of cell culture research, fungal contamination represents a significant and persistent challenge that can compromise experimental integrity and lead to costly losses. Unlike bacterial contamination, which often results in rapid acidification, fungal and yeast contaminants can induce characteristic alkaline shifts in culture media, serving as a critical, though sometimes overlooked, diagnostic indicator. This technical guide examines the pivotal role of pH monitoring in the early detection and management of fungal contamination. We will explore the biochemical mechanisms driving these alkaline shifts, provide methodologies for accurate pH tracking, and present quantitative data to aid researchers and drug development professionals in differentiating contamination types. Integrating pH surveillance into routine aseptic practices forms a cornerstone of robust contamination control, safeguarding both research reproducibility and biomanufacturing quality.
Fungal Contamination in the Cell Culture Laboratory
Fungal contamination, encompassing both filamentous molds and unicellular yeasts, is a frequent airborne threat in cell culture laboratories. These contaminants often enter cultures via spores present in unfiltered air, on unclean surfaces, or through contaminated reagents [2]. A primary, yet frequently underestimated, source is the incubator water tray, which provides an ideal humid environment for fungal growth if not decontaminated regularly [2].
The insidious nature of fungal contamination lies in its growth dynamics. Fungi grow more slowly than bacteria but much faster than mammalian cells, allowing them to become established before being visually detected [2]. Once present, they can form resilient spores that survive in a dormant state on equipment and surfaces, posing a risk of recurring contamination events [7]. Visually, contamination may manifest as filamentous threads or "fuzzy" structures (in the case of molds) or as ovoid, budding particles (in the case of yeasts) when observed under microscopy [2] [7]. A fermented odor in the culture is another common indicator [2].
The Critical Role of pH Monitoring in Detection
While visual and olfactory cues are valuable, pH monitoring provides an earlier and more sensitive indicator of microbial presence. Most mammalian cell lines are maintained in a narrow pH range, typically between 7.2 and 7.4, although this can vary by cell type [44]. Microbial metabolism invariably disrupts this delicate balance.
Bacterial contamination typically produces acidic by-products, such as lactic acid, leading to a rapid drop in pH and a yellowing of the phenol red indicator in the culture medium [2] [7]. In contrast, fungal and yeast contamination initially presents with a stable pH, which then rapidly increases as the contamination becomes more heavy [7]. This characteristic alkaline shift is a key diagnostic feature that can alert a vigilant researcher to a problem before it becomes overwhelming.
Quantitative Data on pH Shifts in Contamination
The following tables summarize key quantitative data relevant to pH monitoring and the interpretation of shifts caused by contamination.
Table 1: Optimal pH Ranges for Various Cell Types in Culture
| Cell Type | Optimal pH Range | Notes | Source |
|---|---|---|---|
| Most Mammalian Cells | 7.2 - 7.4 | Standard range for many primary and immortalized lines. | [44] |
| Transformed Cells | ~7.0 | Often genetically altered; prefer a slightly more acidic environment. | [44] |
| Fibroblast Cell Lines | 7.4 - 7.7 | Unaltered lines often perform better at a slightly alkaline pH. | [44] |
| Insect Cells | ~6.2 | Have a significantly lower optimum pH than mammalian systems. | [44] |
| T Cells | 7.0 - 7.2 | Proliferation capacity can be three times greater at pH 7.0 vs. 7.4. | [44] |
| Hybridoma Cells | 7.6 | Slower glucose consumption and lactate production at lower pH (6.8). | [44] |
Table 2: Characteristic pH Shifts and Other Indicators of Common Contaminants
| Contaminant Type | Characteristic pH Shift | Visual & Microscopic Signs | Speed of Onset |
|---|---|---|---|
| Bacteria | Sudden drop (acidification); medium turns yellow. | Cloudy/turbid medium; tiny, motile granules under microscope. | Very rapid (days) [2] |
| Yeast | Initial stability, then sharp increase (alkalization) in heavy contamination. | Turbid medium; ovoid or spherical particles that may bud. | Gradual, then rapid [7] |
| Mold/Filamentous Fungi | Initial stability, then increase (alkalization) with heavy growth. | Visible filaments or "fuzzy" colonies; mycelia under microscope. | Slower than bacteria [2] [7] |
| Mycoplasma | No consistent, visible shift. | No turbidity or visual signs; unexplained changes in cell growth/morphology. | Often chronic and persistent [2] |
Experimental Protocol for Tracking Alkaline Shifts
This protocol provides a detailed methodology for systematically monitoring and verifying fungal contamination through pH shifts.
Materials and Equipment
- Cell cultures: Test and control cultures (e.g., 293 cells, HeLa cells).
- Culture medium: Phenol red-containing medium appropriate for the cell line.
- Fungal inoculum: A non-pathogenic laboratory strain of yeast (e.g., Saccharomyces cerevisiae) or mold (e.g., Aspergillus niger) for controlled studies.
- pH meter: A calibrated, sterile, benchtop or in-line pH meter with a fine-point electrode.
- Microscope: Inverted light microscope with phase contrast capability.
- Laminar Flow Hood: For all aseptic procedures.
- Incubator: Humidified CO₂ incubator set to 37°C and 5% CO₂.
- Mycoplasma Detection Kit: PCR-based or fluorescence staining kit.
Procedure
Experimental Setup:
- In a biosafety cabinet, seed multiple T-flasks or well plates with an identical number of cells in a logarithmic growth phase.
- Designate flasks as: Group A (Uncontaminated Control), Group B (Fungal-Contaminated), and Group C (Bacterial-Contaminated - for comparison).
- To Group B, intentionally introduce a low titer of the fungal inoculum (e.g., 10-100 CFU). To Group C, introduce a common bacterial contaminant like E. coli.
Daily Monitoring & Data Collection:
- Visual Inspection: Observe all flasks daily for macroscopic changes such as turbidity, film formation, or color change of the phenol red indicator.
- Microscopic Examination: Examine cells under an inverted microscope (100-400x magnification) for signs of contamination (fungal hyphae, budding yeast, bacteria) and changes in cell morphology.
- pH Measurement:
- For adherent cells, take a small, sterile sample of the supernatant medium.
- Measure the pH using a calibrated pH meter. Record the value for each flask daily.
- Ensure measurements are performed quickly and aseptically to avoid contaminating the cultures or altering the pH through CO₂ outgassing.
Endpoint Analysis:
- Once a clear pH shift is observed or at the end of the experiment (e.g., 5-7 days), perform definitive contamination tests.
- Mycoplasma Testing: Use a PCR-based assay to rule out concomitant mycoplasma contamination, which can cause subtle metabolic effects without pH shifts [2].
- Microbial Identification: Plate the culture medium on nutrient agar to isolate and identify the contaminant. For fungal species, this may require specific fungal media.
Data Interpretation
- Group A (Control): pH should remain stable within the optimal range for the cell line. No microbial growth should be detected.
- Group B (Fungal): Expect an initial period of stable pH, followed by a consistent and marked increase in pH (alkalization) coinciding with heavy microbial growth, confirming the characteristic signature of fungal contamination [7].
- Group C (Bacterial): Expect a rapid and sharp decrease in pH (acidification), demonstrating the distinct metabolic signature of bacterial contamination.
Diagram 1: Logical workflow from fungal contamination to alkaline shift detection. The process begins with spore introduction, leading to metabolic consumption and by-product release that collectively increase extracellular pH, which is then detected instrumentally and visually.
The Scientist's Toolkit: Key Reagents and Materials
Table 3: Essential Research Reagent Solutions for pH Monitoring and Contamination Control
| Item | Function & Importance |
|---|---|
| Phenol Red Medium | A pH-sensitive dye incorporated into culture media provides a rapid, visual assessment; yellow indicates acidification (~ pH 6.8), pink indicates alkalization (~ pH 7.8), and red is optimal (~ pH 7.4). |
| Calibrated pH Meter | Provides precise, quantitative measurement of extracellular pH. Regular calibration with standard buffers is critical for accuracy and detecting subtle shifts of 0.1 units or less. |
| Carbonate-Buffered Media | Contains a CO₂/bicarbonate buffer system that works in a humidified CO₂ incubator to maintain physiological pH, counteracting metabolic acid production by cells. |
| Validated Sera & Reagents | Using serum (e.g., FBS) and media from reliable, tested suppliers is crucial to prevent introducing viral or chemical contaminants that can alter cell health and pH. |
| PCR-based Mycoplasma Test Kit | Essential for routine screening to rule out "silent" mycoplasma contamination, which can affect cell metabolism and confound pH data without causing turbidity. |
| Antibiotics/Antimycotics | Should be used sparingly and not as a routine preventative, as they can mask low-level contamination and promote resistant strains. Their use is a short-term solution. |
Integrating pH Monitoring into a Comprehensive Prevention Strategy
While pH monitoring is a powerful diagnostic tool, it must be part of a multi-layered contamination prevention strategy. Key elements include:
- Strict Aseptic Technique: This is the first line of defense. Always work within a properly maintained laminar flow hood, disinfect all surfaces with 70% ethanol, and use sterile pipettes and reagents [2] [1].
- Routine Equipment Maintenance: Regularly decontaminate CO₂ incubators, including shelves, door gaskets, and water trays, as these are common fungal reservoirs [2].
- Quality Control of Reagents: Quarantine and test all new cell lines and critical reagents like serum before integrating them into your main culture space [2] [1].
- Judicious Use of Antibiotics: Avoid the continuous use of antibiotics and antimycotics. They can hide low-level contamination and lead to the development of resistant strains, ultimately increasing risk [2] [7].
Vigilant pH monitoring is an indispensable technique in the cell biologist's arsenal for the early detection and identification of fungal contamination. The characteristic alkaline shift associated with proliferating yeast and molds provides a critical diagnostic clue that differentiates it from bacterial contamination. By understanding the underlying causes of this shift, implementing systematic monitoring protocols, and integrating this data with robust aseptic practices, researchers and bioprocessing professionals can significantly mitigate the risks posed by fungal contaminants. This proactive approach ensures the health of cell cultures, the integrity of experimental data, and the success of downstream applications in drug development.
In the controlled environment of a cell culture laboratory, fungal contamination presents a persistent and costly challenge. Fungi, including yeasts and molds, can originate from a multitude of sources, compromising the integrity of research and the reliability of data. Within the context of a broader thesis on laboratory contaminants, understanding the common sources of fungal introduction is the first step toward effective control. These sources are diverse, encompassing laboratory personnel, unfiltered air, humidified incubators, and contaminated cell stocks or media [13]. Even common laboratory items like cardboard and fruit can serve as reservoirs for fungal spores [13].
The consequences of undetected fungal contamination are severe. It can lead to altered cell metabolism, genetic instability, and unreliable experimental results, potentially invalidating months of research and jeopardizing drug development pipelines [9] [45]. While visual cues like turbidity or mycelia in the medium can signal contamination, these often appear only after the culture is already compromised [13] [46]. Therefore, proactive monitoring and precise identification are paramount. This is where culture-based confirmation using selective media becomes an indispensable tool, allowing researchers to not only detect but also isolate and identify fungal species for both troubleshooting and quality control purposes.
The Principles of Selective Isolation
What is Selective Media?
Selective media are culture formulations designed to suppress the growth of unwanted microorganisms while promoting the growth of desired targets. This selectivity is achieved through the inclusion of specific chemical inhibitors, alterations in nutrient composition, or adjustment of pH. In the context of fungal isolation from cell culture samples—which may contain a mix of bacteria, yeasts, and molds—these media are crucial for isolating specific fungi from a complex background flora.
The fundamental principle relies on exploiting biochemical or physiological differences between microbial groups. For instance, antibiotics like chloramphenicol and gentamicin are commonly used to inhibit gram-positive and gram-negative bacteria, respectively, without affecting most fungi [47]. Similarly, fungicides such as dichloran can inhibit the spreading growth of zygomycetes, providing a cleaner platform for the isolation of other fungi [48]. The efficacy of a selective medium is judged by its ability to maximize the recovery of the target organism while minimizing the growth of competing non-target microbes.
The Critical Role in Cell Culture Contamination Management
Routine cell culture maintenance often involves visual inspection and microscopy, which are effective for detecting gross contamination but lack the sensitivity for low-level or cryptic infections. Incorporating selective media into a monitoring program provides several key advantages:
- *Early Detection:* Selective media can reveal low-level contaminations that are not yet visible in the culture vessel, allowing for preemptive action before a culture is irreparably lost [9].
- *Identification of Contamination Sources:* By isolating the specific fungal contaminant, researchers can trace its origin, be it from a contaminated serum lot, a malfunctioning incubator, or a lapse in aseptic technique [13].
- *Data Integrity:* Ensuring that cell cultures are free from fungal contamination is essential for generating reliable and reproducible data, a non-negotiable standard in drug development and basic research [45].
It is worth noting that many experts, including the ISSCR, recommend conducting these monitoring procedures in the absence of antibiotics in the cell culture medium, as their continuous use can mask low-level contamination and affect cellular biochemistry [45].
Common Selective Media for Fungal Isolation: A Comparative Analysis
A variety of selective media have been developed for the isolation of fungi. Their performance varies depending on the target species and the sample type. The following table synthesizes key media and their applications based on recent research.
Table 1: Selective Media for the Isolation of Fungi from Complex Samples
| Media Name | Key Selective Agents | Primary Target | Advantages | Limitations |
|---|---|---|---|---|
| Malachite Green Agar 2.5 (MGA 2.5) | Malachite Green | Fusarium spp. | Potent selectivity for Fusarium from natural samples; suppresses zygomycetes and yeasts effectively [49]. | Significantly reduces colony diameter of Fusarium species compared to other media [49]. |
| Sabouraud Dextrose Agar + Antibiotics (SDA+) | Cotrimoxazole, Chloramphenicol, Ceftazidime, Colistin | General yeasts and filamentous fungi | Excellent suppression of Gram-negative bacteria (e.g., Pseudomonas aeruginosa) from clinical samples like sputum [47]. | Less effective at suppressing Burkholderia cepacia complex organisms [47]. |
| Medium B+ | Cotrimoxazole, Chloramphenicol, Ceftazidime, Colistin | General yeasts and filamentous fungi | Superior ability to grow a wide range of fungi compared to SDA+ [47]. | Lower ability to suppress bacterial growth compared to SDA+ [47]. |
| Czapek Dox Propiconazole Dichloran Agar (CZPD) | Dichloran, Propiconazole, Chloramphenicol, Chlortetracycline | Fusarium graminearum | Better for detecting F. graminearum from plant material than Komada's medium; produces darker pigmentation over a shorter incubation time [48]. | Requires multiple supplements, increasing preparation complexity [48]. |
| Komada's Medium | Pentachloronitrobenzene (PCNB) | Fusarium spp. | A widely used historical standard for Fusarium isolation [48]. | Concerns about the safety of PCNB; less effective for F. graminearum pigmentation compared to CZPD [48]. |
Quantitative data from a comparative study highlights the performance of different media for Fusarium isolation. The research found no statistical differences in colony counts of various Fusarium strains across several media, but significant differences in growth were observed [49].
Table 2: Efficacy Comparison of Selective Media for Fusarium spp. Isolation [49]
| Media Name | Colony Counts | Colony Diameter | Selectivity from Natural Samples |
|---|---|---|---|
| Nash and Snyder (NS) Medium | No statistical difference | Larger diameter | Allows growth of many other fungi [49]. |
| Dichloran-Chloramphenicol Peptone Agar (DCPA) | No statistical difference | Larger diameter | Allows growth of many other fungi [49]. |
| Czapek Dox Iprodione Dichloran Agar (CZID) | No statistical difference | Larger diameter | Allows growth of many other fungi [49]. |
| Malachite Green Agar 2.5 (MGA 2.5) | No statistical difference | Significantly lower | Potent selectivity; suppresses non-target fungi effectively [49]. |
Detailed Experimental Protocols for Isolation and Testing
Protocol 1: Isolation of Fusarium graminearum from Plant Material using CZPD
This protocol, adapted from current research, is designed for isolating a specific fungal pathogen from wheat debris, a common model for environmental sampling [48].
Workflow Overview:
Materials:
- CZPD Media Components: Czapek Dox agar, 0.2% dichloran in ethanol, 5% chloramphenicol in ethanol, trace metal solution (ZnSO₄·7H₂O + CuSO₄·5H₂O), filter-sterilized 0.5% chlortetracycline hydrochloride, and 0.3% propiconazole suspension (e.g., Bumper) [48].
- Samples: Fusarium graminearum-infected wheat debris (chaff, straw, rachis).
- Equipment: Laminar flow hood, autoclave, incubator.
Methodology:
- Media Preparation:
- Dissolve 48 g of Czapek Dox agar in 1 L of distilled water.
- Add 1 mL of 0.2% dichloran solution and 1 mL of the trace metal solution.
- Autoclave the mixture at 121°C for 15 minutes.
- Cool the autoclaved media to approximately 55°C in a water bath.
- Aseptically add 1 mL of 5% chloramphenicol, 10 mL of 0.5% chlortetracycline, and 1 mL of 0.3% propiconazole suspension. Mix thoroughly without creating bubbles.
- Pour the media into sterile Petri dishes under a laminar flow hood and allow it to solidify.
Sample Processing:
- Surface-sterilize the wheat debris by immersing in sodium hypochlorite solution (1.2% available chlorine) containing 0.05% Tween 20 for 3 minutes.
- Rinse the debris three times in sterile distilled water to remove any residual sterilant.
- Aseptically place five pieces of debris onto each plate of CZPD media. Use five plates per sample for robustness.
Incubation and Identification:
- Incubate the plates at room temperature (approximately 18°C) for 7 to 14 days.
- Observe the plates regularly for the development of fungal colonies with characteristic reddish-pink pigmentation of F. graminearum.
- Sub-culture a presumptive colony onto Potato Dextrose Agar (PDA) to obtain a pure culture.
- Confirm the identity of the isolate through microscopic examination of conidial morphology or molecular methods like species-specific PCR [48].
Protocol 2: Using Antibiotic-Supplemented Media for General Fungal Isolation
This protocol is ideal for monitoring cell culture reagents or environmental samples within the lab for a broad spectrum of yeasts and filamentous fungi.
Workflow Overview:
Materials:
- Media: Sabouraud Dextrose Agar (SDA) and Medium B base.
- Antibiotic Supplements: Prepare stock solutions of Cotrimoxazole (128 mg/L), Chloramphenicol (50 mg/L), Ceftazidime (32 mg/L), and Colistin (24 mg/L) [47].
- Samples: Cell culture supernatant, swabs from biosafety cabinets, or settled air plates.
Methodology:
- Media Preparation:
- Prepare SDA and Medium B (Glucose 16.7 g/L, Agar 20 g/L, Yeast Extract 30 g/L, Peptone 6.8 g/L, pH 6.3) according to standard protocols.
- After autoclaving and cooling to 55°C, supplement both media with the full cocktail of antibiotics to create SDA+ and Medium B+.
- Pour into Petri dishes.
Sample Inoculation:
- For liquid samples, spread 100-200 µL evenly across the agar surface.
- For surface sampling, use contact plates or moistened swabs, which are then streaked onto the media.
- For air monitoring, expose opened plates in the area of interest for a defined period (e.g., 30 minutes).
Incubation and Analysis:
- Incubate plates at 25-30°C for up to 14 days. Monitor daily for growth.
- Compare the growth on SDA+ and Medium B+. SDA+ is superior for suppressing bacterial overgrowth, while Medium B+ often supports better fungal recovery [47].
- The combined use of both media increases the specificity and sensitivity of detection. Identify fungi based on colony morphology, color, and microscopic characteristics.
The Scientist's Toolkit: Essential Reagents for Selective Media
The following table details key reagents used in the preparation of the selective media discussed in this guide.
Table 3: Essential Research Reagents for Fungal Selective Media
| Reagent | Function in Selective Media | Common Working Concentration |
|---|---|---|
| Chloramphenicol | Antibiotic; inhibits a broad range of Gram-positive and Gram-negative bacteria. | 50 mg/L [47] |
| Dichloran | Fungicide; inhibits the spreading growth of zygomycete fungi. | 0.2% solution, 1 mL/L [48] |
| Propiconazole | Azole fungicide; selective inhibitor for isolating Fusarium graminearum. | 0.3% suspension, 1 mL/L [48] |
| Malachite Green | Dye and fungistatic agent; selectively inhibits non-target fungi for Fusarium isolation. | 2.5 ppm [49] |
| Colistin | Antibiotic; particularly effective against Gram-negative bacteria. | 24 mg/L [47] |
| Ceftazidime | Antibiotic; effective against Gram-negative bacteria, including Pseudomonas. | 32 mg/L [47] |
| Chlortetracycline | Antibiotic; broad-spectrum bacterial inhibitor, added post-autoclaving. | 0.5% solution, 10 mL/L [48] |
Integrating Selective Media into a Comprehensive Cell Culture Contamination Control Program
While selective media are powerful for identification, a robust contamination control strategy must be proactive and multi-faceted. The cornerstone of prevention remains rigorous aseptic technique [13]. This includes daily cleaning of the biosafety cabinet with 70% alcohol and monthly cleaning with 10% bleach, alongside regular decontamination of CO₂ incubators [13].
Environmental monitoring is critical. Regularly use settle plates or air samplers containing selective media to assess the microbial load in the lab environment, particularly inside biosafety cabinets and incubators. Furthermore, all incoming biologicals, especially sera and cell stocks, should be treated as potential sources of contamination and quarantined until tested [9] [45]. Cell line stocks should be stored in the vapor phase of liquid nitrogen, not the liquid phase, to minimize the risk of cross-contamination [13].
Finally, the use of antibiotics and antimycotics in cell culture media should be approached with caution. Their continuous use can lead to resistant strains and mask low-level contaminations, ultimately doing more harm than good. They should not be used as a substitute for good technique but reserved for short-term applications if absolutely necessary [15].
Fungal contamination represents a significant threat to the fidelity of cell culture-based research and drug development. Culture-based confirmation using selective media provides a targeted, reliable method for isolating and identifying these unwelcome invaders, moving beyond simple detection to effective root-cause analysis. By integrating protocols like those for CZPD or SDA+ into a holistic hygiene program that prioritizes aseptic technique and environmental monitoring, scientists can safeguard their cultures. This disciplined approach ensures the generation of high-quality, reproducible data, thereby protecting valuable research investments and accelerating the journey from scientific discovery to therapeutic application.
In the context of cell culture research, fungal contamination represents a persistent and costly challenge, capable of compromising experimental integrity, invalidating months of work, and leading to substantial financial losses. Contamination sources are diverse, originating from laboratory personnel, unfiltered air, humidified incubators, and even materials such as fruit, cellulose products (cardboard), and plants [13]. Unlike some contaminants that manifest obvious, immediate effects, fungal infections can initially present with subtle signs, progressing to overt contamination only after becoming well-established. A proactive approach, centered on the implementation of routine screening protocols, is therefore not merely beneficial but essential for any rigorous cell culture laboratory. Such protocols enable researchers to identify contamination at its earliest stages, often before it can irreversibly damage irreplaceable cell lines or skew precious data. This guide details the early warning signs of fungal contamination and provides a framework for establishing robust, routine screening procedures to safeguard your research.
Recognizing the Early Warning Signs
Early detection of fungal contamination hinges on vigilant, routine observation of both the culture medium and the cells themselves. The initial signs are often visual but can be confirmed with basic microscopic examination. The table below summarizes the key early indicators, their descriptions, and the recommended immediate actions.
Table 1: Early Warning Signs of Fungal Contamination in Cell Culture
| Warning Sign | Description | Immediate Action |
|---|---|---|
| Visual Turbidity/Cloudiness | The culture medium appears cloudy or hazy, which is a primary indicator of microbial growth [9] [7] [50]. | Examine under a microscope and isolate the culture from others. |
| pH Shifts | The culture medium may become alkaline, indicated by a color change to pink in media containing phenol red [50]. | Check incubator CO₂ levels and assess medium components. |
| Floating Particles or Filaments | Visible fine, wispy filaments (mycelia) or clumps of spores floating in the medium [9] [7]. | Perform microscopic analysis to confirm fungal structures. |
| Unusual Morphology Under Microscope | Observation of fungal structures such as hyphae (filaments) or, for yeast, ovoid/spherical particles that may bud off smaller particles [7] [50]. | Document findings and begin decontamination procedures. |
| Abnormal Growth Rates | Cells may exhibit slowed proliferation or fail to divide as expected, as their metabolism is disrupted by the contaminant [9]. | Review recent passages and test for contaminants. |
Confirmation Through Microscopy
While visual inspection of the flask is the first line of defense, definitive confirmation of fungal contamination requires microscopic examination. Under a standard light microscope:
- Yeast contaminants appear as individual ovoid or spherical particles. In advanced stages, you may observe them budding to create smaller daughter cells [7].
- Molds present as multicellular filaments called hyphae. These form a connected network known as a mycelium, which appears as thin, wisp-like filaments [7]. The presence of these distinct structures differentiates fungal contamination from bacterial contamination (which appears as tiny, moving granules) or simple cellular debris.
Implementing Routine Screening Protocols
A comprehensive screening protocol extends beyond daily visual checks to include systematic microbiological testing and environmental monitoring. This multi-layered approach ensures that contaminants are identified before they can integrate into your culture systems.
Microbiological Culture Testing
The gold standard for detecting low-level fungal contamination involves culturing the cell sample in nutrient broths. This method is highly sensitive and can reveal contaminants not yet visible under a routine microscope. The following workflow outlines the standard procedure for this test, adapted from established laboratory handbooks [51].
Experimental Protocol: Fungal and Bacterial Detection in Cell Culture
Aim: To detect low-level bacterial and fungal contamination in cell cultures through microbiological culture [51].
Materials & Equipment:
- Aerobic nutrient broth (e.g., Tryptone Soy Broth - TSB)
- Anaerobic nutrient broth (e.g., Thioglycollate Medium - Thio)
- Positive control organisms (e.g., Candida albicans for fungi)
- Personal protective equipment (gloves, lab coat, safety glasses)
- Microbiological safety cabinet
- Incubators set to 22°C and 32°C
- Water bath set to 37°C
- Cell scraper
Procedure:
- Pre-culture Preparation: Culture the cell line in the absence of antibiotics for at least two passages prior to testing. This is critical to avoid masking low-level contamination [51] [14].
- Cell Harvesting: For adherent cells, bring them into suspension using a cell scraper. Suspension cell lines can be tested directly.
- Inoculation: In a biosafety cabinet, inoculate the following [51]:
- Test Samples: 2 x aerobic TSB broths and 2 x anaerobic Thio broths with 1.5 mL of the cell suspension.
- Positive Controls: Inoculate 2 x aerobic and 2 x anaerobic broths with a known, low concentration (e.g., 100 cfu) of control organism (Candida albicans).
- Negative Controls: Inoculate 2 x aerobic and 2 x anaerobic broths with 1.5 mL of sterile PBS to confirm reagent sterility.
- Incubation: Incubate the broths for 14 days as follows [51]:
- Thioglycollate (Thio) broths at 32°C.
- Tryptone Soy (TSB) broths at 22°C.
- Observation: Examine all test and control broths for visual turbidity on days 3, 4, 5, 7, 8, and 14. The positive control broths should show growth by day 7, while the negative controls should remain clear [51].
Interpretation of Results:
- Valid Result: All positive controls show turbidity, and all negative controls remain clear.
- Positive Result: Test broths show any turbidity, confirming microbial contamination.
- Negative Result: Test broths remain clear throughout the 14-day incubation period.
Key Reagents for Screening
Table 2: Research Reagent Solutions for Contamination Screening
| Reagent/Item | Function in Screening Protocol |
|---|---|
| Tryptone Soy Broth (TSB) | An aerobic nutrient broth used to support the growth of a wide range of bacteria and fungi, incubated at 22°C [51]. |
| Thioglycollate Medium (Thio) | An anaerobic nutrient broth that supports the growth of anaerobic bacteria and microaerophilic organisms, incubated at 32°C [51]. |
| Antibiotic-Free Medium | Essential for pre-culture preparation to ensure antibiotics do not suppress the growth of contaminants, thereby giving a false-negative result [51] [14]. |
| Positive Control Organisms | Used to validate the testing protocol. Candida albicans (a yeast) is a common fungal control to confirm the broths和支持 fungal growth [51]. |
| Chromogenic Media | Specialized agar (e.g., Hicrome Candida Agar) can differentiate between Candida species and may allow for direct susceptibility testing, reducing result time by 24-48 hours [52]. |
Broader Prevention and Control Strategies
Routine screening is only one pillar of a comprehensive contamination control program. The most effective strategy is to prevent contamination from occurring in the first place. Key measures include:
- Rigorous Aseptic Technique: This is the single most important factor. Minimize talking over open vessels, maintain proper glove hygiene, and ensure consistent sterile practices across all personnel [9] [13].
- Environmental Control: Implement a strict cleaning schedule. Daily disinfection of hoods with 70% alcohol, monthly cleaning with 10% bleach, and regular decontamination of incubators and water baths are crucial [13] [14].
- Judicious Use of Antimycotics: While antibiotics and antimycotics like Amphotericin B can be used, they should not be a routine crutch. Their continuous use can lead to resistant strains and hide cryptic contaminants like mycoplasma. They are best used as a short-term measure or for decontaminating irreplaceable cultures [7] [14].
- Quarantine and Quality Control: All new cell lines should be quarantined and subjected to full quality control, including fungal and mycoplasma testing, before being introduced into the main culture facility [9] [14].
Vigilance and systematic protocol are the keys to managing fungal contamination in cell culture. By understanding and actively looking for the early warning signs—turbidity, pH shifts, and microscopic filaments—researchers can catch problems at their inception. Implementing a routine screening protocol that combines visual inspection with sensitive microbiological cultures provides a powerful defensive barrier. When this screening is embedded within a broader culture of aseptic technique and environmental control, labs can significantly reduce downtime, protect valuable research investments, and ensure the generation of reliable, high-quality data.
Contamination Control: Strategic Prevention and Decontamination Protocols
In cell culture research, airborne fungal contamination represents a persistent and costly threat to experimental integrity, particularly impacting the reliability of drug development studies. Fungal spores are ubiquitous in the environment and, due to their small size and low mass, can remain airborne for extended periods, infiltrating laboratory spaces through air currents, personnel movement, and compromised cleanroom integrity. Once introduced into a cell culture system, fungal contaminants can rapidly proliferate, leading to altered cell metabolism, unexpected pH shifts, and complete culture loss [9]. The control of airborne exposure is therefore not merely a matter of cleanliness but a fundamental component of robust scientific practice, requiring meticulous attention to aseptic technique, environmental monitoring, and procedural discipline. This guide details the critical procedures researchers must master to minimize these risks, framed within the broader context of a comprehensive fungal contamination control strategy.
Fungal contaminants, including molds and yeasts, pose a significant challenge in cell culture due to their environmental prevalence and resilience. Common fungal genera isolated from contaminated samples include Aspergillus, Penicillium, Fusarium, Rhizopus, and Mucor [53]. These organisms can enter the culture system through multiple airborne pathways.
The risk from these sources is not static; it fluctuates with environmental conditions. For instance, summer months can see increased levels of airborne fungal spores from outdoor sources such as lawnmowing, composting, and pollen clouds, which can enter lab spaces despite closed windows and air conditioning systems [54]. Furthermore, high humidity levels can create ideal conditions for mold or yeast growth in dead corners or poorly ventilated areas [54].
Particle Classifications and Cleanroom Standards
Modern cell culture facilities, particularly those for stem cell line production and pharmaceutical development, require high-quality environmental conditions to avoid particle contamination. Airborne particle monitoring is a critical component of any environmental monitoring program, with standards dependent on local conditions and regulatory requirements [55]. The following table summarizes common particle size thresholds relevant for microbial containment.
Table: Airborne Particle Size Classifications and Concerns
| Particle Size Range | Significance & Concerns |
|---|---|
| 0.1 - 0.5 µm | Viruses, small bacteria; can penetrate standard HEPA filters if not properly specified. |
| 0.5 - 5 µm | Bacteria, fungal spores; primary size range for microbial contaminants of concern in cell culture. |
| >5 µm | Fungal spores, dust particles; typically settle rapidly but can be resuspended by air currents or movement. |
Critical Aseptic Procedures for Minimizing Airborne Exposure
Personal Protective Equipment (PPE) and Gowning
Proper gowning establishes a primary barrier between the operator and the clean environment. The process should follow a strict sequence:
- Don a cleanroom-compatible lab coat and hair cover, ensuring all hair is fully contained.
- Sanitize hands with an appropriate disinfectant (e.g., 70% isopropanol).
- Don sterile gloves, taking care to avoid touching the external surface with bare skin.
- If using a biosafety cabinet, disinfect gloves again before placing arms inside the cabinet.
Personnel qualification and regular requalification through aseptic media fill simulations are essential components of maintaining technique competency, a point emphasized in updated regulatory guidance [56] [57].
Biosafety Cabinet (BSC) Management
The Biosafety Cabinet is the first line of defense against airborne contaminants during open vessel manipulations. Its proper use is non-negotiable.
- Certification and Airflow: Ensure the BSC is annually certified and that daily or weekly airflow checks confirm proper operation. HEPA filters are critical for removing particles ≥0.3 µm with 99.97% efficiency, effectively trapping most bacterial and fungal spores [56].
- Work Surface Preparation: Before use, thoroughly disinfect the entire work surface with a sporicidal agent such as hydrogen peroxide or a freshly prepared sodium hypochlorite solution. Arrange all needed materials in a logical workflow to minimize movement during the critical procedure.
- Proper Work Zone: Perform all manipulations within the central area of the BSC, at least 6 inches from the front grille. This maintains a laminar airflow barrier between the sterile interior and the non-sterile room environment.
- Equipment Placement: Avoid placing unnecessary items in the BSC and never block the front or rear grilles, as this disrupts the protective airflow pattern.
Material Transfer and Manipulation Techniques
The movement of materials into the BSC and subsequent manipulations present high-risk moments for contamination.
- Surface Decontamination: Wipe the exterior surfaces of all containers, media bottles, and equipment with 70% ethanol or an appropriate disinfectant before introducing them into the BSC.
- Awareness of Hands: Always be conscious of hand placement. Gloved hands should not pass over open containers. The "no-touch" technique, where sterile instruments are used instead of direct handling, should be employed whenever possible.
- Limiting Vessel Openness: Reduce the time culture vessels remain open to the absolute minimum. Have caps and lids ready for immediate replacement. Open vessels only at the moment of adding or removing cells or media.
- Flaming: While the necessity of flaming glass pipettes and bottle necks is debated in some modern protocols, if used, it must be done carefully to avoid creating turbulent air currents from the heat.
Diagram: Logical relationship between contamination sources, control procedures, and outcomes in managing airborne exposure.
Environmental Monitoring and Process Validation
Aseptic technique alone is insufficient without a robust system to verify the sterility of the manufacturing environment and process. This requires a comprehensive Environmental Monitoring (EM) program and process validation through Aseptic Process Simulation (APS).
Key Reagents for Contamination Testing and Control
Routine monitoring and testing are vital for detecting breaches in aseptic technique or environmental controls before they lead to widespread contamination.
Table: Essential Research Reagents for Contamination Control
| Reagent / Kit | Primary Function | Application Note |
|---|---|---|
| Aerobic Nutrient Broth (e.g., Tryptone Soy Broth) | Supports growth of aerobic bacteria and fungi. | Used for routine sterility testing; incubated at 22°C for fungal detection [58]. |
| Anaerobic Nutrient Broth (e.g., Thioglycollate Medium) | Supports growth of anaerobic bacteria. | Used to detect oxygen-sensitive contaminants; incubated at 32°C [58]. |
| Mycoplasma Detection Kits (PCR-based) | Rapid, sensitive detection of mycoplasma contamination. | Essential for quality control, as mycoplasma does not cause turbidity and is invisible to the eye [54]. |
| Surface Decontamination Solutions | Decontaminate biosafety cabinets and equipment. | Effective against bacterial and fungal spores; used before and after work sessions [9] [54]. |
| NAT-MAT (Animal-Free Pyrogen Test) | Pyrogen testing according to European Pharmacopoeia. | Uses a stable cell line for reproducible, automatable pyrogen detection [54]. |
Experimental Protocol: Testing for Bacterial and Fungal Contamination
Regular screening of cell cultures for microbial contaminants is a critical quality control measure. The following standardized protocol can detect low-level infections that are not visibly apparent [58].
Materials and Equipment
- Culture Media: Aerobic nutrient broth (Tryptone Soy Broth) and Anaerobic nutrient broth (Thioglycollate Medium).
- Positive Control Organisms: Bacillus subtilis (aerobic control), Candida albicans (fungal control), Clostridium sporogenes (anaerobic control). These are available from culture collections like the National Collection of Type Cultures (NCTC).
- Equipment: Personal protective equipment, waterbath set to 37°C, microbiological safety cabinet, incubators set to 22°C and 32°C.
- Cell Sample: Culture the cell line in the absence of antibiotics for at least two passages prior to testing to avoid masking low-level contamination.
Procedure
- Preparation: Bring adherent cells into suspension using a cell scraper. Suspension cell lines can be tested directly.
- Inoculation:
- Inoculate 2 tubes of aerobic broth and 2 tubes of anaerobic broth with 1.5 mL of the test cell sample.
- For each positive control organism, inoculate 2 aerobic and 2 anaerobic broths with approximately 100 colony-forming units (cfu).
- Inoculate 2 aerobic and 2 anaerobic broths with 1.5 mL of sterile PBS as a negative control.
- Incubation:
- Incubate Thioglycollate (anaerobic) broths at 32°C.
- Incubate Tryptone Soy (aerobic) broths at 22°C.
- Observation and Reading:
- Examine the test broths for visual turbidity on days 3-5, 7-8, and 14.
- Read the positive and negative control broths at day 7.
- Interpretation:
- Valid Test: All positive control broths show growth (turbidity) and all negative controls are clear after 7 days.
- Positive Result: Test broths show any evidence of turbidity, indicating microbial growth.
- Negative Result: Test broths remain clear throughout the 14-day incubation.
Diagram: Workflow for testing cell cultures for bacterial and fungal contamination.
Troubleshooting and Corrective Actions for Contamination Events
When contamination is identified, either through routine testing or visual cues, immediate and systematic action is required.
- Disposal and Decontamination: Immediately dispose of contaminated cultures by autoclaving. Do not attempt to "rescue" a contaminated culture unless it is an irreplaceable line, as this risks spreading contaminants. Thoroughly decontaminate the biosafety cabinet, incubators, and all equipment that may have been exposed [9].
- Investigation and Source Identification: Trace back to recent changes in protocols, reagents, or lab conditions. Key areas to investigate include:
- Reagents and Media: Test new lots of serum, buffers, and media [9].
- Equipment: Check cleaning schedules for incubators, water baths, and centrifuges [9].
- Work Practices: Review aseptic technique of all personnel, with special attention to glove hygiene and practices like talking over open vessels [9].
- Environmental Factors: Inspect biosafety cabinet integrity and filter status, and review environmental monitoring data for trends [9] [55].
- Preventing Recurrence: Strengthen prevention protocols through continuous training on aseptic technique, maintaining a strict cleaning schedule for all equipment, and using dedicated aliquots of reagents to avoid cross-contamination between projects [9]. Integrating these actions into a formal Contamination Control Strategy (CCS), as emphasized in modern regulatory guidance, is essential for ongoing risk mitigation [57].
Mastering aseptic technique to minimize airborne exposure is a multifaceted endeavor that extends beyond simple cleanliness. It requires a holistic approach encompassing disciplined personal practice, rigorous environmental control, systematic monitoring, and a culture of continuous vigilance. By understanding the sources of airborne fungi, implementing the critical procedures outlined for biosafety cabinet use, material transfer, and personnel gowning, and adhering to structured testing and troubleshooting protocols, research and drug development professionals can significantly reduce the risk of catastrophic culture loss. This mastery not only protects valuable experimental data and timelines but also upholds the fundamental scientific principles of reproducibility and reliability, which are paramount to successful outcomes in cell culture-based research.
In cell culture research, fungal contamination represents a persistent and costly challenge, capable of compromising experimental integrity and derailing research timelines. Filamentous fungi and yeasts are aggressive contaminants that grow more slowly than bacteria but much faster than cell cultures, often sneaking into cultures via airborne spores, poorly maintained equipment, or contaminated reagents [2]. Unlike bacterial contamination, fungal outbreaks may take longer to notice—but once established, they can be much harder to eliminate [2]. Environmental controls, particularly HEPA filtration and strategic airflow management, form the first line of defense against these airborne threats. By creating a controlled environment with clean air, researchers can significantly reduce the risk of fungal spores colonizing cultures, thereby protecting valuable experiments and ensuring data reproducibility in both research and drug development settings.
Fungal contamination in cell culture primarily involves filamentous fungi and yeasts, which pose unique challenges due to their airborne transmission and resilience. These contaminants often originate from laboratory environments themselves, with common sources including unfiltered air, unclean surfaces, and improper airflow control [1]. Fungal spores are particularly problematic as they can survive on surfaces or in the air for extended periods, making them particularly resilient [2]. Laboratory personnel can inadvertently introduce spores through clothing or improper technique, while contaminated reagents, especially water sources in incubators, serve as frequent reservoirs for fungal growth [1] [2].
The primary fungal contaminants include species like Aspergillus niger, which has been identified as particularly relevant in controlled environments due to its highly pigmented spores that demonstrate resistance to UV-C radiation and easy dispersal in the air [59]. These spores can settle on culture vessels, equipment, and surfaces, waiting for favorable conditions to germinate and colonize cell cultures.
Impact and Detection of Fungal Contamination
The consequences of fungal contamination extend beyond mere inconvenience, potentially invalidating months of research and compromising drug development pipelines. Contamination affects reproducibility and data integrity, leading to experimental failure, wasted resources, and misinterpretation of results [1]. In biopharmaceutical production, the stakes are even higher, where contamination can lead to entire batch failures, resulting in costly production delays and regulatory scrutiny [1].
Detection of fungal contamination typically involves several indicators:
- Visual signs: Filamentous threads or "fuzzy" structures floating in the medium, visible colonies (white, green, or dark patches) on flasks or dish surfaces [2]
- Microscopic identification: Hyphae or budding cells (~10 µm) visible during routine inspection [2]
- Other indicators: Changes in medium clarity or surface tension, and occasionally a fermented odor in cell cultures [2]
The real-world impact of such contamination is illustrated by a recent case from the University of Liège, where researchers had to retract and redo a study on potato pathogens after discovering that their experimental microorganism had been overgrown by a fungal contaminant [60]. Despite initial macroscopic similarities, genomic sequencing ultimately revealed the error, highlighting how even experienced researchers can overlook fungal contamination until significant resources have been invested [60].
HEPA Filtration: Fundamentals and Performance Metrics
HEPA Filter Mechanism and Efficiency
High Efficiency Particulate Air (HEPA) filtration represents the gold standard for air purification in cell culture environments. These filters operate through a sophisticated mechanical filtration mechanism that captures airborne particles with exceptional efficiency. The filtration process relies on three primary mechanisms: interception, where particles following air streamlines come within one particle radius of a fiber and adhere to it; impaction, where larger particles cannot adjust to the changing air flow around fibers and collide with them; and diffusion, where Brownian motion causes the smallest particles to deviate from air streamlines and contact filter fibers [61].
The performance standard for HEPA filters is defined by their ability to remove at least 99.995% of particles at the most penetrating particle size (MPPS) of 0.3 micrometers [61]. This efficiency is particularly relevant for fungal spore control, as many fungal spores range in size from 1-5 micrometers, well within the HEPA filter's effective capture range. The 0.3 micrometer benchmark represents the most challenging particle size to capture, meaning that both larger and smaller particles are captured with even higher efficiency.
Technical Performance Data
The quantitative performance of HEPA filters makes them indispensable for controlling fungal contamination in cell culture environments. The following table summarizes key performance metrics and their implications for contamination control:
Table 1: HEPA Filtration Performance Metrics for Contamination Control
| Performance Metric | Specification | Significance for Fungal Control |
|---|---|---|
| Filtration Efficiency | 99.995% at 0.3 μm [61] | Effectively captures fungal spores and other airborne contaminants |
| Particle Size Range | Effective across spectrum, with 0.3 μm MPPS | Comprehensive protection against diverse fungal spores |
| Air Quality Delivery | Cleanroom-level air quality inside equipment [61] | Maintains sterile environment for sensitive cultures |
| Application Flexibility | Integrates into incubator shakers, CO₂ incubators, cleanrooms [61] | Multiple protection points in cell culture workflow |
The integration of HEPA filtration directly into cell culture equipment, such as incubator shakers or CO₂ incubators, delivers cleanroom-level air quality precisely where it is needed most [61]. This targeted approach provides a controlled environment ideal for sensitive applications like CHO cells or stem cells, which are particularly vulnerable to contamination effects [61].
Airflow Management Strategies for Contamination Prevention
Airflow Patterns and Containment Principles
Effective contamination control extends beyond filtration to encompass strategic airflow management. The principle of containing contaminated air and preventing its mixing with clean areas is fundamental to laboratory design. Two primary airflow strategies dominate controlled environments: laminar (unidirectional) flow and turbulent (mixed) flow. Laminar flow describes the orderly, more or less parallel motion of air in a single direction, typically employed in biosafety cabinets to create a sterile workspace [62]. In contrast, turbulent flow involves chaotic air movement with particles frequently crossing streamlines randomly, which is characteristic of most cleanroom environments [62].
The critical consideration in airflow management is the prevention of air mixing between contaminated and clean zones. As noted in assessments of incubator design, systems without internal fans rely on "very gentle convection and diffusion that mixes up the gas," creating minimal airstreams that avoid blowing contaminants into culture dishes [63]. This principle highlights the importance of understanding airflow dynamics in all equipment, not just primary containment devices.
Practical Airflow Implementation
The application of airflow management principles extends throughout the cell culture environment. In biosafety cabinets, vertical or horizontal laminar flow creates a protective air curtain that sweeps particulates away from the critical work area. For larger environments, cleanroom classification standards dictate air change rates and pressurization schemes that ensure air flows from cleaner to less clean areas, preventing the ingress of contaminants.
Incubator design considerations illustrate the nuanced approach required for effective airflow management. While fan-driven HEPA-filtered systems provide active contamination control, alternative designs employ passive approaches where "any airborne contaminants will gently settle on any surface" rather than being circulated [63]. This approach acknowledges that with proper aseptic technique and culture vessel lids, the contamination risk can be effectively managed without creating turbulent air streams that might distribute contaminants [63].
The relationship between environmental control elements and contamination pathways can be visualized through the following logical framework:
Figure 1: Integrated contamination control strategy showing how environmental systems address specific threats through multiple defense mechanisms to ensure sterile culture conditions.
Integrated Environmental Control Implementation
Equipment Integration and Maintenance Protocols
The effective implementation of HEPA filtration and airflow management requires systematic integration across cell culture equipment and environments. This begins with the strategic placement of HEPA filtration systems at critical control points, including biosafety cabinets, incubators, and cleanroom air handling units. Modern CO₂ incubators, for instance, may incorporate HEPA filters that "deliver cleanroom-level air quality right inside your incubator" [61], creating a secondary barrier beyond the biosafety cabinet.
Maintenance protocols for HEPA-equipped systems must be rigorously followed to sustain performance. Filter integrity testing should be conducted regularly, typically every six to twelve months, to ensure no leaks have developed. Pressure differentials across filters must be monitored to identify when loading necessitates replacement. For incubators specifically, comprehensive decontamination schedules should be maintained, with experts recommending that "between once per month and once per three months should be sufficient" for most research applications [63].
Humidity control represents another critical factor in fungal management, particularly within incubators. High humidity is essential to minimize medium evaporation but can promote fungal growth if not properly managed [63]. Advanced incubator designs address this challenge with humidity control systems that function as "a new anti-contamination feature" by managing moisture without traditional water pans, which are a frequent but overlooked contamination source [63].
Comprehensive Sterilization Methodologies
While HEPA filtration and airflow management provide critical prevention against fungal introduction, complementary sterilization methods are essential for comprehensive contamination control. Research comparing various bioburden reduction techniques has identified multiple effective approaches with different applications:
Table 2: Comparative Efficacy of Sterilization Methods Against Fungal Contaminants
| Sterilization Method | Mechanism of Action | Efficacy Against Fungi | Application in Cell Culture |
|---|---|---|---|
| Dry Heat | Thermal oxidation | High at sufficient temperature/time [59] | Heat-resistant equipment sterilization |
| UV Light | DNA damage via irradiation | Variable; A. niger shows high resistance [59] | Surface decontamination with limitations |
| Isopropyl Alcohol (70%) | Protein denaturation | Immediate sterilization of A. niger spores [59] | Routine surface disinfection |
| Hydrogen Peroxide (7.5%) | Oxidative damage | No immediate effect on A. niger spores [59] | Limited value for fungal control |
| Vaporized Hydrogen Peroxide | Oxidative damage in vapor phase | ~2 log reduction in A. niger spores [59] | Bulk bioburden reduction |
| Plasma Sterilization | Reactive species interaction | Varies by gas type and microbe [59] | Non-heat-sensitive components |
The selection of appropriate sterilization methods should be guided by the specific application and materials involved. As evidenced by the research, "dry heat could be used for heat-resistant component bioburden reduction, and VHP or plasma for non-heat-resistant components in bulk bioburden reduction" [59]. Furthermore, IPA demonstrates excellent immediate efficacy against fungal spores and can be used for "additional surface bioburden reduction during assembly and testing" [59].
Experimental Protocols for Validation and Monitoring
Environmental Monitoring and Validation Protocols
Regular monitoring and validation of environmental controls are essential to maintain contamination-free cell culture conditions. The following protocols provide methodologies for assessing the effectiveness of HEPA filtration and airflow management systems:
Air Quality Monitoring Protocol
- Sample Collection: Use volumetric air samplers to collect air samples from critical locations including biosafety cabinets, incubators, and room environments
- Culture Conditions: Collect samples onto appropriate fungal culture media such as Sabouraud dextrose agar or malt extract agar
- Incubation Parameters: Incubate plates at 25-30°C for 5-7 days to accommodate slower-growing fungi
- Analysis: Count resulting colonies and calculate colony-forming units per cubic meter (CFU/m³)
- Action Limits: Establish thresholds based on cleanroom classification standards with typical limits of <1 CFU/m³ for ISO Class 5 environments
HEPA Filter Integrity Testing
- Aerosol Challenge: Generate polydisperse or monodisperse aerosol upstream of filter
- Scanning Procedure: Use photometer or particle counter with scanning probe to detect leaks downstream
- Acceptance Criteria: No individual leak exceeding 0.01% of upstream concentration
- Documentation: Record location and size of any leaks for repair verification
Airflow Pattern Visualization
- Tracer Generation: Produce visible water or glycol fog using commercial smoke generator
- Flow Release: Introduce tracer upstream of critical areas or at room boundaries
- Documentation: Capture video and still images of airflow patterns
- Analysis: Verify unidirectional flow in BSCs and proper airflow from clean to less clean areas
Fungal Contamination Detection and Identification
When environmental monitoring indicates the presence of fungi, or when culture contamination is suspected, the following experimental protocols enable detection and identification:
Routine Fungal Screening Protocol
- Microscopic Examination:
- Collect culture medium samples and prepare wet mounts
- Examine at 100-400X magnification for hyphal structures or budding cells
- Note characteristic fungal morphology: septate or non-septate hyphae, conidia, etc.
Culture-Based Detection:
- Inoculate samples onto fungal-specific media with antibiotics to inhibit bacterial growth
- Incubate at 25-30°C and 37°C to detect mesophilic and thermophilic species
- Observe daily for colony formation, noting color, texture, and growth rate
Molecular Identification (for persistent contamination):
- Extract genomic DNA from pure cultures using commercial fungal DNA kits
- Amplify ITS region (Internal Transcribed Spacer) using PCR with universal fungal primers
- Sequence amplified products and compare with databases for species identification
The experimental workflow for comprehensive environmental monitoring and contamination response can be visualized as follows:
Figure 2: Environmental monitoring and response workflow showing the relationship between preventive monitoring, contamination detection, and corrective actions to maintain controlled environments.
Research Reagent Solutions for Contamination Control
The implementation of effective environmental controls requires specific reagents and materials designed to prevent, detect, and address fungal contamination. The following table details essential solutions for a comprehensive contamination control strategy:
Table 3: Essential Research Reagents and Materials for Fungal Contamination Control
| Reagent/Material | Function | Application Protocol |
|---|---|---|
| HEPA Filters | Airborne particle removal with 99.995% efficiency at 0.3 μm [61] | Install in biosafety cabinets, incubators, cleanroom ventilation systems |
| Isopropyl Alcohol (70%) | Surface disinfection with immediate effect on fungal spores [59] | Apply to work surfaces before/after procedures; equipment decontamination |
| Vaporized Hydrogen Peroxide | Bulk bioburden reduction with ~2 log reduction in fungal spores [59] | Use for decontaminating equipment spaces and non-heat-resistant components |
| Sabouraud Dextrose Agar | Fungal culture medium for environmental monitoring | Collect air and surface samples; incubate at 25-30°C for fungal detection |
| Hoechst 33258 Stain | DNA-binding fluorescent dye for mycoplasma detection [64] | Stain cultures and examine microscopically for characteristic fluorescence patterns |
| Sterile Single-Use Consumables | Prevention of cross-contamination from reagents and equipment [1] | Use pre-sterilized flasks, pipettes; avoid reuse of disposable items |
| Validated Cell Lines | Certified contamination-free starting materials [64] | Source from reputable banks; quarantine and test new lines before use |
These reagents and materials form the foundation of a robust contamination control program when combined with proper procedures and environmental controls. Particularly critical is the use of "certified Mycoplasma-free cell lines and reagents" alongside routine screening to detect contaminants that might otherwise remain hidden [2].
The optimization of HEPA filtration and airflow management systems represents a critical defense against fungal contamination in cell culture laboratories. By implementing comprehensive environmental controls that integrate proper equipment selection, validated protocols, and rigorous monitoring, researchers can create stable environments conducive to reliable cell culture work. The systematic approach outlined in this technical guide—combining engineering controls, procedural discipline, and validation methodologies—provides a roadmap for maintaining contamination-free conditions essential for both basic research and drug development applications. As cell culture technologies advance and applications become more sophisticated, the fundamental principles of environmental control remain essential pillars supporting scientific progress and therapeutic innovation.
In the context of cell culture research, the control of fungal contamination is not merely a matter of laboratory housekeeping; it is a fundamental requirement for data integrity and reproducibility. Fungal and yeast contaminants, which often originate from airborne spores, laboratory personnel, or the environment, can rapidly compromise cultures, leading to experimental failure and significant financial losses [2] [1]. Equipment such as CO₂ incubators, water baths, and biosafety cabinets (BSCs) can act as primary reservoirs for these contaminants if not properly maintained. Incubators, with their warm, humidified environments, and water baths, providing stagnant water, are particularly inviting for the growth of filamentous fungi and yeasts [2] [13]. A systematic and validated approach to cleaning this core equipment is therefore an essential pillar of any robust cell culture contamination prevention strategy, directly supporting the integrity of research and drug development pipelines.
Systematic Cleaning of CO₂ Incubators
CO₂ incubators provide an ideal environment for cell growth, but their constant warmth and humidity also create perfect conditions for fungal and microbial contaminants like yeast and filamentous fungi [2] [13]. A proactive and regular cleaning regimen is essential to prevent these contaminants from compromising your cultures.
Detailed Cleaning Protocol
Frequency: Weekly decontamination of internal surfaces and water trays is recommended for optimal prevention [2] [13].
Materials and Reagents:
- Disinfectants: 70% ethanol or a 1:10 dilution of fresh bleach, followed by a rinse with sterile water or 70% ethanol to prevent corrosion [65] [13].
- Cleaning Tools: Soft, non-abrasive cloths.
- Water: Use purified water (e.g., reverse-osmosis) for humidity pans to minimize scale and microbial introduction [66].
Step-by-Step Procedure:
- Preparation: Safely power down the incubator and remove all internal components, such as shelves, racks, and the water pan.
- Initial Decontamination: Thoroughly wipe down all internal surfaces, including the chamber walls, door, and gasket, with 70% ethanol.
- Disinfection: Apply a second disinfectant. A 1:10 fresh bleach solution is effective, but it must be rinsed with sterile water or 70% ethanol afterward to prevent corrosion of stainless steel surfaces [65]. Alternatively, use a commercial disinfectant validated for incubator use.
- Component Cleaning: Clean all removed components (shelves, water pan) separately using the same disinfection protocol. For the water pan, empty it completely and decontaminate it before refilling with fresh, purified water.
- Reassembly and Operation: Once all parts are dry, reassemble the incubator and restore power, allowing it to stabilize to the required temperature, CO₂, and humidity levels before reintroducing cell cultures.
Systematic Cleaning of Laboratory Water Baths
Laboratory water baths are a frequent, yet often overlooked, source of contamination. Their stagnant, warm water is an ideal breeding ground for algae, fungi, and bacteria, posing a direct risk to samples incubated within them [67] [66]. Consistent maintenance is critical to prevent these "creatures from the black lagoon" from ruining experiments [68].
Detailed Cleaning and Maintenance Protocol
Frequency: Weekly cleaning is recommended, though this interval can be extended to two weeks if a biocide is used and water clarity is monitored [66].
Materials and Reagents:
- Biocide/Disinfectant: A specialized commercial water bath disinfectant or a mild, non-chlorinated cleaning solution. Bleach should be avoided as it corrodes stainless steel [66] [68].
- Water: Type III purified water (e.g., reverse-osmosis or singly distilled water) should be used. Avoid both tap water (which causes scale) and ultra-pure deionized water (which can be corrosive) [66] [68].
- Cleaning Tools: Soft cloths or sponges. Abrasive materials like steel wool must never be used as they damage the protective lining of the bath [66].
Step-by-Step Procedure:
- Safety First: Unplug the water bath to eliminate any risk of electrocution [66].
- Disinfect Water: Before draining, disinfect the existing water by either boiling it for 20 minutes (if the bath is capable) or adding a specialized bath disinfectant and allowing it to circulate [66].
- Drain the Bath: Empty the bath via its drain outlet. For models without a drain, carefully siphon the water out using rubber tubing—never use mouth suction [66] [68].
- Clean Interior: Wash the empty chamber with a mild detergent or a dedicated water bath cleaner and a soft cloth to remove any biofilm, scale, or residues.
- Inspect for Damage: Check for signs of wear and tear, such as leaks or cracks, and address them promptly [66].
- Refill with Correct Water: Refill the bath with the recommended Type III purified water. If desired, add a manufacturer-recommended biocide to suppress microbial growth between cleanings [66].
Contamination Prevention Accessories:
- Polypropylene Spheres: A layer of these floating plastic beads covers the water surface, significantly reducing evaporation and heat loss, and acting as a physical barrier to airborne contaminants [66].
- Copper Objects: Placing a small piece of copper tubing in stationary baths can provide antimicrobial protection, but it should not be used in shaking baths or allowed to contact and damage stainless steel [68].
Systematic Cleaning of Biosafety Cabinets
Biosafety Cabinets are the first line of defense in protecting both the operator and the cell cultures from cross-contamination. Proper decontamination and maintenance are non-negotiable for ensuring their continued performance and the safety of the laboratory environment [65].
Detailed Decontamination and Maintenance Protocol
Frequency: Daily surface decontamination, plus monthly more thorough cleaning and annual professional certification [65] [13].
Materials and Reagents:
- Disinfectants: 70% ethanol is standard for daily wiping. For monthly decontamination, a 1:10 fresh bleach solution followed by a 70% ethanol rinse is effective and helps prevent rust [65]. Always ensure disinfectant compatibility with the BSC's interior materials.
- Cleaning Tools: Wipes that are non-abrasive and low-lint.
Step-by-Step Procedure for Routine Decontamination:
- Preparation: Allow the BSC to run for at least 15 minutes to purge particulate matter from the air. Gather all necessary clean materials.
- Surface Decontamination: Thoroughly wipe down all interior work surface areas, the interior of the glass sash, and the sides of the cabinet with 70% ethanol.
- Material Decontamination: Wipe the outside of all vessels, pipettes, and other equipment with 70% ethanol before introducing them into the BSC.
- Final Wipe-Down: After work is complete and all materials have been removed, decontaminate the entire interior surface once more with 70% ethanol.
Critical Maintenance Requirements:
- HEPA Filter Certification: BSCs must be certified at least annually by a qualified professional to ensure HEPA filters are functioning correctly—capturing 99.97% of particles 0.3 microns in size—and that airflow patterns are intact [69] [65].
- Vapor Decontamination: For major maintenance, filter changes, or before moving the cabinet, a full vapor decontamination (e.g., with hydrogen peroxide) is required. This complex procedure must be performed by trained professionals [65].
Quantifying Contamination Risks and Controls
A clear understanding of contamination sources and detection methods is vital for developing an effective defense. The following tables summarize key information on fungal contaminants and the performance standards of critical control equipment.
Table 1: Common Fungal Contaminants in Cell Culture: Sources and Detection
| Contaminant Type | Common Sources | Visual & Microscopic Signs | Additional Detection Methods |
|---|---|---|---|
| Filamentous Fungi | Unfiltered air, humidified incubators, cellulose products (cardboard), water baths [2] [13]. | "Fuzzy" structures (mycelia) or green/black patches floating in medium [2]. | Microbial culture, periodic mycoplasma screening via PCR or fluorescence staining [2]. |
| Yeasts | Lab personnel, unfiltered air, fruit, contaminated water baths and incubators [2] [13]. | Turbidity (cloudiness) in the culture medium, sometimes a fermented odor [2]. | Microbial culture, periodic mycoplasma screening via PCR or fluorescence staining [2]. |
Table 2: Equipment Performance Standards for Contamination Control
| Equipment | Key Performance Metric | Standard / Efficiency | Maintenance & Validation Frequency |
|---|---|---|---|
| Biosafety Cabinet | HEPA Filtration | 99.97% efficient at capturing particles ≥0.3 µm [69]. | Annual certification required [65]. |
| Laboratory Filter | Sterilizing Filtration | 0.2 µm filter removes bacteria; 0.1 µm filter required for smaller organisms like Mycoplasma [70]. | Validated per use; integrity tested. |
| Analytical Balance | Calibration | Auto-calibration features require periodic external verification with NIST-traceable standards [70]. | Frequency depends on use and criticality; external checks recommended [70]. |
The Scientist's Toolkit: Essential Reagents and Materials
A successful equipment maintenance program relies on the consistent use of correct and high-quality materials. The following table details key reagents and their specific functions in the cleaning and maintenance process.
Table 3: Essential Reagents for Equipment Cleaning and Maintenance
| Reagent / Material | Primary Function | Application Notes & Cautions |
|---|---|---|
| 70% Ethanol | Broad-spectrum disinfectant for surface decontamination. | Primary agent for daily wiping of BSCs and incubator surfaces; effective and fast-evaporating [13]. |
| Sodium Hypochlorite (Bleach) | Strong oxidizing disinfectant, effective against a wide range of microbes and spores. | Use as a 1:10 dilution; must be rinsed (e.g., with ethanol or water) from stainless steel surfaces to prevent corrosion [65] [13]. |
| Commercial Water Bath Biocide | Prevents the growth of algae, fungi, and bacteria in water baths. | Extends time between cleanings; use according to manufacturer's instructions to avoid sample interference [66]. |
| Type III / RO Purified Water | Filling and cleaning water baths and incubator humidity pans. | Reduces scale buildup and introduces fewer microbes than tap water; less corrosive than ultra-pure water [66] [68]. |
| HEPA Filter | Critical containment component for BSCs and cleanrooms; removes particulate and microbial contamination from the air. | Efficiency verified by annual certification; filters must be replaced and the cabinet decontaminated by professionals [69] [65]. |
Experimental Workflow for Contamination Investigation
When contamination occurs, a systematic investigation is required to identify the source and implement corrective actions. The following diagram outlines a logical workflow for responding to a suspected fungal contamination event.
Fungal contamination in cell culture is a formidable challenge, but it is not an insurmountable one. By implementing the systematic cleaning protocols outlined for incubators, water baths, and biosafety cabinets, laboratories can drastically reduce the risk of experimental loss. The cornerstone of prevention lies in unwavering adherence to aseptic technique, coupled with a disciplined, documented, and proactive approach to equipment maintenance. Remember, in the fight against contamination, consistency is far more effective than heroics. A rigorous and collective commitment to these practices is the ultimate key to safeguarding the integrity of your research and the success of your scientific endeavors.
Fungal contamination represents a significant and constant challenge in cell culture laboratories, capable of compromising experimental integrity, leading to substantial losses of time and resources, and potentially posing health risks to personnel [71]. Among the strategies to combat this issue, the use of antimycotic agents is a common practice. The polyene antibiotics, Amphotericin B and Nystatin, stand as two critical tools in this effort due to their broad-spectrum fungicidal activity [72] [73]. However, their application is a double-edged sword; their mechanism of action, which targets fungal membrane sterols, also underlies their well-documented toxicity to mammalian cells [74] [75]. This creates a delicate balance for researchers: achieving effective antifungal protection while minimizing adverse effects on the cultured cells. This whitepaper provides an in-depth technical guide to the effective use of Amphotericin B and Nystatin within the context of cell culture research. It synthesizes current understanding of their mechanisms of action and toxicity, provides detailed experimental data on their cytotoxic profiles, and outlines practical protocols for their application, all framed within the overarching goal of preserving cell culture integrity.
Mechanisms of Action and Toxicity
A thorough understanding of the mechanisms by which Amphotericin B and Nystatin exert their effects is fundamental to deploying them effectively and safely in a cell culture environment.
Molecular Mechanisms of Antifungal Activity
Both Amphotericin B and Nystatin belong to the polyene class of antifungals and share a primary mechanism of action. Their activity stems from a high-affinity binding to ergosterol, the principal sterol component of fungal cell membranes [73] [76]. This binding disrupts membrane integrity in two key ways. First, it can lead to the formation of transmembrane pores or channels that are permeable to monovalent ions (K⁺, Na⁺, Cl⁻, H⁺) and small molecules [76]. This leakage, particularly of potassium, disrupts vital electrochemical gradients and leads to metabolic dysfunction and cell death. Second, an alternative or complementary mechanism involves the simple sequestration or extraction of ergosterol from the membrane, thereby compromising its structural and functional integrity without necessarily forming defined pores [77].
The therapeutic selectivity of these drugs is theoretically based on their higher affinity for ergosterol than for cholesterol, the main sterol in mammalian cell membranes [74]. However, this selectivity is relative, not absolute, which is the fundamental cause of their toxicity to host cells.
Mechanisms of Mammalian Cell Toxicity
The toxicity of polyenes to mammalian cells in culture arises from their undesired interaction with cholesterol-containing membranes [77] [75]. The formation of similar ion-permeable channels in mammalian cell membranes can lead to a catastrophic loss of ionic homeostasis. Research has shown that Amphotericin B can induce the leakage of potassium from mammalian cells and cause a collapse of the membrane potential [74] [76]. Furthermore, studies on kidney cell lines have revealed that Amphotericin B treatment modulates receptor trafficking by increasing endosomal pH, a consequence of pore formation in intracellular membranes that disrupts crucial postendocytic trafficking pathways [74].
Notably, the concept of "two types of channels" has been proposed specifically for Amphotericin B [76]. At lower concentrations, the drug may form "non-aqueous channels" that permit the leakage of monovalent cations like K⁺ but are not immediately lethal. At higher, critical concentrations, these evolve into larger "aqueous pores" that are permeable to anions and divalent cations like Ca²⁺. This sustained flux of ions, particularly H⁺ and Ca²⁺, can trigger events that lead to programmed cell death (apoptosis) [76]. The following diagram illustrates the differential toxicity mechanisms of Amphotericin B in fungal versus mammalian cells.
Cellular Defense Mechanisms
Intriguingly, mammalian cells are not entirely passive targets. Imaging studies on human cells exposed to Amphotericin B have revealed a defense mechanism whereby cells actively eliminate drug molecules from their membranes through the formation and budding of small amphotericin B-containing lipid vesicles (exosomes) [77]. Raman spectroscopy analysis has shown that these ejected vesicles are notably devoid of cholesterol, suggesting that the drug can diffuse within the lipid bilayer and be sequestered into sterol-poor membrane domains for export, a process that may help mitigate intracellular damage.
Quantitative Toxicity and Efficacy Data
Empirical data on the concentration-dependent effects of Amphotericin B and Nystatin is essential for making informed decisions in the lab. The following tables summarize key findings from in vitro studies.
Table 1: Cytotoxicity of Amphotericin B on Mammalian Cells In Vitro
| Cell Type | Amphotericin B Concentration | Exposure Time | Observed Effect | Citation |
|---|---|---|---|---|
| Vero & MDCK-PTR9 cells | Not specified (low conc.) | 1 h / 19 h | Cell viability maintained | [74] |
| Mouse Osteoblasts | 1 μg/mL | 7 days | Normal proliferation and morphology | [75] |
| Mouse Osteoblasts & Fibroblasts | 5-10 μg/mL | 7 days | Decreased proliferation; abnormal morphology | [75] |
| Mouse Osteoblasts | 100 μg/mL & 1000 μg/mL | 1 hour | Widespread cell death | [75] |
| Human colon epithelial cells (CCD 841 CoTr) | >5 μg/mL | Not specified | Drastic fall in viability; IC₅₀ = 8.7 μg/mL | [77] |
| Human colon adenocarcinoma cells (HT-29) | >5 μg/mL | Not specified | Drastic fall in viability; IC₅₀ = 21.2 μg/mL | [77] |
Table 2: Efficacy and Toxicity Profile of Nystatin and its Derivatives
| Compound | Antifungal Potency (Units/mg) | Water Solubility | Relative Toxicity | Key Findings | Citation |
|---|---|---|---|---|---|
| Nystatin A₁ | 5756 | Limited (requires DMF) | High | Markedly toxic to human keratinocyte cells | [78] [72] |
| Nystatin, Ethanol Amide Derivative | 5793 | Up to 100 mg/mL | 13.5x lower than Nystatin | Potency similar to parent drug, high solubility, low toxicity | [72] |
| Novel Nystatin A₁ Derivatives | Not specified (lower than parent) | Improved | Lower than Nystatin A₁ | More active against C. albicans in RHOE model with lower epithelial toxicity | [78] |
Experimental Protocols and Workflows
This section outlines core methodologies for assessing the toxicity and efficacy of antimycotics in a cell culture setting, providing a reproducible framework for research.
Protocol for Assessing Cytotoxicity via Metabolic Assays
Objective: To determine the concentration- and time-dependent cytotoxicity of Amphotericin B or Nystatin on adherent mammalian cells.
Materials:
- Cell Lines: Relevant mammalian cells (e.g., MC3T3 osteoblasts, BALB/3T3 fibroblasts, Vero cells) [75].
- Test Articles: Amphotericin B or Nystatin stock solutions.
- Reagents: Cell culture medium, alamarBlue reagent or MTT reagent, DMSO.
- Equipment: 96-well cell culture plates, multi-well plate reader, CO₂ incubator.
Procedure:
- Cell Seeding: Seed cells in a 96-well plate at a standardized density (e.g., 3,000-10,000 cells/well) and incubate for 24 hours to allow attachment [75].
- Dosing: Prepare a series of drug dilutions in fresh culture medium. Replace the medium in the wells with the drug-containing medium. Include a vehicle control (e.g., DMSO at the same concentration as in drug wells).
- Incubation: Incubate the plates for the desired exposure period (e.g., 5 hours for acute toxicity, or up to 7 days for prolonged exposure with medium changes every 2-3 days).
- Viability Assessment:
- alamarBlue Assay (Non-lethal, for prolonged assays): At designated time points, add alamarBlue reagent directly to the medium (typically 10% v/v). Incubate for 1-4 hours, then measure fluorescence (Ex ~560 nm, Em ~590 nm) [75].
- MTT Assay (Endpoint assay): After exposure, add MTT reagent to the wells. Incubate for several hours to allow formazan crystal formation. Solubilize the crystals with DMSO and measure the absorbance at 570 nm [75].
- Morphological Observation: Concurrently, observe changes in cell morphology (e.g., rounding, shrinkage, detachment) using a light microscope [75].
- Data Analysis: Normalize metabolic activity or absorbance readings to the vehicle control to calculate the percentage of cell viability.
The workflow for this cytotoxicity assessment is linear and sequential, as shown below.
Protocol for Evaluating Antifungal Efficacy
Objective: To determine the minimum inhibitory concentration (MIC) of an antimycotic against a specific fungal contaminant.
Materials:
- Fungal Strain: e.g., Candida albicans.
- Test Article: Amphotericin B or Nystatin.
- Media: RPMI 1640 medium or Sabouraud dextrose broth.
- Equipment: Sterile 96-well plates, incubator.
Procedure (Broth Microdilution, based on CLSI guidelines) [74]:
- Inoculum Preparation: Prepare a suspension of the fungal test organism in broth medium, adjusted to a standard turbidity (e.g., 0.5 McFarland standard).
- Dilution Series: Perform a series of two-fold dilutions of the antimycotic in a 96-well plate containing broth.
- Inoculation: Add the standardized fungal inoculum to each well.
- Incubation: Incubate the plate at the appropriate temperature (e.g., 35°C for C. albicans) for 24-48 hours.
- Reading MIC: The MIC is defined as the lowest concentration of the drug that prevents visible growth of the organism.
The Scientist's Toolkit: Essential Research Reagents
Table 3: Key Reagents for Antimycotic Research in Cell Culture
| Reagent / Material | Function / Application | Example Usage in Protocols |
|---|---|---|
| Amphotericin B | Broad-spectrum antimycotic for prevention/treatment of contamination. | Used in cytotoxicity assays (1-100 μg/mL) [75] and antifungal killing curves [74]. |
| Nystatin | Topical antimycotic; used for control of superficial contaminants. | Studied for potency via agar diffusion assays [72]. |
| alamarBlue | Cell-permeant, non-toxic redox indicator for measuring cell proliferation and viability. | Added directly to culture medium during long-term toxicity studies [75]. |
| MTT Reagent | Tetrazolium salt reduced by metabolically active cells to a purple formazan product. | Used for endpoint viability assays after acute drug exposure [75]. |
| BCECF-AM | Fluorescent pH indicator for measuring intracellular pH changes. | Used to label C. albicans to demonstrate AmB-induced vacuolar pH increase [74]. |
| Sabouraud Dextrose Agar (SDA) | Selective growth medium for fungi. | Used for culturing and maintaining fungal strains like C. albicans and S. cerevisiae [74]. |
| RPMI 1640 Medium | Standardized medium for antifungal susceptibility testing. | Used as a diluent and growth medium in MIC and killing curve assays [74]. |
The effective use of Amphotericin B and Nystatin in the context of cell culture research hinges on a meticulous, data-driven approach. While their fungicidal efficacy is potent, their inherent toxicity to mammalian cells demands careful consideration of concentration, exposure time, and cell type. The empirical data clearly shows that concentrations required to eradicate resilient, biofilm-associated fungi (potentially as high as 100-1000 μg/mL for local delivery) are profoundly cytotoxic to osteoblasts and fibroblasts [75]. Therefore, routine prophylactic use in valuable or sensitive cell cultures is not recommended. The future of antimycotic application in sensitive research environments lies in the development of safer formulations. Promising research includes the conjugation of Amphotericin B with arabinogalactan, which has been shown to neutralize its toxicity in mammalian cells while preserving antifungal activity [74]. Similarly, novel derivatives of Nystatin, such as its ethanol amide derivative, demonstrate that chemical modification can yield compounds with dramatically reduced toxicity (up to 13.5-fold) and greatly enhanced water solubility, without sacrificing potency [78] [72]. These advances, coupled with a deeper understanding of cellular defense mechanisms such as drug expulsion via exosomes [77], pave the way for next-generation antimycotic strategies that offer robust protection for cell cultures without the detrimental side effects that have long plagued these essential antibiotics.
Fungal contamination represents a persistent and damaging challenge in cell culture laboratories. Fungal and yeast spores are ubiquitous in the environment, often infiltrating labs through air handling systems or on personnel, and can rapidly establish themselves in culture vessels [2] [36]. Unlike bacterial contamination, which often manifests quickly through turbid media and pH shifts, fungal outbreaks may develop more slowly but become remarkably resilient once established [2] [1]. An established fungal outbreak jeopardizes not only individual experiments but can cross-contaminate other cultures, incubators, and shared equipment, potentially compromising entire research programs and resulting in significant financial losses and data integrity issues [1] [60]. This guide provides a systematic, in-depth protocol for emergency response to such outbreaks, framed within the broader context of mitigating common sources of fungal contamination in cell culture.
Immediate Response and Containment
The moment fungal contamination is confirmed, the primary objective shifts from saving individual cultures to preventing a lab-wide crisis. The following immediate actions are critical.
Initial Isolation and Quarantine
- Isolate Contaminated Cultures: Immediately move all contaminated flasks, dishes, and plates from the incubator and biosafety cabinet into a sealed container, such as a biohazard bag or a dedicated, sealed tub. This must be the first step to prevent further spore dispersal [1].
- Quarantine the Area: Mark the incubator and biosafety cabinet where the contaminated cultures were housed as "CONTAMINATED." Restrict their use until a full decontamination is performed. If possible, dedicate a specific area of the lab for handling the contaminated items [2].
- Notify Relevant Personnel: Alert all lab members and the principal investigator about the outbreak. Transparency is key to preventing others from inadvertently spreading the contamination [60].
Assessment of Contamination Scope
- Visual Inspection: Conduct a thorough, macroscopic and microscopic examination of all cultures in the lab, not just those adjacent to the known contamination. In early stages, fungi produce thin filamentous mycelia, which can progress to dense, fuzzy patches that may appear white, yellowish, or black [36].
- Inventory at Risk: Document all cell lines, reagents, and media bottles that were exposed to the contaminated environment or handled around the same time. This list will be essential for tracking and subsequent testing.
Identification and Characterization of the Contaminant
Proper identification informs the decontamination strategy and helps trace the contamination source. The table below summarizes the common identification methods.
Table 1: Methods for Identifying Fungal Contamination
| Method | Procedure | Key Indicators | Advantages/Limitations |
|---|---|---|---|
| Direct Microscopy | Observe culture medium under low-power (e.g., 40-100x) microscope. | Filamentous mycelia (hyphae) for molds; budding cells for yeasts [2] [36]. | Advantage: Rapid, low-cost initial assessment.Limitation: Cannot speciate; low sensitivity for sparse contamination. |
| Culture & Morphology | Plate culture medium on fungal growth media (e.g., Sabouraud agar), incubate, observe colony morphology. | Colony color (white, green, black), texture (fuzzy, powdery), and growth rate [2]. | Advantage: Confirms viability; allows for preliminary speciation based on phenotype.Limitation: Slow, requires days to weeks [79]. |
| Molecular Diagnostics (qPCR) | Extract DNA from culture medium and perform quantitative Polymerase Chain Reaction with fungal-specific primers. | Amplification of unique genetic sequences for specific fungi (e.g., Aspergillus, Fusarium) [79]. | Advantage: High speed (hours), sensitivity, and specificity; can speciate [79].Limitation: Higher cost; requires specialized equipment and expertise. |
Eradication and Decontamination Protocols
Once contained and identified, a rigorous decontamination process must be implemented.
Disposal of Contaminated Cultures
The safest and most recommended course of action for established outbreaks is the complete disposal of contaminated cultures [1]. Attempting to salvage cultures, especially with antimycotics, risks selecting for resistant fungi and can be toxic to the cells, altering experimental outcomes [2] [36]. Contaminated cultures must be autoclaved according to institutional biosafety guidelines before disposal.
Laboratory and Equipment Decontamination
A multi-step decontamination of the laboratory environment is non-negotiable.
- Biosafety Cabinets: Turn off the cabinet and thoroughly disinfect all interior surfaces, including the walls, work surface, and grilles, with a sporicidal agent. Replace the pre-filter if applicable. Allow the cabinet to run for at least 15 minutes with the UV light on after cleaning [2].
- Incubators: This is a critical reservoir for fungal spores. Decontaminate all internal surfaces, shelves, door gaskets, and humidity pans. The water pan is a frequent but overlooked source of fungal growth and should be replaced immediately [2] [1]. A weekly decontamination schedule is recommended during an outbreak.
- General Lab Surfaces: Wipe down all work areas, pipettors, microscope stages, and storage refrigerators with an appropriate disinfectant like 70% ethanol or a diluted bleach solution [2].
Antimycotic Treatment (As a Last Resort)
If a culture is absolutely irreplaceable, antimycotic treatment can be attempted with extreme caution. The table below details common agents.
Table 2: Antimycotic Agents for Experimental Salvage
| Antimycotic | Mechanism of Action | Working Concentration | Critical Considerations |
|---|---|---|---|
| Amphotericin B (Fungizone) | Binds to ergosterol in fungal cell membranes, causing permeability. | 0.25 - 2.5 µg/mL [36]. | Highly toxic to many mammalian cell lines; use conservative doses and monitor cell health closely [36]. |
| Mycostatin (Nystatin) | Also binds to membrane ergosterol. | 100 - 250 U/mL [36]. | Forms a colloidal suspension; must be mixed thoroughly before use. Appears as crystal-like particles in media [36]. |
| Note: Routine antibiotics like penicillin-streptomycin are NOT effective against fungi [36]. |
The experimental workflow for containment and decontamination is a logical sequence of critical steps, as summarized in the diagram below.
Post-Outbreak Validation and Prevention
Resuming normal operations requires validation that the outbreak has been fully contained.
- Validation Testing: Before reintroducing valuable cell lines, place antibiotic-free culture media in the decontaminated incubators and biosafety cabinets for several days. Then, check the media for any signs of contamination microscopically or by PCR [2]. This "dummy run" confirms the sterility of the environment.
- Root Cause Analysis: Investigate the likely source of the outbreak. Was there a lapse in aseptic technique? Was the incubator not cleaned on schedule? Was a new reagent introduced? Learning from the event is crucial for preventing recurrence [1] [60].
To institutionalize prevention, the following long-term strategies should be implemented, moving from basic to advanced practices.
The Scientist's Toolkit: Key Reagent Solutions
The following table details essential reagents and materials critical for both responding to and preventing fungal outbreaks.
Table 3: Research Reagent Solutions for Fungal Contamination Management
| Reagent/Material | Function | Application Notes |
|---|---|---|
| 70% Ethanol | Surface disinfectant for biosafety cabinets, incubators, and lab benches. | Effective against a broad spectrum of microbes; evaporates quickly without residue [2]. |
| Amphotericin B (Fungizone) | Polyene antimycotic for experimental salvage of contaminated cultures. | Use as a last resort due to high cytotoxicity; working concentration: 0.25-2.5 µg/mL [36]. |
| Mycostatin (Nystatin) | Polyene antimycotic for treating fungal contaminants. | Less toxic than Amphotericin B; used at 100-250 U/mL; appears as particles in medium [36]. |
| qPCR Kits for Fungal DNA | Molecular identification and speciation of fungal contaminants. | Provides rapid, sensitive, and specific results compared to slow culture-based methods [79]. |
| Sterile, Single-Use Pipettes & Flasks | Prevention of cross-contamination via consumables. | Eliminates risk from improperly sterilized reusable glassware [1]. |
| Validated Sera & Media | Use of pre-screened, sterile raw materials. | Critical prevention step; avoids introducing contamination via reagents like FBS [2] [1]. |
An established fungal outbreak in a cell culture laboratory is a serious event that demands a swift, systematic, and uncompromising response. The protocols outlined herein—from immediate quarantine and rigorous decontamination to post-outbreak validation and the implementation of robust preventive measures—provide a comprehensive framework for containment and eradication. Adherence to strict aseptic technique, maintained equipment, and a culture of vigilance remains the most effective defense against the pervasive and costly challenge of fungal contamination, ensuring the integrity and reproducibility of scientific research.
Quality Assurance and Comparative Analysis: Validating Contamination Control Measures
Fungal contamination represents one of the most persistent challenges in cell culture laboratories, capable of compromising experimental integrity, consuming valuable resources, and causing irreversible damage to irreplaceable cell lines. The delicate balance between eliminating fungal contaminants and maintaining cellular health requires a sophisticated understanding of both antifungal mechanisms and cellular responses. This technical guide provides an in-depth analysis of current antimycotic agents, their efficacy profiles against common contaminants, and their potential cytotoxic effects on mammalian cells, framed within the context of managing fungal contamination in cell culture research.
The rising incidence of invasive fungal infections has intensified the focus on antifungal drug development, yet simultaneously highlighted the challenges of drug resistance and host cell toxicity [80] [81]. In cell culture systems, these challenges are magnified by the direct exposure of valuable cellular models to antifungal agents. With global antifungal drug markets projected to expand from $14.48 billion in 2025 to $18.08 billion by 2033, reflecting a compound annual growth rate of 2.81%, the scientific community's investment in resolving these balancing acts has never been more critical [81].
Fungal Contamination in Cell Culture: Scope and Impact
Common Contaminants and Identification
Fungal contamination in cell culture primarily originates from molds and yeasts, which are ubiquitous eukaryotic microorganisms in the environment [7]. These contaminants can enter culture systems through various vectors, including inadequate aseptic technique, contaminated reagents, or environmental exposure during handling. Molds typically appear as thin, filamentous structures under microscopy, often forming denser clumps of spores, while yeasts present as individual ovoid or spherical particles that may bud off smaller particles [7].
Visual inspection remains the first line of detection, with contaminated cultures often appearing turbid or developing a thin film on the surface. Unlike bacterial contamination that typically causes rapid pH shifts, fungal contamination may maintain stable pH levels initially, followed by a rapid increase as the contamination progresses [7]. Advanced detection methods include electron microscopy for ultrastructural analysis, microbial culture on selective media, and metabolic assays to detect fungal-induced alterations in cellular function [82] [7].
Consequences of Contamination
The impact of fungal contamination extends beyond mere inconvenience, causing substantial biological and economic consequences:
Cellular Morphology Disruption: Bacterial and fungal contamination can disrupt cell adherence, interfering with monolayer formation and normal growth patterns [82]. Electron microscopy studies have revealed that contaminated cells display cytoplasmic vacuolization, undefined nuclei, and eventual cell lysis [82].
Metabolic Alterations: Fungal contamination significantly alters secretory profiles of cultured cells. Studies on granulosa-lutein cells demonstrated that bacterial contamination decreased estradiol media levels while increasing progesterone, indicating profound effects on cellular function [82].
Experimental Compromise: Contaminated cultures yield unreliable data, potentially invalidating research findings and necessitating costly repetitions.
Resource Depletion: Decontamination efforts consume significant personnel time, laboratory resources, and may result in the permanent loss of valuable or irreplaceable cell lines.
Antifungal Agents: Mechanisms and Efficacy
Major Antifungal Classes
Currently available antifungal agents target essential fungal cellular components through distinct mechanisms of action, each with varying efficacy spectra and potential limitations for cell culture applications.
Table 1: Major Antifungal Drug Classes and Their Characteristics
| Antifungal Class | Representative Agents | Primary Mechanism | Efficacy Spectrum | Key Limitations |
|---|---|---|---|---|
| Polyenes | Amphotericin B, Nystatin | Binds to ergosterol, disrupting membrane integrity | Broad-spectrum | Significant cellular toxicity; hydrophobic nature [83] [84] |
| Azoles | Fluconazole, Voriconazole, Itraconazole | Inhibits ergosterol synthesis via cytochrome P450 | Variable spectrum | Emerging resistance; drug interactions [81] [85] |
| Echinocandins | Caspofungin | Inhibits β-(1,3)-D-glucan synthase, disrupting cell wall | Broad-spectrum against yeasts and molds | Limited activity against some fungi [86] [83] |
| Membrane-Active Peptides | MP (KKVVFKVKFKK) | Disrupts microbial membrane structure | Broad-spectrum, including resistant strains | Limited clinical application data [87] |
Efficacy Profiles Against Common Contaminants
Quantitative assessment of antifungal efficacy provides critical guidance for agent selection in cell culture contamination management.
Table 2: In Vitro Antifungal Efficacy Against Candida Species (MIC Values, μg/mL)
| Antifungal Agent | C. albicans MIC Range | C. albicans MIC₉₀ | Fluconazole-Resistant C. albicans MIC | C. krusei MIC | Cellular Toxicity Threshold |
|---|---|---|---|---|---|
| Fluconazole | 0.25->64.0 [85] | 27.59 [85] | >64.0 [85] | 32->64 [87] | >100 (NIH 3T3 cells) [87] |
| Amphotericin B | 0.125-1.0 [85] | 0.5 [85] | 0.5-1.0 | 0.5-2.0 [87] | ~1-10 (hematopoietic cells) [84] |
| Caspofungin | 0.06-2.0 | 0.5-1.0 | 0.12-1.0 | 0.25-1.0 | >512 (murine cell lines) [86] |
| Voriconazole | 0.03-2.0 | 0.25-2.0 | 0.12-4.0 | 0.25-4.0 | >500 (hematopoietic cells) [84] |
| MP Peptide | 2-16 [87] | 8-16 [87] | 4-16 [87] | 8-32 [87] | >100 (NIH 3T3 cells) [87] |
The data reveal substantial variation in efficacy across antifungal classes. Amphotericin B demonstrates consistent potency but with concerning toxicity profiles, while echinocandins like caspofungin offer favorable toxicity thresholds suitable for cell culture applications [86] [84]. Notably, the novel membrane-active peptide MP shows promising selectivity, with toxicity concentrations approximately 100 times higher than its MIC for C. albicans [87].
Cytotoxicity Assessment: Balancing Efficacy and Safety
Quantitative Toxicity Profiles
The therapeutic utility of any antimycotic in cell culture depends critically on its selectivity—the ability to inhibit fungal growth while sparing mammalian cells.
Table 3: Cellular Toxicity Profiles of Antifungal Agents
| Antifungal Agent | Cell Type Tested | Toxicity Endpoint | Toxic Concentration | Selectivity Index (IC₅₀/MIC) | Key Observations |
|---|---|---|---|---|---|
| Amphotericin B | Hematopoietic progenitors [84] | CFU-GM inhibition | 60-6000 ng/mL | <1 | Concentration-dependent toxicity [84] |
| Liposomal Amphotericin B | Murine bone marrow [84] | CFU-GM formation | >6000 ng/mL | >100 | No toxicity; enhanced colony formation [84] |
| Caspofungin | J774.16, hybridomas, HUVECs [86] | Morphology/function | >512 μg/mL | >500 | No effect on antibody or cytokine production [86] |
| Voriconazole | Hematopoietic progenitors [84] | CFU-GM inhibition | >500 ng/mL | >50 | Enhanced colony formation with cytokines [84] |
| MP Peptide | NIH 3T3, Jurkat [87] | 50% cell inhibition | ~100 μg/mL | ~100 | High selectivity between fungal and mammalian cells [87] |
The data demonstrate that modern antifungal formulations, including liposomal amphotericin B, caspofungin, and voriconazole, exhibit significantly improved toxicity profiles compared to conventional amphotericin B [86] [84]. Interestingly, several agents not only lacked toxicity but actually enhanced cell proliferation under certain conditions, suggesting potential synergistic effects with culture components [84].
Mechanisms of Cellular Toxicity
Antifungal agents can impact mammalian cells through several mechanisms:
Membrane Disruption: Polyenes like amphotericin B can bind to cholesterol in mammalian membranes, albeit with lower affinity than to fungal ergosterol, leading to membrane permeability and cell lysis [83].
Metabolic Interference: Azoles may inhibit mammalian cytochrome P450 enzymes, disrupting steroid hormone synthesis and other metabolic pathways [81] [83].
Oxidative Stress: Some antifungals induce reactive oxygen species generation, potentially damaging cellular components and triggering apoptosis.
Specific Organelle Toxicity: Amphotericin B is particularly noted for toxicity to kidney cells, the hematopoietic system, and central nervous system [87] [84].
The structural similarity between fungal and mammalian cells presents fundamental challenges for antifungal development, as many potential targets are conserved eukaryotic pathways [83]. This explains why only four main families of antifungal drugs are currently available, compared to more than ten families of antibacterial drugs [83].
Experimental Protocols for Efficacy and Toxicity Assessment
Broth Microdilution Antifungal Susceptibility Testing
Standardized methods for determining minimum inhibitory concentrations (MICs) provide reproducible assessment of antifungal efficacy [87] [85].
Protocol:
- Inoculum Preparation: Harvest fungal colonies from fresh Sabouraud dextrose agar plates and suspend in physiological saline. Adjust concentration to 10⁴ cells/mL in 2× concentrated RPMI 1640 medium [87].
- Antifungal Dilution: Prepare serial two-fold dilutions of antifungal agents in 96-well plates, covering concentration ranges relevant to expected MIC values (typically 0.06-64 μg/mL) [87] [85].
- Inoculation and Incubation: Add equal volumes of fungal inoculum to each well (final concentration 5 × 10³ cells/mL). Include growth control (no antifungal) and sterility control (no inoculum) wells. Incubate at 30°C or 35°C for 24-48 hours depending on fungal species [87].
- Endpoint Determination: MIC is defined as the lowest concentration showing no visible growth compared to the control. For fungicidal activity, determine MFC (minimum fungicidal concentration) by subculturing from clear wells onto antifungal-free media and assessing for growth [87].
Mammalian Cell Toxicity Assessment
Comprehensive toxicity evaluation requires multiple complementary approaches to assess different aspects of cellular health:
Colony-Forming Unit (CFU) Assay Protocol [84]:
- Cell Preparation: Harvest target mammalian cells (e.g., bone marrow cells, cell lines relevant to research models). Count and adjust concentration to 3.5 × 10⁴ cells/mL in appropriate medium.
- Culture Establishment: Plate cells in semisolid methylcellulose medium containing necessary cytokines and growth factors. Add antifungal agents at test concentrations.
- Incubation and Analysis: Culture at 37°C in 5% CO₂ for 7-14 days. Score colonies (>50 cells) using standard morphological criteria. Compare colony numbers in antifungal-containing versus control cultures.
Cell Morphology and Function Assessment [82] [86]:
- Culture Setup: Plate cells at appropriate density in culture vessels containing graded concentrations of antifungal agents.
- Monitoring: Observe daily for signs of toxicity including sloughing, vacuolization, decreased confluency, and abnormal rounding.
- Functional Assays: Assess cell-specific functions such as steroid secretion [82], antibody production (hybridomas) [86], or cytokine profile [86].
- Ultrastructural Analysis: Process cells for transmission electron microscopy to detect subcellular damage [82].
Diagram 1: Antifungal Mechanisms and Cellular Impact Pathways. This diagram illustrates the relationship between antifungal mechanisms of action, their cellular effects, and the resulting balance between efficacy and toxicity that determines selective index.
Strategic Application in Cell Culture Contamination Management
The Scientist's Toolkit: Research Reagent Solutions
Table 4: Essential Reagents for Antifungal Efficacy and Toxicity Assessment
| Reagent/Category | Specific Examples | Primary Function | Application Notes |
|---|---|---|---|
| Cell Culture Media | TCM-199, RPMI 1640, DMEM | Support cellular growth and function | RPMI 1640 recommended for antifungal susceptibility testing [87] |
| Antifungal Agents | Caspofungin, Amphotericin B, Voriconazole | Experimental contamination control | Use at determined non-toxic concentrations; caspofungin effective at <512 μg/mL [86] |
| Detection Tools | Light microscopy, Transmission Electron Microscopy | Contamination identification and characterization | TEM reveals ultrastructural damage in contaminated cells [82] |
| Viability Assays | Trypan blue exclusion, CFU assays, Metabolic dyes | Assessment of cell health and proliferation | Trypan blue assesses membrane integrity [82] [87] |
| Specialized Media | Sabouraud Dextrose Agar, Methylcellulose semisolid medium | Fungal culture and hematopoietic colony assays | Semisolid media enable CFU quantification [84] |
| Antibiotic/Antimycotic Solutions | Penicillin-Streptomycin-Amphotericin B combinations | Prevention of microbial contamination | Use only short-term to avoid resistant strains [82] [7] |
Integrated Contamination Management Protocol
Based on the synthesized efficacy and toxicity data, the following strategic approach is recommended for managing fungal contamination in cell culture:
Diagram 2: Fungal Contamination Management Decision Pathway. This workflow outlines evidence-based steps for responding to fungal contamination in cell culture systems, emphasizing strategic decision points.
Prevention and Monitoring: Implement rigorous aseptic technique and regular contamination screening. Limit prophylactic antibiotic/antimycotic use to avoid developing resistant strains and masking low-level contamination [7].
Contamination Response: Upon detection, immediately isolate contaminated cultures. For low-value cultures, discard and restart. For high-value or irreplaceable cultures, proceed with decontamination protocols [7].
Antifungal Selection: Based on the efficacy and toxicity data presented in this guide, caspofungin represents a favorable option for many applications due to its high efficacy against common contaminants and exceptional tolerance by mammalian cells at concentrations up to 512 μg/mL [86]. Echinocandins specifically target fungal cell wall synthesis through inhibition of β-(1,3)-D-glucan synthase, a mechanism with no direct counterpart in mammalian cells, explaining their superior selectivity [86] [83].
Decontamination Protocol:
- Dissociate, count, and dilute contaminated cells in antibiotic-free medium
- Dispense into multi-well plates with a range of antifungal concentrations
- Observe daily for signs of toxicity and fungal growth
- Culture cells for 2-3 passages at the effective concentration
- Return to antibiotic-free medium for 4-6 passages to confirm eradication [7]
Documentation and Validation: Maintain detailed records of contamination events and decontamination outcomes to inform future responses and improve laboratory practices.
Emerging Strategies and Future Directions
The limitations of current antifungal agents have stimulated development of novel therapeutic approaches with potential applications in cell culture contamination management:
Novel Membrane-Active Compounds: Peptides like MP (KKVVFKVKFKK) demonstrate potent fungicidal activity with high selectivity indices, showing rapid, concentration-dependent killing of Candida species while maintaining low cytotoxicity against mammalian cells [87].
Combination Therapies: Synergistic approaches, such as MP combined with conventional antifungals, have demonstrated dramatic improvements in efficacy—increasing activity of fluconazole and amphotericin B against C. albicans by more than 312-fold and 62.5-fold, respectively [87].
Natural Product Discovery: Endophytic fungi and other natural sources are yielding novel antifungal compounds with unique mechanisms of action. Bioactive extracts from organisms like Colletotrichum aenigma and Curvularia lunata show broad-spectrum activity against pathogenic fungi while potentially offering improved safety profiles [88].
Advanced Formulations: Liposomal and lipid-based delivery systems, exemplified by liposomal amphotericin B, demonstrate significantly reduced cytotoxicity while maintaining antifungal efficacy [84].
These emerging approaches offer promising avenues for developing more effective and cell-friendly contamination management strategies that may overcome the limitations of current antifungal classes.
The optimal management of fungal contamination in cell culture requires a nuanced understanding of both antifungal efficacy and cellular toxicity. The data synthesized in this technical guide demonstrate that modern antifungal agents, particularly echinocandins like caspofungin and novel membrane-active peptides, offer significantly improved selectivity profiles compared to traditional polyenes. By implementing evidence-based contamination management protocols and leveraging the quantitative efficacy and toxicity data presented herein, researchers can make informed decisions that preserve valuable cellular models while effectively controlling fungal contamination. As antifungal development continues to evolve, the emerging strategies highlighted promise further refinement of this critical balance between antimicrobial efficacy and cellular preservation.
Contamination control represents a persistent challenge in cell culture research, where fungal contamination is a particularly prevalent issue capable of compromising months of experimental work. The design and operation of laboratory facilities, particularly their layout and air handling systems, serve as critical determinants in preventing the introduction and spread of these contaminants. Fungal spores, being ubiquitous in the environment, readily exploit vulnerabilities in laboratory infrastructure, from poorly maintained ventilation systems to suboptimal workflow patterns [1] [2]. This technical evaluation examines how strategic facility design functions as a foundational component of contamination control, directly supporting research integrity and reproducibility within the context of cell culture laboratories.
The significance of this issue is magnified by the fact that filamentous fungi and yeasts can rapidly colonize culture environments, often introduced via airborne spores or through contact with contaminated surfaces and equipment [2]. Once established, fungal contaminants can alter experimental conditions, compete with cells for nutrients, and secrete metabolites that directly impact cell health and function. A comprehensive understanding of how laboratory architecture and engineering controls either mitigate or inadvertently contribute to these risks is therefore essential for researchers, scientists, and drug development professionals dedicated to maintaining the highest standards of cell culture purity.
Evaluating Laboratory Layout for Contamination Control
The physical arrangement of a laboratory directly influences contamination risk by dictating workflow patterns, defining separation between clean and dirty processes, and determining the efficiency of environmental monitoring. Several layout paradigms offer distinct advantages and considerations for cell culture work.
Comparative Analysis of Laboratory Layout Typologies
| Layout Type | Core Principle | Advantages for Contamination Control | Potential Risks & Mitigations |
|---|---|---|---|
| Open-Plan [89] | Promotes collaboration with minimal physical barriers. | Enhanced visibility and monitoring; simplified cleaning protocols. | High risk of cross-contamination; implement dedicated zones for specific tasks and use of auxiliary enclosures for sensitive work [89]. |
| Modular [90] [91] | Utilizes movable workstations and reconfigurable furniture. | Adaptable containment; can quickly create segregated areas for new cell lines or hazardous materials. | Temporary connections in utilities may fail; ensure validated connections for ventilation and gases [90]. |
| Process-Based [89] | Organizes space based on a sequential workflow. | Minimizes backtracking and cross-traffic; logical progression from media prep to culture analysis reduces contamination transfer. | Rigid workflow; less suitable for multi-disciplinary research; requires meticulous validation of each zone's air quality [89]. |
| Functional Zoning [89] | Groups similar tasks or technologies into dedicated rooms. | Highest level of separation; contains contaminants within specialized areas (e.g., glasswashing, incubation). | Inefficient for small spaces; high cost; personnel movement between zones must be carefully managed with gowning protocols [89]. |
Space Allocation and Workflow Considerations
Adequate space allocation per researcher is not merely a comfort issue but a critical biosafety parameter. General research laboratories typically require 10-15 square metres per person to allow for safe operation and movement without increasing the risk of accidental contact with sterile surfaces or equipment [89]. The workflow should be designed to follow a unidirectional path, moving from clean areas (e.g., media preparation, biosafety cabinets) to dirty areas (e.g., waste handling, wash-up) without backtracking. This logical progression is a key feature of process-based layouts and is vital for separating activities that generate high particulate or microbial loads from those requiring sterility [89]. Shared equipment, such as centrifuges or microscopes, should be positioned in neutral zones to prevent traffic from non-sterile areas into core cell culture spaces.
The Role of Air Handling Systems in Fungal Contamination
Heating, Ventilation, and Air Conditioning (HVAC) systems are arguably the most critical engineering control for preventing fungal contamination in cell culture laboratories. These systems manage airborne particulates, temperature, humidity, and pressurization—all key factors influencing fungal spore proliferation and distribution.
Paradoxically, the systems designed to protect the indoor environment can become significant reservoirs of contamination if not properly maintained. Fungal and bacterial communities readily colonize various components of HVAC and air-conditioning (AC) systems, particularly in areas with condensation and organic debris [92] [93]. Key risk points include:
- Cooling Coils and Drip Trays: These components operate at high humidity and provide both moisture and nutrients (from trapped particulates) ideal for microbial growth. Studies have identified genera such as Methylobacterium and Sphingomonas as predominant in these niches [93].
- Air Filters: While they remove particulates from the air, filters become a history of indoor airborne contamination. Without regular replacement, overloaded filters can become a source of contamination and potentially shed microorganisms into the supply air [92] [93].
- Ductwork: Improperly sealed or insulated ducts can develop condensation and foster fungal growth, which is then disseminated throughout the laboratory.
The presence of specific fungal taxa in ventilation systems, such as Alternaria spp. and Cladosporium spp., is of particular concern due to their known allergenic and pathogenic potential [92]. Furthermore, the formation of biofilms within HVAC systems not only represents a persistent source of contamination but also reduces the heat-exchange efficiency of the equipment, leading to increased energy consumption [92].
Airflow Dynamics and Pressure Regimes
The direction and quality of airflow are fundamental to containment. Cell culture laboratories should be maintained at a positive air pressure relative to corridors and adjacent non-clean spaces. This ensures that when doors are opened, air flows out of the lab, preventing the ingress of unfiltered, potentially contaminated air [90]. Within the lab itself, more critical areas like biosafety cabinets or cleanrooms require their own carefully controlled pressure cascades.
A sufficient number of air changes per hour (ACH) is crucial for diluting and removing airborne contaminants generated within the space. While the specific ACH requirement depends on the lab's function and containment level, a general guideline for cell culture spaces is 6-12 ACH, with higher rates (e.g., 12-20 ACH) for areas where volatile reagents are used [90] [89]. All supply air should be delivered through High-Efficiency Particulate Air (HEPA) filters, which are capable of removing at least 99.97% of airborne particles 0.3 microns in diameter, effectively capturing fungal spores and most bacteria [90].
Diagram 1: Logical relationship between HVAC system components and fungal contamination risk in the laboratory environment.
Methodologies for Detection and Environmental Monitoring
Proactive environmental monitoring is essential for verifying the efficacy of contamination control measures and identifying potential problems before they impact cell cultures. Standardized sampling and sensitive detection methods are required for this purpose.
Surface Sampling Techniques for Fungal Contamination
A comparative study evaluated three primary sampling techniques for recovering fungal contamination from common healthcare surface materials, with findings directly applicable to laboratory settings [31] [94]. The study inoculated surfaces like formica, aluminum, linen, and HEPA material with approximately 10^4 colony-forming units (CFU) of Aspergillus fumigatus or Candida parapsilosis, then compared recovery rates.
Table 2: Efficacy of Surface Sampling Methods for Fungal Detection
| Sampling Method | Processing & Analysis | Median Percent Recovery (IQR) | Key Findings and Applications |
|---|---|---|---|
| Polyurethane Foam Sponge [31] | Stomached in buffer; analyzed by culture and qPCR. | Culture: 17.9% (11.4-30.0)\nqPCR: 36.2% (25.7-78.4) | Highest recovery rate for both detection methods. Ideal for large, irregular, or heavily contaminated surfaces. |
| Nylon Flocked Swab [31] | Vortexed in PBS; analyzed by culture and qPCR. | Culture: 3.8% (1.9-6.7)\nqPCR: 10.5% (7.7-36.0) | Moderate recovery. Suitable for small, confined areas or delicate equipment where sponges are impractical. |
| RODAC Plates [31] | Direct contact with agar surface; culture-based analysis. | Culture: 3.4% (1.0-7.1) | Lowest recovery, but provides immediate data on viable CFU. Best for flat, non-porous surfaces with low-level contamination. |
The study conclusively demonstrated that foam sponge sampling coupled with qPCR detection provided the most sensitive combination for fungal surveillance, significantly outperforming swabs and RODAC plates (P < 0.01) [31]. This methodology offers a foundation for developing standardized environmental monitoring protocols in cell culture facilities.
Air Quality Monitoring and Molecular Analysis
Air sampling, though not covered in the provided studies, is a complementary technique for assessing the airborne spore load. Settle plates can provide a crude measure of airborne contamination in a specific location over time. More active air samplers that draw a known volume of air over a culture plate or filter are used for quantitative assessment. Furthermore, next-generation sequencing (NGS) of the 16S rRNA gene for bacteria and ITS regions for fungi allows for a comprehensive, non-culture-based analysis of the microbial ecology within a laboratory environment, including HVAC components [93]. This can identify specific contaminant species and trace their sources.
Diagram 2: A generalized workflow for surface sampling and detection of fungal contamination on laboratory surfaces.
The Scientist's Toolkit: Essential Reagents and Materials for Fungal Surveillance
Implementing an effective environmental monitoring program requires specific reagents and materials. The following table details key items for sampling and detecting fungal contamination based on the cited experimental protocols.
Table 3: Key Research Reagent Solutions for Fungal Contamination Monitoring
| Item | Function / Application | Specific Example / Note |
|---|---|---|
| Polyurethane Foam Sponge Sticks [31] | Surface sampling; superior recovery from various materials. | Pre-moistened with a neutralizing buffer before use. |
| Neutralizing Buffer | Sampling suspension fluid; neutralizes residual disinfectants to allow microbial recovery. | Often contains surfactants like Tween 20. |
| Phosphate-Buffered Saline (PBS) with Tween 20 [31] | Used in elution and processing of sponge and swab samples. | Prevents microbial adhesion; aids in recovery. |
| Stomacher Device [31] [93] | Homogenizes sponge samples to separate microorganisms into buffer. | Standardized processing (e.g., 260 RPM for 60 seconds). |
| Sabouraud Dextrose (SD) Agar [31] | Culture medium for the selective isolation and enumeration of fungi. | Used in RODAC plates and for culture-based quantification. |
| qPCR Reagents & Primers [31] | Molecular detection and quantification of fungal DNA. | FungiQuant primers targeting the fungal 18S rRNA gene. |
| DNA Extraction Kit [93] | Purification of microbial DNA from environmental samples for NGS. | Enables comprehensive analysis of microbial communities. |
Integrated Prevention Strategies and Corrective Actions
A robust contamination control strategy integrates facility design with stringent operational protocols and rapid response plans. When design flaws are identified, or contamination occurs, corrective and preventive actions (CAPA) must be implemented.
Prevention Through Design and Maintenance
- HVAC Maintenance: Implement a strict schedule for inspecting and cleaning critical HVAC components. This includes regular replacement of HEPA filters, cleaning of cooling coils and drip pans, and verifying airflow volumes and pressure differentials [92] [90].
- Material Selection: Laboratory surfaces should consist of non-porous, seamless, and chemically resistant materials (e.g., epoxy resin countertops, coved flooring) to facilitate effective cleaning and disinfection and prevent biofilm formation in cracks and seams [90] [89].
- Workflow Enforcement: Use physical design and signage to enforce unidirectional workflow and proper gowning procedures. This minimizes the transfer of contaminants from "dirty" to "clean" areas by personnel [89].
Response to Contamination Events
When fungal contamination is detected in the environment or within cell cultures, a systematic response is critical. For a contaminated cell culture, the standard protocol in research labs is to identify the contamination type via microscopy or molecular methods, safely dispose of the culture following biosafety guidelines, and decontaminate all affected surfaces and equipment [1] [9]. A root cause analysis should then be conducted, examining recent changes in reagents, personnel, equipment, or environmental conditions. This investigation should review data from environmental monitoring to identify potential sources within the facility's infrastructure [1] [2]. Ultimately, preventing recurrence may require infrastructure upgrades, such as enhancing air filtration, reconfiguring lab layouts to improve separation, or implementing more rigorous cleaning protocols for high-risk areas like incubators and biosafety cabinets [1] [90].
Contamination by fungi and other microorganisms represents a critical failure point in cell culture research, compromising data integrity, experimental reproducibility, and therapeutic product safety in drug development. Implementing and validating robust sterile technique is not merely a best practice but a fundamental requirement for scientific rigor. This technical guide provides a structured framework for implementing, validating, and auditing sterile technique compliance within the specific context of mitigating fungal contamination in cell culture laboratories. We frame this within a broader thesis that effective contamination control requires a systematic approach addressing people, processes, and equipment, moving beyond basic aseptic protocols to encompass comprehensive process validation strategies such as media fill simulations and routine compliance monitoring.
Fungal contamination, including molds and yeasts, poses a significant threat due to the resilience of fungal spores and their ability to persist in laboratory environments. Understanding the common sources is the first step in developing effective control strategies.
Table 1: Common Sources and Characteristics of Fungal Contamination
| Source Category | Specific Examples | Typical Contaminants | Key Characteristics & Risks |
|---|---|---|---|
| Airborne Contaminants [95] | Unfiltered air, dirty HEPA filters, air currents from movement | Fungal spores (e.g., Aspergillus, Penicillium), airborne yeasts | Spores are ubiquitous, lightweight, and can settle on surfaces and into open vessels. Inadequate air filtration is a primary vector. |
| Laboratory Personnel [95] | Inadequate PPE, talking/coughing over cultures, improper gloving | Skin flora, fungi from clothing and hair | Humans are a major contamination source, shedding skin cells, hair, and respiratory droplets laden with microorganisms. |
| Non-Sterile Supplies [95] [1] | Contaminated media/reagents, non-sterile plasticware, compromised packaging | Yeasts (e.g., Candida), molds | The growth medium itself can support fungal growth if contaminated. Reusable glassware is a risk if improperly sterilized. |
| Laboratory Equipment [95] [96] | Water baths, incubators, laminar flow hoods with settled spores | Brevibacillus sp. (bacterial spores), various molds | Water baths are a common breeding ground. Equipment with complex interiors can harbor contaminants that are resistant to 70% ethanol. |
| Cross-Contamination [95] [7] | Working with multiple cultures simultaneously, reusing pipettes | Any contaminant, including fungi, can spread between cultures | Once introduced, a contaminant can spread rapidly to other cultures if containment protocols are insufficient. |
Fungal contaminants are particularly challenging due to their spore-forming capabilities. These spores can survive in a dormant state in harsh and inhospitable environments, only to become activated when they encounter the nutrient-rich conditions of cell culture media [7]. Furthermore, some spore-forming bacteria, such as Brevibacillus brevis, have demonstrated resistance to standard 70% ethanol disinfection, necessitating the use of alternative sporicidal agents like chlorine-based solutions for effective eradication [96].
Implementing a Sterile Technique Regimen
Foundational Aseptic Practices
A rigorous sterile technique regimen is the primary barrier against fungal contamination. The following practices are non-negotiable in a cell culture facility.
- Personal Protective Equipment (PPE) and Hygiene: Personnel must wear dedicated lab coats, gloves, masks, and hair covers. Lab coats should not leave the cell culture area. Hands must be washed before and after working with cultures, and gloves should be disinfected with 70% ethanol frequently during procedures [95] [97]. Talking, singing, or whistling when performing sterile procedures should be strictly avoided [97].
- Sterile Work Area Management: The biosafety cabinet (BSC) or laminar flow hood is the cornerstone of the sterile work area. It must be located in a low-traffic area free from drafts [97]. Before use, the work surface and all items introduced into the BSC must be thoroughly wiped with 70% ethanol. The work surface should be uncluttered, containing only items required for the immediate procedure [97]. The BSC should be left running continuously and validated regularly for HEPA filter integrity and airflow.
- Sterile Handling of Reagents and Cultures: All media, reagents, and solutions must be sterilized using validated methods (autoclaving or filter-sterilization) [95] [97]. The outside of bottles and flasks should be wiped with 70% ethanol before placement in the BSC. Bottles and flasks must be kept capped when not in use, and plates should be stored in sterile, re-sealable bags [97]. When working, caps should be placed with the opening face down on a sterile surface, and all liquids should be handled with sterile pipettes, used only once to prevent cross-contamination [97].
The Scientist's Toolkit: Essential Reagents for Contamination Control
Table 2: Key Research Reagent Solutions for Sterile Technique
| Item | Function in Contamination Control | Key Considerations |
|---|---|---|
| 70% Ethanol [98] | Primary disinfectant for gloves, work surfaces, and the exterior of items entering the BSC. | Denatures proteins and dissolves lipids. The water content is crucial for coagulation. Higher concentrations (e.g., 90%) are less effective as they cause surface protein coagulation too rapidly, preventing penetration. |
| Tryptone Soya Broth (TSB) [99] [100] | A general-purpose microbial growth medium used in Media Fill simulations to validate the aseptic process. | Also known as Soybean-Casein Digest Medium (SCDM). It supports the growth of a wide range of aerobic bacteria and fungi. |
| Fluid Thioglycolate Medium (FTM) [99] [100] | Used for validating aseptic processes against anaerobic microorganisms. | Supports the growth of obligate and facultative anaerobic bacteria. May be used in specific media fill simulations where anaerobic conditions are a concern. |
| Chlorine-based Solutions [96] | Sporicidal agent for decontaminating surfaces and equipment when 70% ethanol is ineffective. | Essential for eradicating persistent, spore-forming contaminants like Brevibacillus brevis. Effective for cleaning water baths and pipe systems. |
| Antibiotic/Antimycotic Solutions [7] | Supplements to culture media to suppress microbial growth. | Should not be used for routine, long-term culture due to risks of developing resistant strains and masking low-level cryptic contaminants like mycoplasma. |
Validating the Aseptic Process: Media Fill Simulation (MFS)
Implementation of techniques must be followed by validation to ensure they are effective. For aseptic processes, this is achieved through Aseptic Process Simulation (APS), commonly known as Media Fill Simulation.
Experimental Protocol for Media Fill Simulation
Media Fill Simulation is a validation study that mimics the aseptic manufacturing process using a sterile microbial growth medium instead of the actual drug product [99]. A successful program requires significant operator training, thorough maintenance, effective cleaning, and microbiological monitoring [99].
1. Definition of Worst-Case Conditions: The APS should challenge the aseptic process under "worst-case" conditions to demonstrate robustness. These conditions, defined via risk assessment, include [99]: - Process Conditions: The slowest filling speed, the maximum number of personnel in the aseptic area, and operator fatigue over the maximum batch filling duration. - Operational Conditions: Shift changes and operator breaks. - Interventions: Both routine interventions (e.g., removing jammed stoppers, environmental monitoring) and non-routine interventions (e.g., equipment adjustment, handling unexpected line stoppages) should be simulated as per standard operating procedures.
2. Media Preparation and Selection: Tryptone Soya Broth (TSB) is the standard medium for APS as it supports the growth of a wide range of aerobic microorganisms [99]. The media must be prepared and sterilized according to the manufacturer's instructions. Prior to use, it must undergo quality control testing for Growth Promotion, proving it can support the growth of compendial microorganisms and environmental isolates with an inoculum of ≤ 100 colony-forming units [99].
3. Execution of the Media Fill: The simulation is performed by trained personnel in the specific cleanroom environment where the actual process occurs. The sterile media is handled through all the critical steps of the normal aseptic process, including transfers, vial filling, and stoppering [99]. All defined worst-case conditions and interventions are incorporated during the run.
4. Incubation and Inspection: After filling, all units are incubated under conditions designed to recover both slow-growing and normal contaminants. A standard protocol is incubation at 20°C to 25°C for seven days, followed by 30°C to 35°C for a further seven days [99]. Following incubation, every single unit is visually inspected for turbidity, which indicates microbial growth and thus a contamination event.
5. Acceptance Criteria: Regulatory guidelines provide clear acceptance criteria for media fills [99]: - For fills of less than 5,000 units, zero contaminated units should be detected. - For fills between 5,000 and 10,000 units, one contaminated unit triggers an investigation and possible repeat media fill. - For fills over 10,000 units, one contaminated unit triggers an investigation, and two or more units are cause for revalidation.
The following workflow diagram illustrates the key stages of a Media Fill Simulation.
Auditing for Sterile Technique Compliance
Regular audits are essential to ensure ongoing compliance with established sterile techniques and to identify areas for improvement. An effective audit goes beyond checklist verification to assess the culture of aseptic practice.
Audit Checklist for Sterile Technique
Table 3: Sterile Technique Compliance Audit Checklist
| Audit Area | Key Checkpoints | Compliant (Y/N) | Observations |
|---|---|---|---|
| Personnel & PPE [95] [97] | Proper lab coat, gloves, mask, and hair cover worn. Hands washed before/after work. No jewelry, no cosmetics. Minimal talking and movement in BSC. | ||
| Work Area & BSC [97] [98] | BSC certified and in dedicated, low-traffic area. Work surface uncluttered and disinfected with 70% ethanol before/after use. No storage of non-essential items in BSC. BSC left running when not in use. | ||
| Reagents & Media [95] [97] | All media/reagents are sterile and within expiry. Exterior of bottles wiped with 70% ethanol before entering BSC. Containers capped when not in use. No signs of contamination (cloudiness, unusual color). | ||
| Aseptic Handling [97] | Items placed appropriately in BSC (without blocking grilles). Caps placed face-down on a disinfected surface. Sterile pipettes used once and never laid down. Work is performed deliberately and efficiently. | ||
| Environmental Control [95] [1] | Cleanroom classification and monitoring records are current. Regular cleaning and disinfection of incubators, water baths, and refrigerators. Water bath water is changed and disinfected weekly. | ||
| Documentation & Training [99] | Personnel training records for aseptic technique are up-to-date. Media Fill Simulation validation is current and successful. SOPs for cleaning, passaging, and decontamination are available and followed. |
Addressing Audit Findings and Non-Compliance
When audit findings or contamination events occur, a structured investigation is critical. The first step is to identify the contamination type using microscopy, microbial culture, or molecular methods like PCR [7] [1] [96]. The contaminated culture should be isolated immediately, and all affected equipment and surfaces should be decontaminated. The root cause analysis must scrutinize personnel technique, environmental monitoring data, equipment maintenance logs, and material quality. Corrective and preventive actions (CAPA) may include retraining personnel, revising SOPs, enhancing environmental monitoring, or replacing compromised equipment [1]. For persistent or unusual contaminants, targeted decontamination strategies, such as using chlorine for spore-forming bacteria or formalin gas sterilization for pervasive viral contaminants, may be necessary [96].
Preventing fungal contamination in cell culture is not achieved by a single action but through a holistic system of validated controls. This guide has outlined a comprehensive framework spanning from understanding contamination sources and implementing foundational aseptic practices to validating the entire process via Media Fill Simulation and conducting rigorous compliance audits. For researchers and drug development professionals, the adherence to such a structured approach is paramount. It ensures the integrity of scientific data, the efficiency of research operations, and, ultimately, the safety and efficacy of biopharmaceutical products. In the constant battle against contamination, a robust, validated, and audited sterile technique is the most powerful weapon in a scientist's arsenal.
Fungal contamination represents a persistent and formidable challenge in cell culture research, capable of compromising experimental integrity and derailing research timelines. Unlike bacterial contamination, which often manifests rapidly, fungal contamination can be insidious, with spores germinating slowly before aggressively colonizing culture environments [2]. Filamentous fungi and yeasts are ubiquitous airborne threats that can infiltrate cultures through improper handling, non-sterile reagents, or inadequately maintained equipment [2] [7]. Once established, fungal contaminants can outcompete cell cultures for nutrients, alter pH levels, and release metabolic byproducts toxic to cultured cells [7]. The resilience of fungal spores, which can survive harsh environmental conditions in a dormant state, makes eradication particularly challenging [7]. Within the context of a broader thesis on contamination sources, this technical guide examines the critical equipment features that form the first line of defense against these airborne threats, providing researchers, scientists, and drug development professionals with evidence-based selection criteria to safeguard their investments in cell-based research and production.
Fungal contamination primarily enters cell culture systems through airborne spores, contaminated reagents, or inadequate sterile handling practices [2]. The most common fungal contaminants include filamentous molds, which present as multicellular filaments called hyphae, and unicellular yeasts, which reproduce by budding [7]. Under microscopy, mold contamination appears as thin, wisp-like filaments (hyphae) that may form denser clumps of spores, while yeast appears as individual ovoid or spherical particles [7].
Fungal spores are remarkably resilient and can persist on surfaces, in water baths, or within incubator humidity systems until encountering favorable growth conditions [2] [7]. Incubator water trays represent a frequently overlooked contamination source, creating a humid environment conducive to fungal growth when not properly maintained [2]. The slow initial growth phase of fungal contaminants means contamination may not be visually detectable until it has already compromised culture integrity, emphasizing the critical importance of preventive equipment strategies over detection-based approaches [2] [9].
Critical Equipment Specifications for Fungal Risk Mitigation
Primary Containment: Biosafety Cabinets and Laminar Flow Hoods
The biosafety cabinet (BSC) or laminar flow hood serves as the primary barrier against fungal contamination, creating a sterile environment for cell culture manipulation. These enclosures protect both the operator and the cell culture by providing HEPA-filtered vertical laminar airflow that prevents unfiltered air from reaching the work surface [101].
HEPA Filtration Efficiency: HEPA (High-Efficiency Particulate Air) filters are capable of removing ≥99.97% of particles 0.3 microns or larger, effectively capturing fungal spores and hyphal fragments [101]. Some advanced systems incorporate ULPA (Ultra-Low Penetration Air) filters, which provide even higher efficiency, removing 99.999% of particles 0.12 microns or larger [101]. The selection of equipment with certified HEPA/ULPA filtration represents the most critical specification for preventing airborne fungal contamination.
Airflow Pattern and Velocity: Proper airflow dynamics are essential for maintaining a sterile field. Vertical laminar flow hoods uniformly pass HEPA-filtered air through the cabinet interior, creating a constant outflow that prevents contaminated air from entering the work area [101]. Maintenance of appropriate airflow velocity (typically 0.3-0.5 m/s) ensures particle removal without causing turbulence that could introduce contaminants.
Cabinet Design and Ergonomics: The physical design of containment equipment significantly impacts contamination risk. Class II BSCs, the most common type used in clinical laboratories, provide protection for both personnel and products [102]. These systems feature front openings with maintained inward airflow, physical barriers between the technician and materials, and negative pressure isolation to prevent contaminant escape [103] [102]. Enhanced visibility through advanced LED lighting systems improves operator accuracy and reduces procedural errors [102].
Secondary Containment: Incubators and Environmental Control Systems
While biosafety cabinets provide protection during active manipulation, cell cultures spend most of their existence within incubators, making these systems critical for preventing secondary fungal contamination.
Humidity Control: Precise humidity regulation is essential, as excessive moisture promotes fungal growth while insufficient humidity leads to culture medium evaporation [104]. Advanced incubators offer programmable humidity control typically ranging from 50-90% RH, with fluctuations maintained within ±5% to ensure stable environmental conditions [104].
Temperature Uniformity and Stability: Consistent temperature distribution prevents condensation formation, which can serve as a vector for fungal spore germination and distribution. High-performance incubators maintain temperature uniformity within ±0.1°C throughout the chamber, with minimal fluctuation (±1°C) to ensure stable culture conditions [104].
Integrated Decontamination Systems: Modern incubators incorporate automated decontamination features to eliminate fungal reservoirs. Ultraviolet (UV) sterilization lamps provide periodic chamber sterilization, while high-temperature decontamination cycles (up to 180°C) offer comprehensive eradication of fungal spores between culture cycles [104]. Regular decontamination of CO₂ incubators—including shelves, door gaskets, and water trays—is recommended on at least a weekly basis to prevent fungal establishment [2].
Table 1: Key Equipment Specifications for Fungal Contamination Prevention
| Equipment Type | Critical Feature | Specification | Fungal Risk Mitigation |
|---|---|---|---|
| Biosafety Cabinet | HEPA Filtration | ≥99.97% of particles ≥0.3µm | Removes airborne fungal spores |
| Biosafety Cabinet | Airflow Pattern | Vertical laminar flow | Creates sterile work surface |
| Biosafety Cabinet | Cabinet Class | Class II (personnel & product protection) | Prevents cross-contamination |
| Incubator | Humidity Control | 50-90% RH, ±5% fluctuation | Inhibits spore germination |
| Incubator | Temperature Uniformity | ±0.1°C throughout chamber | Prevents condensation formation |
| Incubator | Decontamination System | UV sterilization, auto-decontamination cycles | Eliminates fungal reservoirs |
| Laboratory Isolator | Containment Barrier | Full physical separation | Highest level of protection |
Tertiary Protection: Laboratory Isolators and Advanced Containment
For high-risk applications or when working with irreplaceable cell lines, laboratory isolators provide the highest level of protection against fungal contamination. Also known as aseptic containment isolators (CAI), these systems create a complete physical barrier between the technician and the materials using glove box enclosures [103]. Unlike biosafety cabinets with front openings, isolators are completely enclosed, eliminating the risk of airborne contaminant entry during manipulation [103]. These systems maintain negative pressure isolation and typically include transfer chambers for material introduction without compromising the sterile environment [103]. While offering superior contamination control, laboratory isolators have limitations in heat and smoke management and may restrict certain procedures due to the physical barrier [103].
Experimental Protocols for Equipment Validation and Monitoring
HEPA Filter Integrity Testing Protocol
Regular verification of HEPA filter integrity is essential for maintaining contamination control. The following protocol should be performed quarterly or according to manufacturer specifications:
Aerosol Challenge: Introduce polydisperse or monodisperse aerosol upstream of the filter. Typically, a thermally generated di-ethyl-hexyl-sebacate (DEHS) or poly-alpha-olefin (PAO) aerosol is used at a concentration of 10-20 µg/L.
Downstream Scanning: Using a calibrated photometer or particle counter, systematically scan the entire downstream face of the filter, including the sealant interface, at a distance of 1-2 inches from the face. Move the probe in overlapping strokes at a rate not exceeding 2 inches per second.
Leakage Threshold: Any reading exceeding 0.01% of the upstream challenge indicates a leak requiring corrective action. Document all findings and maintain records for quality assurance.
Corrective Actions: For seal leaks, remove the filter and reseat with proper gasketing. For filter media leaks, the filter must be replaced immediately, and the cabinet removed from service until replacement is complete.
Incubator Decontamination and Fungal Monitoring Protocol
Regular decontamination prevents incubators from becoming fungal reservoirs. Implement this protocol weekly:
Preparation: Remove all water from humidity reservoirs and disinfect with 70% ethanol or a recommended laboratory disinfectant. Remove all shelves and accessories for separate cleaning.
Surface Decontamination: Wipe all internal surfaces with a sporicidal agent effective against fungal spores (e.g., hydrogen peroxide-based disinfectants). Pay special attention to door gaskets and joints where spores may accumulate.
UV Sterilization: If equipped, activate the UV sterilization system for a minimum of 60 minutes. Ensure all surfaces are directly exposed to UV light, rearranging shelves if necessary.
High-Temperature Decontamination: For incubators with this feature, run a complete high-temperature decontamination cycle (typically 2-4 hours at 90-180°C). Note that this cannot be performed with cultures present.
Environmental Monitoring: Place settle plates or environmental monitoring strips in various locations within the incubator for 4 hours weekly. Culture these on Sabouraud dextrose agar and inspect for fungal growth after 5-7 days incubation at 25-30°C.
The Scientist's Toolkit: Essential Reagent Solutions for Fungal Control
Table 2: Research Reagent Solutions for Fungal Contamination Prevention
| Reagent/Material | Function | Application Protocol |
|---|---|---|
| 70% Ethanol Solution | Surface disinfection | Wipe work surfaces before and after procedures; effective against fungal spores with sufficient contact time |
| Hydrogen Peroxide-based Disinfectants | Sporicidal surface treatment | Apply to incubator surfaces and equipment; effective against resistant fungal spores |
| Sabouraud Dextrose Agar | Fungal culture medium | Use for environmental monitoring via settle plates in incubators and work areas |
| UV Sterilization System | Automated decontamination | Integrated into incubators for periodic sterilization; runs typically 15-60 minutes |
| Certified Mycoplasma-Free Reagents | Contamination-free starting materials | Use only tested sera, media, and supplements from verified suppliers |
| Chemical Decontamination Solutions | Equipment sterilization | For deep cleaning of biosafety cabinets and incubators between uses |
Integrated Contamination Control Strategy
Effective fungal risk management requires an integrated approach combining proper equipment selection, rigorous protocols, and comprehensive staff training. Equipment should be viewed as components in a comprehensive contamination control system rather than standalone solutions. The most advanced biosafety cabinet cannot compensate for poor aseptic technique or inadequate environmental controls [102].
Continuous training ensures that personnel understand not only how to operate equipment but also why specific procedures are necessary for contamination prevention [102]. Training should emphasize the invisible nature of fungal spores and the importance of consistent technique regardless of time constraints or workload [2] [102]. Additionally, establishing a culture of vigilance and accountability within the laboratory promotes adherence to protocols and encourages prompt reporting of potential contamination events [9].
Regular equipment maintenance, including HEPA filter replacements, UV lamp changes, and calibration of environmental controls, must be documented as part of a comprehensive quality assurance program [102]. Maintenance schedules should be based on manufacturer recommendations adjusted for individual usage patterns and environmental conditions [2] [102]. By implementing these integrated strategies, laboratories can create multiple layers of defense against fungal contamination, significantly reducing the risk of experimental compromise and protecting valuable research investments.
Fungal contamination represents a persistent and costly challenge in cell culture laboratories, compromising data integrity, experimental reproducibility, and the safety of biopharmaceutical products [1]. Unlike bacterial contamination, fungal contamination often presents more gradually, with filamentous fungi and yeasts forming visible structures or causing turbidity in the culture medium [2] [105]. The establishment of robust quality control (QC) metrics and documentation protocols is therefore essential for any research or production facility aiming to maintain the highest standards of cell culture integrity. This technical guide provides a comprehensive framework for establishing routine monitoring and documentation protocols specifically designed to mitigate the risk of fungal contamination, framed within the broader context of a thesis on common contamination sources in cell culture laboratories.
The insidious nature of fungal contamination lies in its resilience and detection challenges. Fungal spores are ubiquitous in the environment and can be introduced through unfiltered air, non-sterile equipment, or compromised reagents [1]. Once established, fungi can outcompete cell cultures for nutrients and alter their microenvironment, often leading to complete culture loss [2]. In Good Manufacturing Practice (GMP) environments, fungal contamination carries even graver consequences, potentially resulting in batch failures, regulatory non-compliance, and significant financial losses [1]. By implementing the systematic QC metrics outlined in this guide, laboratories can transition from reactive contamination management to proactive contamination prevention.
Establishing Key Quality Control Metrics for Fungal Contamination
Effective quality control for fungal contamination relies on both direct monitoring of cultures and indirect monitoring of the cell culture environment. The following metrics provide a comprehensive approach to early detection and prevention.
Culture Monitoring Metrics
Routine visual and microscopic examination of cell cultures forms the first line of defense against fungal contamination. The table below summarizes the key observational metrics for detecting fungal presence in cell cultures.
Table 1: Culture Monitoring Metrics for Fungal Contamination
| Metric Category | Specific Parameter | Normal Finding | Abnormal Finding Suggesting Fungal Contamination |
|---|---|---|---|
| Macroscopic Inspection | Medium clarity | Clear, transparent | Cloudy or turbid appearance [105] |
| Medium surface | Uniform | Visible floating patches or film [2] | |
| pH indicator | Stable pH (pink for phenol red) | Rapid pH increase (purple) in advanced stages [105] | |
| Odor | Neutral | Fermented or sour odor [2] | |
| Microscopic Inspection | Hyphal structures | None present | Thin, filamentous, wispy structures (hyphae) [105] |
| Yeast cells | None present | Ovoid or spherical particles that may bud [105] | |
| Cell morphology | Characteristic for cell line | Unexplained changes [2] | |
| Growth Patterns | Growth rate | Consistent with cell line | Slowed growth or sudden cell death [1] |
| Culture acidification | Normal metabolic pattern | Unexpected changes in metabolic activity [2] |
Environmental Monitoring Metrics
The cell culture environment must be systematically monitored as potential sources of fungal contamination are often found in equipment and reagents rather than the cultures themselves.
Table 2: Environmental Monitoring Metrics for Fungal Contamination Prevention
| Monitoring Area | Quality Control Metric | Target Frequency | Acceptance Criteria |
|---|---|---|---|
| Incubators | Humidity levels | Daily | Maintained to specification, but controlled to prevent excess fungal growth [2] |
| Surface contamination | Weekly | No microbial growth detected on contact plates | |
| Water tray sterility | Weekly (or per SOP) | No fungal growth detected [2] | |
| Biosafety Cabinets | HEPA filter integrity | Every 6 months (or per certification) | Meets manufacturer specifications for airflow and containment |
| Surface disinfection | Pre- and post-use | Decontaminated with appropriate agent (e.g., 70% ethanol) [2] | |
| Air particulate counts | Monthly | Meets ISO classification requirements | |
| Reagents & Media | Sterility testing | Each new lot | No growth in aerobic/anaerobic cultures [106] |
| Endotoxin testing | Each new lot | Meets product specifications | |
| Storage condition audit | Monthly | Proper temperature monitoring and documentation |
Experimental Protocols for Detection and Monitoring
Implementation of standardized experimental protocols ensures consistent detection and monitoring of fungal contaminants across research teams and over time.
Protocol for Comprehensive Fungal and Bacterial Testing
This standardized protocol provides a systematic approach for detecting fungal and bacterial contamination in cell cultures, adapting methodologies from established laboratory handbooks [106].
Materials Required
- Aerobic nutrient broth (e.g., Tryptone Soy Broth)
- Anaerobic nutrient broth (e.g., Thioglycollate Medium)
- Personal protective equipment (latex medical gloves, laboratory coat, safety glasses)
- Water bath set to 37°C
- Microbiological safety cabinet at appropriate containment level
- Incubators set at 32°C and 22°C
- Positive control organisms (e.g., Candida albicans NCTC) [106]
Procedure
- Preparation: Culture the cell line in the absence of antibiotics for at least 2 passages prior to testing to avoid masking low-level contamination [2] [106].
- Sample Collection: Bring adherent cells into suspension using a cell scraper. Suspension cell lines may be tested directly.
- Inoculation:
- Inoculate 2 aerobic broths and 2 anaerobic broths with 1.5 mL test sample.
- For each positive control organism, inoculate 2 aerobic broths and 2 anaerobic broths (e.g., 0.1 mL control at 100 cfu per broth).
- Inoculate 2 aerobic and 2 anaerobic broths with 1.5 mL sterile PBS as negative controls.
- Incubation:
- Incubate Thioglycollate broths at 32°C and Tryptone Soy Broths at 22°C.
- Examine test broths on days 3-5, 7-8, and 14.
- Read control broths at 7 days.
- Interpretation:
- Valid Result: All positive control broths show evidence of microorganisms after 7 days of incubation, while negative and PBS control broths show no evidence of contamination.
- Positive Result: Test broths show turbidity indicating microbial growth.
- Negative Result: Test broths remain clear with no evidence of turbidity [106].
Advanced Quantitative Monitoring of Fungal Growth
For laboratories requiring quantitative assessment of fungal growth, particularly in fermentation or industrial mycology contexts, optical density measurements and image analysis techniques offer valuable alternatives to traditional methods.
Research on Aspergillus fumigatus has demonstrated that disruption of specific genes (ags1 and gtb3) results in dispersed hyphal growth rather than pellet formation, enabling quantitative monitoring of fungal growth through optical density measurements at 600 nm (OD600) [107]. This approach allows for:
- Linear correlation between OD600 and mycelial weight for at least 18 hours
- Dose-response assessment of antifungal agents
- Standardized quantification similar to bacterial and yeast cultures [107]
For filamentous fungi that form complex mycelial structures, microscopic image intensity (MII) analysis provides an alternative quantitative method. Studies on Cordyceps militaris have demonstrated a strong correlation (R² = 0.941) between microscopic image intensity and dry cell weight, enabling rapid quantification of fungal biomass [42]. This method is particularly valuable for:
- Real-time monitoring of fungal fermentation processes
- High-throughput screening of antifungal compounds
- Process optimization in industrial applications [42]
Figure 1: Fungal Contamination Testing Workflow. This diagram outlines the standardized protocol for comprehensive fungal and bacterial testing in cell cultures.
Documentation and Data Management Protocols
Consistent documentation is fundamental to effective quality control, enabling trend analysis, root cause investigation, and continuous improvement of laboratory practices.
Essential Documentation Elements
Comprehensive QC documentation should include, at minimum, the following key elements:
- Culture Records: Detailed logs of each cell culture, including source, passage number, media formulations, and morphological observations.
- Environmental Monitoring Data: Regular records of incubator parameters, biosafety cabinet certifications, and cleaning schedules.
- Testing Results: Documented outcomes of all sterility tests, mycoplasma screenings, and fungal contamination checks.
- Deviation Reports: Systematic documentation of any deviations from established protocols or acceptance criteria, including corrective and preventive actions (CAPA).
- Reagent Traceability: Complete records of all reagents, including sources, lot numbers, expiration dates, and quality control testing results.
Electronic Laboratory Notebooks (ELNs) and Database Systems
Implementation of electronic documentation systems significantly enhances the efficiency and reliability of QC data management. Modern ELN systems offer:
- Automated data capture from instruments and sensors
- Standardized templates for consistent data entry
- Advanced search capabilities for trend analysis and data retrieval
- Audit trails to meet regulatory requirements
- Integration with laboratory information management systems (LIMS)
The Scientist's Toolkit: Essential Research Reagent Solutions
Successful implementation of fungal contamination monitoring protocols requires specific reagents and equipment. The following table details essential research reagent solutions for establishing robust quality control measures.
Table 3: Essential Research Reagent Solutions for Fungal Contamination Monitoring
| Reagent/Equipment | Function in QC Protocol | Application Notes |
|---|---|---|
| Aerobic Nutrient Broth (e.g., Tryptone Soy Broth) | Supports growth of aerobic bacteria and fungi for detection | Incubate at 22°C; monitor for turbidity indicating contamination [106] |
| Anaerobic Nutrient Broth (e.g., Thioglycollate Medium) | Supports growth of anaerobic microorganisms | Incubate at 32°C; essential for detecting obligate anaerobes [106] |
| Positive Control Organisms (e.g., Candida albicans) | Validates testing protocol performance | Maintain separate from cell culture area; use for protocol qualification [106] |
| Antibiotic-Free Media | Prevents masking of low-level contamination | Culture cells for ≥2 passages before testing to reveal cryptic infections [2] [106] |
| HEPA-Filtered Biosafety Cabinet | Provides sterile working environment | Certify every 6 months; disinfect with 70% ethanol before/after use [2] [1] |
| Temperature-Controlled Incubators | Maintains optimal cell growth conditions | Monitor CO₂, temperature, and humidity; clean and disinfect regularly [2] |
| PCR Reagents for Mycoplasma Testing | Detects mycoplasma contamination | Perform regularly as mycoplasma often co-occurs with fungal issues [2] |
Establishing comprehensive quality control metrics for fungal contamination is not merely a regulatory requirement but a fundamental component of scientific excellence. By implementing the systematic monitoring, standardized protocols, and thorough documentation practices outlined in this guide, research and production facilities can significantly reduce the risk of fungal contamination, thereby enhancing data reliability, experimental reproducibility, and product safety. The most effective quality control system integrates these technical measures with a culture of continuous improvement, where every team member is empowered and expected to uphold the highest standards of aseptic technique and rigorous documentation.
Figure 2: Fungal Contamination Identification and Response Pathway. This decision tree outlines the systematic process for identifying and responding to suspected fungal contamination in cell cultures.
Conclusion
Fungal contamination represents a multifaceted challenge in cell culture that demands a systematic, vigilant approach integrating understanding, detection, prevention, and validation. By comprehending the biological nature and environmental sources of fungi, implementing rigorous detection methodologies, establishing robust contamination control protocols, and continuously validating preventive measures, laboratories can significantly reduce fungal incidence and its detrimental impacts. The future of reliable biomedical research and safe therapeutic development depends on such comprehensive contamination management strategies, ensuring data integrity, protecting valuable cell resources, and maintaining the highest standards of experimental reproducibility. Moving forward, laboratories should prioritize ongoing training, technological investments in contamination-resistant equipment, and the development of even more targeted antimycotic regimens to stay ahead of this persistent challenge.
References
- 1. Cell culture challenges: Contamination & prevention [https://greenelephantbiotech.com/blog/cell-culture-challenges-contamination-prevention/]
- 2. Cell Culture Contamination: 5 Common Sources and How ... [https://www.capricorn-scientific.com/knowledge-center/cell-culture-contamination]
- 3. Molds (Fungi) - an overview [https://www.sciencedirect.com/topics/agricultural-and-biological-sciences/molds-fungi]
- 4. Introduction to Mycology - Medical Microbiology - NCBI - NIH [https://www.ncbi.nlm.nih.gov/books/NBK8125/]
- 5. Yeasts vs Molds- Definition and 23 Major Differences [https://microbenotes.com/differences-between-yeasts-and-molds/]
- 6. Difference Between Moulds And Yeasts [https://byjus.com/biology/difference-between-molds-and-yeasts/]
- 7. Cell Culture Contamination | Thermo Fisher Scientific - US [https://www.thermofisher.com/us/en/home/references/gibco-cell-culture-basics/biological-contamination.html]
- 8. Troubleshooting Cell Culture Contamination: A Practical ... [https://www.yeasenbio.com/blogs/cell/troubleshooting-cell-culture-contamination-a-practical-solution-guide]
- 9. Troubleshooting Common Cell Culture Contamination Issues [https://cellculturecompany.com/troubleshooting-common-cell-culture-contamination-issues/]
- 10. Types of Cell Contamination and How... | Technology Networks Culture [https://www.technologynetworks.com/cell-science/articles/types-of-cell-culture-contamination-and-how-to-prevent-them-397776]
- 11. Airborne Fungal Spores Exposure Limits: What You Need to ... [https://www.moldbacteria.com/mold/airborne-fungal-spores-exposure-limits.html]
- 12. Mold Air Sampling & Interpretation [https://www.currenenvironmental.com/mold-spore-testing]
- 13. Cell Culture Contamination: How to Prevent Fungal, Yeast, ... [https://www.corning.com/worldwide/en/products/life-sciences/resources/stories/at-the-bench/how-to-control-bacterial-contamination-and-other-unwelcome-micro.html]
- 14. Prevention of Contaminations in Cell Culture [https://ibidi.com/content/436-prevention-of-contaminations]
- 15. Cell Culture Contamination | Thermo Fisher Scientific - TR [https://www.thermofisher.com/tr/en/home/references/gibco-cell-culture-basics/biological-contamination.html]
- 16. Effects of temperature, pH, and relative humidity on the ... [https://www.sciencedirect.com/science/article/pii/S1878614624000606]
- 17. Effect of Temperature and Relative Humidity on Growth ... [https://pmc.ncbi.nlm.nih.gov/articles/PMC6171444/]
- 18. specialises in the cleaning and purification of all types of Air ... Handling [https://amcoil.com.au/the-air-conditioning-system/]
- 19. Standards New Zealand [https://www.standards.govt.nz/shop/asnzs-3666-12011]
- 20. How to troubleshoot bioreactor contamination [https://infors-ht.com/en/blog/how-to-troubleshoot-bioreactor-contamination]
- 21. On the frontline of the fight against cell culture contamination [https://www.nature.com/articles/d42473-019-00306-1]
- 22. Seasonal Variation in Viral Infection Rates and Cell Sizes ... [https://www.frontiersin.org/journals/microbiology/articles/10.3389/fmicb.2021.624980/full]
- 23. Sustainable reduction of bioreactor contamination in an ... [https://www.sciencedirect.com/science/article/abs/pii/S1389172306706624]
- 24. The 5 Most Common Causes of Contamination in Tissue ... [https://plantcelltechnology.com/blogs/blog/the-5-most-common-causes-of-contamination-in-tissue-culture-labs?srsltid=AfmBOoppbbR2t2UFFWzuCeLsdgUS8q_KQkdSejuvUAekHss9Qe8aboUI]
- 25. Cell Culture Techniques and Practices to Avoid ... [https://pubmed.ncbi.nlm.nih.gov/37486116/]
- 26. Tracking and Treating Fungal Contamination in Indoor‐ ... [https://pmc.ncbi.nlm.nih.gov/articles/PMC12312696/]
- 27. Preserving Yeast and Mold Isolates | Fungal Diseases [https://www.cdc.gov/fungal/hcp/laboratories/preserving-yeast-and-mold-isolates-1.html]
- 28. A Comprehensive Guide to Detecting and Handling Laboratory... [https://www.linkedin.com/pulse/comprehensive-guide-detecting-handling-laboratory-contamination-psnre]
- 29. Microbial contamination of cell cultures: A 2 years study [https://www.sciencedirect.com/science/article/abs/pii/S1045105605000163]
- 30. Comparison of DNA sequencing and morphological ... [https://www.nature.com/articles/s41598-021-81996-w]
- 31. Comparative analysis of sampling and detection methods ... [https://pmc.ncbi.nlm.nih.gov/articles/PMC11611500/]
- 32. How to Detect Cell Culture Contamination [https://www.goldbio.com/blogs/articles/how-to-detect-cell-culture-contamination?srsltid=AfmBOopSHmXwXhbMCZDzo-rnIEehcWpfhyFMSXXzzVv7gMGHHVgFZ6G6]
- 33. Fungus Identification - an overview [https://www.sciencedirect.com/topics/immunology-and-microbiology/fungus-identification]
- 34. Fumigation- A disinfection process to decontaminate ... [https://bio-protocol.org/exchange/preprintdetail?id=2137&type=3]
- 35. Cell Culture Contamination: Experts on How to Minimize ... [https://www.corning.com/worldwide/en/products/life-sciences/resources/stories/at-the-bench/how-to-minimize-contamination-risk-and-protect-your-cultures.html]
- 36. Fungus [https://unclineberger.org/tissueculture/contaminant/funguscontam/]
- 37. How to detect a yeast contamination in your cell culture [https://www.eppendorf.com/us-en/lab-academy/life-science/cell-biology/how-to-detect-a-yeast-contamination-in-your-cell-culture/]
- 38. 47: Identifying Fungi [https://bio.libretexts.org/Learning_Objects/Laboratory_Experiments/Microbiology_Labs/Microbiology_Labs_I/47%3A_Identifying_Fungi]
- 39. How to use direct microscopy for diagnosing fungal infections [https://www.sciencedirect.com/science/article/pii/S1198743X23002367]
- 40. Inferring fungal growth rates from optical density data - PMC [https://pmc.ncbi.nlm.nih.gov/articles/PMC11098479/]
- 41. Fungal feature tracker (FFT): A tool for quantitatively ... [https://pmc.ncbi.nlm.nih.gov/articles/PMC6822706/]
- 42. Rapid and concise quantification of mycelial growth by ... [https://www.nature.com/articles/s41598-021-03512-4]
- 43. Rapid Identification of Dimorphic and Yeast-Like Fungal ... [https://pmc.ncbi.nlm.nih.gov/articles/PMC88380/]
- 44. pH Monitoring is the Key to Cell Culture [https://www.scientificbio.com/blog/ph-monitoring-is-the-key-to-cell-culture]
- 45. Appendix 3: Cell Culture Hygiene Practices [https://www.isscr.org/basic-research-standards/appendix-3]
- 46. How to identify fungal in your contamination cell culture [https://www.eppendorf.com/ca-en/lab-academy/life-science/cell-biology/how-to-identify-fungal-contamination-in-your-cell-culture/]
- 47. Development of selective media for the isolation of yeasts ... [https://www.sciencedirect.com/science/article/pii/S1569199308001008]
- 48. Screening of Fungicides and Comparison of Selective ... [https://www.mdpi.com/2076-0817/12/2/197]
- 49. Selective efficacy of culture media recommended for ... [https://pubmed.ncbi.nlm.nih.gov/14717377/]
- 50. How to Detect Cell Culture Contamination [https://www.goldbio.com/blogs/articles/how-to-detect-cell-culture-contamination?srsltid=AfmBOorsl5zdDyD9TIQ2WeoLMnCTINw1lNVUWRhgDCZE6s3PJKP88K6B]
- 51. Testing Cells for Bacterial and Fungal Contamination [https://www.sigmaaldrich.com/US/en/technical-documents/protocol/cell-culture-and-cell-culture-analysis/mammalian-cell-culture/testing-for-bacteria?srsltid=AfmBOore0v9ZQfq_pcyG1GC9naHapRSz0SrNWw5JMHBBwqFOLCpOI46H]
- 52. Chromogenic medium for direct susceptibility testing of ... [https://pubmed.ncbi.nlm.nih.gov/21369747/]
- 53. Fungal profile, levels of aflatoxin M1, exposure, and the risk ... [https://www.sciencedirect.com/science/article/pii/S221475002400009X]
- 54. Contamination Control Compass Edition #07/2025 [https://news.minerva-biolabs.com/newsletter/2025/07/]
- 55. Airborne particle monitoring in clean room environments ... [https://pubmed.ncbi.nlm.nih.gov/18034434/]
- 56. Aseptic Processing and Validation Course - FDA ... [https://www.globenewswire.com/news-release/2025/07/28/3122209/28124/en/Aseptic-Processing-and-Validation-Course-FDA-Expectations-and-Industry-Best-Practices-October-20-21-2025-Avoid-Severe-FDA-Enforcement-Actions.html]
- 57. Updated PDA TR 22: 2025 Edition for Aseptic Process ... [https://www.linkedin.com/posts/vijay-singh-7b004b62_the-new-updated-version-of-pda-technical-activity-7387528515727843329-11jh]
- 58. Testing Cells for Bacterial and Fungal Contamination [https://www.sigmaaldrich.com/US/en/technical-documents/protocol/cell-culture-and-cell-culture-analysis/mammalian-cell-culture/testing-for-bacteria?srsltid=AfmBOor3_etynB95ZFxRnsWNxdY4D_p2abNRb_NbO_Mncj3GVeIfojld]
- 59. Bacterial and fungal bioburden reduction on material ... [https://www.frontiersin.org/journals/microbiology/articles/10.3389/fmicb.2023.1253436/full]
- 60. After realizing a fungus contaminated their experiments ... [https://retractionwatch.com/2025/11/26/potato-pathogens-fungus-contaminated-experiments-retract-replace/]
- 61. How HEPA filters improve cell culture | INFORS HT posted ... [https://www.linkedin.com/posts/inforsht_cellculture-hepafilter-cleanair-activity-7338195594668036096-ck21]
- 62. Fluid Flow and Mixing With Bioreactor Scale-Up [https://www.bioprocessintl.com/bioreactors/lessons-in-bioreactor-scale-up-part-2-a-refresher-on-fluid-flow-and-mixing]
- 63. Don't Overlook Your Incubator: Cell Culture Optimization [https://www.selectscience.net/article/don-t-overlook-your-incubator-cell-culture-optimization]
- 64. Cell Line Authentication Test Recommendations [https://www.atcc.org/resources/technical-documents/cell-line-authentication-test-recommendations]
- 65. Best Practices for Biosafety Cabinet Maintenance and Use [https://www.labmanager.com/best-practices-for-biosafety-cabinet-maintenance-and-use-32002]
- 66. How to Maintain a Laboratory Water Bath [https://www.boekelsci.com/news/lab-water-bath-maintenance.html?srsltid=AfmBOooaTx2vDfZCxdeD0PcXJzNVo46RCqMajGW8hm1IAFiAWcdHSI_Q]
- 67. Understanding Laboratory Water Baths: A Practical Guide ... [https://www.labmanager.com/water-baths-20775]
- 68. How to clean a water bath [https://bitesizebio.com/8543/how-to-clean-a-water-bath/]
- 69. Use of HEPA Filters in Biosafety Cabinets [https://www.nuaire.com/en/resources/hepa-filters-in-biosafety-cabinets]
- 70. Questions and Answers on Current Good Manufacturing ... [https://www.fda.gov/drugs/guidances-drugs/questions-and-answers-current-good-manufacturing-practice-requirements-equipment]
- 71. How to Detect Cell Culture Contamination [https://www.goldbio.com/blogs/articles/how-to-detect-cell-culture-contamination?srsltid=AfmBOop25Oz0AXNG_DdUoNemiwcyoY2pptz09YTlDMPGwPHquS8eRj8-]
- 72. Water-Soluble Nystatin and Derivative - PMC [https://pmc.ncbi.nlm.nih.gov/articles/PMC8842097/]
- 73. Antifungal Agents - StatPearls - NCBI Bookshelf - NIH [https://www.ncbi.nlm.nih.gov/books/NBK538168/]
- 74. Toxicity Mechanisms of Amphotericin B and Its Neutralization ... [https://pmc.ncbi.nlm.nih.gov/articles/PMC3486601/]
- 75. Amphotericin B Is Cytotoxic at Locally Delivered ... [https://pmc.ncbi.nlm.nih.gov/articles/PMC3183219/]
- 76. Amphotericin B toxicity and lethality: a tale of two channels [https://www.sciencedirect.com/science/article/abs/pii/S0378517397004171]
- 77. Imaging of human cells exposed to an antifungal antibiotic ... [https://www.nature.com/articles/s41598-018-32301-9]
- 78. Novel Nystatin A₁ derivatives exhibiting low host cell ... [https://pubmed.ncbi.nlm.nih.gov/24924305/]
- 79. Revolutionizing Fungal Diagnostics: qPCR for Dimorphic ... [https://www.eurofins-viracor.com/news-and-events/posts/2025/may/revolutionizing-fungal-diagnostics-why-qpcr-is-a-game-changer-for-dimorphic-fungal-infections/]
- 80. Next-generation antifungal drugs: Mechanisms, efficacy, ... [https://www.sciencedirect.com/science/article/pii/S2211383525004332]
- 81. New antifungal strategies and drug development against ... [https://www.frontiersin.org/journals/cellular-and-infection-microbiology/articles/10.3389/fcimb.2025.1662442/full]
- 82. Preventing Microbial Contamination during Long-Term In ... [https://pmc.ncbi.nlm.nih.gov/articles/PMC3439989/]
- 83. Antifungal Drugs for the Treatment of Invasive Fungal ... [https://pmc.ncbi.nlm.nih.gov/articles/PMC12389444/]
- 84. In vitro and in vivo study on the effect of antifungal agents ... [https://pmc.ncbi.nlm.nih.gov/articles/PMC4935346/]
- 85. Antifungal Drug Efficacy Profiles Against Vaginal Candida ... [https://www.mdpi.com/2077-0383/14/20/7266]
- 86. Caspofungin reduces the incidence of fungal contamination in ... [https://pubmed.ncbi.nlm.nih.gov/17899440/]
- 87. In Vitro Antifungal Activity and Cytotoxicity of a Novel ... [https://pmc.ncbi.nlm.nih.gov/articles/PMC89347/]
- 88. Antifungal activity of bio-active cell-free culture extracts and ... [https://www.nature.com/articles/s41598-024-60948-0]
- 89. A Guide to Laboratory Layout Design & Space Planning [https://www.restore.co.uk/harrowgreen/laboratory-space-planning-and-design/]
- 90. Innovative Lab Design: Future-Proofing Scientific ... [https://www.labmanager.com/innovative-lab-design-future-proofing-scientific-workspaces-34425]
- 91. Lab Design Trends 2025 [https://iciscientific.com/blogs/lab-design-trends-2025]
- 92. Ventilation and air conditioning systems are a source of ... [https://www.sciencedirect.com/science/article/abs/pii/S0360132325000654]
- 93. Bacterial Communities in Various Parts of Air-Conditioning ... [https://pmc.ncbi.nlm.nih.gov/articles/PMC9697849/]
- 94. Comparative analysis of sampling and detection methods ... [https://pubmed.ncbi.nlm.nih.gov/38770590/?utm_source=WordPress&utm_medium=rss&utm_campaign=pubmed-2&utm_content=1tSFP9-Hb2h0mfzWBE6vruC_rfc63_jfPCuW-RKGQ_T_X-jEah&fc=20230221163413&ff=20240529133441&v=2.18.0.post9+e462414]
- 95. The 5 Most Common Causes of Contamination in Tissue ... [https://plantcelltechnology.com/blogs/blog/the-5-most-common-causes-of-contamination-in-tissue-culture-labs?srsltid=AfmBOopuPn-gpM5Y642pfJGdOg1e20SV48PEbK2qxNErcw4vUW8voUcx]
- 96. Unexpected, pervasive and persistent viral and bacterial ... [https://pmc.ncbi.nlm.nih.gov/articles/PMC7496648/]
- 97. Aseptic Laboratory Techniques and Safety in Cell Culture [https://www.thermofisher.com/us/en/home/references/gibco-cell-culture-basics/aseptic-technique.html]
- 98. Cell Culture Techniques and Practices to Avoid ... [https://www.jove.com/t/64769/cell-culture-techniques-practices-to-avoid-contamination-fungi]
- 99. Validation of Aseptic Processes Using Media Fill [https://ispe.org/pharmaceutical-engineering/march-april-2022/validation-aseptic-processes-using-media-fill]
- 100. Testing Cells for Bacterial and Fungal Contamination [https://www.sigmaaldrich.com/US/en/technical-documents/protocol/cell-culture-and-cell-culture-analysis/mammalian-cell-culture/testing-for-bacteria?srsltid=AfmBOopJSkgW7ibeplxDtsHqOE1DsFbZ5FE1VIA2YZFByOroAOIpYnxC]
- 101. Introducing the Air Science® Mycology Hood [https://www.airscience.com/introducing-the-air-science-mycology-hood]
- 102. The Role of the Biosafety Cabinet in Preventing Infection ... [https://pmc.ncbi.nlm.nih.gov/articles/PMC10823295/]
- 103. Do I Need a Lab Isolator or Biosafety Cabinet? - Tion [https://www.tion.co.uk/education/do-i-need-a-lab-isolator-or-biosafety-cabinet/]
- 104. Fungal Growth Incubator LFGI-101 [http://www.labocon.com/product/fungal-growth-incubator-lfgi-101]
- 105. Cell Culture Contamination | Thermo Fisher Scientific - ZA [https://www.thermofisher.com/za/en/home/references/gibco-cell-culture-basics/biological-contamination.html]
- 106. Testing Cells for Bacterial and Fungal Contamination [https://www.sigmaaldrich.com/US/en/technical-documents/protocol/cell-culture-and-cell-culture-analysis/mammalian-cell-culture/testing-for-bacteria?srsltid=AfmBOorHoxxsMW14X0vRp1zu2QdQJt7B7ukN88CyJCEte6Pwm4fhmLfD]
- 107. Quantitative Monitoring of Mycelial Growth of Aspergillus ... [https://pmc.ncbi.nlm.nih.gov/articles/PMC8729762/]