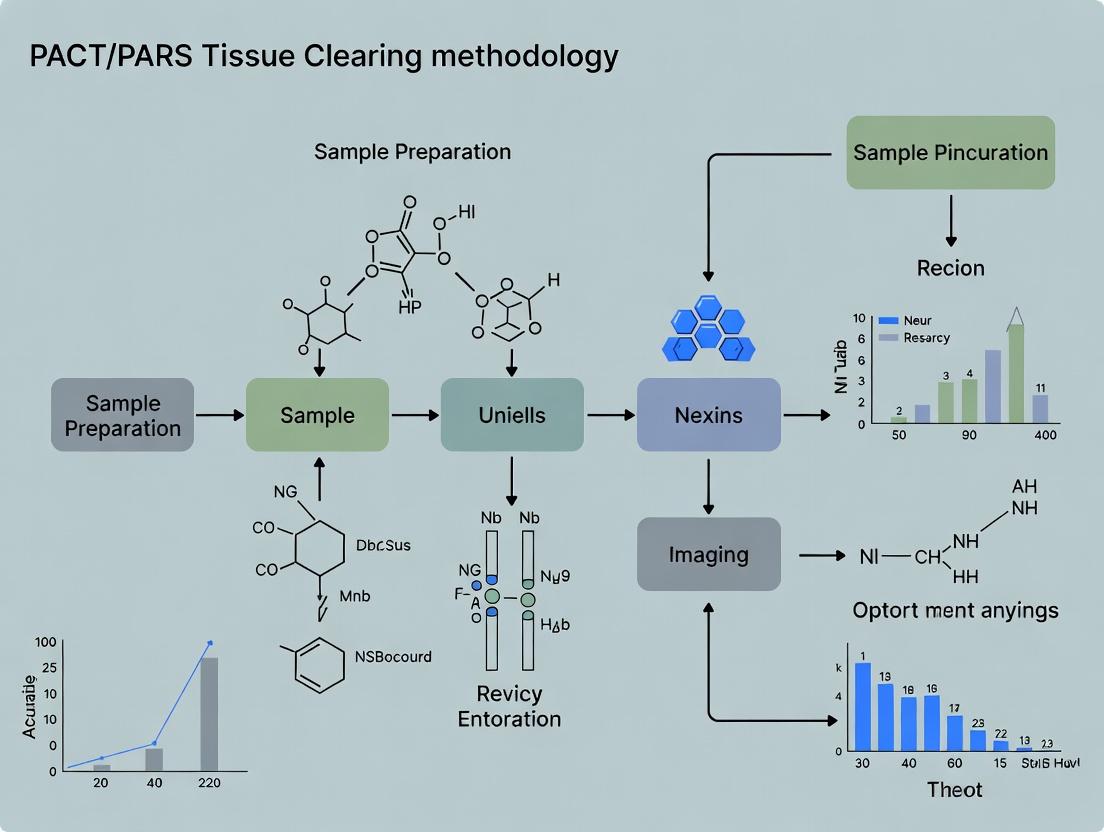
Clearing the Path to Discovery: A Comprehensive Guide to PACT and PARS Tissue Clearing for 3D Imaging
This article provides a complete resource on Passive Clarity Technique (PACT) and its derivative, Perfusion-Assisted Agent Release in Situ (PARS), two hydrogel-based tissue clearing methodologies revolutionizing 3D imaging in biomedical...
Clearing the Path to Discovery: A Comprehensive Guide to PACT and PARS Tissue Clearing for 3D Imaging
Abstract
This article provides a complete resource on Passive Clarity Technique (PACT) and its derivative, Perfusion-Assisted Agent Release in Situ (PARS), two hydrogel-based tissue clearing methodologies revolutionizing 3D imaging in biomedical research. We cover the foundational chemistry and physics of passive clearing, detail step-by-step protocols for organ-scale and whole-body applications, address common troubleshooting and optimization challenges, and present a comparative analysis against other major clearing techniques like CLARITY and iDISCO. Designed for researchers, scientists, and drug development professionals, this guide synthesizes current best practices to empower high-fidelity, scalable volumetric tissue analysis.
Demystifying PACT & PARS: Core Principles, History, and Why They Revolutionized 3D Imaging
This application note is framed within a broader thesis research project focused on advancing Passive Clarity Technique (PACT) and Passive delipidation, Asymmetric Rhodamine Staining (PARS) methodologies. The core innovation lies in the evolution from the original CLARITY protocol to the more streamlined PACT/PARS workflows, which significantly reduce complexity, equipment needs, and processing time while maintaining high-quality tissue clearing and macromolecule preservation for 3D imaging and analysis in drug development research.
Key Protocol Comparisons & Quantitative Data
Table 1: Comparative Summary of CLARITY, PACT, and PARS Protocols
| Parameter | CLARITY (Original) | PACT (Passive Clarity Technique) | PARS (PACT + Asymmetric Staining) |
|---|---|---|---|
| Hydrogel Monomer Solution | 4% Acrylamide, 0.05% Bis-Acrylamide, 4% PFA in PBS | 4% Acrylamide, 0.05% Bis-Acrylamide in PBS (No PFA during infusion) | Same as PACT |
| Tissue Fixation | Hydrogel infusion with simultaneous fixation (PFA present) | Separate PFA fixation prior to hydrogel infusion | Separate PFA fixation prior to hydrogel infusion |
| Polymerization Method | Thermal (37°C) with VA-044 initiator | Thermal (37°C) with VA-044 initiator | Thermal (37°C) with VA-044 initiator |
| Primary Delipidation Method | Active: Electrophoretic Tissue Clearing (ETC) | Passive: Incubation in 8% SDS (w/v), 4-6 weeks | Passive: Incubation in 8% SDS (w/v), 4-6 weeks |
| Typical Clearing Time (Mouse Brain) | 7-14 days with ETC | 4-6 weeks (passive) | 4-6 weeks (passive) |
| Key Equipment | Electrophoresis chamber, power supply, cooling system | Incubator or oven (37-45°C) | Incubator or oven (37-45°C) |
| RIA Buffer Wash Post-SDS | 1-2 days with active perfusion | Extended: >24 hours (passive diffusion) | Extended: >24 hours (passive diffusion) |
| Staining Paradigm | Whole-body or section immunostaining | Whole-body immunostaining | Asymmetric: Staining from one side only |
| Refractive Index Matching | FocusClear, 80% Glycerol, RIMS | 80% Glycerol, sRIMS, RIMS | RIMS, FocusClear |
Table 2: Quantitative Performance Metrics (Representative Data)
| Metric | CLARITY+ETC | PACT | PARS |
|---|---|---|---|
| Lipid Removal Efficiency (% over time) | ~99% after 10 days ETC | ~99% after 6 weeks passive | ~99% after 6 weeks passive |
| Protein/RNA Retention | High (within hydrogel) | High (within hydrogel) | High (within hydrogel) |
| Tissue Expansion/Shrinkage | Minimal with RIMS | Minimal with RIMS | Minimal with RIMS |
| Max Imaging Depth (with 2p microscopy) | ~5-6 mm | ~5-6 mm | ~5-6 mm |
| Immunostaining Penetration Depth | Full organ (with perfusion) | 1-2 mm (passive diffusion) | Asymmetric: Up to 5-6 mm from one surface |
| Total Protocol Duration (Mouse Brain) | ~3-4 weeks | ~8-10 weeks | ~8-10 weeks + staining time |
| Relative Cost (Materials/Equipment) | High | Low | Low |
Detailed Experimental Protocols
Protocol 3.1: PACT Tissue Processing and Clearing
Aim: To render an entire mouse brain optically transparent while preserving fluorescent protein signals and native tissue architecture for 3D imaging.
Materials: See "Scientist's Toolkit" (Section 6). Procedure:
- Perfusion & Fixation: Deeply anesthetize mouse. Transcardially perfuse with 20 mL of 1x PBS followed by 20 mL of 4% PFA (in PBS). Extract brain and post-fix in 4% PFA for 24 hours at 4°C.
- Hydrogel Infusion & Polymerization: Wash brain 3x in 1x PBS (2 hours each). Transfer to 20 mL of PACT Monomer Solution (4% Acrylamide, 0.05% Bis-Acrylamide, 0.25% VA-044 initiator in 1x PBS). Degas under vacuum for 30 minutes. Incubate at 4°C for 3-5 days on a rocker. Replace with fresh, degassed monomer solution. Polymerize hydrogel at 37°C for 3 hours in a nitrogen-filled chamber or sealed container.
- Passive Delipidation: Place hydrogel-embedded sample in 50 mL of PACT Clearing Solution (8% SDS w/v, 0.2% NaN3 in 0.01M PBS, pH 7.5-8.0). Incubate at 37°C with gentle shaking. Replace solution weekly until tissue is fully cleared (4-6 weeks for adult mouse brain).
- SDS Washout (Rinsing): Transfer sample to 50 mL of PBST (0.1% Triton X-100 in PBS). Incubate at 37°C with shaking, changing solution daily until no SDS precipitate forms upon addition of KCl solution (typically 5-7 days).
- Refractive Index Matching: Incubate sample in Refractive Index Matching Solution (RIMS: 88% Histodenz, 0.5% Triton X-100 in 0.02M PBS) for 24-48 hours prior to imaging. Mount in fresh RIMS for light-sheet or confocal microscopy.
Protocol 3.2: PARS Whole-Body Immunostaining
Aim: To achieve deep, asymmetric antibody labeling within a PACT-cleared tissue sample. Procedure:
- Blocking & Permeabilization: After SDS washout (Step 4, Protocol 3.1), incubate cleared sample in PARS Permeabilization/Blocking Buffer (0.2% Triton X-100, 3% Donkey Serum, 0.01% NaN3 in PBS) for 24-48 hours at 37°C.
- Primary Antibody Staining: Place sample in a custom staining chamber or a cut syringe barrel. Add primary antibody diluted in PARS Staining Buffer (0.2% Tween-20, 3% Serum, 0.01% NaN3 in PBS). Seal the container and incubate at 37°C for 7-14 days without agitation to allow asymmetric diffusion from one surface.
- Washing: Remove primary antibody and wash sample in PBST (0.1% Tween-20) at 37°C with gentle agitation. Change wash buffer daily for 5-7 days.
- Secondary Antibody Staining: Add fluorophore-conjugated secondary antibody in PARS Staining Buffer. Incubate at 37°C for 7-14 days without agitation.
- Final Wash & Clearing: Wash as in Step 3 for 5-7 days. Return sample to RIMS for refractive index matching and imaging.
Visualized Workflows and Signaling Pathways
Diagram 1: PACT/PARS Experimental Workflow
Diagram 2: CLARITY to PACT Core Simplifications
The Scientist's Toolkit: Essential Research Reagents & Materials
Table 3: Key Reagent Solutions for PACT/PARS Protocols
| Item | Function & Role in Protocol | Example/Composition Notes |
|---|---|---|
| PACT Monomer Solution | Forms the hydrogel mesh that encapsulates and supports biomolecules (proteins, nucleic acids) while lipids are removed. | 4% Acrylamide, 0.05% Bis-acrylamide, 0.25% VA-044 thermal initiator in 1x PBS. Critical: No PFA. |
| VA-044 (Azo Initiator) | Thermal radical initiator for hydrogel polymerization at 37°C, safer and more efficient than APS/TEMED for thick tissues. | Wako Chemicals 011-19365. Dissolved fresh in monomer solution and degassed. |
| PACT Clearing Solution | Passive delipidation agent. SDS micelles dissolve and remove lipids not anchored to the hydrogel. | 8% (w/v) Sodium Dodecyl Sulfate (SDS) in 0.01M PBS, pH 7.5-8.0. 0.2% Sodium Azide (NaN3) as preservative. |
| RIMS (Refractive Index Matching Solution) | Matches the refractive index of the tissue hydrogel (n~1.46) to minimize light scattering for high-resolution deep imaging. | 88% (w/v) Histodenz, 0.5% Triton X-100, 0.02M PBS. Filter sterilize. Alternative: 80% Glycerol. |
| PARS Staining Buffer | Buffer for long-term antibody incubations. Provides mild detergent for penetration, serum for blocking, and azide for preservation. | 0.2% Tween-20, 3% appropriate serum (e.g., donkey), 0.01% NaN3 in 1x PBS. |
| Histodenz | A non-ionic, iodinated density gradient medium. Key component of RIMS for high RI (n=1.46) with low autofluorescence. | Sigma-Aldrich D2158. Dissolve in buffer with mild heating and stirring. |
Within the framework of a thesis on advanced tissue clearing methodologies, this document serves as detailed Application Notes and Protocols for two seminal techniques: Passive Clarity Technique (PACT) and Perfusion-Assisted Agent Release in Situ (PARS). Both methods aim to render biological tissues transparent for high-resolution, deep-tissue imaging but are distinguished by their fundamental mechanisms, experimental workflows, and optimal applications.
Core Principles and Quantitative Comparison
The primary distinction lies in the agent introduction method: PACT relies on passive diffusion, while PARS employs active, perfusion-driven delivery.
Table 1: Foundational Comparison of PACT and PARS
| Parameter | Passive Clarity Technique (PACT) | Perfusion-Assisted Agent Release in Situ (PARS) |
|---|---|---|
| Core Principle | Passive immersion and diffusion of hydrogel monomers and clearing reagents into fixed tissue. | Active, whole-body vascular perfusion to deliver hydrogel monomers and clearing reagents in situ. |
| Primary Agent Introduction | Diffusion from surrounding solution. | Cardiovascular perfusion. |
| Typical Clearing Time | 7-14 days for mouse brain. | 2-3 days for whole mouse body. |
| Tissue Integrity | High, but sample size limited by diffusion. | Excellent, preserves organ and whole-body anatomy. |
| Best For | Individual organs (e.g., brain, kidney) and biopsies. | Whole-body or whole-organism clearing and labeling. |
| Key Equipment | Incubator, shaking incubator. | Perfusion pump, surgical tools. |
| Throughput | Medium to High (multiple samples in parallel). | Low to Medium (sequential perfusion). |
Table 2: Key Reagent Formulations
| Solution | PACT Composition (Typical) | PARS Composition (Typical) | Function |
|---|---|---|---|
| Hydrogel Monomer Solution | 4% Acrylamide, 0.05% Bis-acrylamide in PBS. | 4% Acrylamide, 0.05% Bis-acrylamide in PBS. | Forms a supportive polymer mesh within tissue. |
| Initiation System | 0.25% VA-044 initiator in PBS. | 0.25% VA-044 initiator, co-perfused. | Thermally initiates hydrogel polymerization. |
| Delipidation/Clearing Agent | 200mM Boric acid, 4% SDS (pH 8.5). | 200mM Boric acid, 4% SDS (pH 8.5). | Removes lipids, the primary source of light scattering. |
| Refractive Index Matching Solution | 88% Histodenz or RIMS (Refractive Index ~1.46). | 88% Histodenz or RIMS (Refractive Index ~1.46). | Matches tissue RI to that of immersion medium for final transparency. |
Detailed Experimental Protocols
Protocol 2.1: PACT for Mouse Brain
Objective: To clear an intact, fixed mouse brain for deep imaging.
Materials:
- Fixation: 4% Paraformaldehyde (PFA) in PBS.
- Hydrogel Monomer Solution: See Table 2.
- Clearing Buffer: 200mM Boric acid, 4% SDS, pH 8.5.
- RI Matching Solution: 88% Histodenz in 0.02% PBS-Tween.
- Equipment: 37°C incubator, 50mL conical tubes, shaking incubator or rocker.
Procedure:
- Perfusion & Fixation: Deeply anesthetize mouse. Transcardially perfuse with 20mL PBS followed by 20mL 4% PFA. Dissect brain and post-fix in 4% PFA for 24h at 4°C.
- Wash: Rinse brain in PBS for 24h at 4°C, changing buffer 3-4 times.
- Hydrogel Infusion: Transfer brain to hydrogel monomer solution. Incubate at 4°C for 3-7 days on a gentle rocker.
- Polymerization: Replace solution with fresh, degassed monomer solution containing 0.25% VA-044. Flush with Nitrogen gas for 1 min. Incubate at 37°C for 3h in a sealed tube.
- Delipidation: Transfer polymerized sample to 20-50mL of Clearing Buffer. Incubate at 37°C with gentle shaking until clear (typically 7-14 days). Replace solution every 2-3 days.
- Wash & RI Matching: Rinse cleared brain in PBS-Tween (0.2%) for 24h at 37°C to remove SDS. Transfer to RI Matching Solution for ≥24h before imaging.
Protocol 2.2: PARS for Whole-Body Mouse Clearing
Objective: To perfuse hydrogel monomers in situ and clear an entire adult mouse.
Materials:
- Perfusion Solutions: PBS, 4% PFA, Hydrogel Monomer Solution (with initiator).
- Clearing Buffer: As in Table 2.
- RI Matching Solution: As in Table 2.
- Equipment: Peristaltic pump, heating pad, surgical tools, 37°C incubator.
Procedure:
- Surgical Setup: Deeply anesthetize and secure mouse on a heated pad. Perform a midline incision to expose the thoracic cavity.
- Vascular Access: Cannulate the left ventricle of the heart. Create an incision in the right atrium for outflow.
- Blood Clearance: Perfuse with 20mL PBS at a rate of 10mL/min to exsanguinate.
- In Situ Hydrogel Perfusion: Immediately switch to perfusing with degassed Hydrogel Monomer Solution containing 0.25% VA-044 initiator. Perfuse 20-30mL.
- In Situ Polymerization: Without disturbing the carcass, place the entire animal in a 37°C incubator or water bath for 2-3h to polymerize the hydrogel in situ.
- Dissection & Delipidation: Dissect the desired organ or use the whole body. Submerge in Clearing Buffer at 37°C with shaking until transparent (2-3 days for organs, up to 14 days for whole body).
- Wash & RI Matching: Proceed as in PACT Step 6.
The Scientist's Toolkit: Essential Research Reagents & Materials
Table 3: Core Research Reagent Solutions
| Item | Function in PACT/PARS | Key Consideration |
|---|---|---|
| Paraformaldehyde (4% PFA) | Crosslinks and fixes proteins, preserving tissue architecture. | Freshly prepared or aliquoted from single-use stocks is optimal. |
| Acrylamide/Bis-acrylamide | Monomers form a polyacrylamide hydrogel mesh within tissue, stabilizing proteins and nucleic acids. | Handle with care (neurotoxin). Use electrophoresis-grade purity. |
| VA-044 (Azo Initiator) | Thermal free-radical initiator for hydrogel polymerization at 37°C. | Preferable over APS/TEMED for more uniform and controllable polymerization. |
| Sodium Dodecyl Sulfate (SDS) | Ionic detergent that actively solubilizes and removes phospholipids (delipidation). | High concentration (4%) requires elevated temperature (37-50°C) and agitation. |
| Boric Acid Buffer (pH 8.5) | Maintains optimal basic pH for SDS clearing efficacy and hydrogel stability. | |
| Histodenz / RIMS | High-refractive-index aqueous solution for final immersion, minimizing light scattering at interfaces. | RI should be calibrated to ~1.46. Alternative: FocusClear, TDE. |
| Passive Clearing Chamber | For PACT: A sealed, temperature-controlled chamber for sample immersion. | Must be chemically resistant to SDS. |
| Peristaltic Pump & Cannulae | For PARS: Enables controlled, vascular perfusion of reagents in situ. | Calibrate flow rate (5-15 mL/min for mice) prior to experiment. |
Visualized Workflows and Mechanisms
Title: PACT Passive Diffusion Workflow
Title: PARS Active Perfusion Workflow
Title: PACT/PARS Biochemical Clearing Mechanism
This application note details the principles and protocols for hydrogel-tissue hybridization and passive diffusion, core tenets of advanced tissue-clearing methodologies such as PACT (Passive CLARITY Technique) and PARS (Perfusion-assisted Agent Release in Situ). Within the broader thesis of PACT/PARS research, understanding these principles is paramount for achieving macromolecule-compatible tissue transparency, facilitating deep-tissue imaging, and enabling high-resolution phenotyping for biomedical research and drug development.
Hydrogel-Tissue Hybridization: Principles and Applications
Hydrogel-tissue hybridization involves the infusion and in situ polymerization of hydrophilic monomers (e.g., acrylamide) within a fixed tissue matrix. This process creates a co-polymerized hybrid that physically supports tissue architecture while allowing for the removal of light-scattering components like lipids.
Core Principle Table
| Principle | Chemical/Physical Basis | Role in Clearing |
|---|---|---|
| Tissue Fixation | Formaldehyde-based crosslinking of proteins/nucleic acids. | Preserves structural integrity for hybridization. |
| Monomer Infusion | Passive diffusion of acrylamide, bis-acrylamide, and initiators. | Prepares tissue for polymerization. |
| Thermal Polymerization | 37°C-initiated, radical-driven formation of polyacrylamide mesh. | Creates interpenetrating hydrogel network. |
| Lipid Electrophoresis | SDS-mediated solubilization & electrophoretic removal. | Extracts lipids; primary source of opacity. |
| Refractive Index Matching | Immersion in aqueous RI-matching solutions (e.g., FocusClear, RIMS). | Minimizes light scattering; finalizes clarity. |
Protocol: PACT Hydrogel-Tissue Hybridization
Materials: 4% PFA, Acrylamide/Bis-Acrylamide Stock (40%), VA-044 Initiator, 0.1M PB Buffer, 8% SDS Solution, Electrophoresis Chamber, RI Matching Solution.
Procedure:
- Perfusion & Fixation: Perfuse subject transcardially with PBS followed by 4% PFA. Dissect tissue and post-fix in 4% PFA for 24h at 4°C.
- Hydrogel Solution Preparation: Prepare "PACT Solution": 4% acrylamide, 0.05% bis-acrylamide, and 0.25% VA-044 thermal initiator in 0.1M PB. Degas for 20 min.
- Passive Infusion: Submerge fixed tissue in 5-10x volume of PACT solution. Incubate at 4°C for 3-7 days (duration depends on tissue size).
- Thermal Polymerization: Replace solution with fresh, degassed PACT solution. Incubate at 37°C for 3 hours to form the hydrogel-tissue hybrid.
- Passive Lipid Clearing: Transfer tissue to 8% SDS solution in 0.1M PB (pH 8.5). Incubate at 37°C with gentle shaking for 1-4 weeks until clear. Solution should be replaced weekly.
- Washing & RI Matching: Wash cleared tissue in 0.1M PB with 0.1% Triton X-100 for 24h to remove SDS. Immerse in RI matching solution (e.g., RIMS, n=1.46) for 48h prior to imaging.
Passive Diffusion: Principles and Optimization
Passive diffusion is the rate-limiting step for reagent delivery in thick tissues. It is governed by Fick's laws, where diffusion time (t) scales with the square of the diffusion distance (L): t ∝ L² / D, where D is the diffusion coefficient.
Quantitative Diffusion Data
| Tissue Type | Approx. Thickness (mm) | Estimated Time for Full Antibody Penetration (Days) | Key Limiting Factor |
|---|---|---|---|
| Mouse Brain (Hemisphere) | 3-4 | 14-21 | High lipid density & cellular packing |
| Mouse Kidney | 2-3 | 10-14 | Vascular/glomerular complexity |
| Mouse Lymph Node | 1-2 | 7-10 | Dense cellular architecture |
| Human Brain Slab | 5 | 28-35+ | Extreme size & post-mortem factors |
Protocol: Optimizing Passive Diffusion for Immunostaining in Cleared Tissue
Materials: Cleared tissue sample, Primary & Secondary Antibodies, PBST (0.1M PB + 0.1% Triton X-100), Blocking Buffer (5% DMSO, 3% Donkey Serum in PBST).
Procedure:
- Blocking: Incubate cleared tissue in blocking buffer for 24-48h at 37°C to reduce non-specific binding.
- Primary Antibody Staining: Dilute primary antibody in blocking buffer (typically 1:100-1:500). Incubate tissue sample at 37°C. Duration is critical: For a 3mm-thick sample, incubate for 10-14 days. Gentle agitation improves convection at the surface.
- Washing: Remove primary antibody and wash with PBST. Use 5-10x sample volume. Wash for 24h, refreshing buffer every 8h, at 37°C.
- Secondary Antibody Staining: Dilute fluorescent-conjugated secondary antibody (1:200-1:500) in blocking buffer. Incubate at 37°C for 10-14 days, protected from light.
- Final Washing & RI Matching: Wash thoroughly with PBST for 24-48h. Return tissue to RI matching solution for 48h before imaging.
Diagrams
PACT Clearing Workflow
Passive Diffusion & Staining Dynamics
The Scientist's Toolkit: Key Reagent Solutions
| Reagent/Material | Function in PACT/PARS | Key Consideration |
|---|---|---|
| Paraformaldehyde (PFA) | Crosslinks proteins to preserve structure during lipid removal. | Freshly prepared or stabilized stocks prevent formic acid formation. |
| Acrylamide/Bis-Acrylamide | Monomers for hydrogel formation. Provide supportive mesh. | Use high-purity, electrophoresis-grade. Handle with care (neurotoxin). |
| VA-044 (Azo Initiator) | Thermal radical initiator for polymerization at 37°C. | Preferable over APS/TEMED for more uniform & gentle polymerization. |
| Sodium Dodecyl Sulfate (SDS) | Ionic detergent solubilizes membrane phospholipids & cholesterol. | High concentration (4-8%) and alkaline pH (8.5) are required for efficacy. |
| Refractive Index Matching Solution (RIMS) | Aqueous solution with high RI (~1.46) to match hydrogel-tissue hybrid. | Critical for final transparency. Common base: Histodenz or iohexol. |
| Triton X-100/PBST | Non-ionic detergent for washing steps post-clearing. Removes SDS residue. | Essential to prevent SDS crystallization and permit antibody staining. |
| DMSO in Blocking Buffer | Penetration enhancer for immunostaining. Disrupts hydrophobic interactions. | Typically used at 3-6% to improve antibody diffusion without damage. |
Application Notes
Within the context of PACT (Passive CLARITY Technique) and PARS (Perfusion-assisted agent release in situ) tissue clearing methodologies, precise reagent selection is critical for achieving optimal tissue transparency, structural preservation, and macromolecule integrity for subsequent analysis. These reagents function synergistically to create a hydrogel-tissue hybrid that anchors native biomolecules while removing light-scattering lipids.
Acrylamide serves as the primary monomer for hydrogel formation. Its small molecular weight allows for rapid and uniform diffusion throughout thick tissue specimens during passive incubation or active perfusion. It covalently incorporates into the polymer mesh via free-radical polymerization, creating a porous matrix that covalently binds to proteins and nucleic acids, preventing their loss during delipidation.
Formaldehyde is the critical fixative. It crosslinks amines, primarily forming methylene bridges between lysine residues and other nucleophilic sites on proteins and between proteins and nucleic acids. This stabilizes the 3D architecture of the tissue, preventing degradation and diffusion of biomolecules during the subsequent harsh clearing process. In PACT/PARS, a careful balance is struck: sufficient fixation for anchoring, but not so extensive as to hinder monomer infiltration or create excessive autofluorescence.
VA-044 Initiator (2,2'-Azobis[2-(2-imidazolin-2-yl)propane] dihydrochloride) is a water-soluble, azo-type free-radical initiator. Its key characteristic is a low decomposition temperature (~44°C), which allows for thermally triggered polymerization under mild conditions that are compatible with biological samples. This controlled initiation ensures uniform hydrogel formation throughout the tissue block without generating excessive heat or damaging epitopes.
The integration of these reagents enables the core PACT/PARS workflow: tissue stabilization (Formaldehyde) -> hydrogel hybridization (Acrylamide + VA-044) -> lipid removal -> refractive index matching.
Protocols
Protocol 1: Standard PACT Tissue Hydrogel Embedding
Objective: To form a hydrogel-tissue composite within a fixed tissue sample for passive clearing.
Materials:
- Fixed tissue sample (e.g., 1-2 mm³ mouse brain block)
- 4% Formaldehyde in PBS (PFA)
- Acrylamide, 40% stock solution
- VA-044 Initiator powder
- PBS (Phosphate Buffered Saline)
- Nitrogen gas or Argon gas (for deoxygenation)
Method:
- Fixation: Immerse tissue in 4% PFA at 4°C for 24-48 hours with gentle agitation. Rinse with PBS 3x for 1 hour each at 4°C.
- Monomer Solution Preparation: In a vial, prepare a solution of 4% (w/v) Acrylamide and 4% PFA in PBS. For 10 mL: Add 1 mL of 40% Acrylamide stock, 1 mL of 40% PFA stock, and 8 mL PBS.
- Deoxygenation: Bubble nitrogen/argon gas through the monomer solution for 20-30 minutes on ice to remove dissolved oxygen, a potent free-radical scavenger.
- Initiator Addition: Add VA-044 to a final concentration of 0.25% (w/v). For 10 mL, add 25 mg. Dissolve completely while keeping the solution on ice.
- Infiltration: Submerge the fixed, rinsed tissue in the monomer/initiator solution. Place the vial in a vacuum desiccator at 4°C for 1 hour (to aid infiltration), then transfer to 4°C with agitation for 24-48 hours.
- Thermal Polymerization: Place the sealed vial in a 37°C water bath for 3 hours, then transfer to a 50°C oven for 24 hours to complete the reaction.
- Post-Polymerization Rinse: The hydrogel-tissue composite is now ready. Rinse with PBS to remove unpolymerized reagents before proceeding to delipidation (e.g., with 8% SDS in PBS).
Protocol 2: PARS-Perfusion for Whole-Body/Organ Clearing
Objective: To achieve whole-body hydrogel hybridization via vascular perfusion.
Materials:
- Anesthetized rodent.
- Perfusion pump and surgical tools.
- Heparinized saline.
- Monomer Solution: 4% Acrylamide, 4% PFA, 0.25% VA-044 in PBS (pre-deoxygenated on ice).
- Ice bath.
Method:
- Pre-perfusion: Perform transcardial perfusion with heparinized saline to clear blood.
- Fixative Perfusion: Perfuse with 4% PFA in PBS at a slow rate (e.g., 5 mL/min) for 10-15 minutes.
- Monomer Perfusion: Switch immediately to the ice-cold, deoxygenated monomer/initiator solution. Perfuse at 5 mL/min for 5-10 minutes. Important: Keep solutions and lines on ice to prevent premature polymerization.
- Dissection & Incubation: Quickly dissect the target organ(s) and immerse them in the same monomer solution on ice.
- Polymerization: Transfer the sample in solution to a 37°C incubator for 3 hours, then to 50°C for 24 hours, as in Protocol 1.
Table 1: Key Reagent Properties & Roles in PACT/PARS
| Reagent | Chemical Formula | Primary Role in PACT/PARS | Typical Working Concentration | Critical Property |
|---|---|---|---|---|
| Acrylamide | C₃H₅NO | Hydrogel monomer | 4% (w/v) | Small size (71.08 Da) for deep tissue penetration; forms polyacrylamide mesh. |
| Formaldehyde | CH₂O | Fixative / Crosslinker | 4% (w/v) | Creates methylene bridges between biomolecules (proteins, nucleic acids). |
| VA-044 | C₁₂H₂₄N₈Cl₂ | Thermal Free-Radical Initiator | 0.25% (w/v) | Low decomposition temp (44°C); water-soluble; generates nitrogen as only byproduct. |
Table 2: Optimized Protocol Parameters
| Step | Key Parameter | PACT (Passive) | PARS (Perfusion) | Rationale |
|---|---|---|---|---|
| Fixation | Time & Temp | 24-48h at 4°C | 10-15min perfusion at RT | Balance between structure preservation and monomer infiltration hindrance. |
| Monomer Infiltration | Time | 24-48h at 4°C | 5-10min perfusion (ice-cold) | PARS uses vascular system for rapid, uniform delivery. |
| Polymerization | Temperature Profile | 3h at 37°C, then 24h at 50°C | 3h at 37°C, then 24h at 50°C | 37°C initiates VA-044 decomposition; 50°C ensures complete polymerization. |
| Delipidation | Solution | 8% SDS in PBS | 8% SDS in PBS | SDS effectively removes lipids, the primary source of light scattering. |
Diagrams
PACT/PARS Hydrogel Formation Workflow
VA-044 Initiated Polymerization Mechanism
The Scientist's Toolkit: Key Reagent Solutions for PACT/PARS
| Item | Function in PACT/PARS | Notes |
|---|---|---|
| 40% Acrylamide Stock Solution | Provides the monomer for hydrogel formation. Pre-mixed solutions ensure consistency and reduce exposure to neurotoxic powder. | Often contains bis-acrylamide (e.g., 29:1 or 37.5:1 Acrylamide:Bis) as a crosslinker. |
| Paraformaldehyde (PFA) 4% in PBS | Primary tissue fixative. Creates reversible crosslinks that stabilize structure while allowing for biomolecule anchoring. | Must be prepared fresh or aliquoted from frozen stocks to prevent formic acid formation. |
| VA-044 (Wako Chemicals) | Water-soluble, low-temperature azo initiator. Enables controlled, uniform hydrogel polymerization within biological tissue. | Critical to store dry at -20°C and protect from moisture and light to maintain activity. |
| Phosphate Buffered Saline (PBS), 10X | Physiological buffer for all solution preparation, rinsing, and perfusion. Maintains ionic strength and pH. | Used for diluting PFA, acrylamide, and for post-polymerization rinses. |
| Sodium Dodecyl Sulfate (SDS), 20% Stock | Ionic detergent used at 4-8% for active delipidation. Removes lipids, the primary source of light scattering. | Requires active electrophoresis (CLARITY) or passive, heated incubation (PACT) for days to weeks. |
| Hydrogel Monomer Solution | Working solution containing Acrylamide, PFA, and VA-044 in PBS. The core reagent mix for tissue hybridization. | Must be deoxygenated and kept ice-cold before thermal polymerization is triggered. |
| Refractive Index Matching Solution | Final immersion medium for imaging (e.g., 80% Glycerol, RIMS, FocusClear). Matches the R.I. of the cleared tissue (~1.45). | Eliminates last light-scattering interfaces for high-resolution deep imaging. |
PACT (Passive CLARITY Technique) and PARS (Perfusion-Assisted Agent Release in Situ) are hydrogel-based tissue-clearing methodologies that enable three-dimensional interrogation of intact biological specimens. Within the broader thesis of advancing whole-organ imaging, these techniques are uniquely suited to answer complex biological questions involving long-range connectivity, spatial cellular relationships, and system-wide effects of disease or treatment. This application note details the specific research questions addressable by PACT/PARS and provides standardized protocols for their implementation.
The fundamental advantage of PACT and PARS over traditional sectioning lies in the preservation of macroscopic structure while achieving optical transparency. PACT is a passive diffusion-based method ideal for cleared tissue imaging, while PARS utilizes active perfusion to deliver reagents throughout the entire vasculature of an organism, enabling whole-body clearing and labeling. This positions them to resolve questions intractable to conventional 2D histology.
Uniquely Addressable Biological Questions
Mapping Long-Range Neural Circuits
PACT/PARS enables tracing of neuronal projections across centimeters within intact brains, crucial for connectomics.
Key Application: Determining the brain-wide integration of a specific neuronal subtype (e.g., dopaminergic neurons) in a mouse model of Parkinson's disease.
Quantifying System-Wide Metastatic Dissemination
Whole-body PARS clearing allows visualization of single metastatic cells in the context of entire organs.
Key Application: Profiling the organotropism and colonization efficiency of circulating tumor cells in an oncology mouse model.
Analyzing 3D Vascular Architecture and Perfusion
The PARS method directly leverages the vascular system, making it ideal for studying angiogenesis and vascular remodeling.
Key Application: Evaluating the efficacy of an anti-angiogenic drug on tumor vasculature density and morphology.
Characterizing Distributed Immune Cell Responses
To understand immune surveillance or inflammation, locating rare immune populations in 3D space is essential.
Key Application: Mapping microglial activation states relative to amyloid-beta plaques throughout an entire Alzheimer's disease mouse brain.
Table 1: Quantitative Comparison of PACT vs. PARS for Key Applications
| Biological Question | Recommended Method | Typical Sample Size | Clearing Time | Key Metric Enabled |
|---|---|---|---|---|
| Deep brain circuit mapping | PACT | Whole adult mouse brain | 7-14 days | Projection distance (mm) & terminal density |
| Whole-body metastasis count | PARS | Whole adult mouse body | 14-21 days | Total metastatic foci per organ system |
| Tumor vascular complexity | PARS | Whole tumor (+ margin) | 10-14 days | Vessel volume fraction & branch points |
| Organ-wide immune infiltration | PACT | Whole organ (e.g., spleen, lung) | 5-10 days | 3D density distribution of labeled cell type |
Detailed Protocols
Protocol 1: PACT for Whole-Brain Neuronal Circuit Mapping
Objective: Clear and immunolabel an adult mouse brain for imaging of sparsely labeled neurons.
Materials: See "The Scientist's Toolkit" below. Procedure:
- Perfusion & Hydrogel Embedding: Perfuse transcardially with 20 mL of PBS followed by 40 mL of PACT hydrogel solution (4% acrylamide, 0.05% VA-044 initiator in PBS). Extract brain.
- Polymerization: Incubate sample in degassed hydrogel at 4°C for 3 hours, then polymerize at 37°C for 3 hours.
- Passive Clearing & Delipidation: Transfer sample to 20 mL of 8% SDS in borate buffer (pH 8.5). Incubate at 37°C with gentle shaking for 7 days, replacing solution every 2 days.
- Immunolabeling: Wash in PBS + 0.1% Triton X-100 (PBST) for 24 hours. Incubate in primary antibody (e.g., anti-GFP) in PBST + 6% DMSO for 5 days at 37°C. Wash for 24 hours, then incubate in secondary antibody for 5 days.
- Refractive Index Matching: Wash and incubate in EasyIndex or 87% Histodenz for 48 hours until transparent.
- Imaging: Mount in RI-matching solution and image with light-sheet or confocal microscope.
Protocol 2: PARS for Whole-Body Metastasis Analysis
Objective: Clear and label vasculature and tumor cells in a whole mouse for metastasis detection.
Procedure:
- Perfusion-Based Labeling & Clearing: Euthanize mouse. Perfuse via the left ventricle with 20 mL PBS, then 20 mL of PBS containing a fluorescent Ulex europaeus lectin (vascular label) and a cell-permeant nuclear dye (e.g., DRAQ5). Follow with 50 mL of PARS hydrogel (4% acrylamide).
- Whole-Body Polymerization: Place carcass in hydrogel at 4°C for 6 hours, then 37°C for 3 hours.
- Active Delipidation: Perfuse with 100 mL of 8% SDS solution at 1 mL/hr via a peristaltic pump connected to the aortic cannula. Continue recirculating SDS for 10-14 days until transparent.
- Washing & RI Matching: Perfuse with PBS for 24 hours to remove SDS. Perfuse with EasyIndex for 48 hours for RI matching.
- Whole-Body Imaging: Place the cleared carcass in an imaging chamber and perform multi-channel light-sheet microscopy.
Visualizations
Title: PACT & PARS Application Strengths Map
Title: PACT/PARS Core Workflow Comparison
The Scientist's Toolkit
Table 2: Essential Research Reagents & Materials
| Item | Function | Example/Note |
|---|---|---|
| Hydrogel Monomer | Forms porous polymer mesh to support tissue structure. | Acrylamide (4%). Use with caution (neurotoxin). |
| Photoinitiator | Generates radicals for hydrogel polymerization. | VA-044 (thermal initiator for PACT/PARS). |
| Detergent Solution | Actively removes lipids for optical clearing. | 8% Sodium Dodecyl Sulfate (SDS) in borate buffer. |
| Refractive Index Matching Solution | Eliminates light scattering for final transparency. | EasyIndex, 87% Histodenz, or RIMS. |
| Passive Clearing Chamber | Holds sample during long-term incubation. | 50mL conical tube with screw cap. |
| Peristaltic Pump (PARS) | Actively circulates clearing reagents via vasculature. | Required for whole-body PARS; flow rate ~1 mL/hr. |
| Light-Sheet Microscope | Enables rapid 3D imaging of large cleared samples. | Ideal for samples >1mm. Confocal suitable for smaller blocks. |
| Permeabilization/Blocking Buffer | Enables antibody penetration and reduces background. | PBST (0.1% Triton X-100) with 6% DMSO & 3% serum. |
Mastering the Protocol: Step-by-Step Guide to PACT/PARS from Sample Prep to Imaging
The initial phase of tissue processing is the most critical determinant of success for downstream analyses, particularly within the context of PACT (Passive CLARITY Technique) and PARS (Perfusion-Assisted Agent Release in Situ) tissue clearing methodologies. This phase establishes the foundation for preserving native macromolecular structures and epitope integrity, enabling deep, high-resolution imaging of intact organs.
Quantitative Parameters for Optimal Fixation
The following table summarizes key parameters and their impact on structural and antigenic preservation, derived from recent studies (2023-2024) optimizing fixation for clearing techniques.
Table 1: Comparative Analysis of Fixation Methods for PACT/PARS-Compatible Tissues
| Parameter | Formaldehyde (FA) Fixation (Standard) | Paraformaldehyde (PFA) Perfusion (Optimized for PACT) | Glyoxal-Based Fixation (Emerging for Epitopes) | Dual-Aldehyde Fixation (FA + Glutaraldehyde) |
|---|---|---|---|---|
| Primary Mechanism | Crosslinks primary amines (protein-protein, protein-nucleic acid). | Controlled perfusion delivers uniform crosslinking. | Forms cyclic adducts with arginine, lysine; less methylene bridging. | FA for rapid penetration, low-dose GA for superior structural fixation. |
| Typical Concentration | 4% FA in PBS, pH 7.4 | 4% PFA via cardiac perfusion, 20-30 mL/min for mice. | 2-3% Glyoxal in MOPS or PBS, pH ~7.0. | 4% FA + 0.25-0.5% GA in PBS. |
| Fixation Duration | 6-24 hours at 4°C (immersion). | Perfusion: 5-10 min; Post-fixation: 12-24h at 4°C. | 6-12 hours at 4°C. | Perfusion or immersion: 6-12h at 4°C. |
| Impact on Epitopes | Moderate to High masking; requires antigen retrieval. | Moderate masking; more uniform than immersion FA. | Reported lower epitope masking; superior for many phospho-epitopes. | High masking; often incompatible with many antibody-based assays. |
| Tissue Hardening | Moderate. | Low to Moderate (with proper perfusion). | Low. | High. |
| Autofluorescence | Moderate (increases with time). | Moderate. | Reported lower autofluorescence. | High (GA-induced). |
| Compatibility with PACT/PARS Hydrogel | High. | Excellent. Uniform fixation enables even hydrogel monomer infusion. | Under investigation; early reports promising. | Poor. Excessive crosslinking impedes hydrogel diffusion and clearing. |
| Clearing Efficiency (PACT) | Good. | Optimal. | Good (preliminary data). | Poor. |
Detailed Protocol: Cardiac Perfusion Fixation for Murine Brain (PARS/PACT-Optimized)
This protocol ensures rapid, uniform fixation critical for subsequent hydrogel embedding and passive clearing.
Materials & Reagents
- Anesthetic (e.g., Ketamine/Xylazine or Isoflurane setup).
- Peristaltic pump or gravity-fed perfusion system with tubing and 27G butterfly needle.
- Dissection tools (scissors, forceps, hemostats).
- Ice-cold 1x Phosphate-Buffered Saline (PBS), pH 7.4.
- Ice-cold 4% Paraformaldehyde (PFA) in PBS, pH 7.4. Note: Prepare fresh or use aliquots stored at -20°C, thawed on ice.
- iced container or dissection mat.
Procedure
- Anesthesia: Deeply anesthetize the mouse according to approved IACUC protocols. Ensure absence of pedal reflex.
- Perfusion Setup: Flush the perfusion system with PBS to remove air. Fill the line with ice-cold PBS.
- Thoracotomy: Pin the mouse supine. Make a midline cutaneous incision from abdomen to chin. Use scissors to cut through the rib cage laterally from the xiphoid process towards the shoulders, exposing the heart. Carefully retract the rib cage.
- Needle Insertion: Clamp the descending aorta with hemostats. Insert the butterfly needle into the left ventricle. Immediately make an incision in the right atrium to create an outflow.
- PBS Perfusion: Start perfusion with ice-cold PBS at a rate of 10-15 mL/min. Perfuse with ~20-30 mL of PBS until the liver pales and the effluent from the atrium runs clear.
- Fixative Perfusion: Switch the line to ice-cold 4% PFA. Perfuse at 10 mL/min for 5-7 minutes (~50-70 mL total). Observe mild limb and tail stiffening.
- Harvest: Decapitate and carefully remove the skull using fine rongeurs. Extract the brain gently with a spatula.
- Post-fixation: Immerse the brain in ice-cold 4% PFA for 12-24 hours at 4°C. Do not over-fix.
- Washing: Transfer tissue to PBS with 0.02% sodium azide. Wash 3-4 times over 24 hours at 4°C to remove residual PFA. Tissue can now proceed to hydrogel embedding for PACT or be used for other analyses.
The Scientist's Toolkit: Key Reagents for Tissue Harvest & Fixation
Table 2: Essential Research Reagent Solutions
| Item | Function & Rationale |
|---|---|
| Paraformaldehyde (PFA), 4% in PBS | The gold-standard fixative for immunohistochemistry. Provides uniform protein crosslinking while maintaining reasonable epitope accessibility post-retrieval. Essential for PACT hydrogel infusion. |
| Glyoxal Solution, 2-3% in MOPS Buffer | An alternative fixative reported to better preserve protein structure and certain labile epitopes (e.g., phosphorylation sites) while generating less autofluorescence. |
| HEPES or MOPS Buffered Saline | Used for glyoxal fixation or as a perfusion buffer. They lack primary amines, preventing competition with tissue amines during fixation. |
| Sodium Azide (0.02%) | Added to PBS storage buffer to inhibit microbial and fungal growth in fixed tissues during long-term storage at 4°C. |
| Passive CLARITY Tissue (PACT) Hydrogel Solution | Acrylamide/bis-acrylamide monomer solution with thermal initiators. Infuses into fixed tissue to form a porous hydrogel matrix that supports lipids during electrophoresis or passive clearing. |
| PARS Perfusion Solution | Aqueous solution containing electrophoresis buffer and detergent (e.g., SDS) for in situ lipid clearing via active electrophoresis, following PACT hydrogel embedding. |
Visualization: Workflow and Decision Pathway
Tissue Fixation Decision Workflow for Clearing
PACT Tissue Prep Core Steps & Outcomes
This protocol details the second phase of the Passive Acuity Clearing Technique/PARS (PACT/PARS) workflow, following initial tissue fixation and permeabilization. The core objective is to infuse and polymerize a acrylamide-based hydrogel matrix within the tissue sample, creating a covalently linked, stable tissue-hydrogel hybrid. This hybrid network preserves biomolecular architecture (proteins, nucleic acids) while providing mechanical stability for subsequent harsh clearing treatments, such as SDS-mediated delipidation. This step is foundational for achieving high transparency and optical accessibility in thick tissue specimens, critical for 3D imaging in neuroscience, developmental biology, and drug discovery.
Key Reagent Solutions and Materials
Table 1: Research Reagent Solutions for Hydrogel Infusion and Polymerization
| Reagent/Material | Composition/Details | Primary Function |
|---|---|---|
| Acrylamide Monomer Solution | 4% (w/v) Acrylamide, 0.05% (w/v) Bis-acrylamide in 1x PBS. | Forms the primary backbone of the hydrogel. The bis-acrylamide provides cross-links. |
| Thermo-Initiation System | 0.25% (w/v) Ammonium Persulfate (APS), 0.2% (v/v) N,N,N',N'-Tetramethylethylenediamine (TEMED). | APS (thermal initiator) and TEMED (catalyst) generate free radicals to initiate polymerization at 37°C. |
| Paraformaldehyde (PFA) | 4% (w/v) in PBS. Used in pre-phase fixation. | Provides additional fixation during polymerization, stabilizing the tissue-hydrogel bond. |
| Passive Infusion Device | Simple vial or tube on a rocker or shaker. | Enables slow, uniform diffusion of monomers into tissue without active pressure. |
| Thermal Heater/Incubator | Precise temperature control at 37°C ± 1°C. | Provides the thermal energy required for the APS/TEMED-initiated polymerization. |
| Oxygen Scavenger (Optional) | Sodium Ascorbate or 2,2,6,6-Tetramethylpiperidine-1-oxyl (TEMPO). | Enhances polymerization efficiency by reducing oxygen inhibition, especially in dense tissues. |
Detailed Experimental Protocol
Preparation of Monomer Solution
- Under a fume hood, prepare the monomer stock by dissolving 4g of acrylamide and 0.05g of N,N'-methylenebisacrylamide (Bis) in 100mL of 1x PBS. Filter sterilize (0.22 µm) and store aliquots at 4°C in the dark for up to 2 weeks.
- On the day of infusion, for each 10mL of monomer solution, add 25 µL of 10% (w/v) APS stock and 20 µL of pure TEMED. Mix gently by inversion. Do not vortex to avoid premature bubble formation. The solution is now active and should be used within 15 minutes.
Hydrogel Monomer Infusion
- Transfer the fixed and permeabilized tissue sample (from PACT Phase 1) into a 5-10x sample volume of the active monomer solution.
- Place the container on a gentle rocker or rotator at 4°C for infusion.
- Infusion times are critical and scale with tissue size and density:
- Mouse brain (whole): 3-5 days
- Mouse brain hemisphere: 2-3 days
- 1 mm³ organoid/spheroid: 12-24 hours
- Infusion times are critical and scale with tissue size and density:
- Ensure the sample is fully submerged and not trapped against the container wall.
Thermal Polymerization
- After infusion, carefully transfer the sample (still in monomer solution) into a suitable, gas-tight polymerization chamber (e.g., a sealed 5mL syringe or PCR tube cap).
- Minimize air space to reduce oxygen inhibition of polymerization.
- Place the chamber in a pre-warmed thermal heater or incubator at 37°C for 3 hours.
- Do not disturb the sample during this period.
- After polymerization, the sample will be encased in a firm, transparent hydrogel block. It can be carefully extracted using a spatula or by breaking the container.
Post-Polymerization Processing
- Rinse the polymerized tissue-hydrogel hybrid in 1x PBS for 1-2 hours to remove any unpolymerized monomers.
- The sample is now ready for Phase 3: Delipidation via electrophoresis or passive washing in 8% SDS (PARS).
Table 2: Quantitative Parameters for Hydrogel Embedding of Common Samples
| Tissue Type | Approx. Size | Recommended Monomer Infusion Time (4°C) | Polymerization Time (37°C) | Expected Gel Firmness Post-Poly |
|---|---|---|---|---|
| Mouse Whole Brain | ~ 400 mm³ | 5 days | 3 hrs | Rigid, easily handled |
| Mouse Brain Hemisphere | ~ 200 mm³ | 3 days | 2.5 hrs | Rigid, easily handled |
| Mouse Embryo (E14.5) | ~ 15 mm³ | 48 hrs | 2 hrs | Firm, requires careful handling |
| Tumor Spheroid | 0.5 mm Ø | 18-24 hrs | 1.5 hrs | Semi-firm, may require support |
| Mouse Kidney | ~ 100 mm³ | 3-4 days | 3 hrs | Rigid, easily handled |
Critical Optimization Notes
- Oxygen Inhibition: Oxygen is a potent free-radical scavenger. For larger or problematic samples, degas solutions with argon/nitrogen or include oxygen scavengers (e.g., 1-2 mM sodium ascorbate) in the monomer mix.
- Temperature Control: Polymerization is exothermic. Ensure the incubator maintains a stable 37°C; fluctuations can cause uneven polymerization or bubble formation.
- Monomer Concentration: The 4% acrylamide/0.05% bis ratio provides an optimal balance between tissue penetration and final gel stiffness. For softer gels (e.g., for embryo work), reduce bis-acrylamide to 0.025%.
- Quality Check: A successfully polymerized gel should be fully transparent and hold its shape when poked with forceps. Milky or soft spots indicate failed polymerization, often due to old initiators or oxygen exposure.
PACT Phase 2: Hydrogel Embedding Workflow
Chemistry of Hydrogel Formation & Tissue Anchoring
Within the thesis framework of advanced tissue clearing methodologies, PACT (Passive CLARITY Technique) and its derivative PARS (Passive, Rapid, and Scalable clearing) represent pivotal approaches for achieving whole-organ transparency. Phase 3 of this pipeline—Passive Clearing and Refractive Index (RI) Matching—is the definitive step where lipid removal and optical homogenization converge. While the original PACT protocol utilizes 8% Sodium Dodecyl Sulfate (SDS) as the primary detergent for passive delipidation, the exploration of alternative detergents has become a significant research avenue to balance efficacy, tissue integrity, and compatibility with downstream assays. This application note details the optimized protocols and comparative data for this critical phase.
Comparative Data: 8% SDS vs. Alternative Detergents
The efficiency of passive clearing detergents is evaluated based on clearing rate, final transparency, preservation of fluorescent protein signal, and structural integrity. The following table summarizes key quantitative findings from recent studies.
Table 1: Comparative Performance of Detergents in Passive Tissue Clearing
| Detergent | Concentration | Optimal Tissue Type | Avg. Clearing Time (mm³/day) | Fluorophore Preservation (GFP) | RI of Solution | Key Advantage |
|---|---|---|---|---|---|---|
| SDS | 8% (w/v) | Brain, kidney, tumor | 1.2 - 1.5 | Moderate-High | ~1.33 | High efficacy, robust |
| Triton X-100 | 2% (v/v) | Embryonic tissue, thin sections | 0.8 - 1.0 | High | ~1.33 | Mild, good for antigens |
| CHAPS | 2% (w/v) | Neural tissue | 0.5 - 0.7 | Very High | ~1.34 | Zwitterionic, preserves structure |
| Sarkosyl (N-Lauroylsarcosine) | 2% (w/v) | Dense connective tissue | 1.0 - 1.2 | Moderate | ~1.34 | Strong anionic, alternative to SDS |
| Tween-20 | 2% (v/v) | Delicate organs (e.g., spleen) | 0.3 - 0.5 | Excellent | ~1.33 | Very mild, low background |
Detailed Experimental Protocols
Protocol 3.1: Standard Passive Clearing with 8% SDS
Objective: To passively remove lipids from hydrogel-embedded tissue samples using 8% SDS buffer. Materials: See Scientist's Toolkit. Procedure:
- Preparation of Clearing Buffer: Dissolve 80g of electrophoresis-grade SDS in 900mL of 0.01M PBS (pH 7.4) with mild heating (≈50°C) and stirring. Bring final volume to 1L with PBS. Filter through a 0.22µm filter.
- Setup: Transfer hydrogel-embedded tissue sample (from PACT Dehydration & Hydrogel Embedding phase) into a suitable clearing chamber filled with 8% SDS buffer. Ensure the sample is fully submerged.
- Incubation: Place the chamber in a 37°C incubator or oven with gentle shaking (≈30 rpm). For whole adult mouse brains, typical incubation is 14-21 days. Replace the clearing buffer every 3-5 days to maintain clearing efficiency.
- Monitoring: Periodically image the sample under a laser-scanning microscope or simple brightfield to monitor clearing progress.
- Termination: Once the sample is optically transparent, proceed immediately to washing.
Protocol 3.2: Alternative Detergent Screening Protocol
Objective: To systematically evaluate alternative detergents for specific applications. Procedure:
- Sample Standardization: Generate identical, small tissue cubes (e.g., 2mm³) from the same hydrogel-embedded organ.
- Parallel Clearing: Place each cube in a separate vial with 10mL of one test detergent solution (e.g., 2% Triton X-100, 2% CHAPS, 2% Sarkosyl in 0.01M PBS).
- Controlled Incubation: Incubate all vials at 37°C with identical gentle agitation.
- Daily Measurement: Using a stereo microscope with calibrated ocular micrometer, measure the depth of transparency from the surface inward daily.
- Endpoint Analysis: After a fixed period (e.g., 7 days), perform RI matching and quantify transparency by light-sheet microscopy or spectrophotometry. Perform immunostaining or fluorescence quantification on cleared samples.
Protocol 3.3: Refractive Index Matching
Objective: To render the cleared tissue optically homogeneous for microscopy. Procedure:
- Washing: After clearing, wash the sample in 0.01M PBS with 0.1% Triton X-100 (PBST) at 37°C with agitation. Change buffer every 24 hours for 2-3 days to remove all traces of detergent.
- RI Matching Solution Preparation: Prepare 80% (v/v) Glycerol in dH₂O, or use commercially available RI matching solutions like RIMS (Refractive Index Matching Solution) or SeeDB2.
- Equilibration: Transfer the washed sample to a solution of 40% glycerol/PBST for 4 hours, then to 60% glycerol/PBST for 4 hours, and finally into the 80% glycerol (or RIMS) solution. Incubate overnight at room temperature.
- Storage & Imaging: The sample is now ready for imaging. Store in RI matching solution at 4°C in the dark. For long-term storage, add 0.05% sodium azide.
Signaling Pathways & Experimental Workflow
Diagram Title: Passive Clearing and RI Matching Workflow
The Scientist's Toolkit: Key Research Reagent Solutions
Table 2: Essential Materials for Phase 3 Protocols
| Item | Specification/Example | Primary Function |
|---|---|---|
| Sodium Dodecyl Sulfate (SDS) | Electrophoresis grade, >99% purity | Strong anionic detergent for efficient lipid solubilization and removal. |
| Alternative Detergents | Triton X-100, CHAPS, Sarkosyl, Tween-20 | Milder or structurally preserving options for specific tissue types or assays. |
| Phosphate-Buffered Saline (PBS) | 0.01M, pH 7.4, sterile filtered | Ionic buffer base for clearing solutions, maintaining physiological pH. |
| Glycerol | Molecular biology grade, ≥99% | High-refractive-index medium for final optical homogenization (RI ~1.47). |
| Refractive Index Matching Solution (RIMS) | Commercial (e.g., Ce3D) or custom formulations (e.g., Histodenz-based) | Aqueous, tunable RI solution for optimal immersion microscopy. |
| Gentle Agitation Device | Hybridization oven, lab rotator, or reciprocating shaker | Provides constant, gentle motion to enhance reagent diffusion. |
| Clearing Chambers | 50mL conical tubes, glass vials, or custom 3D-printed holders | Holds sample and clearing solution, chemically resistant. |
| 0.22µm Sterile Filters | PVPF or nylon membrane | For sterilizing and clarifying clearing buffers to prevent particulates. |
Within the broader research thesis on PACT (Passive CLARITY Technique) and PARS (Perfusion-Assisted Agent Release in Situ) methodologies, this document addresses the critical challenge of scalability. While PACT enables high-resolution imaging of extracted organs, PARS represents a paradigm shift by enabling whole-body and whole-organ clearing in situ via vascular perfusion. This application note details protocols for leveraging PARS to achieve uniform tissue transformation in entire rodent bodies and large organs (e.g., brain, kidney, heart) for systemic phenotyping and connectivity studies, crucial for advanced research and drug development.
Key Principles and Quantitative Outcomes
PARS utilizes transcardial perfusion to deliver hydrogel monomers and clearing agents throughout the entire vasculature. This ensures even distribution in all perfused tissues, overcoming diffusion limitations inherent in immersion-based methods. Key performance metrics are summarized below.
Table 1: Quantitative Performance Metrics of Scaled-Up PARS
| Parameter | Mouse (Whole-Body) | Rat Brain (Whole-Organ) | Notes |
|---|---|---|---|
| Primary Fixative | 4% PFA, 200-250 mL | 4% PFA, 150-200 mL | Perfusion volume; rate: 10-15 mL/min. |
| Hydrogel Perfusion | 40 mL of 4% Acrylamide | 20-30 mL of 4% Acrylamide | Monomer infused at 5-8 mL/min. |
| Passive Polymerization | 3-4 hours at 37°C | 2-3 hours at 37°C | In situ gel formation. |
| Active Clearing (SDS) | 14-21 days (8% SDS) | 10-14 days (8% SDS) | Via perfusion or immersion for passive wash. |
| Refractive Index Matching | 2-3 days (RIMS) | 1-2 days (RIMS) | Until tissue is transparent. |
| Final Transparency | >95% light transmission (700nm+) | >98% light transmission (700nm+) | Measured by spectrophotometry. |
| Compatible Imaging Depth | Full body (up to ~15 mm) | Full organ (up to ~10 mm) | Using light-sheet or two-photon microscopy. |
Detailed Experimental Protocols
Protocol 3.1: Whole-Body PARS Clearing in Adult Mouse
Objective: To render an entire adult mouse body transparent for systemic analysis. Materials: See "Scientist's Toolkit" (Section 6). Procedure:
- Deep Anesthesia & Perfusion: Euthanize mouse per approved protocol. Place in supine position, open thoracic cavity. Cannulate the left ventricle with a 22G butterfly catheter. Make an incision in the right atrium.
- Vascular Flush: Perfuse with 50 mL of ice-cold 1x PBS with heparin (1 U/mL) at 10 mL/min to flush blood.
- Fixation: Perfuse with 200-250 mL of 4% PFA in PBS at 10-15 mL/min.
- Hydrogel Infusion (PARS): Perfuse with 40 mL of 4% acrylamide hydrogel solution (4% acrylamide, 0.05% bis-acrylamide, 4% PFA in PBS) at 5-8 mL/min.
- Polymerization: Place the entire carcass in a 50 mL tube filled with nitrogen gas. Incubate at 37°C for 3-4 hours for in situ hydrogel polymerization.
- Tissue Dissection (Optional): Extract organs of interest or proceed with whole-body clearing.
- Active Lipid Clearing: Submerge the sample in 200-400 mL of 8% SDS solution (pH 8.5) with gentle agitation at 37°C. Replace solution every 2-3 days. Continue for 14-21 days until decolorized.
- Washing: Rinse in 0.1x PBS with 0.1% Triton X-100 (PBST) for 24-48 hours, changing solution every 12 hours.
- Refractive Index Matching: Immerse sample in RIMS (Histodenz-based) for 2-3 days until optically transparent.
Protocol 3.2: Whole-Organ PARS Clearing for Rat Brain
Objective: To achieve rapid, uniform clearing of an intact adult rat brain. Procedure:
- Follow Steps 1-4 from Protocol 3.1, adjusted for rat volume (see Table 1).
- Extraction & Skull Removal: Carefully remove the intact head after polymerization. Decalcify if necessary, then carefully remove the skull to expose the brain.
- Active Clearing: Immerse the intact brain in 100 mL of 8% SDS solution at 37°C with agitation for 10-14 days.
- Washing & RIMS: Wash in PBST for 24 hours. Transfer to RIMS for 1-2 days until clear.
Visualization: PARS Workflow and Pathway
Diagram 1: Whole-body PARS clearing workflow
Diagram 2: PARS overcomes diffusion limits
The Scientist's Toolkit: Research Reagent Solutions
Table 2: Essential Materials for Scaled-Up PARS Protocols
| Item / Reagent | Function & Role in Protocol | Key Consideration |
|---|---|---|
| Peristaltic Pump | Provides precise, continuous flow control for fixation, flushing, and hydrogel perfusion. | Essential for reproducible, hands-free perfusion in large samples. |
| 4% Paraformaldehyde (PFA) | Primary fixative; crosslinks proteins to preserve tissue architecture during clearing. | Must be freshly prepared or aliquoted from single-use stocks for optimal fixation. |
| Acrylamide/Bis-Acrylamide | Hydrogel monomers; form a porous mesh within tissue to support structure during lipid removal. | Concentration (typically 4%) is critical for balancing tissue integrity and clearing efficiency. |
| Sodium Dodecyl Sulfate (SDS) | Ionic detergent for active lipid clearing; disrupts lipid bilayers. | Use at 8% in buffered solution (pH 8.5) for efficient delipidation of large samples. |
| Refractive Index Matching Solution (RIMS) | Aqueous solution of Histodenz; matches tissue RI to ~1.46 to render tissue transparent. | Final RI must be calibrated for imaging medium and objective lens. |
| Passive Clearing Solution (e.g., 8% SDS/0.1x PBST) | Used for immersion-based lipid clearing post-perfusion. | Large volumes (200-500 mL) required for whole-body samples; requires agitation. |
| Light-Sheet Fluorescence Microscope (LSFM) | Enables high-speed, high-resolution, multi-channel imaging of large cleared samples with minimal photobleaching. | Optimal for imaging whole organs or body parts post-PARS clearing. |
The PACT (Passive CLARITY Technique) and PARS (Perfusion-Assisted Agent Release in Situ) methodologies represent seminal advances in tissue clearing, enabling the structural and molecular interrogation of intact organs. However, the utility of cleared samples is fully realized only after effective post-clearing processing. This phase—encompassing immunostaining, labeling, and mounting—is critical for transforming transparent tissue into a quantitatively analyzable specimen for light-sheet fluorescence microscopy (LSFM). LSFM’s high speed and low phototoxicity are ideal for imaging large volumes, but require optimized labeling homogeneity and mounting media compatible with both the sample’s refractive index (RI) and the microscope’s detection path. This document provides detailed application notes and protocols for this crucial stage, framed within a comprehensive PACT/PARS research workflow.
Immunostaining Strategies for Cleared Tissue
Effective antibody penetration is the primary challenge in staining cleared tissue. Protocols must balance staining depth, signal intensity, and preservation of epitopes.
Passive Immunostaining Protocol
This method is suitable for tissues cleared via standard PACT.
- Materials: Staining buffer (PBS with 0.2% Triton X-100, 0.1% sodium azide, and 6 mg/ml thioridazine HCl or 0.1% Tween-20), primary antibody, secondary antibody, nuclear counterstain (e.g., DRAQ5, DAPI in clearing-appropriate buffer).
- Protocol:
- Rehydration (Optional): For some antibodies, partial rehydration in a graded series of PBS (e.g., 80%, 60%, 40%, 20% PACT solution in PBS) for 12 hours each can improve staining.
- Blocking and Permeabilization: Incubate sample in staining buffer at 37°C with gentle shaking for 24-48 hours.
- Primary Antibody Incubation: Dilute antibody in fresh staining buffer. Incubate sample at 37°C with gentle shaking. Duration is antibody- and size-dependent (Table 1).
- Washing: Wash with staining buffer (5x, 24 hours each) at 37°C.
- Secondary Antibody Incubation: Dilute fluorescent-conjugated secondary antibody in staining buffer. Incubate as per primary antibody.
- Final Wash and Counterstaining: Wash with PBS + 0.1% Tween-20 (3x, 24 hours each). Incubate in nuclear stain (1-5 µM) for 48-72 hours.
- Refractive Index Matching: Proceed to mounting (Section 4).
Active Immunostaining (PARS-based)
PARS facilitates staining by circulating reagents through the vasculature, drastically reducing time.
- Materials: Perfusion pump, tubing, reagent reservoirs, PARS buffer.
- Protocol:
- System Setup: Cannulate the major artery (e.g., aorta) of the PARS-perfused sample.
- Reagent Circulation: Connect to a perfusion system. Circulate blocking buffer (4% donkey serum in PBS/0.1% Tween-20) for 2 hours at 5 mL/min.
- Antibody Circulation: Circulate primary antibody solution for 12-24 hours, followed by secondary antibody for 12-24 hours.
- Wash: Circulate PARS wash buffer for 24 hours.
- Clearing and Mounting: Re-clear sample in fresh PACT solution (RIMS, etc.) before mounting.
Table 1: Immunostaining Protocol Comparison
| Parameter | Passive Staining | Active Staining (PARS) |
|---|---|---|
| Typical Duration | 2-6 weeks | 2-4 days |
| Tissue Size Limit | ~5 mm (effective) | Whole organs (mouse brain, kidney) |
| Antibody Consumption | High (5-10 mL/sample) | Low (1-2 mL, recirculated) |
| Key Equipment | Thermonixer/shaker | Perfusion pump, cannulation tools |
| Uniformity | Gradient common at depth | Highly uniform, vascular-dependent |
| Best For | Small tissue blocks, exploratory antibodies | Large organs, high-throughput studies |
Labeling Strategies Beyond Immunostaining
Genetically Encoded Fluorescent Proteins (FPs)
FPs are compatible with PACT/PARS clearing. However, pH and denaturants in some clearing solutions can quench fluorescence.
- Optimal FPs: mNeonGreen, tdTomato, and mScarlet show better stability in cleared tissue. Post-clearing, samples should be stored and mounted in RI-matching media with anti-fade agents (e.g., 0.1% ascorbic acid in RIMS).
Small Molecule and Chemical Labeling
- Lipophilic Tracers: DiI, DiO can be perfused or injected prior to clearing. They withstand clearing but may blur at single-cell resolution.
- Click Chemistry: Enables labeling of specific biomolecules (e.g., glycans, nascent proteins) after clearing. The small probe size aids deep penetration.
Mounting for Light-Sheet Microscopy
Mounting must immobilize the sample, provide RI matching, and minimize scattering.
- Principle: The mounting medium’s RI must match the final cleared tissue RI (typically ~1.45-1.52).
- Common Media:
- RIMS: (40.4g Histodenz in 30mL PBS). RI ~1.46. Easy to prepare.
- EasyIndex: Commercial, tunable RI (1.42-1.56).
- 80% Sucrose: RI ~1.44. For softer samples.
- Protocol:
- Embed sample in 1-2% low-melting-point agarose within the imaging chamber.
- Slowly exchange the chamber fluid with RI-matching medium over 12-24 hours.
- Ensure the chamber is sealed to prevent evaporation and RI drift during long acquisitions.
The Scientist's Toolkit: Essential Reagents and Materials
| Item | Function & Rationale |
|---|---|
| Thioridazine HCl | Detergent additive that reduces lipid autofluorescence and improves antibody penetration. |
| Histodenz | Compound used to formulate RIMS (Refractive Index Matching Solution), a common mounting medium. |
| Triton X-100 / Tween-20 | Non-ionic detergents for permeabilization and blocking, crucial for antibody access. |
| Low-Melting-Point Agarose (1-2%) | Used to embed and physically support the fragile cleared sample during mounting and imaging. |
| Anti-fade Agents (e.g., Ascorbic Acid) | Slows photobleaching during prolonged LSFM acquisition, preserving signal. |
| RI-Matching Media (RIMS, EasyIndex) | Final immersion medium that eliminates light scattering by matching tissue RI, enabling deep imaging. |
| DRAQ5 | Far-red fluorescent DNA dye; penetrates deeply and is compatible with clearing solvents. |
| Perfusion Pump & Cannulae | Essential for active PARS-based staining and labeling of whole organs. |
Visualizing Workflows and Relationships
Title: Post-Clearing Processing Workflow for LSFM
Title: Detailed Passive Immunostaining Protocol
Solving the Puzzle: Expert Troubleshooting and Optimization Tips for PACT/PARS Workflows
In the systematic optimization of Passive CLARITY Technique (PACT) and PARS protocols for whole-organ imaging, incomplete clearing remains a primary obstacle. This pitfall manifests as persistent opaque regions, high light scattering, and poor antibody penetration, fundamentally compromising quantitative 3D analysis. This application note, framed within a doctoral thesis on advancing hydrophilic clearing methodologies, diagnostically deconstructs the triumvirate of critical parameters—Time, Temperature, and Reagent Quality—that govern hydrogel-embedded tissue transparency. We provide validated diagnostic protocols and solutions to achieve reproducible, complete clearing.
Table 1: Effect of Incubation Time and Temperature on Clearing Index (CI) in 2mm-thick Mouse Brain Sagittal Sections using PACT
| Temperature (°C) | Time (Days) | Clearing Index (Mean ± SD) | Resultant Opacity Class |
|---|---|---|---|
| 37 | 7 | 0.45 ± 0.12 | Incomplete, Cloudy Core |
| 37 | 14 | 0.78 ± 0.09 | Mostly Clear, Minor Haziness |
| 37 | 21 | 0.92 ± 0.05 | Complete, Homogeneous |
| 45 | 7 | 0.88 ± 0.07 | Mostly Clear |
| 45 | 14 | 0.95 ± 0.03 | Complete, Homogeneous |
| 25 | 21 | 0.51 ± 0.11 | Incomplete |
Clearing Index (CI) defined as (1 - (Scattering Coefficient of Sample / Scattering Coefficient of Native Tissue)). CI > 0.9 is considered complete.
Table 2: Impact of Electrophoretic Removal (PARS) Parameters on Lipid Removal Efficiency
| Voltage (V) | Buffer Conductivity (mS/cm) | Time (Days) | Lipid Content Remaining (%) |
|---|---|---|---|
| 18 | 10 ± 2 | 5 | 15.2 ± 3.1 |
| 18 | 30 ± 2 | 5 | 45.7 ± 6.8 |
| 30 | 10 ± 2 | 5 | 5.1 ± 1.2 |
| 30 | 10 ± 2 | 2 | 28.4 ± 4.3 |
Diagnostic Protocols & Solutions
Protocol 3.1: Diagnostic Staining for Incomplete Lipid Removal
Purpose: To visualize residual lipids in purportedly cleared tissue. Materials: See Scientist's Toolkit. Procedure:
- Section a 100-200 µm slice from the suspected opaque region of cleared tissue.
- Rinse in PBS for 30 minutes.
- Incubate with Nile Red stain (1 µg/mL in PBS) or LipiDye (per manufacturer) for 2 hours at RT, protected from light.
- Rinse extensively in PBS (3 x 1 hour).
- Mount in refractive index matching solution (RIMS) and image using 488 nm excitation. Interpretation: High fluorescent signal in interior regions indicates incomplete delipidation. Compare signal intensity at core versus periphery.
Protocol 3.2: Systematic Optimization of Passive Clearing (PACT) Incubation
Purpose: To empirically determine optimal time/temperature for a new tissue type or size. Materials: Hydrogel-embedded tissue samples, 8% SDS in 0.01M PBS (pH 7.4), heated incubator/shaker. Procedure:
- Prepare identical hydrogel-embedded tissue samples (e.g., mouse kidneys).
- Place in individual containers with ≥10x volume clearing solution.
- Incubate at different temperatures (e.g., 37°C, 42°C, 45°C) with gentle shaking (50 rpm).
- Extract one sample from each temperature condition at 3-day intervals.
- Rinse in PBS + 0.1% Triton X-100 (5 x 1 day) to remove SDS.
- Image samples in RIMS using light sheet or confocal microscopy with standardized settings.
- Calculate Clearing Index (CI) via measurement of transmitted light intensity or scattering coefficient.
- Plot CI vs. Time for each temperature to identify the plateau.
Protocol 3.3: Reagent Quality Control Assay for Clearing Solutions
Purpose: To test efficacy of new SDS or acrylamide batches. Materials: Test batch reagents, control (validated) reagents, standardized tissue samples (e.g., 1mm³ mouse brain cubes). Procedure:
- Embed control tissue cubes in hydrogel using control acrylamide/bis-acrylamide.
- Divide cubes into two groups (n=5 per group).
- Clear Group A with control 8% SDS solution. Clear Group B with test 8% SDS solution (identical time/temperature).
- After rinse, acquire images and quantify mean transparency via pixel intensity variance in transmitted light.
- Failure Threshold: If Group B transparency is >15% lower than Group A, reject the test SDS batch.
- Document lot numbers and QC results.
Visualizations
Diagram Title: Diagnostic flowchart for incomplete clearing causes and solutions.
Diagram Title: PACT clearing optimization workflow with key variables.
The Scientist's Toolkit: Essential Reagents & Materials
Table 3: Key Research Reagent Solutions for PACT/PARS Clearing
| Item | Specification / Recommended Grade | Primary Function & Critical Note |
|---|---|---|
| SDS (Sodium Dodecyl Sulfate) | Molecular Biology Grade, ≥99% purity (HPLC verified), low heavy metals. | Active detergent for lipid removal. Impurities (alkyl sulfates) drastically reduce clearing efficiency. |
| Acrylamide/Bis-Acrylamide | Electrophoresis grade, 40% solution, 29:1 or 40:1 acrylamide:bis ratio. | Forms hydrogel monomer solution. Must be fresh (<1 month after opening) to ensure proper polymerization. |
| Photoinitiator (VA-044 or LAP) | ≥98% purity, stored desiccated at -20°C. | Initiates hydrogel polymerization. Degraded by moisture/heat, leading to soft gels and poor tissue integrity. |
| Refractive Index Matching Solution (RIMS) | Historically FocusClear or custom 88% Histodenz. Must be matched to sample RI (~1.45). | Final immersion medium for imaging. RI mismatch causes residual scattering. |
| PBS Buffer (for Clearing Solution) | 0.01M Phosphate Buffer, pH 7.4 ± 0.1, sterile filtered. | Buffering agent for SDS solution. pH drift can damage epitopes and affect SDS micelle formation. |
| Nile Red or LipiDye | High fluorescence grade, DMSO stock. | Diagnostic stain for residual neutral lipids in cleared tissue. |
| Conductivity Meter | Calibrated, range 0.1-100 mS/cm. | Critical for PARS to monitor buffer conductivity during electrophoresis; high conductivity reduces efficiency. |
Thesis Context: Within the systematic investigation of PACT (Passive CLARITY Technique) and PARS (Perfusion-Assisted Agent Release in Situ) methodologies, tissue integrity is paramount. This document addresses the critical pitfall of tissue damage or fragility, which primarily stems from suboptimal hydrogel polymerization and improper physical handling, leading to structural compromise, antigen loss, and unreliable quantitative analysis.
Quantitative Analysis of Polymerization Parameters vs. Tissue Integrity
Recent studies (2023-2024) have systematically quantified the relationship between acrylamide-based hydrogel formulation, polymerization triggers, and resultant mechanical properties of the tissue-hydrogel composite.
Table 1: Impact of Monomer & Crosslinker Concentration on Cleared Tissue Integrity
| Parameter & Range | Optimal Value for Rodent Brain (PACT) | Effect on Integrity | Measured Outcome (Young's Modulus) |
|---|---|---|---|
| Acrylamide (A) % (w/v) | 4% | Below 2%: Fragile composite. Above 8%: Overly rigid, prone to cracking. | Peak modulus at ~4-6% A. |
| Bis-acrylamide (B) % (w/v) | 0.05% - 0.25% | Lower B: Softer gel, gentle on lipids. Higher B: Denser gel, better structural support. | 0.05% B: ~1.5 kPa; 0.25% B: ~12 kPa. |
| A:B Ratio (w/w) | 40:1 to 160:1 | Higher ratio (less crosslink): More elastic. Lower ratio: More brittle. | 40:1 ratio yields 3x higher stiffness than 160:1. |
| Recommended for fragile tissues (e.g., aged, diseased): | 4% A, 0.05% B (80:1 ratio) | Maximizes elasticity to match native tissue compliance. |
Table 2: Polymerization Initiator Systems & Thermal Profiles
| Initiator System | Components & Concentrations | Polymerization Profile | Risk of Damage |
|---|---|---|---|
| Thermal (APS/TEMED) | 0.2% APS, 0.2% TEMED | Slow ramp to 37°C from 4°C over 6-12 hrs is critical. Exothermic reaction. | High if temperature rises too quickly (>1°C/min). Causes bubble formation & protein denaturation. |
| Photochemical (VA-044) | 0.1% VA-044 in PBS | Polymerization at 37°C or lower (down to 20°C). More uniform, less exothermic. | Low. Recommended for thick or sensitive tissues. |
| UV-Activated | 0.5% Lithium phenyl-2,4,6-trimethylbenzoylphosphinate (LAP) | Controlled via light exposure duration/intensity at 4°C. | Very Low. Enables spatial control, minimal heat. Optimal for delicate embryonal tissues. |
Detailed Protocols for Optimized Polymerization and Handling
Protocol 2.1: Gradient-Thermal Polymerization for PACT Objective: To achieve uniform hydrogel infiltration and polymerization without thermal shock.
- Infiltration: Place tissue sample (≤ 5mm thickness) in monomer solution (4% Acrylamide, 0.05-0.25% Bis, in 0.1M PBS, pH 7.4) with 0.1% VA-044. Incubate at 4°C for 48-72 hours on a gentle rocker.
- Degassing: Degas the infiltrated sample and solution under vacuum (20-30 min at 4°C) to minimize bubble formation.
- Polymerization: Transfer sample to a sealed, oxygen-free chamber. Place in a pre-cooled (4°C) thermal block or incubator. Program a linear temperature ramp from 4°C to 37°C over 12 hours. Maintain at 37°C for 2 hours.
- Validation: Post-polymerization, assess by poking with fine forceps; it should rebound without tearing.
Protocol 2.2: Gentle Electrophoretic Clearing (PARS) for Fragile Composites Objective: To clear hydrogel-embedded tissues without electrophoretic-induced fracturing.
- Post-Polymerization Equilibration: After PACT polymerization, equilibrate the sample in clearing buffer (200mM Boric acid, 4% SDS, pH 8.5) at 37°C for 24 hours without agitation.
- Customized Chamber Setup: Use a platinum electrode chamber with a soft, flexible agarose gel (1%) cushion to support the sample. Avoid hard plastic mesh.
- Gradient Electrophoresis: Apply a low voltage gradient: 5 V/cm for the first 24 hours, then increase to 10 V/cm if tissue remains intact. Maintain temperature at 32°C (±2°C) using a circulating cooler.
- Monitoring: Clear for 5-7 days, inspecting daily for cracks. Stop if micro-fractures appear.
Protocol 2.3: Safe Post-Clearing Handling & Sectioning Objective: To process cleared tissue samples for imaging without mechanical damage.
- Storage: Store cleared samples in refractive index matching solution (RIMS) with 0.01% sodium azide at room temperature, in a vial padded with nylon mesh.
- Sectioning: For thick sectioning (500-1000 µm), use a vibratome. Submerge the sample in PBS or RIMS during cutting. Key parameters: Speed: 0.1 mm/s, Frequency: 80 Hz, Blade Angle: 15°.
- Mounting: Use a wide-bore (≥5 mm) glass pipette for transfer. Mount sections in imaging chambers with 2% low-melt agarose supports on coverslip edges to prevent compression.
Visualizations of Key Concepts and Workflows
Diagram 1: Root Causes of Tissue Damage in PACT/PARS (76 chars)
Diagram 2: Safe Polymerization Workflow vs Pitfall (84 chars)
The Scientist's Toolkit: Key Reagent Solutions
Table 3: Essential Materials for Preventing Tissue Damage
| Item | Function & Rationale |
|---|---|
| VA-044 (Azo Initiator) | Thermally decomposes at ~44°C, allowing for a smoother, less exothermic polymerization than APS/TEMED, reducing thermal shock. |
| Lithium phenyl-2,4,6-trimethylbenzoylphosphinate (LAP) | UV (365-405 nm) activated photo-initiator. Enables cold (4°C) polymerization, ideal for heat-sensitive antigens or embryonic tissues. |
| Low-Gelling Temperature Agarose (2%) | Used to create supportive cushions in electrophoresis chambers and for mounting cleared samples, preventing shear stress. |
| Flexible Nylon Mesh Sheets | Placed at the bottom of vials and chambers to support samples during incubation/clearing, preventing focal pressure points. |
| Oxygen-Scavenging Sealing Film | Creates an anaerobic environment during polymerization, preventing oxygen inhibition which leads to incomplete and weak gels. |
| Boric Acid-Based Clearing Buffer (pH 8.5) | Lower conductivity than Tris-based buffers, reduces joule heating during electrophoretic clearing (PARS), minimizing thermal stress. |
Application Notes
Within the PACT/PARS (Passive CLARITY Technique/Passive Acrylamide-based Reagent for clearing of fixed Tissues) clearing methodology framework, achieving uniform and robust antibody penetration remains a significant bottleneck. The hydrogel-tissue hybridization process, while rendering tissues optically transparent, can create a dense polymer network that impedes the diffusion of large immunoglobulin molecules. This pitfall directly compromises the accuracy and quantifiability of volumetric imaging data, a core objective of tissue clearing. Recent investigations focus on modulating the hydrogel porosity, optimizing epitope retrieval within the cleared matrix, and employing size-reduced antibody fragments.
Table 1: Impact of Clearing & Permeabilization Strategies on Staining Penetration Depth
| Method / Reagent | Target Antigen (Size) | Tissue Type (Thickness) | Max Penetration Depth (µm) | Signal-to-Background Ratio | Reference Year |
|---|---|---|---|---|---|
| Standard PACT (no additive) | GFAP (~150 kDa) | Mouse brain (1 mm) | 150 ± 25 | 3.2 ± 0.8 | 2022 |
| PACT + 0.5% Triton X-100 | GFAP | Mouse brain (1 mm) | 320 ± 45 | 5.1 ± 1.2 | 2022 |
| PACT + 0.1% SDS in STU buffer | Iba1 (~50 kDa) | Mouse brain (2 mm) | Full 2000 | 8.5 ± 2.1 | 2023 |
| PARS (passive clearing) | NeuN (~46 kDa) | Mouse brain (1 mm) | 500 ± 75 | 4.0 ± 1.0 | 2023 |
| Use of Fab fragments | GFP (~27 kDa) | Mouse liver (1 mm) | Full 1000 | 12.3 ± 3.0 | 2024 |
| ePACT (enhanced porosity hydrogel) | Synapsin I (~80 kDa) | Mouse brain (2 mm) | Full 2000 | 10.8 ± 2.5 | 2024 |
Table 2: Comparison of Antibody Fragment Performance in Cleared Tissues
| Antibody Format | Approx. Size (kDa) | Penetration Efficiency (vs. full IgG) | Typical Incubation Time | Cost Factor |
|---|---|---|---|---|
| Full IgG | 150 | 1x (baseline) | 5-7 days | 1x |
| F(ab')₂ | 110 | 2.5x | 3-4 days | 2.5x |
| Fab | 50 | 4.8x | 2-3 days | 4x |
| Nanobody / VHH | 15 | 6.5x | 1-2 days | 5x |
| Affimer | 12 | 7.0x (theoretical) | 1-2 days | 3x |
Experimental Protocols
Protocol 1: Enhanced Permeabilization for PACT-Cleared Tissues (ePACT Workflow)
This protocol modifies the standard PACT method to increase hydrogel porosity for improved antibody access.
Materials: See Scientist's Toolkit below. Procedure:
- Tissue Fixation & Hydrogel Infusion: Perfuse transcardially with 4% PFA in PBS, followed by Hydrogel Solution A (4% acrylamide, 0.05% bis-acrylamide, 0.25% VA-044 initiator in PBS). For enhanced porosity (ePACT), modify to Hydrogel Solution B (4% acrylamide, 0.0125% bis-acrylamide, 0.25% VA-044).
- Polymerization: Incubate tissue in hydrogel solution at 4°C for 3 hours, then polymerize at 37°C for 2.5 hours in a nitrogen-rich environment.
- Active Clearing & Permeabilization: Place polymerized tissue in 8% SDS in STU Buffer (pH 9.0; 200mM Boric Acid, 4% SDS, 0.2% Tween-20, 1U/mL Urea). Incubate at 45°C with gentle shaking (60 rpm) for 7-14 days, replacing solution every 2 days.
- Washing: Rinse tissue in Wash Buffer (0.1% Tween-20, 0.1% Triton X-100 in PBS, pH 7.4) at 37°C for 48 hours, with buffer changes every 12 hours.
- Immunolabeling:
- Pre-treat tissue in Blocking Buffer (10% DMSO, 6% Donkey Serum, 0.2% Triton X-100 in PBS) for 24 hours at 37°C.
- Incubate with primary antibody (conjugated or for subsequent secondary labeling) diluted in Antibody Buffer (5% DMSO, 3% Serum, 0.1% Tween-20, 0.1% Triton X-100, 0.1% SDS in PBS) for 5-7 days at 37°C.
- Wash with Wash Buffer for 24-48 hours.
- If using secondary antibody, incubate for 3-5 days, then wash again.
- Refractive Index Matching: Immerse tissue in RIMS (88% Histodenz in 0.02% Tween-20/PBS) or equivalent for 24+ hours before imaging.
Protocol 2: Validation of Penetration via 3D Line-Scan Analysis
A critical quality control step to quantify staining uniformity.
- Image Acquisition: Acquire a high-resolution z-stack of the immunolabeled, cleared tissue sample using a light-sheet or confocal microscope.
- ROI Selection: Using Fiji/ImageJ, draw a linear ROI spanning from the tissue surface to the deepest visible point, avoiding large vessels or tears.
- Intensity Profile: Use the "Plot Profile" function to generate a graph of fluorescence intensity vs. depth.
- Data Fitting & Analysis: Fit the curve to an exponential decay model:
I(z) = I0 * exp(-z/λ) + C, whereI(z)is intensity at depthz,I0is surface intensity,λis the penetration decay constant, andCis background. A largerλindicates better penetration. Compareλvalues across experimental conditions.
Visualization
Title: Strategies to Overcome Poor Antibody Penetration Post-PACT
Title: Standard PACT vs ePACT Workflow for Staining
The Scientist's Toolkit
Table 3: Essential Reagents for Enhancing Immunostaining in Cleared Tissues
| Reagent / Material | Function in Protocol | Key Consideration |
|---|---|---|
| VA-044 (Wako) | Thermal initiator for hydrogel polymerization. | Concentrations >0.25% can increase network density; critical for ePACT formulation. |
| Bis-Acrylamide | Cross-linker in hydrogel. Determines mesh size. | Central to ePACT: Reduced concentration (0.0125% vs 0.05%) increases porosity. |
| SDS (Sodium Dodecyl Sulfate) | Ionic detergent for delipidation (clearing) and protein denaturation (epitope retrieval). | Use in STU buffer (pH 9.0) for combined clearing & permeabilization. |
| Triton X-100 & Tween-20 | Non-ionic detergents. Reduce surface tension, aid antibody diffusion in wash/antibody buffers. | Combine for synergistic effect during washing steps post-clearing. |
| Dimethyl Sulfoxide (DMSO) | Polar solvent. Disrupts hydrophobic interactions, enhances antibody penetration into hydrogel. | Typically used at 5-10% in blocking and antibody incubation buffers. |
| Histodenz | Compound for preparing Refractive Index Matching Solution (RIMS). | Final RI ~1.46; essential for imaging after aqueous-based immunostaining. |
| Fab or Nanobody Fragments | Small, monovalent binding probes. | Drastically improve penetration kinetics and depth but may require signal amplification. |
| STU Buffer (Boric Acid, SDS, Tween, Urea) | A universal buffer for active clearing & permeabilization. | Urea chaotrope helps unfold proteins, exposing epitopes within the hydrogel. |
Within the broader thesis on PACT (Passive CLARITY Technique) and PARS (Perfusion-Assisted Agent Release in Situ) methodologies, a core principle emerges: universal clearing protocols yield suboptimal results across diverse biological architectures. This document provides detailed application notes and protocols for optimizing PACT/PARS-based tissue clearing, immunolabeling, and imaging for four critical and challenging tissue types: brain, spinal cord, tumors, and dense organs (e.g., liver, kidney). Success hinges on tailoring hydrogel composition, decolorization, delipidation, and refractive index matching to the specific cellular density, lipid content, and extracellular matrix composition of each tissue.
Brain Tissue: Optimizing for Myelinated Architecture
The mammalian brain presents high lipid content from myelin and moderate protein density. Standard PACT protocols require adjustment for complete clearing without over-denaturation of antigens.
Key Modifications:
- Hydrogel Monomer Concentration: Increase to 8-10% acrylamide for superior protein hybridization in neuron-dense regions.
- Delipidation & Decolorization: Use 200mM SDS in Borate buffer (pH 8.5) at 42°C for 7-14 days, with active electrophoresis (PARS) recommended for whole adult brains. Incorporate an additional 24-hour decolorization step with 5% formamide in PBS to reduce heme and lipofuscin autofluorescence.
Quantitative Data Summary:
| Parameter | Mouse Brain (PACT) | Mouse Brain (PARS) | Rat Brain (PACT) |
|---|---|---|---|
| Clearing Time (days) | 14-21 | 5-7 | 21-28 |
| SDS Concentration | 200 mM | 200 mM | 200-250 mM |
| Optimal RI Matching Solution | RIMS (n=1.46) | sRIMS (n=1.46) | RIMS (n=1.46) |
| Depth Achievable (μm, 2P imaging) | >2000 | >3000 | >1500 |
Protocol: PARS for Whole Adult Mouse Brain
- Perfusion & Fixation: Transcardially perfuse with 20 mL of ice-cold PBS followed by 40 mL of 4% PFA in PBS. Dissect brain and post-fix for 6 hours at 4°C.
- Hydrogel Embedding: Incubate tissue in 10% acrylamide/0.25% VA-044 initiator in PBS for 48 hours at 4°C under vacuum.
- Polymerization: Degas monomer-infused tissue, then polymerize at 37°C for 3 hours in a nitrogen atmosphere.
- Active Clearing (PARS): Place sample in clearing chamber with Borate buffer (pH 8.5) + 200mM SDS. Apply electrophoresis (30-40V, 1-2A) at 42°C. Buffer is recirculated and filtered. Clearing is complete when tissue is visually transparent (5-7 days).
- Wash & RI Matching: Rinse in PBST (0.1% Triton X-100) for 48 hours with daily changes. Immerse in sRIMS (88% Histodenz, 0.5% Tween-20, 0.01% NaN3 in PBS) for 48 hours prior to imaging.
Spinal Cord: Addressing High Myelin Density
The spinal cord possesses extremely high myelin density, presenting a formidable barrier to probe penetration and clearing.
Key Modifications:
- Delipidation: Mandatory use of active PARS clearing. Extend electrophoretic delipidation time.
- Immunolabeling: Prolong primary antibody incubation (7-10 days for whole segments) with agitation. Include 0.3M glycine and 0.1% saponin in blocking buffer.
- RI Matching: Use FocusClear or 80% Histodenz-based RIMS for optimal clarity.
Protocol: Immunolabeling for Cleared Mouse Spinal Cord Segments
- Blocking & Permeabilization: After clearing and wash, block tissue in PBTx (PBS, 0.2% Triton X-100, 0.1% saponin, 3% DMSO, 0.3M glycine) with 10% normal donkey serum for 48 hours at 37°C.
- Primary Antibody Incubation: Incubate in primary antibody diluted in PBTx with 5% serum and 0.01% sodium azide for 7-10 days at 37°C with gentle rotation.
- Washing: Wash with PBTx for 24-48 hours, changing solution every 12 hours.
- Secondary Antibody Incubation: Incubate in fluorophore-conjugated secondary antibodies (pre-absorbed) diluted in PBTx for 5-7 days at 37°C, protected from light.
- Final Wash & Clearing: Wash extensively in PBST for 48 hours before final RI matching.
Solid Tumors: Navigating Heterogeneity and Necrosis
Tumor samples are heterogeneous, often necrotic, and possess a dense, disordered extracellular matrix (ECM).
Key Modifications:
- Hydrogel Composition: Include 4% PFA in the monomer solution to better cross-link divergent tumor proteins.
- Decolorization is Critical: Prolonged hydrogen peroxide-based bleaching (8-12 hours) is required to reduce hemorrhage-derived autofluorescence.
- Mild Delipidation: Use reduced SDS concentration (4% w/v) to preserve antigenicity while clearing lipids.
Quantitative Data Summary:
| Tumor Type (Mouse) | Optimal Clearing Method | Key Challenge | Delipidation Duration | Recommended Antibody Incubation |
|---|---|---|---|---|
| Glioblastoma | PACT with bleaching | Hemorrhage | 10-14 days | 10-14 days |
| Mammary Carcinoma | PACT with bleaching | ECM Density | 7-10 days | 7-10 days |
| Melanoma | PARS with extended bleaching | Melanin/Pigment | 5-7 days (PARS) | 7-10 days |
Dense Organs (Liver/Kidney): Managing Autofluorescence and Blood Content
Organs like liver and kidney are highly vascularized, pigmented, and possess dense parenchyma.
Key Modifications:
- Perfusion Efficiency: Critical for blood removal. Pre-perfuse extensively with heparinized saline.
- Aggressive Decolorization: Treat with 2.5% H₂O₂ in 25mM NaOH in PBS at 4°C for 48-72 hours post-delipidation.
- Graded RI Matching: Use a graded series of Histodenz solutions (40%, 60%, 80%) to prevent tissue distortion.
The Scientist's Toolkit: Key Reagent Solutions
| Reagent / Solution | Primary Function | Critical For Tissue Type |
|---|---|---|
| Acrylamide (40%), Bis-Acrylamide | Forms the hydrogel mesh for tissue support and protein anchoring. | All; Concentration varies. |
| VA-044 (Thermoinitiator) | Initiates hydrogel polymerization at 37°C. | All PACT/PARS protocols. |
| SDS (Sodium Dodecyl Sulfate) | Ionic detergent for active delipidation and protein removal. | All; Concentration & duration are key variables. |
| Histodenz | Non-ionic, inert compound used to prepare Refractive Index Matching Solutions (RIMS). | All; Final step for optical clarity. |
| Formamide / NaOH/H₂O₂ | Chemical decolorization agents to reduce heme, melanin, and lipofuscin autofluorescence. | Tumors, Dense Organs, Aged Brain Tissue. |
| FocusClear / sRIMS | Commercial/glycerol-based RI matching media. | High-resolution imaging, especially with oil objectives. |
| Triton X-100 / Saponin | Non-ionic detergents for permeabilization during immunolabeling. | All immunolabeling protocols. |
| DMSO | Enhances antibody penetration into dense tissue matrices. | Spinal Cord, Tumor, Dense Organs. |
Visualization: Tissue-Specific PACT/PARS Optimization Workflow
Diagram Title: PACT/PARS Workflow with Tissue-Specific Modifications
Achieving optimal transparency, antigen preservation, and image quality with PACT/PARS requires a deliberate, tissue-informed strategy. The protocols outlined here form a refined toolkit, advancing the core thesis that methodological specificity is paramount for unlocking high-fidelity, organism-scale 3D phenotyping in neuroscience, oncology, and organ biology research.
The PACT (Passive CLARITY Technique) and PARS (Perfusion-Assisted Agent Release in Situ) methodologies are pivotal for rendering biological tissues optically transparent, enabling deep-tissue imaging. A core step in these protocols is the removal of lipids via electrophoretic or passive clearing, traditionally reliant on Sodium Dodecyl Sulfate (SDS). While effective, SDS poses challenges, including lengthy clearing times, potential for protein loss or epitope damage, and interference with endogenous fluorescence. Concurrently, achieving optimal transparency requires a refractive index (RI) matching solution compatible with the cleared tissue and imaging system. This application note evaluates the non-ionic detergent X-CLARITY as an alternative to SDS and systematically compares high-performance RI matching solutions within the framework of a thesis on advancing PACT/PARS protocols.
Reagent Comparison Tables
Table 1: Comparison of Lipid Removal Reagents
| Reagent | Type | Mechanism | Typical Conc. in PACT/PARS | Clearing Time (for 1mm³ mouse brain) | Key Advantages | Key Limitations | Protein Integrity Preservation (Relative Score) |
|---|---|---|---|---|---|---|---|
| SDS | Ionic detergent | Dissolves membranes, denatures/displaces proteins | 4-8% (w/v) | 7-14 days (passive) | Highly effective, low cost, well-characterized | Harsh, may damage epitopes, high conductivity for ETC | 3/10 |
| X-CLARITY | Non-ionic detergent/ hydrogel-embedded reagent | Mild lipid dissolution within stabilized hydrogel | As per mfg. protocol (e.g., 1-2% v/v) | 3-7 days (passive) | Faster, preserves fluorescence & epitopes, lower conductivity | Higher cost, proprietary formulation | 8/10 |
| Tween-20 | Non-ionic detergent | Mild solubilization of lipids | 2-4% (v/v) | >21 days (passive) | Very gentle, inexpensive | Very slow, inefficient for dense tissues | 9/10 |
Table 2: Comparison of Refractive Index Matching Solutions
| Solution | Base Composition | Target RI | Viscosity | Clarity Duration | Compatibility with Common Labels | Notes on Use |
|---|---|---|---|---|---|---|
| FocusClear | Proprietary aqueous | 1.45 | Medium | Months (sealed) | High (FPs, dyes) | Ready-to-use, minimal swelling. |
| RIMS (Histodenz-based) | 40% Histodenz in 0.02M PB | 1.46-1.48 | Low-Medium | Weeks | High | Can be tuned; may cause slight swelling. |
| sRIMS (Sorbitol-based) | 60% Sorbitol in PBS | ~1.44 | High | Months | Very High | Economical, minimal quenching, high viscosity. |
| EasyIndex | Proprietary (TI-based) | 1.42-1.52 | Low | Months | High | Tunable RI, low autofluorescence, for long-term storage. |
| 87% Glycerol | Glycerol/PBS | ~1.44 | Medium | Weeks (hygroscopic) | Moderate (can quench some dyes) | Economical, common, but suboptimal for thick samples. |
Detailed Experimental Protocols
Protocol 1: Evaluating X-CLARITY vs. SDS in Passive Clearing (PACT framework) Objective: To compare clearing efficiency, speed, and fluorescence preservation. Materials: Mouse brain samples (fixed, hydrogel-embedded), 8% SDS/0.2M BA buffer (pH 8.5), X-CLARITY Clearing Solution, PBS-T (0.1% Tween-20), shaking incubator at 37°C. Procedure:
- Prepare sample hemispheres via PACT fixation and hydrogel embedding (4% AA/4% PFA).
- Group 1 (SDS): Place samples in 15mL of 8% SDS/BA buffer. Group 2 (X-CLARITY): Place samples in 15mL of X-CLARITY solution.
- Incubate both groups at 37°C with gentle shaking (85 rpm).
- Monitor clearing daily via simple light transmission. Replace solutions every 3 days.
- Upon full transparency (no visible opacity), terminate clearing (approx. Day 7 for X-CLARITY, Day 14 for SDS).
- Wash samples 3x24h in PBS-T at 37°C with shaking to remove residual detergent.
- Proceed to immunolabeling and RI matching for comparative imaging analysis.
Protocol 2: Systematic Evaluation of RI Matching Solutions Objective: To assess transparency, sample stability, and fluorescence compatibility. Materials: Cleared tissue samples (from Protocol 1), candidate RI solutions (FocusClear, RIMS, sRIMS, EasyIndex), refractive index meter, imaging chambers, light sheet or confocal microscope. Procedure:
- Prepare RI solutions as per published or manufacturer instructions. Measure and record exact RI.
- Mount cleared samples in separate chambers and immerse in each RI solution. Allow 2-4 hours for equilibration.
- Quantify Transparency: Capture transmitted light images. Measure grayscale intensity uniformity; higher, more uniform intensity indicates better clearing/RI matching.
- Assess Dimensional Stability: Measure sample dimensions (x,y,z) before and after 24h immersion to calculate swelling/shrinkage.
- Quantify Fluorescence Preservation: Image a standard fluorescent bead layer or an endogenous fluorescence signal (e.g., GFP) using identical settings across all samples. Measure mean fluorescence intensity and signal-to-background ratio.
- Long-Term Stability: Monitor clarity and fluorescence weekly for one month.
Diagrams (Generated with Graphviz)
Title: Reagent Optimization Workflow in Tissue Clearing
Title: Core PACT Clearing and Imaging Protocol
The Scientist's Toolkit: Essential Reagent Solutions
| Item | Function in PACT/PARS Optimization |
|---|---|
| X-CLARITY Clearing Solution | Non-ionic detergent alternative to SDS for faster, gentler lipid removal with superior epitope and fluorescence preservation. |
| Histodenz | Compound for formulating tunable, aqueous-based Refractive Index Matching Solutions (RIMS). |
| FocusClear | Proprietary, ready-to-use RI matching solution offering high transparency and long-term sample stability. |
| Sorbitol | For preparing sorbitol-based RIMS (sRIMS), a low-cost, low-autofluorescence, high-viscosity mounting medium. |
| EasyIndex | Tunable RI matching solution based on a proprietary compound, designed for minimal swelling and long-term storage. |
| 4% Acrylamide/4% PFA | Standard hydrogel monomer and fixative solution for PACT tissue embedding, stabilizing structure for clearing. |
| 0.2M Borate Buffer (pH 8.5) | Alkaline buffer used with SDS to enhance its lipid-removal efficacy during electrophoretic or passive clearing. |
| PBS-T (0.1% Tween-20) | Standard washing buffer to remove clearing reagents and prepare samples for labeling or RI matching. |
Benchmarking Performance: How PACT/PARS Compare to CLARITY, iDISCO, and Other Clearing Methods
This document provides a detailed, experimentally grounded comparison of two seminal tissue clearing methodologies within the broader thesis research on PACT (Passive CLARITY Technique) and PARS (Perfusion-Assisted Agent Release in Situ). The core thesis investigates the optimization of hydrogel-based tissue clearing for high-throughput, three-dimensional phenotyping in translational research and drug development. A critical appraisal of the technical accessibility, resource requirements, and practical efficacy of PACT versus the original Active CLARITY electrophoretic method is essential for guiding protocol selection in diverse laboratory settings.
Table 1: Head-to-Head Comparison of Key Parameters
| Parameter | Original Active CLARITY | PACT (Passive CLARITY Technique) |
|---|---|---|
| Core Principle | Electrophoretic removal of lipids (ETC) using a custom electrophoresis chamber. | Passive lipid removal via simple incubation in clearing solution at 37°C. |
| Key Equipment | Custom ETC chamber, constant voltage power supply, cooling circulator. | Standard laboratory incubator (37°C), orbital shaker (optional). |
| Typical Clearing Time | 5-7 days for a mouse brain. | 14-28 days for a mouse brain. |
| Approximate Startup Cost (Excl. Reagents) | High ($2,000 - $5,000 for custom chamber, power supply, cooler). | Very Low (< $100, if incubator is available). |
| Per-Sample Operational Cost | Moderate (Higher buffer volume, electricity). | Low (Primarily reagent costs). |
| Technical Skill Required | High (Chamber setup, electrical safety, troubleshooting). | Low (Simple solution changes). |
| Throughput Potential | Low to Moderate (Limited by chamber size). | High (Limited only by incubator space). |
| Tissue Integrity | Risk of bubble formation, heating, and protein loss if not optimized. | Excellent preservation of fluorescent proteins and structure. |
| Best Suited For | Labs with dedicated equipment and need for rapid clearing. | High-throughput studies, multi-sample projects, labs with budget/space constraints. |
Table 2: Key Research Reagent Solutions & Materials
| Item | Function | Typical Formulation (PACT) |
|---|---|---|
| Hydrogel Monomer Solution | Forms a porous mesh to support tissue structure and anchor biomolecules. | 4% Acrylamide, 0.05% Bis-acrylamide, 4% PFA in 0.1M PBS. |
| Thermal Initiation System | Initiates hydrogel polymerization at 37°C without specialized equipment. | 0.25% VA-044 initiator. |
| Passive Clearing Buffer (PBS-PH) | Removes lipids via passive diffusion; high pH accelerates process. | 200mM Boric acid, 4% SDS, pH adjusted to 8.5 with NaOH. |
| Refractive Index Matching Solution | Renders tissue transparent by minimizing light scattering. | 80% Histodenz in 0.02M PBS (RI ~1.45) or RIMS. |
| Blocking & Permeabilization Buffer | Reduces non-specific staining and enables antibody penetration. | 0.1% Triton X-100, 6% Donkey Serum, 0.02% Sodium Azide in PBS. |
Detailed Experimental Protocols
Protocol A: PACT for Whole Mouse Brain
- Sample Preparation & Hydrogel Embedding:
- Perfuse mouse transcardially with 20mL of 1x PBS followed by 20mL of Hydrogel Monomer Solution (see Table 2).
- Dissect the brain and post-fix in the same monomer solution at 4°C for 24 hours.
- Degas the monomer solution for 30 minutes.
- Replace solution with monomer containing 0.25% VA-044. Incubate at 37°C for 3 hours in a sealed tube to polymerize the hydrogel.
- Passive Lipid Clearing:
- Transfer hydrogel-embedded brain to 50mL of pre-warmed Passive Clearing Buffer (PBS-PH).
- Incubate at 37°C with gentle agitation (e.g., on an orbital shaker). Replace solution every 2-3 days.
- Monitor clearing progress. A full mouse brain typically becomes transparent after 14-28 days.
- Refractive Index Matching & Imaging:
- Wash cleared tissue in 0.02M PBS with 0.1% Triton X-100 (PBS-T) for 24 hours at 37°C to remove SDS.
- Transfer brain through a graded series of Histodenz solutions (40%, 60%, 80% in PBS) for 24 hours each.
- Mount in 80% Histodenz solution and image using light-sheet or confocal microscopy.
Protocol B: Original Active CLARITY (Electrophoretic Tissue Clearing - ETC)
- Hydrogel Embedding (as per Protocol A, steps 1-4).
- Electrophoretic Lipid Clearing:
- Assemble the custom electrophoresis chamber, ensuring electrode connections are secure.
- Fill the chamber with Clearing Buffer (200mM Boric acid, 4% SDS, pH 8.5). Place the hydrogel-embedded sample in the sample bay.
- Connect the chamber to a recirculating cooler set to 16°C to manage Joule heating.
- Apply a constant voltage of 30-50V (resulting in ~0.5-1.0A current). Clear for 5-7 days, replacing buffer every 24-48 hours.
- CAUTION: Monitor for bubbles, leaks, and excessive current, which indicate problems.
- Washing & Refractive Index Matching (as per Protocol A, step 3).
Visualization Diagrams
Title: PACT vs Active CLARITY Workflow Decision Tree
Title: Protocol Selection Based on Key Parameters
Within the broader research thesis on advanced tissue clearing, the choice between hydrogel-based and solvent-based methods fundamentally dictates the biochemical information preserved in the sample. This application note provides a direct comparison between Passive CLARITY Technique (PACT)/PARS and iDISCO/uDISCO protocols, focusing on their differential preservation of lipids versus proteins, complete with quantitative data and detailed experimental workflows.
Table 1: Methodological Comparison & Preservation Profile
| Aspect | PACT / PARS (Hydrogel-Based) | iDISCO / uDISCO (Solvent-Based) |
|---|---|---|
| Chemical Basis | Acrylamide hydrogel hybridization, SDS-mediated electrophoresis/diffusion. | Organic solvent dehydration, delipidation, and refractive index matching. |
| Primary Preservation | Proteins & Nucleic Acids. Hydrogel mesh immobilizes macromolecules. | Protein Epitopes (after methanol fixation). Lipids are extensively removed. |
| Lipid Preservation | High. Lipids are retained within the hydrogel-preserved tissue structure. | Very Low. Solvents (methanol, dichloromethane) dissolve and extract lipids. |
| Clearing Mechanism | Hyperhydrating, charge-driven lipid removal via electrophoresis (PARS) or passive diffusion (PACT). | Solvent-based lipid dissolution and matching RI with dibenzyl ether (DBE) or ethyl cinnamate. |
| Typical Clearing Time | Days to weeks (passive); 1-7 days (active PARS). | 1-3 weeks (multi-step protocol). |
| Tissue Size Limit | ~5 mm thick (passive); whole organs (e.g., mouse brain) with PARS. | Whole embryos, organs, and small organisms (e.g., adult mouse brain). |
| Compatible Labels | Endogenous fluorescence, immunolabeling, RNA FISH. | Immunolabeling (whole-mount), nuclear stains (post-clearing). |
| Key Advantage | Preserves native lipids for metabolomics or lipid signaling studies; compatible with long-term storage in refractive index matching solution (RIMS). | Excellent for deep immunolabeling of proteins; enables whole-body clearing. |
| Major Drawback | Slower for large samples; immunolabeling can be slower than in iDISCO. | Complete lipid loss; harsh solvents quench endogenous fluorescence. |
Detailed Experimental Protocols
Protocol A: PACT/PARS for Lipid-Preserving Whole-Brain Clearing & Immunolabeling
Objective: Clear an adult mouse brain while preserving lipids for subsequent protein immunolabeling.
Materials: PACT/PARS Reagent Kit
- Acrylamide/Bis-Acrylamide (40%): Forms the hydrogel polymer matrix.
- Thermo-initiator (VA-044): Initiates hydrogel polymerization at 37°C.
- Passive Clearing Solution (4% SDS in Borate Buffer, pH 8.5): Passively removes lipids via diffusion.
- Electrophoretic Clearing Buffer (Same as Passive): For active lipid removal via PARS.
- Refractive Index Matching Solution (RIMS): 88% Histodenz in 0.02% PBS-Tween. Matches RI (~1.46) for final transparency.
- Permeabilization Buffer (0.2% Triton X-100 in PBS): For antibody penetration post-clearing.
Procedure:
- Perfusion & Hydrogel Hybridization: Perfuse animal transcardially with 20 mL of PBS followed by 20 mL of PACT solution (4% acrylamide, 0.05% VA-044 in PBS). Dissect the brain.
- Polymerization: Incubate the sample in PACT solution at 37°C for 3 hours to form the hydrogel.
- Lipid Removal (Choose ONE):
- PACT (Passive): Incubate the sample in 20 mL of Passive Clearing Solution at 37°C with gentle shaking. Change solution daily until clear (~2-3 weeks for a whole brain).
- PARS (Active): Place the sample in the PARS chamber filled with Electrophoretic Clearing Buffer. Apply a constant 1-2W power limit for 24-48 hours.
- Washing: Rinse the cleared sample in 0.02% PBS-Tween for 24-48 hours to remove all SDS.
- Immunolabeling: Incubate in primary antibody (diluted in Permeabilization Buffer with 5% DMSO) for 7-14 days at 37°C, followed by secondary antibody incubation for 5-7 days.
- RI Matching: Dehydrate the sample stepwise in 50%, 80%, and 100% RIMS (diluted in water), each for 24 hours. Mount in 100% RIMS for imaging.
Protocol B: iDISCO+ for Whole-Mount Protein Immunolabeling in Cleared Samples
Objective: Achieve deep immunolabeling in a whole mouse embryo or organ, sacrificing lipids.
Materials: iDISCO+ Reagent Kit
- Methanol Series (20%, 40%, 60%, 80%, 100%): Dehydrates and delipidates tissue; permeabilizes for antibodies.
- Dichloromethane (DCM): Aggressively removes remaining lipids and bleaches pigments.
- Dibenzyl Ether (DBE): High-refractive index (1.562) clearing agent for final RI matching.
- Primary Antibody Diluent (PBT): PBS with 0.2% Triton X-100 and 3% donkey serum.
- PTxW.2 Buffer: PBS with 0.2% Tween-20 and 0.1% sodium azide for washing.
Procedure:
- Fixation & Permeabilization: Fix the sample in 4% PFA for 24-48 hours at 4°C. Wash in PBS. Permeabilize in 100% methanol for 2 hours at 4°C.
- Bleaching (Optional): Incubate in 5% H₂O₂ in methanol overnight at 4°C to quench autofluorescence.
- Rehydration: Gradually rehydrate the sample through a methanol series (100%, 80%, 60%, 40%, 20%) to PBS, 1 hour per step.
- Immunolabeling: Block in PBT with 3% serum for 2 hours. Incubate in primary antibody (in PBT) for 5-7 days at 37°C. Wash with PTxW.2 for 1-2 days. Incubate in secondary antibody for 3-5 days. Wash again.
- Dehydration & Delipidation: Dehydrate through a methanol series (20% to 100%), 1 hour per step. Incubate in 66% DCM / 33% methanol for 3 hours.
- Final Clearing: Incubate in 100% DCM for 15 minutes (twice) to remove residual lipids. Transfer to 100% DBE for RI matching. The sample is now ready for imaging.
Visualizing Methodological Pathways & Workflows
Diagram 1: Comparative clearing workflows (54 chars)
Diagram 2: Method selection decision tree (46 chars)
The Scientist's Toolkit: Essential Reagent Solutions
Table 2: Key Research Reagents & Their Functions
| Reagent | Primary Function | Used in Method | Critical Consideration |
|---|---|---|---|
| Acrylamide Hydrogel | Forms a supportive mesh to covalently anchor proteins and nucleic acids, preserving structure while lipids are removed. | PACT/PARS | Polymerization time and temperature are key for tissue integrity. |
| Sodium Dodecyl Sulfate (SDS) | Ionic detergent that solubilizes and emulsifies lipids for removal via electrophoresis or diffusion. | PACT/PARS | Must be thoroughly washed out post-clearing to prevent interference with imaging. |
| Refractive Index Matching Solution (RIMS) | Aqueous-based, high-RI solution (Histodenz). Matches tissue RI for transparency; compatible with hydrogel samples. | PACT/PARS | Enables imaging in aqueous, non-toxic media. Samples can be stored long-term. |
| Methanol | Organic solvent that dehydrates tissue, permeabilizes membranes, and precipitates proteins to preserve epitopes. | iDISCO/uDISCO | Quenches most endogenous fluorescent proteins (e.g., GFP). |
| Dichloromethane (DCM) | Powerful organic solvent that rapidly removes residual lipids and pigments, accelerating final clearing. | iDISCO/uDISCO | Highly volatile and toxic. Requires use in a fume hood. |
| Dibenzyl Ether (DBE) | High-refractive index (1.562) organic clearing agent. Provides final transparency for solvent-cleared samples. | iDISCO/uDISCO | Hygroscopic; must be stored with molecular sieves to prevent oxidation and acidification. |
| PTxW.2 Wash Buffer | Standard washing buffer (PBS + Tween-20) with sodium azide to prevent microbial growth during long incubations. | iDISCO/uDISCO | Essential for maintaining sample integrity during multi-day labeling and washing steps. |
Within the evolving field of PACT (Passive CLARITY Technique) and PARS (Perfusion-assisted Agent Release in Situ) tissue clearing methodologies, the quantitative evaluation of performance is critical for standardization and advancement. This application note details robust, quantitative metrics for assessing three cornerstone parameters: clearing depth, signal preservation, and morphological integrity. Framed within a broader thesis on optimizing whole-organ imaging, this document provides researchers and drug development professionals with standardized protocols and data analysis workflows to rigorously benchmark and compare clearing protocols.
The qualitative assessment of cleared samples is insufficient for method optimization or translational application. A quantitative framework enables:
- Objective comparison between different clearing protocols (e.g., PACT vs. PARS variants).
- Systematic optimization of reagent concentrations and incubation times.
- Reproducible benchmarking across laboratories.
- Correlation of imaging quality with downstream analytical outcomes (e.g., cell counting, synaptic density).
Core Quantitative Metrics: Definitions and Significance
Clearing Depth
Definition: The maximum depth (µm) into a tissue block at which high-resolution features (e.g., neuronal processes, subcellular structures) can be distinguished with a signal-to-background ratio (SBR) above a defined threshold. Significance: Determines the practical imaging volume and the suitability for studying deep structures.
Signal Preservation
Definition: The quantitative retention of endogenous fluorescence (e.g., from fluorescent proteins) or immunolabeled signal intensity post-clearing, relative to pre-clearing or control samples. Significance: Critical for accurate phenotyping, expression level quantification, and long-term archival of samples.
Morphological Integrity
Definition: The preservation of native tissue and cellular geometry, measured by metrics like tissue shrinkage/expansion, nuclear circularity, and the structural similarity index (SSIM) of known architectures. Significance: Ensures that quantitative spatial analyses (distances, volumes, network topology) are biologically accurate.
Experimental Protocols for Quantitative Assessment
Protocol 3.1: Measuring Clearing Depth
Objective: To determine the depth-dependent attenuation of signal and resolution. Materials: Cleared tissue sample, confocal or light-sheet microscope, sub-resolution fluorescent beads embedded at known depths. Workflow:
- Sample Preparation: Embed 100 nm fluorescent beads (excitation/emission matched to your signal) at the surface of the tissue block before clearing.
- Z-stack Acquisition: Image the sample with a high-NA objective, acquiring a Z-stack from the surface to beyond the visibly clear region. Use consistent laser power, gain, and step size (e.g., 1 µm).
- Data Analysis:
- Plot the intensity of the embedded beads and tissue background versus depth.
- Calculate the Signal-to-Background Ratio (SBR) as:
SBR(z) = (I_bead(z) - I_background(z)) / I_background(z). - Define the Clearing Depth as the depth at which the SBR falls below a threshold of 2.
- Alternatively, fit the intensity decay curve to an exponential model and report the attenuation length (λ).
Diagram: Clearing Depth Assessment Workflow
Diagram Title: Clearing Depth Measurement Protocol
Protocol 3.2: Quantifying Signal Preservation
Objective: To measure the loss of fluorescence intensity attributable to the clearing process. Materials: Paired tissue samples (cleared and uncleared control), standardized imaging chamber, calibration slides. Workflow:
- Control Sample Preparation: Image a freshly cut, uncleared but fixed tissue slice in a refractive index-matched solution (e.g., 80% glycerol). This is the Pre-clearing Control.
- Cleared Sample Imaging: Image the same region (if possible) or a matched region from the contralateral sample after full clearing and mounting.
- Intensity Normalization: Image a fluorescent calibration slide under identical settings during each session to correct for day-to-day instrument variability.
- Data Analysis:
- Segment a region of interest (ROI) containing uniform signal (e.g., cell body layer).
- Calculate the mean pixel intensity within the ROI for both control (Icontrol) and cleared (Icleared) samples.
- Calculate % Signal Preservation as:
(I_cleared / I_control) * 100. - Report the coefficient of variation (CV) of intensity within the ROI to assess signal homogeneity loss.
Protocol 3.3: Assessing Morphological Integrity
Objective: To quantify dimensional and structural changes induced by clearing. Materials: Cleared sample, uncleared control, microscope with calibrated scale, structural landmarks (blood vessels, nuclei). Workflow A - Volumetric Change:
- Measure the physical dimensions (X, Y, Z) of the tissue block before and after clearing with calipers or from low-magnification images.
- Calculate Volume Change as:
((V_cleared - V_initial) / V_initial) * 100.
Workflow B - Nuclear Morphometry:
- Stain nuclei with a DNA dye (e.g., DRAQ5) before and after clearing.
- Acquire high-resolution 3D images of a defined region.
- Segment nuclei in 3D.
- Calculate metrics: Volume, Sphericity Index, and Circularity (2D). Compare distributions between control and cleared samples.
Workflow C - Structural Similarity Index (SSIM):
- Acquire images of intricate, recognizable structures (e.g., hippocampal laminar organization) in control and cleared samples.
- Register the images.
- Calculate the SSIM, a perceptual metric comparing luminance, contrast, and structure within a sliding window. An SSIM of 1 indicates perfect integrity.
Diagram: Morphological Integrity Assessment Pathways
Diagram Title: Three Pathways to Assess Tissue Integrity
Table 1: Representative Quantitative Metrics from PACT and PARS Protocols
| Metric | Protocol (Reference) | Typical Value | Measurement Method | Key Influence Factors |
|---|---|---|---|---|
| Clearing Depth | PACT (Original) | 1-2 mm (in mouse brain) | SBR decay of beads | Refractive index matching, hydrogel density, lipid removal efficiency. |
| PARS (Optimized) | 4-6 mm (in mouse brain) | SBR decay of beads | Perfusion efficiency, hyperhydration steps, detergent choice. | |
| Signal Preservation (GFP) | PACT (8-week clearing) | ~40-60% retained | Pre/post intensity ROI | Clearing duration, pH, temperature, presence of antioxidants. |
| PARS (2-week clearing) | ~70-85% retained | Pre/post intensity ROI | Shorter immersion time, controlled reagent release. | |
| Volume Change | PACT (AQBPA-based mounting) | -5% to +20% (variable) | Physical measurement | Mounting medium RI vs. tissue RI; hyperhydration vs. dehydration. |
| PARS (RIMS-based mounting) | +5% to +15% (expansion) | Physical measurement | Osmolarity of final storage solution. | |
| Nuclear Sphericity | PACT (mild conditions) | SSIM > 0.9 | 3D segmentation & SSIM | Gelation stiffness, ionic strength of buffers. |
| PARS (standard) | SSIM > 0.92 | 3D segmentation & SSIM | Perfusion fixation quality, pressure during perfusion. |
The Scientist's Toolkit: Essential Research Reagents & Materials
Table 2: Key Reagents for Quantitative Clearing Assessment
| Item | Function in Quantification | Example/Notes |
|---|---|---|
| Sub-resolution Fluorescent Beads (100 nm) | Depth fiducials for measuring signal attenuation and point spread function (PSF) widening. | TetraSpeck beads; choose channels distinct from sample signal. |
| Refractive Index (RI) Matching Solutions | Standardizes imaging conditions; critical for accurate depth measurements. | SeeDB2 (RI=1.52), RIMS (RI=1.46), 80% Glycerol (RI=1.45). |
| Fluorescent Calibration Slides | Normalizes microscope intensity across imaging sessions for signal preservation studies. | e.g., Argolight slides with patterns and known intensity references. |
| DNA-binding Dyes (e.g., DRAQ5, SYTOX Green) | Labels nuclei for morphometric analysis of volume and shape integrity. | Must be stable under clearing conditions (check photo-stability). |
| Hydrogel Monomers (Acrylamide, Bis-Acrylamide) | Forms the tissue-polymer hybrid matrix in PACT; concentration affects shrinkage & clearing. | PACT: 4% Acrylamide; PARS: May use lower concentrations or alternatives. |
| Passive Clearing Agents (e.g., 8M Urea, 20% Nycodenz) | Removes lipids and matches RI in PACT; concentration affects speed and preservation. | Hyperhydration agents can cause swelling; require optimization. |
| Perfusion-based Clearing Apparatus | Enables PARS protocol; pump consistency is critical for reproducible morphological integrity. | Syringe or peristaltic pump with fine control over flow rate (1-5 mL/min). |
| Validated Antibodies for Immunolabeling | Assesses signal preservation for key biomarkers post-clearing. | Must be validated for use in cleared tissue (epitope accessibility). |
The adoption of these quantitative metrics—clearing depth, signal preservation, and morphological integrity—provides a rigorous, reproducible framework for evaluating PACT/PARS methodologies. By implementing these standardized application notes and protocols, researchers can move beyond qualitative descriptions, enabling data-driven optimization of tissue clearing for specific applications in neuroscience, developmental biology, and whole-organ pathology in drug development. This quantitative approach is fundamental to the thesis that systematic metrication accelerates methodological reliability and translational utility.
Application Note: Photochemical Acoustic and Photoacoustic Remote Sensing (PACT/PARS) tissue clearing methodologies render large, intact biological specimens optically transparent and refractive-index matched, enabling deep, high-resolution volumetric imaging. This note details the compatibility, optimization protocols, and quantitative performance metrics for integrating cleared samples with three major optical imaging modalities.
The following table summarizes key compatibility parameters for imaging PACT/PARS-cleared tissue samples.
Table 1: Quantitative Performance Metrics Across Modalities
| Parameter | Light-Sheet Fluorescence Microscopy (LSFM) | Confocal Laser Scanning Microscopy (CLSM) | Multiphoton Microscopy (MPM) |
|---|---|---|---|
| Optimal Clearing | PACT (Passive) for large volumes (>1 cm³) | PARS (Active) for high RI homogeneity | PACT (Passive) for deep imaging |
| Max Imaging Depth | >5 mm (full sample) | 300-500 µm | 1-2 mm |
| Lateral Resolution | 0.6 - 2.0 µm | 0.2 - 0.5 µm | 0.5 - 0.8 µm |
| Axial Resolution | 2.0 - 6.0 µm | 0.5 - 1.5 µm | 1.5 - 3.0 µm |
| Typical Scan Speed | Very Fast (10-1000 µm³/ms) | Slow (0.1-1 µm³/ms) | Moderate (1-10 µm³/ms) |
| Excitation Wavelength | 405 nm, 488 nm, 561 nm, 640 nm | 405 nm, 488 nm, 561 nm, 640 nm | 720 nm - 1300 nm (Tunable) |
| Primary Contrast | Fluorescence (eGFP, tdTomato, dyes) | Fluorescence | Autofluorescence, SHG, THG |
| Photobleaching | Low | High | Very Low |
| Best Application | High-throughput whole-organ mapping | Subcellular detail in defined regions | Deep tissue & label-free imaging |
Experimental Protocols for Modality-Specific Imaging
Protocol 2.1: Optimized Whole-Brain Imaging via Light-Sheet Microscopy
- Objective: To acquire a complete, high-resolution volumetric dataset of a PACT-cleared mouse brain expressing tdTomato in neuronal subsets.
- Materials: See "Scientist's Toolkit" below.
- Procedure:
- Sample Mounting: Embed the cleared brain in 1.0% low-melt agarose within the imaging chamber filled with refractive-index matching solution (RIMS, n=1.46). Position the sample on the sample holder, ensuring it is centered in the light-sheet path.
- System Alignment: Align the illumination (488 nm for tdTomato) and detection objectives orthogonally. Calibrate the light-sheet waist to the center of the detection focal plane using fluorescent beads.
- Acquisition Parameters: Set the laser power to 10-20 mW (at sample). Use a 5.2x/0.16 NA detection objective with a 594/40 nm emission filter. Set the step size to 3.0 µm for z-stack acquisition. Enable bidirectional scanning.
- Data Acquisition: Acquire tiles if necessary (for large samples) using an automated tiling routine with 10% overlap. Perform channel sequencing if multi-label imaging is required.
- Post-Processing: Use computational stitching (e.g., with BigStitcher in Fiji) and deconvolution (e.g., with Huygens) to generate the final volume.
Protocol 2.2: High-Resolution Subcellular Imaging via Confocal Microscopy
- Objective: To resolve dendritic spines and fine axonal projections in a 500 µm-thick PARS-cleared hippocampal slice.
- Materials: See "Scientist's Toolkit" below.
- Procedure:
- Sample Preparation: After PARS clearing, mount the slice in a glass-bottom dish using RIMS and a #1.5 coverslip. Ensure no bubbles are trapped.
- Microscope Setup: Use a high-NA oil immersion objective (63x/1.4 NA). Select the appropriate laser lines (e.g., 561 nm for Alexa Fluor 568). Set the pinhole to 1 Airy unit.
- Parameter Optimization: Perform a z-stack pre-scan to define the region of interest (ROI). Set digital zoom to achieve a pixel size of 80 nm (for super-resolution, if available). Set z-step to 0.3 µm.
- Mitigating Photobleaching: Use low laser power (1-2%) and optimize detector gain. Consider using a resonant scanner for faster acquisition. Activate the "line accumulation" function (e.g., 4x) to improve signal-to-noise ratio at low laser power.
- Acquisition: Run the z-stack acquisition. Save data in a non-proprietary format (e.g., .tiff, .ome.tiff) for analysis.
Protocol 2.3: Deep-Tissue Label-Free Imaging via Multiphoton Microscopy
- Objective: To visualize collagen networks and cellular morphology in a 2 mm-thick PACT-cleared human skin biopsy without exogenous labels.
- Materials: See "Scientist's Toolkit" below.
- Procedure:
- Sample Mounting: Secure the cleared biopsy in a silicone imaging chamber with RIMS. Use a long-working-distance water-dipping objective (25x/1.0 NA).
- Laser Tuning: Tune the femtosecond pulsed laser to 780 nm for nicotinamide adenine dinucleotide (NADH) autofluorescence and second harmonic generation (SHG). For third harmonic generation (THG), tune to 1200 nm.
- Detector Configuration: Configure non-descanned detectors (NDDs). For 780 nm excitation: use a 440/40 nm bandpass filter for NADH and a 390/20 nm filter for SHG. For 1200 nm excitation: use a 400/20 nm filter for THG.
- Depth Acquisition: Set the initial focal plane at the sample surface. Begin acquisition of a z-stack with a step size of 1.5 µm. Continuously monitor signal intensity and adjust laser power (starting at 10-15 mW) using depth-compensation features to maintain consistent signal up to 1.5 mm depth.
- Data Collection: Acquire sequential or simultaneous channels. Merge channels post-acquisition to create a composite label-free image.
Visualization Diagrams
Workflow: Clearing Method Selection for Imaging
Label-Free Contrast Mechanisms in Multiphoton Imaging
The Scientist's Toolkit: Research Reagent Solutions
Table 2: Essential Materials for Imaging Cleared Samples
| Item Name | Function / Purpose |
|---|---|
| PACT Clearing Solution | Aqueous-based, refractive-index matching solution for passive clearing of large, delicate organs. |
| PARS Hyperhydration Buffer | Initial buffer for active clearing, facilitating hydrogel monomer infiltration. |
| Electroporation Cuvettes | Used in PARS methodology to apply electrical fields for accelerated reagent delivery. |
| Refractive Index Matching Solution (RIMS, n=1.46) | Immersion medium during imaging to minimize spherical aberration and light scattering. |
| Low-Melt Agarose (1.0%) | For embedding and stabilizing cleared samples during light-sheet microscopy. |
| #1.5 High-Performance Coverslips | Optimal thickness for high-NA oil immersion objectives in confocal/multiphoton microscopy. |
| Silicone Imaging Chambers | Customizable chambers for mounting irregularly shaped cleared samples in multiphoton systems. |
| Long-Working-Distance Water-Dipping Objectives | Essential for deep imaging of cleared samples in their native aqueous mounting media. |
| Femtosecond Pulsed Ti:Sapphire Laser | Tunable near-infrared laser source required for multiphoton excitation in cleared tissues. |
| Non-Descanned Detectors (NDDs) | Critical for collecting weak nonlinear signals (SHG, THG, autofluorescence) in deep tissue. |
Within the context of PACT/PARS (Passive CLARITY Technique/Passive Artery Clearing) methodology research, ensuring the reliability of quantitative data derived from cleared tissue volumes is paramount for advancing biomedical discovery and drug development. This document outlines standardized Application Notes and Protocols for rigorous validation, quantification, and promotion of reproducibility in 3D imaging datasets.
Three-dimensional tissue clearing, particularly via hydrophilic polymer-based methods like PACT, enables unprecedented system-level analysis of intact biological specimens. However, the complexity of these large, multidimensional datasets introduces significant challenges for quantitative analysis and cross-study validation. Establishing best practices is essential to transform qualitative observations into statistically robust, reproducible findings.
Chapter 1: Foundational Principles for Quantitative 3D Analysis
Defining Metrics and Avoiding Bias
Quantification must move beyond simple intensity measurements. Key validatable metrics include:
- Object Number: Counts of cells, nuclei, or vascular segments.
- Spatial Density: Objects per unit volume.
- Morphometrics: Volume, surface area, sphericity, branching complexity.
- Network Topology: Graph theory parameters for neurites or vasculature.
- Intensity Distribution: Expression levels within defined compartments.
Best Practice: All metrics must be defined a priori with clear operational definitions to avoid confirmation bias. Use blinding and randomization during image acquisition and analysis.
Calibration and Standardization
Internal and external standards are non-negotiable for comparing results across samples, batches, and labs.
Table 1: Essential Calibration Tools for 3D Quantification
| Tool/Standard | Function | Application in PACT/PARS |
|---|---|---|
| Fluorescent Beads | Define point spread function (PSF) & resolution limits | Measure effective resolution post-clearing/expansion. |
| Reference Slides | Uniform fluorescence for intensity calibration | Normalize signal across imaging sessions. |
| Synthetic Phantoms | Known structure geometries (e.g., fibers, spheres) | Validate segmentation algorithms. |
| Internal Control Tissue | Non-varying biological structure (e.g., vessel wall autofluorescence) | Intra-sample normalization. |
Diagram 1: Calibration workflow for 3D data validation.
Chapter 2: Protocol for Validated Cell Quantification in Cleared Tissue
Protocol 2.1: Rigorous 3D Nuclei Segmentation and Counting
Objective: To obtain accurate, reproducible counts of cell nuclei from a PACT-cleared, DAPI-stained tissue volume.
Materials (Research Reagent Solutions):
- PACT-Cleared Tissue Sample: Hydrogel-embedded, refractive index matched.
- Nuclear Stain: e.g., DAPI, SYTO 16, or nuclear-targeted histone-GFP.
- Imaging Solution: 8M Urea in PBS for PACT-RIMS (Refractive Index Matching Solution).
- Calibration Beads: 0.2 μm TetraSpeck beads for XYZ registration.
- Reference Standard: Fluorescent slide (e.g., Chameleon 725) for intensity calibration.
Method:
- Pre-Imaging Calibration:
- Image TetraSpeck beads under identical settings as tissue samples to generate a system-specific PSF model.
- Image the reference standard slide to create a session-specific flat-field correction and linear intensity calibration map.
Image Acquisition:
- Acquire tile-scan z-stacks of the entire sample with sufficient overlap (≥15%). Maintain laser power/detector gain below saturation.
- Critical: Include a representative "no tissue" region to measure background autofluorescence of the mounting medium.
Pre-processing (Must be documented with exact parameters):
- Apply flat-field correction using the reference standard data.
- Perform tile stitching and z-drift correction using bead signals.
- Apply a 3D Gaussian filter (σ=0.5-1 px) to reduce high-frequency noise.
- Subtract the per-session measured background intensity value.
Segmentation & Quantification:
- Use a trained 3D U-Net model (pre-trained on similar tissue) or a standardized algorithm (e.g., 3D Spot Enhancing Filter + Watershed).
- Define detection thresholds objectively: Set intensity threshold based on the 99.5 percentile of background voxels. Set minimum volume threshold based on the known physical resolution limit (PSF).
- Output raw count, individual object volumes, and integrated intensities.
Validation Step:
- Manually annotate a random sub-volume (≥ 0.1% of total volume). Compare automated vs. manual counts to report Precision, Recall, and F1-score.
Table 2: Example Quantitative Output & Validation Metrics
| Sample ID | Auto Count (n) | Manual Count (n) | Precision (%) | Recall (%) | F1-Score | Mean Nuclear Volume (μm³) ± SD |
|---|---|---|---|---|---|---|
| PACTBrain1 | 125,447 | 118,632 | 96.5 | 94.2 | 0.953 | 154.3 ± 21.7 |
| PACTBrain2 | 131,892 | 124,901 | 95.8 | 95.0 | 0.954 | 152.8 ± 23.1 |
| PACTTumor1 | 98,567 | 93,345 | 92.1 | 91.0 | 0.915 | 201.4 ± 45.6 |
Chapter 3: Ensuring Reproducibility Across Experiments and Labs
The Metadata and SOP Imperative
Reproducibility requires exhaustive documentation beyond the manuscript methods.
Table 3: Critical Metadata for PACT/PARS Dataset Reproducibility
| Category | Specific Parameters to Document |
|---|---|
| Sample Prep | Fixation type/duration, hydrogel composition, incubation times/temps, clearing solution batch, RI of final solution. |
| Staining | Antibody clone, concentration, dilution buffer, staining duration, number of washes. |
| Imaging | Microscope make/model, objective (NA, magnification), immersion medium, laser wavelengths/powers, detector (type, gain, offset), voxel size (xy, z), bit depth. |
| Analysis | Software name/version, algorithm name, all input parameters (e.g., filter kernels, thresholds), segmentation validation metrics. |
Protocol for Inter-Laboratory Validation
Objective: To standardize a sample processing and analysis pipeline between two labs (Lab A & B) using PACT.
Method:
- Shared Reagents: Centralized preparation and aliquoting of key reagents (hydrogel monomer solution, primary antibody stock, reference standard slides).
- Sample Exchange: Lab A prepares, clears, and stains 10 identical tissue samples. 5 are imaged/analyzed by Lab A, 5 are shipped to Lab B for imaging/analysis.
- Blinded Analysis: Both labs receive the same analysis SOP and software container (e.g., Docker image).
- Comparison: Compare key quantitative outputs (e.g., cell density, mean signal intensity) using a pre-defined statistical agreement test (e.g., Bland-Altman analysis).
Diagram 2: Inter-laboratory validation workflow.
Chapter 4: Data Management and Sharing for Reproducibility
FAIR Data Practices
Data must be Findable, Accessible, Interoperable, and Reusable.
- Deposition: Upload raw and processed data to public repositories (e.g., BioStudies, Image Data Resource) with a unique Digital Object Identifier (DOI).
- Format: Use open, standard formats (e.g., OME-TIFF for images, CSV for quantitative data).
- Code: Publish analysis scripts on version-controlled platforms (e.g., GitHub, GitLab) with an OSI-approved license.
Adherence to the detailed protocols and principles outlined herein—encompassing rigorous calibration, standardized SOPs, comprehensive metadata capture, and FAIR data sharing—will substantially strengthen the validation and reproducibility of quantitative findings in 3D cleared tissue research. This framework is critical for building a reliable knowledge base from PACT/PARS and related methodologies to accelerate translational drug development.
Conclusion
PACT and PARS represent a paradigm shift towards accessible, scalable, and high-fidelity tissue clearing, democratizing volumetric imaging for a broad research community. By mastering the foundational principles, meticulous protocol execution, and systematic troubleshooting outlined here, researchers can reliably generate transparent tissues that preserve both structure and molecular information. While PACT excels in simplicity and sample integrity for organ-scale projects, PARS extends this capability to whole organisms, enabling systemic studies. When validated against and chosen over more complex or harsher methods, these techniques provide a robust pipeline for uncovering complex spatial biology in development, disease, and therapeutic response. The future lies in further protocol miniaturization, enhanced multiplexing compatibility, and the integration of AI-driven analysis of the rich 3D datasets they produce, solidifying their role as cornerstone methodologies in next-generation biomedical research and drug development.