A Practical Guide to Validating Stereotaxic Probe Placement with Post-Mortem Histology
This article provides a comprehensive guide for researchers and drug development professionals on validating stereotaxic probe placement using post-mortem histology.
A Practical Guide to Validating Stereotaxic Probe Placement with Post-Mortem Histology
Abstract
This article provides a comprehensive guide for researchers and drug development professionals on validating stereotaxic probe placement using post-mortem histology. It covers the foundational importance of histological verification for data integrity in neuroscience and preclinical studies, details step-by-step methodological protocols from tissue preparation to imaging, addresses common troubleshooting and optimization strategies to minimize errors, and explores advanced validation and comparative techniques. By synthesizing current methodologies and emerging technologies, this resource aims to standardize validation practices, enhance experimental reproducibility, and support robust translational research.
The Critical Role of Histological Validation in Stereotaxic Surgery
In stereotaxic neuroscience research, the precise targeting of specific brain structures is a foundational requirement. However, the assumption of accuracy is not a guarantee. Validation through post-mortem histology is the critical, non-negotiable step that bridges the gap between intended and actual probe placement, ensuring the integrity of the resulting data. Without this rigorous confirmation, even the most carefully designed experiments risk producing irreproducible or misleading results. This guide objectively compares the performance of different validation approaches and details the methodologies essential for confirming stereotaxic accuracy, providing researchers and drug development professionals with the framework to fortify their experimental conclusions.
The High Stakes of Inadequate Validation
The consequences of skipping robust validation are not merely theoretical; they directly undermine scientific reproducibility and translational potential.
- Irreproducible Electrophysiology Findings: A multi-laboratory study designed to test reproducibility found that variability in electrode targeting was a key factor hindering the replication of experimental outcomes. Despite standardized behavioral tasks and electrophysiological procedures, differences in stereotaxic probe placement across labs led to significant variability in results [1].
- Critical Reinterpretation of Seminal Cases: The post-mortem histological examination of patient H.M., a foundational case in memory research, revealed that the extent of his medial temporal lobe lesions, based on the surgeon's intraoperative sketches and later MRI, was not entirely accurate. A significant amount of histologically intact hippocampal tissue was discovered, which necessitated a refined understanding of the brain structures essential for memory consolidation [2]. This underscores that even modern neuroimaging has limitations that only detailed histology can address.
- Quantifying Technical Accuracy: A study on a 3D-printed, patient-specific stereotaxic system for brain biopsy demonstrated a mean target point deviation of approximately 0.5 mm [3]. While this exceeded clinical requirements, it highlights that even in controlled systems, inherent technical variability exists and must be accounted for to ensure the reliability of tissue sampling or experimental interventions.
Comparative Analysis of Validation Techniques
The following table summarizes key methodologies used for validating stereotaxic procedures, highlighting their respective applications and limitations.
| Validation Method | Primary Application | Key Performance Metrics | Inherent Limitations |
|---|---|---|---|
| Post-mortem Histology | Gold standard for precise localization; provides cellular-level resolution [2]. | Direct measurement of lesion borders [2]; cytoarchitectonic identification of probe track and target structure [4]. | Destructive; requires specialized tissue processing and expertise. |
| Post-mortem MRI | Non-destructive 3D reconstruction; excellent for gross anatomical correlation [5]. | Correlation with histology (e.g., myelin/iron content) [6] [7]; measurement of specimen dimensions and probe trajectories [1]. | Lower resolution than histology; contrast mechanisms may not be specific to target [7]. |
| Stereotaxic Cutting & Atlasing | Places histological data into a standardized 3D coordinate system for inter-study comparisons [8]. | Accuracy of alignment to commissural planes [8]; reproducibility of sectioning angle and thickness. | Dependent on initial brain alignment; complex setup and procedure. |
Essential Experimental Protocols for Validation
Protocol for Post-Mortem Histological Verification in Rodents
This protocol is a cornerstone for validating stereotaxic manipulations in animal models, such as drug microinjection or electrode implantation [4] [9].
- Step 1: Perfusion and Fixation. Following deep anesthesia, transcardial perfusion is performed with a fixative solution (e.g., paraformaldehyde) while the heart is still beating. This ensures rapid and uniform preservation of brain tissue. The brain is then carefully removed and post-fixed [4].
- Step 2: Sectioning. The fixed brain is sectioned, typically using a cryostat for frozen sections. Sections are cut at a thickness appropriate for the study (e.g., 20-50 μm) and mounted on gelatin-coated glass slides [4].
- Step 3: Staining. Sections are stained to visualize cellular architecture. Common stains include Cresyl Violet (Nissl stain) for neuronal cell bodies or specific immunohistochemical markers to identify target proteins or trace probe locations [2] [9].
- Step 4: Microscopic Analysis. Each section is systematically examined under a light microscope. The location of the probe track, lesion site, or injection cannula is identified and compared against a stereotaxic atlas. Only animals with histologically confirmed correct target sites are included in the final data analysis [4].
Protocol for Standardized Human Brainstem Processing
Human post-mortem tissue presents unique challenges due to its size and inter-specimen heterogeneity. This protocol ensures reproducible sampling [5].
- Step 1: Harvesting and Fixation. The brainstem is harvested during autopsy and immersion-fixed in 4% paraformaldehyde for a standardized duration (e.g., 2 weeks) [5].
- Step 2: Internal Landmark-Based Standardization. To account for inter-specimen size differences, the rostrocaudal axis of the brainstem is divided into reproducible levels based on clearly identifiable internal anatomical landmarks, rather than absolute length. This is analogous to using the anterior and posterior commissures for forebrain standardization [8] [5].
- Step 3: Cryoprotection and Sectioning. The brainstem is cryoprotected in sucrose before being sectioned entirely on a cryostat. Serial sections are collected (e.g., 50 μm thickness) at set intervals (e.g., every 750 μm) to create a complete histological library [5].
- Step 4: Histological and MRI Correlation. A series of sections is stained (e.g., Cresyl Violet) and digitized. The histological levels are then correlated with post-mortem MRI images of the same specimen to create a validated, anatomically precise map [5].
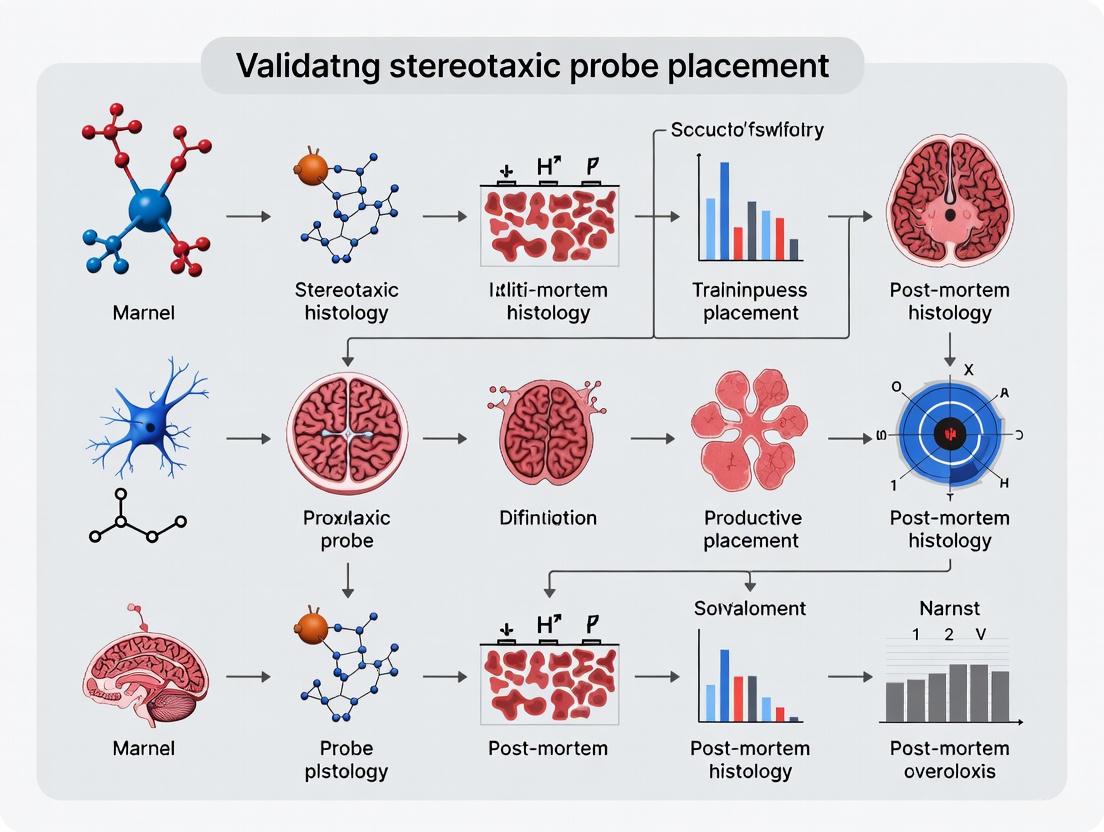
The workflow below illustrates the critical pathway for rigorous stereotaxic experimentation, where post-mortem validation acts as the essential feedback loop.
The Scientist's Toolkit: Essential Research Reagents & Materials
The following reagents and instruments are fundamental for executing the validation protocols described above.
| Item | Function in Validation |
|---|---|
| Paraformaldehyde | Primary fixative for tissue preservation; cross-links proteins to maintain structural integrity during histology [4] [5]. |
| Cresyl Violet (Nissl Stain) | Histological stain that labels neuronal cell bodies (Nissl substance); essential for identifying cytoarchitectonic boundaries and verifying target structures [2] [5]. |
| Cryostat | Instrument used to cut thin, frozen sections of fixed brain tissue for microscopic examination [4] [5]. |
| Stereotaxic Atlas | Reference containing detailed maps and coordinates of brain structures in a standardized space; crucial for planning injections and identifying locations in histological sections [4]. |
| Cryoprotectant (Sucrose) | Solution used to replace water in fixed tissue to prevent ice crystal formation during the freezing process, preserving tissue morphology for sectioning [5]. |
| Glass Microcapillaries | Used for precise intracerebral drug injections (e.g., Kainic Acid); pulled to fine tips to minimize tissue damage and improve targeting accuracy [9]. |
In the rigorous world of neuroscience and drug development, the path from a stereotaxic coordinate to a reliable scientific conclusion is paved with validation. The integrated use of post-mortem histology, correlation with imaging, and standardized processing protocols is not an optional extra but a fundamental component of the experimental workflow. By adopting the comparative data and detailed methodologies outlined in this guide, researchers can move beyond assumption, ensure data integrity, and build a more reproducible and trustworthy foundation for understanding the brain.
Neural probes are fundamental tools in modern neuroscience, enabling researchers to record and manipulate neural activity within defined circuits. The core principle underlying their use is that the physical location of the probe's recording sites directly determines which neural populations and circuits can be monitored, thereby fundamentally shaping data interpretation and biological conclusions. Recent technological advances have produced probes with dramatically different designs, scaling capabilities, and spatial resolutions, each offering distinct advantages for specific research applications.
The functional interpretation of neural data is inextricably linked to the anatomical context in which it was collected. Stereotaxic placement provides the initial targeting, but post-mortem histology remains the gold standard for precisely localizing recording sites to specific brain layers, regions, or nuclei. This validation is crucial, as even minor deviations in probe placement can result in recording from entirely different neural populations, potentially leading to misinterpretation of a circuit's function. This guide objectively compares the performance of leading probe alternatives, detailing their operational principles and the experimental methodologies essential for validating their placement and interpreting the resulting data.
Comparative Analysis of Neural Probe Technologies
The following section provides a structured, data-driven comparison of three advanced neural probe technologies, highlighting their key specifications, performance metrics, and suitability for different experimental needs.
Table 1: Technical Specifications and Performance Comparison of Neural Probes
| Feature | Neuropixels Ultra [10] | ROSE Probe [11] | Fiber Photometry [12] [13] |
|---|---|---|---|
| Core Technology | Silicon probe with ultra-high-density sites | Rolled 2D flexible polymer probe into 3D monolithic structure | Optical recording via implanted optical fiber |
| Spatial Resolution | Single-neuron & single-spike; 6 µm site-to-site spacing | Customizable 3D electrode arrangements; single-unit resolution | Population-level signal; not single-cell resolved |
| Scalability (Channels) | Not explicitly stated (High) | Up to 256 channels demonstrated; design supports high scalability | Typically single-channel, sometimes dual-sensor [13] |
| Key Advantage | >2-fold increase in neuronal yield; detects small waveform "footprints" | True 3D volumetric recording; reduced tissue damage from flexibility | Cell-type specific recording via genetically encoded sensors |
| Cell-Type Identification | ∼80-85% accuracy for cortical interneurons [10] | Provides 3D spatial mapping for decoding | Specificity from viral targeting & sensor expression |
| Temporal Resolution | Sub-millisecond (electrophysiology) | Sub-millisecond (electrophysiology) | Sub-second to second timescales [13] |
| Tissue Response | Not specified in results | Reduced immune response & tissue stress vs. stiff silicon probes [11] | Chronic inflammation around implant; requires validation |
Table 2: Functional Application and Data Output Comparison
| Aspect | Neuropixels Ultra | ROSE Probe | Fiber Photometry |
|---|---|---|---|
| Primary Data | Extracellular action potentials (spikes) & local field potentials | Extracellular action potentials (spikes) & local field potentials | Fluorescence changes from biosensors (e.g., calcium, dopamine) |
| Circuit Interrogation | High-density sampling within a region or along a track | Simultaneous 3D sampling across a brain volume | Projection-specific or population-specific activity |
| Interpretation Strength | Identifying individual neuron identity and functional properties | Mapping 3D functional architecture and distributed networks | Correlating neuromodulator/ion dynamics with behavior |
| Chronic Stability | Not specified in results | 5-week+ recording stability demonstrated in mice [11] | Varies; signal can persist for weeks to months |
| Ideal Use Case | Cell type classification, fine-scale functional architecture | Decoding distributed cognitive processes, chronic recording | Neurotransmitter release, behavior-linked population dynamics |
Experimental Protocols for Probe Application and Validation
To ensure the accurate linking of probe location to neural circuit function, a rigorous experimental protocol must be followed. This section details the key methodologies for stereotaxic surgery, functional recording, and post-mortem histological validation.
Stereotaxic Surgery and Probe Implantation
The foundation of precise neural recording is the accurate surgical placement of the probe into the target brain structure.
- Animal Preparation: Adult C57BL/6 mice (6-10 weeks old) are anesthetized using isoflurane (3-5% for induction, 1-2% for maintenance in oxygen) and secured in a stereotaxic frame. Body temperature is maintained at 37°C using a heating pad. Analgesics (e.g., Meloxicam, 5 mg/kg) and local anesthetics (e.g., Lidocaine) are administered pre-operatively [14] [12].
- Viral Injection (for biosensors): For studies using fiber photometry or optogenetics, an adeno-associated virus (AAV) carrying the genetic sensor (e.g., AAV9.hSyn.GRAB.Ado1.0m for adenosine or AAV.Syn.NES-jRGECO1a for calcium) is injected into the target brain region using a nanoliter injector and a glass micropipette or Hamilton syringe [12] [13].
- Probe Implantation: The skull is exposed, and a craniotomy is performed at the calculated stereotaxic coordinates relative to Bregma. The probe (e.g., Neuropixels, ROSE probe, or optical fiber) is slowly lowered into the brain using a microdrive. For intracerebral hemorrhage models, an injection of autologous blood (e.g., 25 µL into the striatum) can be performed [14]. For fiber photometry, an optical fiber (e.g., 200 µm diameter, NA=0.37) is implanted above the virus-injected region [12].
- Fixation and Recovery: The probe is secured to the skull using dental acrylic cement. Mice receive post-operative care, including subcutaneous fluids and extended analgesia, and are allowed to recover for several weeks before recording to permit transgene expression and surgical recovery [14] [12].
Functional Validation and Behavioral Coupling
Once the probe is implanted and the animal has recovered, functional validation is critical.
- Electrophysiology Recording: For Neuropixels and ROSE probes, neural signals are recorded while the animal is awake, often performing a behavioral task. The ROSE probe's 3D architecture allows for microscopy-like spatiotemporal mapping of spike activities across a brain volume, which can be used to decode sensory information like visual orientation [11].
- Fiber Photometry Recording: The implanted optical fiber is connected to a photometry system. LEDs at specific wavelengths (e.g., 405 nm for isosbestic control, 465 nm for dLight excitation) excite the biosensor. The emitted fluorescence is collected, and the ΔF/F is calculated to represent neurotransmitter or calcium dynamics [13]. This is ideally coupled with video tracking to correlate neural signals with spontaneous or task-based behaviors [13].
Post-Mortem Histological Validation
This is the definitive step for confirming probe placement and relating functional data to anatomy.
- Perfusion and Fixation: Under deep anesthesia, mice are transcardially perfused with phosphate-buffered saline (PBS) followed by 4% paraformaldehyde (PFA). The brain is extracted and post-fixed in 4% PFA overnight [14] [12].
- Sectioning: Fixed brains are sectioned into 30-100 µm thick coronal slices using a vibrating blade microtome (e.g., Leica VT1000S) [12].
- Staining and Imaging: Sections containing the probe track or fiber lesion are stained with markers like DAPI (for cell nuclei) or specific antibodies (e.g., against neuronal or glial markers). Imaging with a fluorescence or confocal microscope confirms the exact location of the probe track and the expression zone of any viral vectors [12] [13]. This histology is overlayed with a standard brain atlas to definitively identify the recorded brain structures [14].
Visualizing the Core Workflow and Signaling Pathways
The following diagrams illustrate the core experimental workflow for linking probe location to circuit function and an example of a signaling pathway studied with these techniques.
Diagram 1: Core Experimental Workflow. This flowchart outlines the essential steps from probe selection to final data interpretation, highlighting the critical inputs for validation and the final correlative analysis that links functional data to an anatomical circuit.
Diagram 2: GRAB Sensor Signaling Pathway. This diagram shows the molecular pathway of G protein-coupled receptor (GPCR)-activation-based (GRAB) sensors used in fiber photometry. A neuromodulator binding to the engineered receptor induces a conformational change that increases fluorescence, which is detected as an optical signal.
The Scientist's Toolkit: Essential Research Reagents and Materials
A successful experiment relies on a suite of carefully selected reagents and equipment. The table below details key solutions used in the protocols and studies cited in this guide.
Table 3: Key Research Reagent Solutions and Experimental Materials
| Item Name | Function / Application | Example Use Case & Specification |
|---|---|---|
| AAV9.hSyn.GRAB.Ado1.0m [12] | Genetically encoded sensor for detecting extracellular adenosine dynamics. | Expressed in specific brain regions (e.g., hippocampus) via stereotaxic injection for in vivo or ex vivo adenosine imaging. |
| pAAV.Syn.NES-jRGECO1a [13] | Red fluorescent genetically encoded calcium indicator (GECI). | Used for recording neural population activity; can be co-injected with other sensors for simultaneous multi-parameter imaging. |
| pAAV9-hSyn-dLight1.2 [13] | Genetically encoded dopamine sensor. | Monitors dopamine release in brain regions like the olfactory tubercle during behavior. |
| Doric Lenses Fiber Photometry System [13] | Turn-key system for in vivo fluorescence recording. | Provides LEDs, fluorescence detectors, and software for quantifying biosensor signals in freely moving animals. |
| Neuropixels Ultra Probe [10] | Ultra-high-density electrode array for extracellular recording. | Enables high-yield, single-neuron recording and improved cell-type classification in cortical and other structures. |
| ROSE Probe [11] | Monolithic 3D flexible neural probe for volumetric recording. | Records single-unit activity across a 3D brain volume with reduced tissue damage, ideal for mapping distributed networks. |
| Isoflurane [14] [12] | Inhalable anesthetic for rodent surgery. | Maintains surgical anesthesia during stereotaxic procedures. |
| Paraformaldehyde (PFA) [12] | Fixative for tissue preservation. | Used for transcardial perfusion and post-fixation of brain tissue for post-mortem histological validation. |
In preclinical neuroscientific research and drug development, stereotaxic surgery serves as a cornerstone technique for precise intracerebral interventions, including drug administration, electrode implantation, and cell-specific modulation. The accuracy of stereotaxic probe placement directly dictates the reliability, reproducibility, and translational value of generated data. Misplacement, even at sub-millimeter scales, can lead to erroneous data interpretation, compromised experimental outcomes, and ultimately, costly failures in downstream drug development pipelines. Within the context of validating stereotaxic probe placement via post-mortem histology, this guide systematically compares the performance profiles of prevalent stereotaxic techniques, supported by quantitative accuracy metrics and detailed experimental protocols. The overarching goal is to equip researchers with the evidence necessary to select appropriate methodologies, implement rigorous validation, and mitigate risks associated with stereotaxic misplacement in preclinical studies.
Quantitative Comparison of Stereotaxic Technique Accuracy
The accuracy of stereotaxic systems is typically quantified by calculating the deviation between the planned trajectory and the actual probe placement, measured as Entry Point (EP) error, Target Point (TP) error, and Angular deviation. The following table synthesizes performance data from the literature for various guidance systems, highlighting the impact of technological advancement on placement precision [15].
Table 1: Accuracy Metrics of Stereotaxic Implantation Techniques
| Technique Category | Specific Technique/System | Reported Entry Point (EP) Error (mm, mean ± SD) | Reported Target Point (TP) Error (mm, mean ± SD) | Key Advantages | Noted Limitations |
|---|---|---|---|---|---|
| Frameless Image Guidance | Vertek Arm (Medtronic) with skin fiducials | 3.5 ± 1.5 | 3.0 ± 1.9 | - | Lower accuracy compared to bone-fiducial or modern systems [15] |
| Frameless Robotic Guidance | iSYS1 System | 1.54 ± 0.8 | 1.82 ± 1.1 | Improved accuracy over older frameless systems [15] | - |
| iSYS1 System (with K-wire technique modification) | 1.18 ± 0.5 | 1.66 ± 1.12 | Demonstrates technique optimization can further improve precision [15] | - | |
| Frameless with Intraoperative MRI | Brainlab Navigation with Lyla retractors | 1.4 ± 1.2 | 3.2 ± 2.2 | Allows for intraoperative verification [15] | - |
| Frame-Based (Historical Gold Standard) | Traditional Stereotactic Frame | - | - | Considered the previous "gold-standard" [15] | Supporting evidence for newer techniques is often limited to class 3 studies [15] |
A meta-analysis of stereoelectroencephalography (SEEG) electrode implantations underscores the significance of these accuracy metrics, noting that a safe trajectory threshold can be calculated based on the mean entry point error plus three standard deviations. This precise calculation is critical for avoiding cerebral vasculature and ensuring patient safety in clinical applications, a principle that directly translates to ethical and valid animal research [15].
Experimental Protocols for Validation and Impact Assessment
Standardized Protocol for Stereotaxic Intrahippocampal Administration
The following detailed protocol, adapted from Bielefeld et al., ensures precise intracerebral injections and is a benchmark for studies investigating conditions like epilepsy, with direct implications for neuropharmaceutical development [9] [16].
Table 2: Key Research Reagent Solutions for Stereotaxic Surgery
| Item/Category | Specific Example | Function in the Protocol |
|---|---|---|
| Anesthetics & Analgesics | Isoflurane, Ketamine/Xylazine, Buprenorphine | Induction and maintenance of anesthesia; post-operative pain management. |
| Chemoconvulsant | Kainic Acid (KA) Monohydrate | Glutamate agonist used to induce seizures and model temporal lobe epilepsy. |
| Injection Equipment | Borosilicate glass capillaries, Nanoject II Auto-Nanoliter injector | Pulled capillaries minimize tissue damage; automated injector ensures precise volume delivery. |
| Stereotaxic Apparatus | Kopf or Stoelting digital system | Provides a stable, precise platform for targeting specific brain coordinates. |
| Validation Methods | Post-mortem histology (H&E, LFB), Post-mortem MRI (e.g., 11.7T DTI) | Gold-standard techniques for verifying probe placement and assessing structural outcomes. |
Workflow Steps:
- Craniotomy: Anesthetize the subject (e.g., C57Bl/6 mouse) and secure it in the stereotaxic apparatus. Administer local anesthetic (e.g., Lidocaine) to the scalp. Make a midline incision, retract the skin, and clean the skull. Using a hand-held drill, perform a craniotomy at the predetermined coordinates relative to Bregma for the target region (e.g., hippocampus: AP -2.0 mm, ML -1.5 mm, DV -1.8 mm).
- Stereotaxic Administration: Load a pulled glass capillary connected to the nanojector with the desired solution (e.g., KA dissolved in sterile saline). Lower the capillary to the target depth at a controlled speed. Infuse the solution slowly (e.g., 2.2 mM KA for low-level epileptiform activity or 20 mM for Status Epilepticus). Allow the capillary to remain in place for several minutes post-infusion before slow retraction to prevent backflow.
- Placement of Recording Electrodes (Optional): For simultaneous electrophysiological recording, implant electrodes into the hippocampus and/or subdural space. Secure the electrode assembly to the skull using dental cement.
- Post-operative Care: Suturing the skin and providing post-operative care, including analgesia and monitoring, until the subject fully recovers.
This protocol's advantages include dose-dependent induction of pathology, lower inter-individual variability, and lower mortality rates compared to systemic administration models, making it highly reproducible across independent research centers [9] [16].
Protocol for Post-Mortem Histological Validation
Post-mortem histology remains the gold standard for definitively verifying probe placement and assessing the resulting structural and cellular changes.
Workflow Steps:
- Perfusion and Tissue Fixation: At the experimental endpoint, deeply anesthetize the subject and perform transcardial perfusion with phosphate-buffered saline (PBS) followed by 4% paraformaldehyde (PFA). Extract the brain and post-fix it in 4% PFA, then cryoprotect in a sucrose solution.
- Sectioning: Cut coronal brain sections (e.g., 30-40 µm thickness) containing the target region using a cryostat or vibratome.
- Staining:
- Nissl Staining (e.g., Cresyl Violet): To visualize neuronal cell bodies and assess gross morphology and probe track location.
- Immunohistochemistry (IHC): Use antibodies against specific proteins to evaluate pathological hallmarks. For example, Glial Fibrillary Acidic Protein (GFAP) to assess astrogliosis and Neuronal Nuclear Protein (NeuN) to evaluate neuronal loss.
- Luxol Fast Blue (LFB): To evaluate myelin integrity and white matter pathology.
- Imaging and Analysis: Image stained sections using light or fluorescence microscopy. Correlate the lesion site or probe track with the intended stereotaxic coordinates. Quantify changes, such as the extent of granule cell dispersion in the dentate gyrus or the degree of gliosis, which are dose-dependent outcomes of KA administration [9] [16].
- Correlation with Advanced Post-Mortem Imaging: For a multi-parametric validation, correlate histological findings with post-mortem MRI. A study using 11.7 Tesla Diffusion Tensor Imaging (DTI) on glioblastoma-affected brains found significant microstructural alterations in tumor-infiltrated regions, validated by LFB staining and Polarized Light Imaging (PLI). This demonstrates the power of correlating advanced imaging metrics with traditional histology to understand underlying architectural changes [17].
Diagram 1: Impact of placement accuracy on the research pipeline.
Impact of Misplacement on Drug Development Pipelines
The failure rate of clinical drug development is strikingly high, with approximately 90% of drug candidates failing during clinical trials after entering Phase I. The primary reasons for failure are a lack of clinical efficacy (40-50%) and unmanageable toxicity (30%) [18]. While not the sole factor, unreliable preclinical data stemming from flawed experimental models, including inaccurate stereotaxic targeting, is a significant contributor to this attrition.
Diagram 2: Consequences of misplacement on data integrity.
- Misleading Efficacy Data: Administering a therapeutic agent to an off-target brain region can lead to false negative results (dismissing an effective compound) or false positive results (attributing an effect to the wrong target). This directly contributes to the 40-50% failure rate due to lack of efficacy [18].
- Inaccurate Toxicity Profiling: In neuroscience drug development, it is crucial to distinguish between on-target and off-target toxicity. Misplacement can cause a compound to affect unintended brain structures, leading to spurious toxicity signals that halt the development of a potentially safe and effective drug. Conversely, it may fail to reveal true on-target toxicity, allowing a flawed candidate to advance [18].
- Compromised Reproducibility: A lack of standardized, precise protocols is a known contributor to the reproducibility crisis in preclinical science. Inconsistent probe placement across studies or laboratories generates conflicting data, undermining the foundational evidence required to make high-stakes decisions about advancing a drug candidate [9].
The consequences of stereotaxic probe misplacement permeate the entire drug development pipeline, from invalidating basic research hypotheses to contributing directly to costly late-stage clinical failures. The quantitative data and protocols presented herein provide a framework for mitigating these risks.
To enhance the reliability and translational value of preclinical neuroscientific research, the following best practices are recommended:
- Technique Selection: Invest in and validate modern stereotaxic systems (e.g., robotic guidance) that demonstrate superior accuracy in peer-reviewed studies.
- Rigorous Validation: Mandate post-mortem histological verification of probe placement as a gold standard in all studies involving stereotaxic interventions.
- Protocol Standardization: Adopt and meticulously document detailed, standardized surgical protocols to minimize inter-user and inter-laboratory variability.
- Comprehensive Reporting: Clearly report accuracy metrics, validation methods, and any observed discrepancies in publications to ensure full transparency and enable proper data interpretation.
By prioritizing precision and validation in stereotaxic procedures, the research community can generate more reliable, reproducible, and impactful data, thereby strengthening the foundation of the drug development pipeline and increasing its chances of success.
Validating the precise location of stereotaxic probes is a critical foundation for the integrity of post-mortem brain research. This process ensures that neuroanatomical data, whether collected for deep brain stimulation (DBS) targeting or basic connectome mapping, can be accurately correlated with specific brain structures and subsequently compared across studies. The fundamental challenge in this domain lies in reconciling high-resolution histological data with three-dimensional anatomical context, particularly given the complex organizational packing of brainstem structures and the inherent tissue deformations introduced by fixation and processing [5] [19]. Without explicit approaches to account for these sources of heterogeneity, drawing inferences from interindividual comparisons becomes significantly challenging [5].
This guide objectively compares the performance of current validation methodologies, from classical histological techniques to advanced imaging-based approaches. We provide experimental data and detailed protocols to enable researchers to select the optimal workflow for their specific research context, whether focusing on microelectrode verification in rodent models or human brainstem mapping for neurodegenerative disease studies. The consistent theme across all methods is the necessity of using internal anatomical landmarks—such as the anterior commissure (AC) and posterior commissure (PC)—to create a common coordinate framework that transcends individual neuroanatomical variation [20].
Core Validation Workflow
The validation of stereotaxic probe placement follows a logical progression from tissue preparation through to computational integration, with multiple verification points ensuring anatomical accuracy. The workflow diagram below outlines this comprehensive process:
Workflow Description and Key Decision Points
The workflow illustrates the essential pathway for validating stereotaxic probe placement, beginning with proper tissue fixation and advancing through coordinated histological and imaging procedures. The critical stereotaxic processing phase (green nodes) establishes the anatomical coordinate system that enables subsequent validation, while the multi-modal imaging phase (blue nodes) provides the computational framework for precise anatomical localization.
A pivotal decision point in this workflow occurs at the stereotaxic alignment stage, where researchers must choose between internal commissural landmarks (AC-PC line) or external skull-based fiduciaries for establishing reference planes. Current evidence strongly favors the AC-PC approach as implemented in Talairach space, as this method provides more consistent correlation with deep brain structures and minimizes individual neuroanatomical variation [20]. The convergence of histological and radiological data in the 3D reconstruction phase represents another critical validation point, where registration accuracy metrics determine the reliability of the final anatomical verification.
Comparative Analysis of Validation Methodologies
Researchers have developed multiple technical approaches to address the challenge of stereotaxic validation, each with distinct advantages and limitations. The following table summarizes the performance characteristics of predominant methodologies:
Table 1: Comparison of Stereotaxic Validation Methodologies
| Methodology | Spatial Resolution | Key Advantages | Technical Limitations | Validation Accuracy |
|---|---|---|---|---|
| Classical Histology with Stereotaxic Cutting [20] | ~1μm (microscopy) | Gold standard for cytoarchitecture; Direct visualization | Tissue deformation (~20% shrinkage); 2D section alignment challenges | High for cellular localization when deformation corrected |
| Post-mortem Diffusion MRI [21] | 50-200μm isotropic | 3D preservation of anatomy; White matter connectivity mapping | Limited cellular resolution; Long acquisition times (208 hours) | High for tractography; Moderate for nuclear boundaries |
| CT-Based Electrode Localization [22] | 50-100μm | Fast acquisition; Metallic implant compatible; In vivo application possible | Poor soft tissue contrast; Limited to electrode positioning only | 90% correspondence to histology for structure assignment |
| High-Thickness Histology with MRI Registration [19] | ~1μm (microscopy) | Reduced processing artifacts; Enhanced segmentation capability | Specialized sectioning required (400-560μm); Computational intensive registration | Good overlap (Dice coefficient 0.7-0.9) after registration |
Performance Metrics and Experimental Outcomes
Each methodology demonstrates distinct performance characteristics when applied to specific research contexts. The CT-based verification approach offers particular advantages for chronic microelectrode array studies, where researchers achieved reliable segmentation of individual electrode tips within arrays with 250μm inter-electrode spacing, demonstrating approximately 90% correspondence with histological verification in assigning electrode groups to correct anatomical structures [22].
For human brainstem studies, post-mortem diffusion MRI provides exceptional white matter connectivity data, with probabilistic tractography successfully reconstructing the dentatorubrothalamic tract (DRT) for deep brain stimulation targeting. This approach enabled correlation between electrode proximity to the DRT and improvement in essential tremor symptoms in clinical applications [21].
The high-thickness histological technique (400-560μm sections) combined with MRI registration represents a balanced approach, minimizing processing artifacts while maintaining cytoarchitectural detail. This method has demonstrated Dice similarity coefficients of 0.7-0.9 and small shape differences between registered volumes, indicating good overlap between histological and MRI datasets [19].
Detailed Experimental Protocols
Protocol 1: Stereotaxic Cutting of Post-Mortem Human Brains
The stereotaxic cutting protocol establishes the foundational anatomical framework for subsequent validation [20]:
- Instrument Preparation: Construct a stereotaxic apparatus with transparent methacrylate plate (30×25×1cm), mirror (25×24.5cm), four metal legs (2.5×2.5×40cm), and 52 metal columns (14cm height, 0.8cm diameter) arranged with 0.2cm slots between columns.
- Brain Alignment: Position the cerebral hemisphere on the transparent plate with medial surface facing downward. Using the mirror to visualize the medial surface, align the anterior commissure (AC) and posterior commissure (PC) with the carved lines on the methacrylate plate.
- Slab Formation: Insert knives between the metal columns to obtain coronal slabs at 1cm intervals in the stereotaxic space of Talairach and Tournoux. Maintain the brain in a chilled state (+4°C) during cutting to preserve tissue integrity.
- Coordinate Calculation: For histological sections obtained from stereotaxic slabs, calculate stereotaxic coordinates using the proportional grid system of Talairach, which accounts for individual brain size variations relative to standard AC-PC distance.
Protocol 2: CT-Based Electrode Localization in Rodent Brain
This protocol enables programmatic verification of microelectrode placement without histological processing [22]:
- CT Image Acquisition: Scan specimens using high-resolution micro-CT scanner with optimized scanning angles to minimize shadowing effects from metallic electrodes. Use voltage of 50kVp, current of 0.2mA, and exposure time of 300ms for optimal contrast.
- Electrode Segmentation: Implement semi-automated algorithm to identify individual electrode trajectories in acquired CT images. The algorithm thresholds metallic implants based on radiodensity, then applies morphological operations to separate closely spaced electrodes.
- Atlas Registration: Align CT data to anatomical landmarks (bregma, lambda) and map onto standard reference atlas (e.g., Paxinos & Watson). Use affine transformation followed by non-linear deformation to account for individual neuroanatomical variation.
- Tip Localization: Determine individual electrode tip locations within arrays with 250μm inter-electrode spacing by combining trajectory data with known electrode dimensions from manufacturer specifications.
Protocol 3: Post-Mortem Diffusion MRI for Connectivity Validation
This protocol emphasizes high-resolution tractography for white matter validation [21]:
- Specimen Preparation: Following formalin fixation, rehydrate brainstem specimens in 0.1M phosphate buffered saline with 1% (5mM) gadoteridol contrast agent for one week prior to imaging to reduce T1 relaxation effects.
- Image Acquisition: Perform diffusion MRI at 7 Tesla using spin-echo sequence with following parameters: TR=100ms, TE=33.6ms, 200μm isotropic voxels, b=4000 s/mm² with 120 unique diffusion directions. Total acquisition time approximately 208 hours.
- Tractography Reconstruction: Manually segment regions of interest (e.g., superior cerebellar peduncles, red nuclei, VIM thalamus) from anatomic data. Reconstruct probabilistic tractography using FSL's BedpostX with probabilistic tracking parameters (5000 streamlines, curvature threshold=0.2).
- Clinical Correlation: Register post-mortem tractography to in vivo clinical images from DBS patients and calculate distance between electrode contacts and reconstructed tracts. Correlate proximity measures with clinical outcomes (e.g., tremor improvement).
Research Reagent Solutions and Essential Materials
Successful implementation of stereotaxic validation workflows requires specific reagents and equipment. The following table details essential materials and their applications:
Table 2: Essential Research Reagents and Materials for Stereotaxic Validation
| Category | Specific Reagents/Materials | Application Purpose | Technical Notes |
|---|---|---|---|
| Fixation Solutions | 10% Neutral Buffered Formalin; 4% Paraformaldehyde | Tissue preservation and structural integrity | Formalin fixation: 2 weeks for brainstem specimens [21] |
| Staining Reagents | Cresyl Violet (Nissl); Gallocyanin (Nissl) | Cytoarchitectural visualization | Modified gallocyanin for high-thickness sections [19] |
| Histological Processing | Celloidin (8% solution); Sucrose (25% in PBS) | Tissue embedding and cryoprotection | Celloidin embedding reduces sectioning artifacts [19] |
| Contrast Agents | Gadoteridol (ProHance); Liquid Fluorocarbon | MR signal enhancement | 1% (5mM) gadoteridol in PBS for post-mortem MRI [21] |
| Stereotaxic Equipment | Talairach-compatible frame; Methacrylate plates | Anatomical alignment | Custom apparatus with 1cm spaced columns [20] |
| Image Registration | ANTs; FSL | Multi-modal data integration | 12-parameter affine transformation for eddy current correction [21] |
Integration Strategies and Analytical Approaches
Data Integration Framework
The convergence of multi-modal data streams requires sophisticated integration strategies to achieve comprehensive validation. The following diagram illustrates the computational workflow for integrating histological and imaging data:
Validation Metrics and Quality Control
Rigorous quality control measures are essential throughout the validation workflow. For registration procedures, calculate the Dice similarity coefficient to quantify overlap between registered volumes and normalized weighted spectral distance to assess shape differences between structures [19]. Implement internal consistency checks by comparing multiple registration pathways (e.g., both manual and automated methods) and flag datasets with discrepancy scores exceeding laboratory-defined thresholds.
When validating stereotaxic targeting, establish accuracy metrics based on known anatomical distances. For example, the distance between the anterior and posterior commissures should measure approximately 23-27mm in human brains, providing a internal scale reference [20]. In rodent studies, compare electrode locations against multiple anatomical landmarks to identify systematic registration errors.
The validation of stereotaxic probe placement represents a critical methodological foundation for neuroanatomical research integrity. Through comparative analysis of current methodologies, several key recommendations emerge:
For studies requiring cellular resolution and precise cytoarchitectural boundaries, the classical histology approach with stereotaxic cutting provides the highest spatial fidelity, particularly when supplemented with deformation correction algorithms. When white matter connectivity represents the primary research focus, post-mortem diffusion MRI offers unparalleled 3D tract reconstruction capabilities, though with longer acquisition requirements. For high-throughput electrode verification in experimental animals, CT-based methods provide an optimal balance of speed and accuracy.
The most robust validation frameworks implement convergent approaches, where multiple methodologies provide complementary verification of anatomical localization. This multi-modal strategy effectively mitigates the limitations inherent in any single technique, ensuring that stereotaxic probe placement can be validated with the precision required for contemporary neuroscience research and therapeutic development.
A Step-by-Step Protocol for Histological Verification of Probe Placement
Validating the precise placement of stereotaxic probes in post-mortem brain tissue is a critical requirement in neuroscience research and drug development. The accuracy of this validation is almost entirely dependent on the quality of the underlying histology, which in turn is governed by the methods of tissue preparation and fixation. Optimal preservation safeguards cellular architecture and enables precise anatomical localization, allowing researchers to correlate physiological data from probes, such as neuronal recordings or stimulation sites, with their exact histological location. This guide objectively compares various fixation and processing techniques, providing experimental data to help researchers select the optimal protocols for their specific validation needs.
Core Principles of Tissue Fixation for Validation
Tissue fixation is the foundational step that stabilizes biological specimens, preventing autolysis and putrefaction to preserve cellular and subcellular morphology. For stereotaxic probe validation, the goal is to maintain the tissue's structural integrity in a state that closely resembles its living condition, ensuring that the observed probe track and surrounding tissue damage are authentic and not artifacts of processing.
The journey from fresh tissue to a histological section ready for analysis is a multi-stage process where each step introduces potential variables. The following workflow outlines the standard protocol, with key decision points that significantly impact the quality of the final histological analysis for probe validation.
Figure 1: Standard Tissue Processing Workflow for Histology.
Several factors occurring before fixation can significantly compromise molecular quality. Prefixation time—the delay between tissue resection and immersion in fixative—is a major variable. During this period, anoxic changes and enzymatic degradation (autolysis) begin, which can blur the precise boundaries of a probe-induced lesion [23]. The nature of the anesthetic used prior to tissue collection can also influence the molecular profile of the tissue, for instance, by affecting the phosphorylation state of cellular signaling pathways [23].
Comparative Analysis of Fixation Methods
The choice of fixative involves a trade-off between optimal morphological preservation and the compatibility of the tissue with downstream molecular analyses. The following table provides a structured comparison of the most common fixatives used in research settings.
Table 1: Comparison of Common Tissue Fixatives
| Fixative Type | Mechanism of Action | Impact on Morphology | Impact on Nucleic Acids/Proteins | Suitability for Probe Validation |
|---|---|---|---|---|
| 10% Neutral Buffered Formalin [24] [23] | Cross-links proteins via methylene bridges. | Excellent long-term preservation of tissue architecture. | May mask epitopes for antibody binding; can fragment nucleic acids over time. | Excellent. The gold standard for morphological assessment of probe tracks. |
| Ethanol-based Fixatives [23] | Precipitates proteins and carbohydrates. | Can cause tissue hardening and shrinkage. | Better preservation of RNA and protein antigenicity compared to formalin. | Good. Useful if subsequent RNA/DNA analysis from the probe site is needed. |
| Snap-Freezing [23] | Rapidly halts metabolic and degradative processes. | Ice crystal formation can distort cellular structure. | Optimal for preservation of labile molecules like RNA and proteins. | Moderate. Ideal for molecular studies but morphology may be compromised for precise track analysis. |
Formalin fixation is the most widely used method for histological validation. Its widespread use is attributed to its deep penetration and excellent preservation of structural details, which are paramount for identifying the subtle tissue disruption caused by a stereotaxic probe [24] [23]. However, the cross-linking nature of formalin can negatively impact the quality of DNA, RNA, and proteins, making the tissue less ideal for subsequent genomic or proteomic analysis of the probe site [23].
Tissue Processing: From Fixed Tissue to Histological Section
After fixation, tissue must be processed into a solid block to enable thin sectioning. This involves dehydration, clearing, and wax infiltration. Inconsistent processing can lead to artifacts that interfere with the clear visualization of probe placement.
Table 2: Standard Tissue Processing Schedule for Paraffin Embedding [24]
| Processing Step | Reagent | Duration (for a 4mm thick specimen) | Function |
|---|---|---|---|
| Dehydration | 70% Ethanol | 15 minutes | Removes water from the tissue. |
| Dehydration | 90% Ethanol | 15 minutes | Further removes water. |
| Dehydration | 100% Ethanol | 15 minutes (x2), 30 min, 45 min | Replaces all residual water with alcohol. |
| Clearing | Xylene | 20 minutes (x2), 45 minutes | Ethanol is removed; tissue is prepared for wax. |
| Infiltration | Paraffin Wax | 30 minutes (x2), 45 minutes | Wax replaces xylene, supporting tissue for sectioning. |
Dehydration is typically achieved through a graded series of ethanol, progressively removing water to avoid distortion. Clearing uses an intermediary solvent (e.g., xylene) that is miscible with both ethanol and paraffin wax. Finally, in wax infiltration, the tissue is immersed in molten paraffin wax, which replaces the clearing agent and provides the medium for embedding [24]. It is estimated that tissues can shrink by 20% or more by the completion of this process, a critical factor to consider when making measurements to validate probe depth [24].
The Scientist's Toolkit: Essential Reagents for Histology
Table 3: Research Reagent Solutions for Tissue Processing
| Item | Function / Explanation |
|---|---|
| 10% Neutral Buffered Formalin [24] | The most common fixative; provides excellent morphological preservation by cross-linking proteins. |
| Ethanol Series (70%, 90%, 100%) [24] | A graded series of alcohols used for dehydration, removing water from the tissue to prepare it for wax infiltration. |
| Xylene or Xylene Substitutes [24] | A clearing agent that is miscible with both ethanol and paraffin wax, facilitating the transition between dehydration and infiltration. |
| Histological Paraffin Wax [24] | A supporting medium that infiltrates tissue; when solidified, it provides the consistency needed for cutting thin sections on a microtome. |
| Stereotaxic Apparatus [20] | A crafted instrument or commercial system used to cut post-mortem brain slabs in a defined stereotaxic plane (e.g., Talairach and Tournoux), enabling accurate coordinate-based analysis. |
Stereotaxic Alignment and Sectioning for Validation
The ultimate goal of validating stereotaxic probe placement requires moving beyond general histology to precise anatomical coordination. This is achieved by aligning the post-mortem brain within a stereotaxic frame before sectioning. The Talairach and Tournoux stereotaxic space, which uses the anterior commissure (AC) and posterior commissure (PC) as key landmarks, is a widely used system for this purpose [20]. Aligning the brain along the AC-PC line and sectioning in coronal planes perpendicular to this line ensures that histological sections correspond to coordinates used during the in vivo probe insertion [20]. This allows researchers to confirm not only that the probe reached the target structure but also to assess its trajectory and the extent of glial scarring or immune response around the implantation site, a common challenge noted with both rigid and flexible neural probes [25].
The relationship between the stereotaxic cutting instrument and the aligned brain is crucial for obtaining anatomically accurate sections, as illustrated below.
Figure 2: Stereotaxic Cutting for Coordinate-Specific Sections.
The validation of stereotaxic probe placement via post-mortem histology is a procedure where success is determined at the earliest stages of tissue preparation. There is no single "best" method; rather, the choice of fixation and processing protocol must be tailored to the specific research question. If impeccable cellular morphology for precise track localization is the sole requirement, 10% Neutral Buffered Formalin fixation followed by standard paraffin processing remains the gold standard. However, if the study requires subsequent molecular analysis of the tissue surrounding the probe, a hybrid approach involving snap-freezing or ethanol-based fixation may be necessary, with the understanding that morphological detail might be slightly compromised. A thorough understanding of these protocols and their impacts ensures that the critical data regarding probe placement is accurate, reliable, and meaningful.
Cresyl violet staining, also known as Nissl staining, serves as a fundamental histological technique in neuroscience research, particularly for validating stereotaxic probe placements in post-mortem studies. This technique specifically targets the Nissl substance, which consists of the rough endoplasmic reticulum and ribosomes in neuronal cell bodies, providing crucial visualization of cytoarchitectural details within brain tissue [26]. The stain's strong affinity for ribosomal RNA (RNA) due to its basic chemical nature enables clear labeling of neuronal somata and nuclei, making it indispensable for identifying structural features and determining precise anatomical locations in experimental brain research [26].
In the context of stereotaxic research, cresyl violet provides researchers with a reliable method for histological verification of probe trajectories and targeted brain regions. This verification is critical for correlating functional data obtained through electrophysiological recordings with precise anatomical locations, thereby ensuring the validity and reproducibility of experimental findings [27]. The technique's simplicity, cost-effectiveness, and compatibility with various quantitative analyses further contribute to its enduring value in neuroscience investigations, particularly in studies requiring accurate spatial localization within complex brain structures [26].
Biochemical Principles and Staining Mechanism
Cresyl violet staining operates on well-established biochemical principles that account for its specificity and utility in neural tissue visualization. As a basic dye, cresyl violet possesses a strong affinity for acidic components within cells, particularly the RNA abundant in the rough endoplasmic reticulum and ribosomes of neuronal perikarya [26]. This fundamental property enables the stain to selectively highlight neuronal cell bodies and dendrites while providing minimal staining of axonal tracts, which lack the Nissl substance essential for binding [26].
The staining mechanism involves electrostatic interactions between the positively charged cresyl violet molecules and negatively charged phosphate groups in RNA backbone [26]. This binding results in a characteristic purple-blue coloration of neuronal cytoplasm, with the intensity of staining directly correlating with the density of RNA-containing structures. The nuclear chromatin in neuronal nuclei also stains a similar color due to the presence of DNA, though the distinctive pattern of Nissl substance distribution throughout the cytoplasm provides the most diagnostically useful information for cellular identification and architectural analysis [28].
A critical aspect of the cresyl violet staining process is the differentiation step, which enhances specificity by reducing nonspecific background staining. This process typically involves using solutions such as 50% ethanol with 0.5% acetic acid, which selectively removes excess dye from connective tissue and non-neuronal elements while retaining the specific staining of Nissl substance [26]. Proper execution of this differentiation is crucial, as over-differentiation can cause irreversible loss of staining intensity, potentially compromising the histological analysis [26].
Detailed Experimental Protocols
Standard Staining Protocol for Paraffin-Embedded Sections
The following protocol is adapted for paraffin-embedded brain tissue sections and includes critical steps for optimal results in stereotaxic track visualization [29] [28]:
Deparaffinization: Begin with incubating sections in xylene (2-3 changes, 3-10 minutes each) to completely remove embedding paraffin. Proper paraffin removal is essential for uniform staining [29] [28].
Rehydration: Transfer sections through a graded ethanol series: 100% ethanol (2 changes, 3-5 minutes each), 95% ethanol (3 minutes), 85% ethanol (3 minutes), 70% ethanol (3 minutes), and finally 50% ethanol (3 minutes). Complete rehydration prepares tissues for aqueous staining solutions [28].
Rinsing: Rinse sections in tap water (5 minutes) followed by distilled water (5 minutes) to remove residual alcohol [28].
Staining: Immerse sections in filtered 0.1-0.5% cresyl violet acetate solution for 4-30 minutes at room temperature or 35°C. Staining time may require optimization based on tissue thickness and fixative type [29] [28].
Rinsing: Quickly rinse stained sections in distilled water (approximately 1 minute) to remove excess stain [28].
Differentiation: Briefly differentiate in 95% ethanol (approximately 15 seconds) to remove non-specific background staining. For more precise control, use a differentiation solution of 95% ethanol with a few drops of glacial acetic acid or cajeput oil, monitoring progress microscopically [30] [28].
Dehydration: Complete dehydration through two changes of absolute ethanol or isopropanol (2-5 minutes each). Isopropanol may better preserve staining intensity [28].
Clearing: Clear sections in xylene (2 changes, 3-10 minutes each) to render tissues transparent for microscopy [29] [28].
Mounting: Coverslip using a resinous mounting medium such as DePeX, DPX, or synthetic alternatives. Acid-free mounting media help preserve staining long-term [28].
Protocol Variations for Different Research Applications
Different research applications and tissue preparation methods necessitate protocol modifications. For frozen sections or lightly fixed tissues, staining times may be reduced to 4-10 minutes to prevent over-staining [31]. When combining cresyl violet with other techniques, such as Luxol fast blue for simultaneous myelin visualization, the staining sequence and timing require adjustment to optimize contrast between different structural elements [26].
For laser capture microdissection applications followed by RNA analysis, a specialized protocol using the Ambion LCM Staining Kit demonstrates that cresyl violet staining does not compromise RNA quality or subsequent molecular analyses, unlike some other histological stains [32]. In quantitative stereological studies, consistent staining intensity across all sections is paramount, requiring meticulous control of staining and differentiation times, as well as solution freshness [26].
Figure 1: Cresyl Violet Staining Workflow. This diagram illustrates the sequential steps in standard cresyl violet staining for paraffin-embedded tissues, highlighting critical stages that affect final staining quality.
Comparative Performance Analysis
Advantages and Limitations Relative to Alternative Methods
Cresyl violet staining offers several distinct advantages for structural visualization in neuroscience research, particularly for stereotaxic validation. Its cost-effectiveness and technical simplicity make it accessible for laboratories with varying resource levels, while its reliability and well-characterized protocol ensure consistent results across experiments [26]. The stain's compatibility with quantitative stereological methods enables unbiased estimation of neuronal numbers and densities, providing valuable data for studies of neurodegeneration, development, and comparative neuroanatomy [26]. Furthermore, cresyl violet's minimal impact on RNA integrity makes it suitable for combined histological and molecular studies, especially in laser capture microdissection workflows where preservation of nucleic acids is essential [32].
Despite these advantages, researchers must consider several limitations when selecting cresyl violet for their investigations. The stain's inability to distinguish between neuronal and glial cell populations based solely on Nissl substance staining can complicate interpretation in mixed cell regions [26]. This nonspecificity necessitates complementary techniques for definitive cell type identification in studies requiring cellular resolution. Additionally, the technique is unsuitable for visualizing peripheral nerves and is applicable only to tissues containing neuronal cell bodies, such as autonomic or spinal ganglia [26]. Technical challenges include vulnerability to over-differentiation, which irreversibly diminishes staining intensity, and potential fading of stained sections when stored in aqueous media [26].
Quantitative Comparison with Alternative Staining Methods
Table 1: Performance Comparison of Cresyl Violet with Alternative Histological Stains for Neuronal Visualization
| Staining Method | Specificity | RNA Compatibility | Cost per Slide | Protocol Complexity | Compatibility with Stereology | Best Applications |
|---|---|---|---|---|---|---|
| Cresyl Violet | Nissl substance (neuronal somata) | High [32] | Low | Low | High [26] | Cytoarchitecture, neuronal density, stereotaxic validation |
| NeuN Immunohistochemistry | Neuronal nuclei | Low | High | Medium | High [26] | Specific neuronal identification, cell counting |
| Hematoxylin & Eosin | Nuclear & cytoplasmic elements | Moderate | Low | Low | Moderate | General histology, tissue screening |
| Luxol Fast Blue + Cresyl Violet | Myelin + neurons | N/A | Low | Medium | High [26] | Simultaneous myelin and neuronal visualization |
When compared to immunohistochemical methods like NeuN for neuronal identification, cresyl violet demonstrates comparable effectiveness for stereological estimation of total neuron numbers, though NeuN may offer superior detection of small neuronal populations [26]. The combination of cresyl violet with Luxol fast blue creates a powerful tool for simultaneous visualization of both neuronal and myelin architecture, particularly valuable in studies of demyelinating diseases or complex circuit tracing [26].
Table 2: Experimental Data Comparison in Specific Research Applications
| Research Application | Stain Used | Key Metric | Performance Outcome | Reference |
|---|---|---|---|---|
| LCM-RNA Analysis | Cresyl Violet | RNA quality post-staining | No detrimental effect on RNA analysis [32] | ThermoFisher AMBION Study [32] |
| LCM-RNA Analysis | Mayer's Hematoxylin | RNA quality post-staining | Detrimental effect on RNA analysis [32] | ThermoFisher AMBION Study [32] |
| Neuron Counting | Cresyl Violet | Correlation with NeuN | High correlation for total neuron numbers [26] | Sciencedirect Overview [26] |
| Stereotaxic Validation | Cresyl Violet | Histological verification | Successful track localization in multi-lab study [27] | eLife Study [27] |
Applications in Stereotaxic Probe Validation
Cresyl violet staining plays an indispensable role in the histological verification of stereotaxic probe placements, a critical quality control step in systems neuroscience research. This application was prominently featured in a comprehensive multi-laboratory study investigating the reproducibility of electrophysiological measurements, where researchers utilized cresyl violet staining to visualize probe trajectories through various brain regions including secondary visual areas, hippocampus, and thalamus [27]. The staining enabled precise anatomical localization of recording sites, facilitating correlations between electrophysiological data and specific brain structures while providing crucial validation of targeting accuracy across multiple experimental sites [27].
In practice, the application of cresyl violet for stereotaxic validation involves processing brain sections containing probe tracks through standard staining protocols, resulting in clear visualization of both the structural damage caused by probe insertion and the surrounding cytoarchitecture. This allows researchers to confirm that recording electrodes were positioned in intended target regions and to reconstruct precise three-dimensional localization of recording sites based on known stereotaxic coordinates [27]. The high contrast between the probe track and surrounding properly organized neurons enables accurate determination of anatomical positions, which is particularly important when comparing results across different laboratories or experimental conditions.
The utility of cresyl violet in this context extends beyond simple track visualization to include assessment of tissue integrity surrounding recording sites. Researchers can evaluate potential neuroinflammatory responses, neuronal density alterations, or other pathological changes associated with chronic electrode implantation, providing valuable data for optimizing recording techniques and interpreting electrophysiological findings within their structural context [27]. This comprehensive structural information is essential for ensuring the validity and reproducibility of neuroscience findings, particularly in large-scale collaborative projects where standardized verification methods are crucial.
Figure 2: Stereotaxic Validation Workflow Using Cresyl Violet Staining. This diagram outlines the complete process from in vivo probe implantation to histological validation, highlighting the critical role of cresyl violet staining in confirming anatomical localization.
Research Reagent Solutions Toolkit
Table 3: Essential Reagents for Cresyl Violet Staining Protocols
| Reagent | Specifications | Function in Protocol | Technical Notes |
|---|---|---|---|
| Cresyl Violet Acetate | 0.1-0.5% in acetate buffer [29] [28] | Primary staining solution | Use acetate form (CAS: 10510-54-0) for optimal results [28] |
| Ethanol Series | 50%, 70%, 85%, 95%, 100% | Tissue dehydration & rehydration | Gradual concentration changes prevent tissue damage |
| Xylene | Histological grade | Clearing agent & paraffin removal | Proper fume handling essential; alternatives available |
| Acetic Acid | Glacial, 0.5% in 95% ethanol [26] [30] | Differentiation solution | Critical for reducing background staining |
| Mounting Medium | Resinous (DePeX, DPX, Euparal) [28] | Permanent section preservation | Acid-free media prevent fading [28] |
| Differentiation Solutions | Cajeput oil in ethanol or acetic ethanol [30] | Selective destaining | Enables precise control of staining intensity |
Cresyl violet staining remains an indispensable technique in the neuroscience research arsenal, particularly for applications requiring precise structural visualization and stereotaxic validation. Its well-characterized biochemical properties, cost-effectiveness, and compatibility with quantitative analyses ensure its continued relevance in both basic and translational research contexts. While alternative methods such as immunohistochemistry offer greater cellular specificity, cresyl violet's simplicity, reliability, and minimal impact on biomolecular integrity provide distinct advantages for many experimental paradigms.
The ongoing development of automated image analysis platforms and optimized differentiation protocols continues to enhance the utility of cresyl violet staining in contemporary neuroscience research. When implemented with appropriate quality control measures and histological verification standards, this classic technique provides robust structural data essential for validating stereotaxic probe placements and ensuring the anatomical precision required for reproducible neuroscientific discovery. As demonstrated in multi-laboratory reproducibility studies, the integration of cresyl violet-based histological verification with standardized experimental protocols significantly strengthens the reliability of electrophysiological and behavioral research findings across the neuroscience community.
In post-mortem histology research, particularly for validating stereotaxic probe placements, the processes of sectioning and mounting are critical junctures where data fidelity is either preserved or compromised. The quality of these technical steps directly dictates the accuracy of subsequent 3D reconstructions and the validity of pathological correlations. This guide objectively compares the performance of different sectioning technologies and mounting approaches, providing researchers with the data needed to select the optimal method for ensuring that a histological section faithfully represents the original in-situ anatomy.
Sectioning Technology Performance Comparison
The choice of microtome significantly influences section quality, throughput, and applicability to specific experimental needs, such as handling fresh-frozen versus paraffin-embedded tissues. The table below compares the core technologies.
Table 1: Performance Comparison of Microtome Types for Histological Sectioning
| Microtome Type | Optimal Section Thickness | Tissue Type & Hardness | Key Advantages | Primary Limitations | Best-Suited Applications |
|---|---|---|---|---|---|
| Rotary Microtome [33] | 1 - 60 μm [33] | Paraffin-embedded tissues; can handle specimens of varying uniformity [33] | Yields highly consistent paraffin sections; ideal for standard histology [33] | Requires extensive tissue processing (dehydration, clearing, embedding) [33] | High-volume, standardized sectioning for routine pathology [33] |
| Cryostat Microtome [33] | 4 - 10 μm [33] | Fresh-frozen, unfixed tissues; softer tissues [33] | Preserves native biochemical state (e.g., for IHC); no embedding required [33] | Tissue more prone to cutting artifacts (folds, tears); requires temperature control [33] | Immunohistochemistry; validation of fresh tissue procedures [33] [12] |
| Sliding Microtome [33] | Thicker sections | Larger, harder specimens [33] | Durable; capable of creating thick sections [33] | Generally slower and less common for high-throughput thin sectioning [33] | Sectioning of large tissue blocks or hard materials [33] |
| Vibrating Blade Microtome [12] | 30 - 50 μm [12] | Soft, fixed tissues (e.g., vibratome for acute brain slices) [12] | Can section tissue without freezing or paraffin embedding, preserving antigenicity | Produces thicker sections; not suitable for high-resolution cellular imaging on thin sections | Preparation of acute live slices for electrophysiology or imaging [12] |
Experimental Protocols for Validation
Protocol 1: Standardized Postmortem Brainstem Sectioning for Inter-Specimen Alignment
This protocol is designed to mitigate inter-specimen structural heterogeneity, a critical factor for accurate cross-study comparisons and validation of stereotaxic targets [5].
- Tissue Preparation: Brainstem specimens are fixed in 4% paraformaldehyde, cryoprotected in sucrose, and embedded. The plane of section is set perpendicular to the floor of the 4th ventricle to ensure anatomical consistency across specimens [5].
- Sectioning Process: Using a cryostat (e.g., Leica CM 1900), collect serial sections at 50 μm thickness. A systematic interval of 750 μm between consecutive sections in a series balances comprehensive sampling with practical feasibility [5].
- Staining & Mounting: Sections are mounted on charged slides and stained with cresyl violet. A critical step is defatting in xylene and chloroform to ensure optimal clarity and adherence for downstream imaging [5].
- Landmark-Based Standardization: The protocol uses readily identifiable internal anatomic landmarks rather than absolute distances to assign rostrocaudal levels. This approach accounts for intrinsic individual differences and has been validated with postmortem MRI [5].
Protocol 2: Ex Vivo MRI-Guided Histology Sampling for 3D Reconstruction
This methodology bridges macro-scale MRI findings with micro-scale histology, essential for confirming the location of stereotaxic probes in a 3D context [34].
- MRI-Guided Sampling: Intact brain hemispheres are scanned with ultra-high resolution postmortem 7T MRI. Patient-specific 3D printed molds built from the MRI data are then used to guide tissue block extraction, providing a permanent spatial reference frame [34].
- Tissue Processing & Sectioning: Formalin-fixed, paraffin-embedded (FFPE) blocks are sectioned at a thickness of 30 μm on a standard microtome. This thickness offers a superior compromise, providing greater cytoarchitectural resolution for detailed analysis while still being compatible with on-slide immunohistochemistry, avoiding costly free-floating methods [34].
- Registration Pipeline: A semi-automated registration pipeline aligns the 2D histology images back into the 3D MRI volume. This corrects for tissue distortions introduced during embedding and sectioning, enabling precise localization of pathological features within the original brain anatomy [34].
Impact of Sectioning Quality on Reconstruction Accuracy
The following diagram illustrates how sectioning and mounting quality directly influences the fidelity of anatomical reconstruction, which is fundamental for validating probe placement.
The Scientist's Toolkit: Essential Research Reagents and Materials
Successful sectioning and reconstruction depend on a foundation of high-quality reagents and materials.
Table 2: Essential Research Reagent Solutions for Sectioning and Mounting
| Reagent/Material | Function | Experimental Consideration |
|---|---|---|
| Paraformaldehyde [12] | Tissue fixative that cross-links proteins to preserve cellular structure. | Standard concentration is 4% in phosphate buffer. Prolonged fixation can mask antigens [33]. |
| Cresyl Violet [5] | A Nissl stain used to visualize neuronal cell bodies and cytoarchitecture. | Used for defining anatomical landmarks in the brainstem [5]. |
| Charged Slides [5] | Microscope slides with a positive surface charge. | Enhances adhesion of tissue sections, preventing detachment during staining [5]. |
| Phosphate-Buffered Saline (PBS) [5] [12] | An isotonic buffer for washing and storing tissues and sections. | Prevents osmotic damage and maintains pH during processing steps. |
| Dental Acrylic / Metabond [12] [35] | A durable cement used in stereotaxic surgery. | Secures cranial implants like optical fibers or electrodes for subsequent histological validation [12] [35]. |
| Paraffin Wax [36] | An embedding medium that provides support for thin sectioning. | High-throughput methods allow multiple samples to be embedded in a single block [36]. |
| Sucrose [5] | A cryoprotectant used for frozen tissues. | Prevents ice crystal formation that can damage ultrastructure during freezing. |
| AAV-hSyn.GRAB.Ado1.0m [12] | Genetically encoded sensor for detecting adenosine release. | An example of a probe whose placement and function require histological validation [12]. |
This guide compares the performance of different microscopy imaging techniques for the analysis of biological sections, with a specific focus on validating stereotaxic probe placements in post-mortem brain tissue.
Comparison of Microscopy Modalities
The table below summarizes the core performance characteristics of the primary microscopy techniques used for digitizing tissue sections.
| Microscopy Technique | Optical Sectioning Capability | Best Suited Sample Thickness | Typical Imaging Speed | Key Strengths | Major Limitations |
|---|---|---|---|---|---|
| Widefield Epifluorescence [37] [38] | No | Thin specimens | Fastest [37] | Ease of use, speed, low cost [37] | Out-of-focus blur in thicker samples [39] [37] |
| Laser Scanning Confocal (CLSM) [39] | Yes | Thick samples (~50μm) [39] | Slow [39] [37] | High-resolution optical sectioning [39] | Slow speed, high photobleaching/ [37] |
| Spinning Disk Confocal (SDCM) [39] [37] | Yes | Thick samples [39] | Fast for confocal [39] [37] | Good speed for live imaging [37] | Potentially lower resolution vs. CLSM [39] |
| Grid Confocal / Structured Illumination [39] | Yes (computed) | Intermediate (~20μm) [39] | Moderate (requires 3 images) [39] | Affordable add-on for widefield [39] | Fails on thick specimens, prone to artifacts [39] |
| Super-Resolution (STED, STORM/PALM) [37] | Varies | Specialized samples | Very Slow [37] | Resolution beyond diffraction limit [37] | High cost, complexity, high phototoxicity [37] |
Experimental Protocols for Imaging
Here, we detail the methodologies for key experiments relevant to histological validation.
Protocol 1: Quantifying RNA and Protein Expression
This protocol is adapted from a study comparing RNAscope and immunohistochemistry (IHC) for quantification in the developing rat hindbrain [38].
- 1. Tissue Preparation: Perfuse and dissect the brain region of interest. Embed the tissue in optimal cutting temperature (OCT) compound and section it on a cryostat (e.g., 14-20 µm thickness). Mount sections on glass slides.
- 2. RNAScope In Situ Hybridization: Follow the standard RNAScope multiplex fluorescent v2 assay protocol. Use designed probes for your target mRNA (e.g., Hoxb1, Hoxb2) and develop the signal with fluorescent dyes (e.g., Cy3, Cy5) [38].
- 3. Immunohistochemistry: After RNAScope, perform IHC co-staining. Block sections and incubate with a primary antibody against your protein of interest (e.g., Phox2b, Islet1), followed by a fluorescently-labeled secondary antibody [38].
- 4. Image Acquisition: Image the same slides using both an epifluorescence microscope and a confocal microscope. Use a consistent magnification and ensure the same exposure settings are applied for both systems for accurate comparison [38].
- 5. Image Quantification: Use open-source software like QuPath for analysis.
Protocol 2: Optical Sectioning of Thick Tissue for 3D Reconstruction
This protocol outlines the use of confocal microscopy to create a 3D model from a series of optical sections, crucial for precisely locating probes in a volume of tissue [39].
- 1. Sample Preparation: Stain a thick tissue section (e.g., 50 µm) with appropriate fluorescent dyes. Ensure the stain penetrates the entire thickness of the section.
- 2. Microscope Setup: Use a laser scanning confocal microscope (CLSM) or a spinning disk confocal microscope (SDCM). Select objectives with high numerical aperture (NA) and appropriate working distance.
- 3. Z-Stack Acquisition:
- Set the top and bottom focal planes of the region of interest to define the volume to be scanned.
- Define the step size (distance between each optical section). Adhere to the Nyquist criterion (sampling interval should be 2.5-3 times smaller than the smallest resolvable feature) to ensure sufficient detail is captured without undersampling [40].
- Acquire the Z-stack series. A CLSM will build the image point-by-point, while an SDCM will image entire planes more rapidly [39].
- 4. Image Processing and Deconvolution: Use software to assemble the Z-stack into a 3D volume. Apply deconvolution algorithms to reassign out-of-focus light and enhance the resolution and contrast of the final 3D image [37].
Diagram Specifications and Workflows
Workflow for Validating Stereotaxic Placement
From Microscope to Digital Image
The Scientist's Toolkit: Research Reagent Solutions
The table below lists essential materials and their functions for the experiments described in this guide.
| Research Reagent / Material | Function / Application |
|---|---|
| RNAScope Probe [38] | Target-specific probes for the in situ hybridization and detection of mRNA molecules in tissue sections. |
| Fluorescently-Labeled Secondary Antibody [38] | Binds to a primary antibody to amplify and visualize the signal for protein detection in IHC. |
| DAPI Stain | A fluorescent stain that binds strongly to DNA, used to label cell nuclei in tissue sections for segmentation and counting [38]. |
| Antibody Blocking Solution | A protein solution (e.g., containing normal serum) used to prevent non-specific binding of antibodies to the tissue [38]. |
| Optimal Cutting Temperature (OCT) Compound | A water-soluble embedding medium used to support tissue for cryostat sectioning [38]. |
| Mounting Medium with Antifade | A solution used to preserve fluorescence and mount a coverslip onto the stained slide for long-term storage [38]. |
| High-NA Microscope Objective [41] [37] | A critical optical component that determines resolution, light-gathering ability, and clarity. Plan apochromat objectives offer the highest correction for chromatic and geometric aberrations [41]. |
Accurate landmark identification is a critical foundation for validating stereotaxic probe placement in post-mortem histology research. Researchers currently rely on multiple methodologies, each with distinct strengths in handling biological variability and data integration. This guide objectively compares the performance of three established approaches: Internal Landmark Standardization, Active Texture-Based Digital Atlasing, and MRI-Guided Stereotactic Planning.
Method Performance Comparison
The table below summarizes the core performance characteristics of three key landmark identification methods.
| Method | Core Principle | Best For | Throughput | Key Advantage | Key Limitation |
|---|---|---|---|---|---|
| Internal Landmark Standardization [5] | Using internal anatomical landmarks to define a coordinate system | Studies with significant inter-specimen size/shape heterogeneity | Medium | Accounts for individual anthropometry (e.g., height, brain weight) | Requires expert anatomical knowledge for initial landmark identification |
| Active Texture-Based Digital Atlas [42] | Machine learning classifiers identify cytoarchitecture from tissue texture | Precise alignment in cytoarchitecturally ill-defined regions | High (once established) | Automated, reproducible, and continuously improves with use | Requires significant initial investment to train models and create the atlas |
| MRI-Guided Stereotactic Planning [43] | Using individual MRI scans to calculate subject-specific coordinates | Species with high intersubject variability or for which brain atlases are poor | Low | Highest individual accuracy; accounts for unique brain morphology | Higher cost and technical complexity of MRI acquisition |
Detailed Experimental Protocols
Protocol for Internal Landmark Standardization in Human Brainstem
This protocol is designed to accommodate inter-specimen structural heterogeneity in postmortem human brainstem research [5].
- Tissue Acquisition and Preparation: Harvest brainstems during autopsy and fix in 4% paraformaldehyde for two weeks. Gently remove the pia mater, choroid plexus, and major vessels.
- Tissue Blocking and Sectioning: Block specimens perpendicular to the floor of the fourth ventricle. Cryoprotect in sucrose, then serially section on a cryostat. Collect sections in a series with a set interval (e.g., 750 µm between sections in one series).
- Staining and Imaging: Stain a complete series of sections with cresyl violet for Nissl substance, which reveals cytoarchitectural details. Digitize all slides at high resolution.
- Alignment with Reference Series: Order slides from caudal to rostral. Align individual histological sections to a reference brainstem series using readily identifiable internal anatomic landmarks (e.g., distinct nuclei, fiber tracts) observed in the stained sections. This assigns a standardized rostrocaudal level to each section.
Protocol for Validation via Preliminary Dye Injection
This protocol provides rapid feedback on stereotaxic coordinate accuracy before committing to lengthy viral vector experiments [44].
- Skull Leveling and Coordinate Zeroing: Anesthetize the mouse and secure it in a stereotaxic frame. Level the skull by ensuring the dorsal-ventral (z-axis) values at bregma and lambda differ by less than 0.1 mm. Confirm left-right levelness.
- Dye Preparation and Injection: Prepare a dye solution, such as SDS-PAGE loading buffer containing bromophenol blue. Load a small volume (e.g., 0.3 µL) into a microsyringe. Using the stereotaxic coordinates for the target region, inject the dye at a slow, controlled rate (e.g., 0.1 µL/min).
- Immediate Verification via Cryosectioning: Euthanize the animal immediately post-injection. Extract the brain, freeze it, and prepare cryosections through the target region. The dye spot, visible without additional processing, reveals the actual injection site.
- Coordinate Adjustment: Compare the actual injection site to the intended target. Use this data to adjust the stereotaxic coordinates for subsequent experiments involving viral tracers or other agents.
The Scientist's Toolkit: Essential Research Reagents & Materials
| Item | Function/Application |
|---|---|
| Cresyl Violet [5] [42] | A Nissl stain used to visualize neuronal cell bodies and define brain regions based on cytoarchitecture. |
| Bromophenol Blue Dye Solution [44] | A visible marker used for rapid, low-cost preliminary validation of stereotaxic injection coordinates. |
| Adeno-Associated Virus (AAV) Vectors [44] | A common gene delivery tool for long-term neural circuit tracing and manipulation; requires precise targeting. |
| Phosphate-Buffered Saline (PBS) [5] | A physiological buffer used for rinsing and storing tissue specimens to maintain osmotic balance. |
| Paraformaldehyde (PFA) [5] | A fixative used to preserve structural integrity of postmortem brain tissue for histological examination. |
Workflow for Landmark Identification & Validation
The following diagram illustrates the logical relationship and workflow between the different landmark identification methods discussed in this guide.
Key Methodological Insights
Addressing Variability is Paramount: A primary challenge in stereotaxic alignment is biological variability. The Internal Landmark Standardization approach directly addresses this by using an individual specimen's own anatomy as a ruler, rather than relying on external coordinates alone [5]. This is particularly crucial for brainstem studies and in non-human primate species with high intersubject variability [43].
Automation Enhances Reproducibility: Manual landmark identification is subjective and time-consuming [45]. The Active Texture-Based Digital Atlas demonstrates that machine learning can automate the detection of cytoarchitectural borders, reducing expert burden and improving consistency across studies and laboratories [42]. This "active" atlas improves with each use.
Multi-Modal Validation is Ideal: No single method is perfect. The most robust research programs often combine techniques. For instance, using MRI-Guided Planning [43] to establish initial coordinates, followed by Preliminary Dye Injection [44] for empirical verification, and finally using Internal Landmark Standardization [5] to precisely locate probe tips or injection sites post-mortem. This layered approach cross-validates results across different modalities.
Solving Common Challenges and Enhancing Precision in Validation
Minimizing Tissue Distortion and Shrinkage During Processing
In stereotaxic probe placement for neuroscience research, the ultimate validation of targeting accuracy relies on post-mortem histology. However, the path from a perfused brain to a mounted histological section is fraught with technical challenges that can compromise this crucial step. Tissue distortion and shrinkage during processing are significant, often overlooked variables that can introduce substantial error, potentially leading to the misinterpretation of probe location and, consequently, experimental results [19] [46]. This guide objectively compares current methodologies for mitigating these artifacts, providing researchers with the experimental data and protocols necessary to ensure the highest fidelity in correlating stereotaxic coordinates with histological findings.
Comparative Analysis of Tissue Processing Methods
The following table summarizes the key performance characteristics of different approaches to managing tissue distortion, based on recent experimental findings.
Table 1: Comparison of Tissue Processing Method Performance
| Method / Characteristic | Reported Tissue Size Change | Key Advantages | Primary Limitations | Best Suited For |
|---|---|---|---|---|
| SOLID Clearing [47] | Minimal distortion; No evident changes in brain dimensions; allows reliable registration to reference atlases. | High transparency; good fluorescence preservation; compatible with multi-color imaging and whole-brain mapping. | Requires specialized chemical protocol (1,2-HxD mixtures). | Brain-wide cellular profiling; validating virus-based neural projections; correlating histology with atlas coordinates. |
| Traditional Solvent-Based Clearing [47] | Severe shrinkage; Imaging depth reduced to <4500 μm due to overall tissue shrinkage. | High transparency achieved quickly. | Significant tissue deformation prevents reliable registration; often quenches fluorescence. | Applications where absolute spatial fidelity is not critical. |
| Aqueous-Based Clearing [47] | Maintains tissue size effectively. | Better preservation of endogenous signals; less tissue distortion. | Limited transparency degrades image quality in deep brain regions. | Smaller tissue samples or studies where immunolabeling is a priority. |
| High-Thickness Celloidin Embedding [19] | Distortion is minimized via thick sections (400–560 μm); requires non-linear registration to correct deformations. | Provides outstanding histological resolution for cyto- and myeloarchitecture. | Process is resource-intensive and time-consuming (months). | Creating detailed 3D histological atlases of subcortical structures. |
| Conventional Thin-Section Histology [46] [34] | Non-uniform shrinkage and cutting-induced distortions (folds, tears) are common; requires warping correction. | Accessible and standard in most labs; allows for high-contrast cellular staining. | Inherently introduces spatial artifacts; registration is a complex challenge. | All standard histology applications, provided distortion correction algorithms are used. |
Detailed Experimental Protocols
The SOLID Clearing Protocol for Minimal Distortion
The SOLID (Suppressing tissue distortion based on synchronized dehydration/delipidation treatment with 1,2-hexanediol mixtures) pipeline was developed specifically to overcome the trade-off between transparency and tissue size preservation [47].
Workflow Overview:
Key Reagent Formulations:
- Graded 1,2-HxD Solutions: A series of 1,2-hexanediol solutions in water, typically from 30% to 90%. The pH of each solution is adjusted with 2% N-butyldiethanolamine to enhance fluorescence and clearing performance [47].
- Final Dehydration Solution: 90% 1,2-HxD mixed with 10% tert-butanol (TB). This combination prevents the fluorescence quenching associated with pure 1,2-HxD [47].
- RI Matching Solution (BBPN): A mixture of Benzyl Benzoate, Polyethylene glycol methacrylate 500 (PEGMMA500), and N-butyldiethanolamine in a ratio of 75:20:5, which provides optimal refractive index matching and fluorescence preservation [47].
Experimental Validation: In a comparative study, mouse brains processed with SOLID showed no evident changes in size across dimensions when measured with micro-CT, while those cleared with traditional solvent-based methods exhibited significant shrinkage. This allowed SOLID-cleared brains to achieve an imaging depth of >6000 μm, compared to <4500 μm with other solvent-based methods, and enabled reliable registration to the Allen Brain Atlas using standard algorithms [47].
MRI-Guided Sampling and Distortion Correction for Conventional Histology
For researchers requiring traditional histology with stains incompatible with clearing techniques, a protocol using ex vivo MRI-guided sampling and computational distortion correction can preserve spatial fidelity.
Workflow Overview:
Key Methodological Steps:
- Post-mortem MRI and Mold Creation: A fixed brain hemisphere is scanned using ultra-high resolution 7T MRI. A patient-specific 3D-printed mold is then created from the MRI scan to act as a permanent spatial reference frame during subsequent sampling [34].
- Guided Block Extraction: The mold guides the extraction of tissue blocks for formalin-fixed, paraffin-embedding (FFPE), ensuring that the location of each block is known within the original MRI coordinate system [34].
- Sectioning and Staining: Tissue blocks are sectioned, with thicker sections (e.g., 30 μm) providing greater cytoarchitectural detail while being prone to distortion. Sections are stained and digitized into whole-slide images [34].
- Computational Distortion Correction: This critical step involves registering the 2D histology image to the 3D ex vivo MRI. A validated method uses a Thin Plate Spline (TPS) transformation with a large number of boundary correspondence points (20-30) and at least two internal fiducial points. This method has been shown to be robust, capable of correcting torn sections, and results in an interior distance error of only 0.6 ± 0.3 mm, significantly outperforming polynomial or triangle warping [46].
The Scientist's Toolkit: Essential Research Reagents and Materials
Table 2: Key Reagent Solutions for Minimizing Distortion
| Reagent / Material | Function | Application Context |
|---|---|---|
| 1,2-Hexanediol (1,2-HxD) [47] | Synchronizes delipidation and dehydration; low concentrations cause transient tissue expansion to counteract subsequent shrinkage. | Core component of the SOLID clearing method. |
| BBPN Solution [47] | Refractive index matching solution that optimally preserves fluorescence in cleared samples. | Final immersion step for imaging in SOLID and similar pipelines. |
| Celloidin Embedding [19] | A historical but effective embedding medium for producing very thick sections (400-560 μm) with minimal cutting distortion. | Creating high-resolution reference atlases from post-mortem human or large animal brains. |
| Quality Control Metrics (RIGOR) [27] | A set of histological and electrophysiological Quality Control criteria (Recording Inclusion Guidelines for Optimizing Reproducibility) to standardize data inclusion. | Validating stereotaxic probe placement and ensuring reproducible electrophysiology recordings across labs. |
| Thin Plate Spline (TPS) Algorithm [46] | A non-linear registration algorithm used to warp distorted histology images back to their native space using fiducial points. | Correcting spatial distortions in conventional thin-section histology during MRI-histology registration. |
Selecting the optimal method for minimizing tissue distortion hinges on the specific experimental goals. For brain-wide cellular phenotyping where fluorescent protein preservation is key, the SOLID method offers a superior balance of minimal distortion and high-quality imaging. For studies requiring traditional stains on human brain tissue or the creation of detailed anatomical atlases, high-thickness sectioning combined with MRI-guided sampling and computational distortion correction provides the necessary spatial accuracy. By adopting these advanced protocols and rigorous quality control measures, researchers can significantly enhance the reliability of stereotaxic probe validation and ensure that their histological findings truly reflect the in vivo reality.
Addressing Ambiguities in Landmark Identification and Atlas Alignment
Validating stereotaxic probe placement is a critical step in post-mortem histology research, ensuring that neurophysiological data and experimental interventions are accurately correlated with their intended anatomical locations. Ambiguities in landmark identification and subsequent atlas alignment can, however, significantly compromise data integrity and reproducibility. This guide objectively compares contemporary methodologies—ranging from traditional histology to advanced computational and AI-driven approaches—for addressing these challenges. We present supporting experimental data and detailed protocols to assist researchers, scientists, and drug development professionals in selecting the most appropriate validation technique for their specific research context.
Comparative Analysis of Key Methodologies
The following table summarizes the core characteristics, performance data, and optimal use cases for the primary methodologies discussed in this guide.
Table 1: Performance Comparison of Landmark Identification and Atlas Alignment Methods
| Methodology | Reported Accuracy (Mean Error) | Key Performance Metrics | Primary Applications | Technical Considerations |
|---|---|---|---|---|
| Anatomical Landmark Standardization [5] | Not directly quantified (relies on internal landmarks) | Enabled reproducible level assignment across specimens; correlated standardized length with subject height (p-value not reported) [5]. | Post-mortem human brainstem studies; integration of disparate datasets from tissue slabs or MRI [5]. | Requires whole brainstem specimens; expertise in neuroanatomy for initial landmark identification. |
| AI-Driven 3D Landmark Detection [48] | 1.3 - 1.4 mm (Mean Radial Error, MRE) | Success Detection Rate (SDR) of landmarks within a 2-4 mm error threshold; robust to metal artifacts and malocclusion [48]. | Craniofacial assessment on Spiral CT (41 landmarks) and CBCT (14 landmarks); pre-surgical planning [48]. | Requires substantial training data; model performance is contingent on scan quality and landmark definition. |
| Knowledge-Based Geometric Modeling [49] | 0.4 - 1.8 mm (Median Euclidean Distance) | Median angular error of forearm coordinate system: -1.4 to 0.6 degrees [49]. | Automated coordinate system calculation for radius and ulna bones; biomechanical analysis [49]. | Does not rely on pre-labeled data; performance is specific to the modeled anatomy (e.g., forearm). |
| Hybrid CNN-Transformer Model (CASEMark) [50] | 1.06 - 1.16 mm (Mean Absolute Error, MAE) | SDR at 2mm: 86.32% on ISBI2015 dataset; state-of-the-art performance on public benchmarks [50]. | Anatomical landmark detection across diverse X-ray datasets; tasks requiring global context and local detail [50]. | Computationally intensive; requires a hybrid architecture (CAST module) for optimal performance. |
| CT-Based Electrode Segmentation [22] | ~90% correspondence with histology | Reliable segmentation of individual microelectrode tips in arrays with 250 µm spacing [22]. | Verification of chronic microelectrode targeting in rodent brains; neurophysiology studies [22]. | Scanning angle impacts resolution due to shadowing; does not replace histology for cellular phenotyping. |
Detailed Experimental Protocols
Protocol 1: Standardized Processing of Post-Mortem Human Brainstem
This protocol, adapted from a study on standardizing the human brainstem along the rostrocaudal axis, is designed to account for inter-specimen structural heterogeneity [5].
- Tissue Harvesting and Fixation: Harvest the brainstem during autopsy, ideally with a post-mortem interval under 10 hours. Immerse the intact brainstem in 4% paraformaldehyde for two weeks for fixation, then transfer to phosphate-buffered saline (PBS) for storage and shipping [5].
- Gross Dissection and Blocking: Gently remove the pia mater, choroid plexus, and major vessels. For cryostat processing, block the specimen perpendicular to the floor of the fourth ventricle. Make a second cut caudal to the decussation of the corticospinal tract if significant spinal cord remains attached [5].
- Cryosectioning and Staining: Cryoprotect tissue blocks in 25% sucrose PBS for two weeks. Section the brainstem at 50 µm thickness in a series with a 750 µm interval between consecutive sections in one series. Mount sections and stain with cresyl violet (Nissl) for cytoarchitectural analysis [5].
- Imaging and Level Assignment: Digitize stained sections at high resolution (e.g., 40x magnification). Order slides from caudal to rostral. Assign reproducible rostrocaudal levels based on readily identifiable internal anatomic landmarks (e.g., the appearance of the inferior olive, facial nucleus, etc.), not absolute distance [5].
- Validation with Post-Mortem MRI: Validate the histological reconstruction approach by correlating it with post-mortem MRI imaging of the intact brainstem specimen prior to blocking [5].
Protocol 2: AI-Driven 3D Landmark Detection on CT Scans
This protocol outlines the methodology for training and validating an automated 3D landmark detection model for craniofacial structures [48].
- Data Collection and Annotation:
- Imaging Data: Collect Spiral CT (SCT) or Cone-Beam CT (CBCT) scans. For a robust model, use large datasets (e.g., hundreds of cases from multiple centers) [48].
- Landmark Definition: Define a set of diagnostically critical landmarks. For SCT, this may include 41 craniometric points (midline and bilateral pairs). For CBCT, focus on 14 key skeletal and dental landmarks [48].
- Reference Standard: Have senior clinicians with over 9 years of experience independently annotate landmarks using 3D reconstruction software (e.g., Mimics). Establish a "reference standard" by re-annotating a subset of cases after a 4-week interval and using landmarks with an intraclass correlation coefficient (ICC) ≥ 0.70 [48].
- Model Establishment and Training:
- Architecture: Implement a model using a 3D U-Net network architecture for volumetric data processing [48].
- Training: Train the model on the annotated dataset, using the reference standard landmarks as ground truth.
- Performance Validation:
- Metrics: Evaluate model performance using Mean Radial Error (MRE) and Success Detection Rate (SDR) at 2-mm, 3-mm, and 4-mm error thresholds [48].
- Robustness Testing: Test the model on external datasets and under complex conditions (e.g., malocclusion, missing teeth, metal artifacts) to validate generalizability [48].
Protocol 3: CT-Based Verification of Microelectrode Placement
This semi-automated procedure verifies anatomical targeting of brain structures in rodent brains from CT scans, increasing the reproducibility of neurophysiological data [22].
- CT Image Acquisition: Scan the fixed rodent brain specimen with the microelectrode array in situ. To maximize resolution, optimize the scanning angle to minimize shadowing effects caused by the dense electrode materials [22].
- Electrode Segmentation: Use a custom-developed software package (e.g., the tools provided by the authors) to programmatically segment the trajectory of individual electrodes within the array from the acquired CT images [22].
- Tip Localization and Atlas Registration: Determine the 3D coordinates of each electrode tip from the segmented paths. Coregister the CT-derived coordinates with a standard anatomical atlas (e.g., Paxinos and Watson) to assign the tip locations to specific brain structures [22].
- Comparison with Histology (Optional): For validation, compare the CT-based targeting results with traditional histological verification. The method has shown approximately 90% correspondence in assigning electrode groups to the same anatomical structure as histology [22].
Visualized Workflows and Logical Frameworks
Method Selection Workflow
Method Selection Guide
AI Landmark Detection Pipeline
AI Pipeline for 3D Landmarks
The Scientist's Toolkit: Essential Research Reagents and Materials
Table 2: Key Reagents and Materials for Landmark Identification Studies
| Item | Specification / Function | Application Context |
|---|---|---|
| Paraformaldehyde (PFA) | 4% solution in PBS; cross-linking fixative for tissue preservation. | Standard protocol for post-mortem human brainstem fixation [5]. |
| Cresyl Violet | Nissl stain for neuronal cell bodies; reveals cytoarchitectural landmarks. | Histological staining for identifying nuclei in brainstem sections [5]. |
| Phosphate-Buffered Saline (PBS) | pH 7.4; isotonic buffer for rinsing and storing fixed tissues. | Storage and shipping medium for fixed brainstem specimens [5]. |
| Sucrose | 25% solution in PBS; cryoprotectant to prevent ice crystal formation. | Tissue treatment prior to cryosectioning [5]. |
| Microelectrode Arrays | Chronic implants for large-scale neurophysiological recordings. | Target for CT-based verification in rodent brains [22]. |
| Standard Anatomical Atlas | e.g., Paxinos and Watson for rodent brain; reference for coordinate mapping. | Coregistration target for CT-derived electrode positions [22]. |
| Cone-Beam CT (CBCT) | Medical imaging for 3D reconstruction of craniofacial structures. | Primary data source for AI-driven landmark detection in dental/maxillofacial applications [48]. |
Correcting for Inter-Specimen Anatomical Variability and Brain Size Differences
In neuroscience and drug development research, the accuracy of stereotaxic probe placement and the interpretation of resulting data are fundamentally challenged by inter-specimen anatomical variability and differences in brain size. These biological differences, if unaccounted for, introduce significant confounding variables that can compromise data integrity, experimental reproducibility, and the validity of cross-study comparisons. This guide objectively compares contemporary methodological approaches for correcting anatomical variability, providing researchers with a structured analysis of their performance characteristics, underlying protocols, and applications in post-mortem histological validation.
Comparative Analysis of Correction Methods
The following table summarizes the key technical approaches for addressing anatomical variability, detailing their core principles, performance metrics, and primary applications.
Table 1: Comparison of Methods for Correcting Anatomical Variability
| Method Category | Specific Technique | Reported Performance/Accuracy | Primary Application Context | Key Advantages |
|---|---|---|---|---|
| Standardized Landmark-Based Frameworks | Brainstem Level Standardization [5] | Enables reproducible level assignment; Standardized length correlates with height (p-value not reported) and brain weight [5]. | Post-mortem human brainstem studies; Histological section alignment [5]. | Uses internal anatomic landmarks; Accommodates structural heterogeneity; Validated with post-mortem MRI [5]. |
| Advanced Spatial Normalization & Atlases | NextBrain Probabilistic Atlas [52] | Average registration error of 0.99 mm (SD ± 0.51 mm); Significant improvement over prior methods (P < 10⁻²¹) [52]. | Bayesian segmentation of in vivo and ex vivo MRI; Integration of 3D histology [52]. | 333 densely labeled ROIs; Built from 5 whole hemispheres; AI-enabled registration; Open-source [52]. |
| High-Precision Stereotactic Systems | 3D-Printed Patient-Specific Frames [53] | Target point deviation: 0.51 mm (CAD vs. print); Exceeds clinical accuracy requirement (2 mm) by 4x [53]. | Frameless stereotactic brain biopsy [53]. | No frame-based CT needed; Autoclavable (PA12 material); Customized trajectory [53]. |
| Frame-Based Stereotaxy (Leksell Frame) [54] [55] | Diagnostic yield: 91-98%; Complication rate: ~2-4.5% [54] [55]. | Brain biopsy for diagnostic tissue sampling [54] [55]. | Established gold standard; High accuracy and efficacy [54]. | |
| Robotic Guidance (ROSA) [54] | Diagnostic yield: 98%; Overall procedure time: 169 min (vs. 179 min for frame-based) [54]. | Frameless stereotactic biopsy [54]. | Shorter overall procedure time; No frame registration CT needed [54]. | |
| Intensity Normalization for Multi-Scanner Studies | Histogram-Based Normalization [56] | Improved performance in image registration, segmentation, and tissue volume measurement vs. existing methods [56]. | MRI studies using different scanners or acquisition parameters [56]. | Reduces inter-scanner intensity variation; Improves template quality [56]. |
Detailed Experimental Protocols
Protocol 1: Landmark-Based Standardization for Post-Mortem Brainstem
This protocol, designed for whole brainstem specimens, addresses heterogeneity introduced by tissue procurement and anthropometric factors like subject height [5].
Workflow Overview:
Key Steps:
- Tissue Procurement and Processing: Brainstems are harvested and fixed in 4% paraformaldehyde. After gentle removal of the pia mater and major vessels, the specimen is blocked perpendicular to the floor of the fourth ventricle to accommodate sectioning [5].
- Sectioning and Staining: Tissue blocks are cryoprotected and serially sectioned on a cryostat. A complete series of 50 μm sections is collected, mounted on charged slides, and stained with Cresyl Violet for anatomical visualization [5].
- Landmark Identification and Standardization: Digitized slides are annotated using software (e.g., NDP.view). Standardization relies on identifying readily identifiable internal anatomic landmarks (e.g., the inferior border of the inferior colliculus, the obex) to assign reproducible rostrocaudal levels, rather than absolute distance, thus accommodating inter-specimen length differences [5].
- Validation: The landmark-based approach is validated by correlating the standardized brainstem length with subject biometrics (e.g., height, brain weight) and through post-mortem MRI imaging of select specimens [5].
Protocol 2: AI-Enabled 3D Histology Reconstruction for Probabilistic Atlasing
This pipeline creates a densely labeled, probabilistic histological atlas (NextBrain) from multimodal serial histology, enabling high-granularity Bayesian segmentation of MRI scans [52].
Workflow Overview:
Key Steps:
- Data Acquisition: Multiple whole human hemispheres, including cerebellum and brainstem, are processed. Each case undergoes high-resolution ex vivo MRI, followed by sectioning for serial histology with H&E and LFB stains [52].
- AI-Powered Registration: A custom registration framework aligns thousands of histological sections into a coherent 3D volume using the ex vivo MRI as a reference. This involves:
- A differentiable regularizer to minimize gaps and overlaps between tissue blocks [52].
- A contrastive learning AI method for highly accurate cross-modal (MRI-to-histology) alignment [52].
- A Bayesian refinement technique based on Lie algebra to ensure 3D smoothness and handle outliers like tissue folds [52].
- Segmentation and Atlasing: A semi-automated AI method delineates 333 cortical and subcortical ROIs on the aligned 3D histology. Labels from multiple hemispheres are coregistered into a common coordinate frame and merged to create the probabilistic NextBrain atlas, which captures inter-individual anatomical variance [52].
- Application: The atlas and its companion Bayesian tool are used to automatically segment these 333 ROIs in both ultra-high-resolution ex vivo and conventional in vivo MRI scans, greatly increasing the specificity of volumetric analyses [52].
The Scientist's Toolkit
Table 2: Essential Research Reagents and Materials
| Item | Function/Application |
|---|---|
| Cresyl Violet Stain [5] | A histological Nissl stain used to visualize neuronal cell bodies on tissue sections, enabling identification of cytoarchitectural landmarks. |
| Luxol Fast Blue (LFB) Stain [52] | A histological stain used to visualize myelinated fibers (white matter), providing complementary contrast to cellular stains. |
| Hematoxylin and Eosin (H&E) Stain [52] | The standard histological stain for visualizing general tissue structure, including cell nuclei and cytoplasm. |
| PA12 (Polyamide 12) [53] | A 3D-printing material used to manufacture patient-specific stereotactic frames; known for durability and resistance to autoclave sterilization. |
| Neuropixels Probes [57] | High-density silicon-based electrophysiology probes used for recording extracellular activity from hundreds of neurons simultaneously. |
| Leksell Stereotactic Frame [54] [55] | A frame-based stereotactic system considered the gold standard for precise targeting in brain biopsies and deep brain stimulation. |
| ROSA (Robotic Surgery Assistant) [54] | A robotic guidance system for frameless stereotactic procedures, offering an alternative to traditional frame-based systems. |
Discussion and Performance Data
Quantitative Performance in Stereotactic Targeting
The choice of stereotactic system involves a trade-off between procedural efficiency, diagnostic yield, and technical accuracy.
Table 3: Stereotactic Biopsy System Performance Comparison
| Metric | Frame-Based (Leksell) [54] [55] | Robotic (ROSA) [54] | 3D-Printed Patient-Specific Frame [53] |
|---|---|---|---|
| Diagnostic Yield | 91% [54] | 98% [54] | N/A (Technical study) |
| Symptomatic Hemorrhage Rate | 2.7% [54] | 2% [54] | N/A |
| Overall Procedure Time | 179 min [54] | 169 min [54] | N/A |
| Technical Accuracy (Target Deviation) | N/A | N/A | 0.51 mm [53] |
The data shows that robotic and frame-based systems have comparable safety profiles, with robotics offering a modest reduction in overall procedure time, attributed to the elimination of a separate CT scan for frame registration [54]. The high diagnostic yield of 3D-printed frames is underpinned by their sub-millimeter technical accuracy, which is more than four times higher than the clinically required benchmark of 2 mm for brain biopsies [53].
Impact of Probe and Recording Site Design
The physical design of neural probes directly influences data quality. In acute neuronal recordings, the placement of recording sites on planar silicon-based probes is a critical factor. Studies consistently show that edge sites (located near the border of the probe shank) outperform center sites in signal quality metrics across various probe types [58].
Edge sites record significantly higher signal power and a greater number of large-amplitude samples. While single-unit yield may be similar, the spike amplitudes detected by edge sites are noticeably larger, particularly for high-amplitude spikes. This performance advantage is attributed to the higher electrical conductivity of the surrounding neural tissue compared to the probe's silicon substrate, which concentrates the current flow towards the edges of the shank [58]. This finding is crucial for designing and selecting probes to maximize the signal-to-noise ratio in electrophysiology experiments.
Optimizing Staining Protocols for Consistent and Reproducible Results
This guide compares optimization strategies for histological staining, framing them within the critical context of post-mortem research for validating stereotaxic probe placements. Consistent and reproducible staining is the foundation upon which reliable anatomical verification and subsequent data interpretation are built.
Multiplex Immunohistochemistry (mIHC) Optimization
Multiplex immunohistochemistry allows for the simultaneous detection of multiple antigens on a single tissue section, providing a comprehensive view of cellular environments and structures relevant to probe localization.
Experimental Comparison of Antibody Stripping Methods
A 2025 study systematically evaluated antibody stripping methods, a critical step in TSA-based Opal mIHC, to prevent signal cross-reaction while preserving fragile tissue integrity [59]. The following table summarizes the key quantitative findings:
Table 1: Comparison of Antibody Stripping Methods for Opal mIHC
| Method | Antibody Removal Efficacy | Tissue Integrity Preservation (in fragile tissues) | Key Advantage | Key Limitation |
|---|---|---|---|---|
| Microwave Oven-Assisted (MO-AR) | Effective | Poor | Effective antibody removal | Compromises tissue integrity; not suitable for delicate tissues |
| Chemical Reagent-Based (CR-AR) | Variable | Variable | Gentle chemical action | Sensitivity to temperature/pH variations; inconsistent efficacy |
| Hybridization Oven-Based at 50°C (HO-AR-50) | Not Specified | Not Specified | Mild thermal conditions | Insufficient antibody removal |
| Hybridization Oven-Based at 98°C (HO-AR-98) | Effective | Good | Optimal: Preserves tissue integrity while effectively removing antibodies | Requires specialized equipment (hybridization oven) |
Detailed Experimental Protocol: HO-AR-98 for Opal mIHC
The following workflow and protocol detail the optimized method for multiplex staining, which is crucial for identifying multiple anatomical landmarks around a probe track.
Optimized Thermochemical Stripping Protocol (HO-AR-98) [59]:
- After image acquisition of the first signal, place the slide in a coplin jar filled with stripping buffer (e.g., a solution containing SDS and β-mercaptoethanol).
- Place the coplin jar in a pre-heated hybridization oven set to 98°C for 15-30 minutes. The hybridization oven provides uniform heat distribution, which is key to the method's success.
- Wash the slides thoroughly in distilled water followed by TBST or PBS buffer.
- Validate stripping efficiency by applying only the secondary antibody and a chromogenic substrate for the just-removed signal. The absence of staining confirms successful stripping.
- Proceed with the next cycle of primary antibody, secondary antibody, and TSA/Opal signal amplification with a different fluorophore.
This protocol was validated in a five-color mIHC experiment on mouse kidney and brain sections, demonstrating strong target-specific signals while maintaining the structural integrity of delicate brain tissues [59].
Standardized Tissue Processing for Anatomical Reference
Accurate histological reconstruction of probe placement is highly dependent on minimizing inter-specimen structural heterogeneity, especially in complex regions like the brainstem.
Experimental Data on Brainstem Standardization
A 2025 study developed a standardized approach for postmortem human brainstem tissues to account for variability arising from procurement or anthropometric factors [5]. The methodology and key correlations are outlined below:
Table 2: Factors in Brainstem Specimen Standardization
| Factor | Impact on Specimen Heterogeneity | Standardization Outcome |
|---|---|---|
| Subject Height | Positive correlation with brainstem length | A standardized length metric was developed that accounts for this variability. |
| Brain Weight | Positive correlation with brainstem length | The standardized approach corrects for differences in overall brain size. |
| Age at Death | No significant correlation with brainstem length | Not a primary factor for structural adjustment. |
| Tissue Procurement | Major source of rostrocaudal length variation | Protocol uses internal anatomic landmarks (e.g., floor of 4th ventricle) for reproducible level assignment. |
Detailed Experimental Protocol: Brainstem Level Assignment
This protocol ensures consistent sampling and alignment across different specimens, which is paramount for comparing probe locations in a cohort study [5].
- Tissue Preparation: Harvest and fix brainstems in 4% paraformaldehyde. Gently remove the pia mater and major vessels.
- Blocking: Block the specimen perpendicular to the floor of the 4th ventricle to establish a consistent plane of sectioning.
- Sectioning: Collect serial sections (e.g., 50 μm thickness) on a cryostat. Maintain a fixed interval (e.g., 750 μm) between consecutive sections in a series.
- Staining for Landmarks: Stain a complete series of sections with cresyl violet (Nissl stain) to reveal cytoarchitectonic landmarks.
- Digital Reconstruction and Level Assignment: Digitize the entire series of slides. Use readily identifiable internal anatomic landmarks (e.g., the appearance/disappearance of specific nuclei, the obex, the inferior colliculus) to assign a reproducible rostrocaudal level to each section, creating a reference series for the individual brainstem.
This approach was validated using postmortem MRI imaging of whole brainstem specimens, confirming that standardized length correlated with subject height and brain weight but not age [5].
Optimization of Routine H&E Staining
The H&E stain is the fundamental first step for general morphological assessment, including initial evaluation of probe-induced tissue reaction and localization.
Comparison of H&E Staining Approaches
The quality of an H&E stain is influenced by every step, from tissue fixation to the final bluing. The choice between progressive and regressive staining is a key variable [60].
Table 3: Comparison of H&E Staining Methodologies
| Staining Parameter | Progressive H&E | Regressive H&E |
|---|---|---|
| Core Principle | Dye is applied until desired intensity is reached, without subsequent removal. | Tissue is over-stained, then excess dye is selectively removed (differentiated). |
| Differentiation Step | No | Yes (critical step) |
| Key Advantage | Simpler protocol; can stain non-nuclear elements (e.g., mucin), aiding tumor identification. | Superior control over nuclear detail and contrast; generally preferred for critical morphology. |
| Key Disadvantage | Potential for high background staining; less control. | Requires optimization and careful timing of differentiation to prevent over- or under-staining. |
Detailed Protocol: Regressive H&E Staining
The following optimized protocol for a regressive H&E stain provides a balance of nuclear and cytoplasmic detail [60].
Key Considerations for Optimization [61] [60]:
- Fixation: Use adequate volume of 10% neutral buffered formalin with proper fixation time to preserve morphology.
- Differentiation: This is the most critical step. Over-differentiation removes too much nuclear stain; under-differentiation results in obscured nuclear detail. A mild acid differentiator (e.g., acetic acid) offers more control than strong hydrochloric acid.
- Bluing: This step converts the red hematoxylin complex to a stable blue color. Use a slightly basic solution like Scott's Tap Water or a commercially available bluing reagent.
- Troubleshooting: Basophilia (general over-staining purple hue) can be caused by over-dehydration during tissue processing, which makes tissue prone to hematoxylin uptake [61].
The Scientist's Toolkit: Essential Research Reagent Solutions
Table 4: Key Reagents for Staining Protocol Optimization
| Item | Function in Protocol | Application Context |
|---|---|---|
| Tyramide Signal Amplification (TSA) Kits | Amplifies weak signals, enabling detection of low-abundance targets. | Multiplex IHC (e.g., Opal systems); critical for high-plex imaging. |
| Alum-Based Hematoxylin (e.g., Harris, Gill's) | Standard nuclear counterstain for H&E; provides blue-purple nuclear detail. | Routine morphology assessment in H&E staining. |
| Eosin Y | Acidic counterstain for H&E; provides pink-red coloration to cytoplasm and proteins. | Routine morphology assessment in H&E staining. |
| Cresyl Violet | Nissl stain that labels RNA-rich rough endoplasmic reticulum in neuronal cell bodies. | Defining cytoarchitectonic boundaries in brain mapping. |
| Mild Acid Differentiator (e.g., Acetic Acid) | Selectively removes excess hematoxylin after staining to fine-tune nuclear intensity. | Regressive H&E staining protocols. |
| Hybridization Oven | Provides uniform, high-temperature incubation for thermochemical antibody stripping. | HO-AR-98 method for multiplex IHC. |
| Chambered Slides | Integrated platform for cell culture, fixation, and staining; minimizes sample handling. | Optimizing staining protocols for cell cultures; reduces contamination [62]. |
Optimizing staining protocols is a multi-faceted process that requires careful selection and execution of methodologies. For the validation of stereotaxic probe placement, this guide demonstrates that the thermochemical HO-AR-98 method is superior for multiplex IHC in fragile tissues, while standardized anatomical landmarking is essential for reconciling inter-specimen heterogeneity. The foundational H&E stain remains irreplaceable but requires meticulous control over its regressive steps. By implementing these optimized, data-driven protocols, researchers can achieve the consistent and reproducible histology necessary for reliable anatomical verification in post-mortem brain research.
In stereotaxic neuroscientific research and clinical neurology, the precision of probe placement is paramount. Whether for injecting viral vectors, recording neural activity, or performing deep brain stimulation, the success of an intervention hinges on the accurate positioning of surgical instruments within the brain. The validation of this precision relies on specific quantitative metrics that objectively measure the deviation between planned and achieved trajectories. Entry Point (EE), Target Point (TE), and Angular Error (AE) represent the fundamental triad of measurements used to quantify stereotaxic accuracy [63]. These metrics provide researchers and clinicians with a standardized framework for evaluating procedural success, comparing different surgical techniques and technologies, and ultimately ensuring the reliability of experimental or therapeutic outcomes.
Within the context of post-mortem histology research, these metrics serve as a critical bridge between pre-surgical planning and post-hoc verification. By quantifying placement error, scientists can correlate functional or morphological findings from histology with the precise anatomical location of stereotaxic interventions. This manuscript provides a comparative analysis of current methodologies for quantifying placement error, detailing experimental protocols for its validation and presenting a structured comparison of performance data across different stereotaxic techniques.
Core Metrics for Quantifying Placement Error
The accuracy of a stereotaxic trajectory is evaluated at its two most critical junctures: where the probe enters the brain and where it terminates. A third metric captures the overall directional fidelity of the entire path.
- Entry Point Error (EE): This metric measures the Euclidean distance (in millimeters) between the planned entry point on the skull surface and the actual entry point achieved during surgery [63]. It reflects the precision of the initial probe positioning and is influenced by factors such as registration accuracy and mechanical stability of the stereotaxic apparatus.
- Target Point Error (TE): This metric measures the Euclidean distance (in millimeters) between the tip of the probe at its intended target structure deep within the brain and its actual terminal position [63]. TE is often considered the most critical error metric, as it directly impacts whether the intervention engages the desired brain structure.
- Angular Error (AE): This metric quantifies the deviation in the trajectory angle of the inserted probe from the planned angle [63]. It is often reported in radians and reflects the directional accuracy of the entire insertion path. Even small angular deviations can result in significant target point errors, especially for deep brain structures.
Comparative Analysis of Stereotaxic Techniques
Stereotaxic procedures have evolved from traditional manual systems to advanced robotic and image-guided platforms. The choice of system and registration method significantly impacts the overall accuracy, as quantified by EE, TE, and AE.
Performance Data from Clinical and Preclinical Studies
The following tables consolidate quantitative error metrics from recent studies investigating different stereotaxic workflows.
Table 1: Accuracy Comparison of Registration Methods in Robotic-Guided Stereoelectroencephalography (SEEG) This table compares two patient registration methods for robotic surgery in a clinical study involving 49 patients and 920 implanted electrodes [63].
| Registration Method | Entry Error (EE) mm (Mean±SD) | Target Error (TE) mm (Mean±SD) | Angular Error (AE) radians (Mean±SD) | Registration Error (RMS) mm (Mean±SD) |
|---|---|---|---|---|
| Laser-based Facial Scanning | 1.86 ± 0.92 | 2.90 ± 1.59 | 0.062 ± 0.048 | 0.62 ± 0.11 |
| O-arm with Frame-based Fiducials | 1.29 ± 0.85 | 2.67 ± 1.45 | 0.045 ± 0.032 | 0.77 ± 0.14 |
| Statistical Significance (p-value) | < 0.0001 | 0.0329 | < 0.0001 | 0.0006 |
Table 2: Accuracy of Contactless Registration in a Preclinical Model This table summarizes the accuracy of a contactless optical-tracking registration (OTR) method in a phantom and animal model study [64].
| Experimental Model | Entry Error (EE) mm (Mean±SD) | Target Error (TE) mm (Mean±SD) | Registration Time seconds (Mean±SD) |
|---|---|---|---|
| Phantom and Bama Pig Model (OTR) | 0.76 ± 0.39 | 1.68 ± 0.80 | 99.71 ± 1.08 |
| Comparative Group (CBR) | 0.70 ± 0.33 | 1.49 ± 0.79 | 241.29 ± 28.95 |
Interpretation of Comparative Data
The data reveals a trade-off between accuracy and efficiency. While the O-arm/Fiducial method demonstrated statistically superior performance in EE, TE, and AE compared to laser scanning, it had a slightly higher overall registration error [63]. This suggests that different error metrics capture distinct aspects of the procedural pipeline. Furthermore, the contactless OTR method significantly reduced registration time while maintaining a sub-millimeter EE and sub-2-millimeter TE, comparable to the traditional contact-based method (CBR) [64]. This highlights a key advancement towards faster, streamlined workflows without sacrificing precision. The Angular Error (AE) is a critical differentiator, as it significantly impacts the TE, especially for deep targets; the lower AE in the O-arm group contributes to its improved TE despite a higher registration RMS error [63].
Experimental Protocols for Validation
Rigorous validation of stereotaxic accuracy requires controlled experiments in phantom models and in vivo, with subsequent histological verification.
Phantom Validation Model
Phantom studies provide a high-throughput, controlled environment for initial validation.
- Phantom Construction: Develop a stable phantom with a base that firmly fixes to the stereotaxic system. The phantom should incorporate a matrix of predefined test points, which are holes of known diameter (e.g., 1-4 mm) drilled into columns of varying heights [64].
- Fiducial Markers: Integrate both optical fiducial markers (for OTR) and bone screw markers (for CBR) into the phantom design [64].
- Error Measurement: Define the target error as the distance between the center of these pre-drilled holes and the tip of the stereotaxic probe [64]. This provides a ground truth for measuring TE.
In Vivo Animal Validation with Post-Mortem Histology
Animal models are essential for validating accuracy in biological tissue, with histology as the gold standard.
- Surgical Planning and Registration: Preoperative MRI and CT images are acquired and fused using surgical planning software [64]. The animal is then secured in the stereotaxic frame, and registration is performed using either CBR or OTR.
- Probe Insertion: Following the surgical plan, probes are inserted to the target coordinates. The use of computer-guided systems that track all linear and rotational movements can facilitate complex, angled approaches to avoid confounding damage to superficial structures [65].
- Histological Processing and Analysis: After a survival period, animals are perfused, and brains are extracted, sectioned, and stained (e.g., with Nissl stain or immunohistochemical markers). The actual probe track and tip location are identified under a microscope.
- Metric Quantification: The actual entry and target points are mapped onto the corresponding histological sections. EE and TE are calculated by comparing these actual coordinates to the original surgical plan within the standard stereotaxic coordinate space [66]. This process confirms whether the probe reached the intended structure for the research purpose.
Diagram 1: Experimental workflow for validating stereotaxic placement error, integrating both phantom and in vivo models, and culminating in post-mortem histological analysis.
The Scientist's Toolkit: Essential Research Reagents and Materials
Successful execution of stereotaxic procedures and their validation requires a suite of specialized equipment and reagents.
Table 3: Essential Materials for Stereotaxic Placement and Validation
| Item | Function | Example Use Case |
|---|---|---|
| Stereotaxic Instrument / Robot | Precise mechanical manipulation for positioning probes in 3D space. | Manual digital stereotaxic frames or robotic systems (e.g., ROSA) for high-precision insertion [65] [63]. |
| Stereotaxic Atlas & Planning Software | Provides a 3D coordinate map of brain structures for surgical planning. | Software like AtlasGuide allows visualization of oblique paths and reorientation to match the subject's brain [66]. |
| Registration Method (CBR/OTR) | Aligns the patient's/animal's anatomy with the pre-operative images and planning software. | Bone-fiducial contact registration (CBR) or contactless optical tracking (OTR) [64]. |
| Precision Probes | The device inserted into the brain (e.g., for injection, recording, stimulation). | Rigid clinical probes (SEEG/DBS), flexible polymer probes, or microwires [25]. |
| Micro-CT / MRI Scanner | High-resolution imaging for creating subject-specific anatomical maps and atlases. | Used to generate co-registered CT/MRI hybrid 3D atlases for accurate stereotaxic coordinate reference [66]. |
| Histology Reagents | For tissue fixation, sectioning, and staining to visualize probe tracks post-mortem. | Includes perfusates (e.g., paraformaldehyde), cryostat/microtome, and stains (e.g., Nissl) to identify probe location in brain sections. |
The rigorous quantification of placement error using Entry Point, Target Point, and Angular Error metrics is a cornerstone of reliable stereotaxic research. As the data demonstrates, the choice of surgical platform and registration method directly influences these error values, creating a landscape of trade-offs between accuracy, speed, and workflow complexity. The integration of advanced robotic systems with contactless registration and sophisticated 3D planning software is pushing the boundaries of precision, enabling angled approaches that avoid confounding variables [65]. Ultimately, the consistent application of the validation protocols and metrics outlined herein is essential for ensuring that the data generated through stereotaxic interventions—whether in basic neuroscience or drug development—is both accurate and reproducible.
Advanced Techniques and Cross-Validation with Imaging Modalities
Leveraging Post-Mortem MRI for 3D Reconstruction and Validation
In neuroscience and drug development research, the precise anatomical localization of stereotaxic probes is paramount for data integrity. Post-mortem Magnetic Resonance Imaging (MRI) has emerged as a powerful tool for validating these placements, offering a non-destructive, three-dimensional dataset that bridges the gap between in vivo experiments and histological analysis. This guide objectively compares the performance of post-mortem MRI with other validation modalities, providing researchers with the experimental data and protocols needed to integrate this technology effectively into their workflows. By framing this within the context of stereotaxic probe validation, we highlight how post-mortem imaging strengthens research reproducibility and translational potential.
Performance Comparison of Post-Mortem Validation Modalities
Selecting the right validation method is a critical strategic decision. The table below provides a quantitative and qualitative comparison of the most common techniques used for post-mortem verification of stereotaxic probe placement.
Table 1: Performance comparison of modalities for post-mortem validation of stereotaxic probe placement.
| Modality | Spatial Resolution | Key Strength | Key Limitation | Best for Probe Validation |
|---|---|---|---|---|
| Post-mortem MRI (PMMR) | ~100-300 µm (9.4T) [5] | Excellent soft tissue contrast for anatomy; 3D volume data [67] [68] | Lower resolution than histology; cannot visualize single cells [68] | Reconstructing entire probe trajectories and relation to large-scale anatomy |
| Post-mortem CT (PMCT) | ~20-100 µm [69] | Excellent for visualizing bone, metal probes, and air [69] [68] | Very poor soft tissue contrast [67] [68] | Precise, artifact-free localization of metallic probes or electrodes [22] |
| Traditional Histology | <1 µm (cellular level) | Gold standard for cellular morphology and pathology [70] [68] | Destructive; 2D sections prone to distortion; difficult 3D reconstruction [70] | Ultimate validation of precise cellular target engagement |
| Virtual Autopsy (Virtopsy) | Varies (MRI/CT combo) | Combines strengths of PMMR and PMCT; non-invasive [71] [68] | High cost and complexity; requires multi-modal expertise [68] | Comprehensive studies requiring both structural (CT) and soft tissue (MRI) data |
Experimental Protocols for Validation
Implementing a robust validation pipeline requires standardized protocols. Below are detailed methodologies for key experiments integrating post-mortem MRI.
Core Protocol: Post-Mortem MRI for 3D Brain Reconstruction
This protocol is designed to generate high-fidelity 3D data for stereotaxic validation [5] [70].
- Tissue Preparation: Harvest the brainstem or whole brain with a post-mortem interval under 60 hours [67]. Gently remove the pia mater and major vessels. Fixate in 4% paraformaldehyde for approximately two weeks, then transfer to phosphate-buffered saline (PBS) with 0.01% sodium azide for long-term storage at 4°C [5]. For optimal MRI signal, cryoprotect in 25% sucrose PBS for two weeks prior to scanning [5].
- Image Acquisition: Use a high-field MRI system (e.g., 9.4T or 7T) [5] [70]. Maintain the specimen at a physiologically relevant temperature (~37°C) during scanning [5]. Implement a high-resolution 3D sequence; a T2-weighted DIXON sequence is highly effective for soft tissue contrast (Parameters: TR: 4077 ms, TE: 80 ms, slice thickness: 0.5 mm) [67].
- 3D Reconstruction & Standardization: Reconstruct 2D MRI slices into a 3D volume using software like NDP.view or a custom registration pipeline [5] [70]. To account for inter-specimen anatomical heterogeneity, standardize the reconstructed brain using readily identifiable internal landmarks (e.g., the floor of the 4th ventricle, decussation of the corticospinal tract) to assign reproducible rostrocaudal levels [5].
Integration Protocol: MRI-Histology Co-registration
This protocol validates MRI findings against the gold standard of histology, creating a powerful correlative dataset [70].
- MRI-Guided Tissue Sampling: After 3D reconstruction, label cortical or deep brain landmarks on the ex vivo MRI. Use a patient-specific 3D printed mold, created from the MRI scan, to guide the precise sampling of tissue blocks for histology, ensuring spatial fidelity [70].
- Histological Processing: Process formalin-fixed tissue into paraffin-embedded (FFPE) blocks. Section blocks at a thickness of 30-50 µm [5] [70]. Mount sections on charged slides and stain with Cresyl Violet for cytoarchitecture or immunohistochemistry for specific proteins (e.g., phosphorylated tau) [5] [70]. Acquire whole-slide images using a high-resolution slide scanner (e.g., Hamamatsu NanoZoomer).
- Semi-Automated Registration: Upload whole-slide images to a digital archive (e.g., PICSL Histology Annotation Server). Use a semi-automated, iterative registration pipeline to align the 2D histological images with their corresponding 3D post-mortem MRI data, accounting for tissue distortion and shrinkage from processing [70].
Application Protocol: CT-MRI Fusion for Metallic Probe Verification
For studies involving metallic electrodes, this multi-modal protocol maximizes localization accuracy [22].
- Multi-Modal Imaging: First, acquire a whole-brain PMCT scan. Use a bone-optimized reconstruction kernel (e.g., Br 60) to minimize metal artifact and clearly visualize the hyperdense metallic probes [69] [22]. Then, perform a PMMR scan of the same specimen using the protocol in 3.1.
- Semi-Automated Probe Segmentation: Fuse the PMCT and PMMR datasets in a common coordinate space. Programmatically segment the trajectory of individual electrodes from the CT data. Under optimal conditions, this method can resolve individual electrodes with 250 µm spacing [22].
- Atlas Mapping: Align the fused image dataset to a standard anatomical brain atlas (e.g., Allen Brain Atlas) using the internal architecture visible on the PMMR. This allows for the determination of individual recording tip locations within specific anatomical structures [22].
Workflow Visualization
The following diagram illustrates the logical workflow for integrating post-mortem MRI into a stereotaxic probe validation pipeline.
Diagram 1: Multi-modal probe validation workflow.
The Scientist's Toolkit: Research Reagent Solutions
Successful implementation of these protocols relies on specific materials and tools. The table below details key research reagents and their functions.
Table 2: Essential research reagents and materials for post-mortem MRI validation pipelines.
| Item | Function / Application | Key Considerations |
|---|---|---|
| Paraformaldehyde (PFA) | Primary fixative for tissue preservation. Cross-links proteins to maintain structural integrity [5]. | Requires careful pH buffering (e.g., to 7.4) to prevent tissue acidosis and artifact formation. |
| Phosphate-Buffered Saline (PBS) | Isotonic solution for washing and storing fixed tissue; base for cryoprotectant solutions [5]. | Adding sodium azide (0.01-0.02%) prevents microbial growth during long-term storage [5]. |
| Sucrose (25% in PBS) | Cryoprotectant. Reduces ice crystal formation during freezing, preserving tissue ultrastructure [5]. | Tissue typically sinks upon full saturation, indicating readiness for sectioning or scanning. |
| Polyethylene Glycol (PEG) | Carrier substance in post-mortem CT angiography (PMCTA). Mixes with contrast agent for vascular filling [71]. | Can alter organ haptic properties and color; less extravasation than Ringer's solution [71]. |
| Iodinated Contrast Agent | For PMCTA. Provides radiopacity to visualize vascular structures and lesions on CT [71]. | Often expired clinical-grade agent is used for cost efficiency [71]. |
| Cresyl Violet | Nissl stain for histological sections. Stains neuronal cell bodies (Nissl substance) to visualize cytoarchitecture [5]. | Allows for identification of nuclear groups and cortical layers for anatomical registration. |
| 3D Printed Patient-Specific Mold | Physical guide created from post-mortem MRI data for precise histological sampling [70]. | Provides a permanent spatial reference frame, bridging the 3D MRI and 2D histology domains. |
Integrating Fluorescent Tracers and Immunohistochemistry for Multi-Modal Confirmation
In stereotaxic neuroscientific research, the precise validation of probe placement is a fundamental requirement for experimental integrity. Post-mortem histological confirmation has traditionally relied on conventional immunohistochemistry (IHC), a technique limited to visualizing a single marker per tissue section [72]. This restriction poses significant challenges for comprehensive analysis, particularly when studying complex cellular interactions within specific brain regions targeted by stereotaxic procedures. The integration of fluorescent tracers with advanced multiplex immunohistochemistry/immunofluorescence (mIHC/IF) represents a methodological evolution that enables simultaneous detection of multiple biomarkers on a single tissue section [72] [73]. This multi-modal approach provides researchers with a powerful tool for confirming stereotaxic probe placement while simultaneously characterizing cellular responses, neural pathways, and molecular changes in the surrounding microenvironment.
The limitations of conventional IHC extend beyond single-marker detection to issues of inter-observer variability and semi-quantitative assessment [72]. These constraints are particularly problematic in stereotaxic research, where accurate localization is paramount for correlating intervention sites with functional outcomes. Multiplexed fluorescent techniques overcome these limitations by providing high-throughput multiplex staining with standardized quantitative analysis, resulting in highly reproducible, efficient, and cost-effective tissue characterization [72]. For drug development professionals and neuroscientists, this integrated approach offers unprecedented capability to validate targeting accuracy while gathering rich datasets on cellular responses to experimental manipulations, from gene therapy vectors to pharmacologic agents administered via stereotaxic guidance.
Technical Comparison: Fluorescent mIHC/IF Versus Conventional IHC and Chromogenic Multiplexing
Performance Metrics Across Modalities
Table 1: Comparative Analysis of Histological Techniques for Stereotaxic Validation
| Parameter | Conventional IHC | Chromogenic mIHC | Fluorescent mIHC/IF |
|---|---|---|---|
| Markers per section | Single | 2-3 (visually distinguishable) | 6+ with spectral imaging [74] |
| Spatial resolution | High (crisp localization) | High (crisp localization) [75] | High (crisp localization with spectral imaging) [75] |
| Quantification capability | Semi-quantitative (subjective) | Semi-quantitative (subjective) | Highly quantitative (digital analysis) [72] |
| Inter-observer variability | High [72] | Moderate to high | Low (automated analysis) [72] |
| Co-localization assessment | Not possible on same section | Limited to 2-3 markers | Excellent (multiple markers simultaneously) [73] |
| Tissue conservation | Poor (multiple sections needed) | Moderate | Excellent (multiple markers on one section) [72] |
| Instrument requirements | Standard brightfield microscope | Standard brightfield microscope | Fluorescence/spectral imaging system [72] |
| Validation against gold standard | Reference standard | Good correlation with IHC [74] | Excellent correlation (Spearman's rho >0.9) [74] |
Quantitative Performance Data
Table 2: Validation Metrics for Fluorescent mIHC/IF in Tissue Analysis
| Validation Parameter | Performance Metric | Experimental Context |
|---|---|---|
| Correlation with conventional IHC | Spearman's rho = 0.750-0.927 (p<0.0001) [74] | Immune cell markers in melanoma |
| Reproducibility between mIHC replicates | Spearman's rho >0.940 (p<0.0001) [74] | Intra-assay precision testing |
| Correlation single-plex vs multiplex IF | Spearman's rho >0.9 (p<0.0001) [74] | Method comparison study |
| Plexing capacity | 6-9+ markers simultaneously [72] | Commercial system capabilities |
| Sensitivity enhancement | 10-50x over direct fluorescence [74] | Tyramide signal amplification (TSA) |
The performance advantages of fluorescent mIHC/IF are particularly relevant for stereotaxic confirmation studies, where tissue conservation is critical when validating probe placement in small, specific brain nuclei. The ability to simultaneously detect a fluorescent tracer alongside multiple cell-type-specific markers (e.g., neuronal, glial, inflammatory) on a single section provides comprehensive contextual information about the targeted region and its response to the experimental intervention [73].
Experimental Protocols for Multi-Modal Integration
Standardized Workflow for Combined Fluorescent Tracer Detection and Multiplex IHC
Critical Protocol Specifications
The sequential staining protocol for integrating fluorescent tracers with multiplex IHC requires careful optimization of several key parameters:
Tissue Preparation: Formalin-fixed paraffin-embedded (FFPE) tissues sectioned at 4μm thickness provide optimal preservation of antigenicity and tissue architecture [74]. Sections should be mounted on charged slides and baked at 65°C for 30 minutes prior to deparaffinization.
Antigen Retrieval: Heat-induced epitope retrieval (HIER) using high-pH buffer (pH 9) at 110°C for 10 minutes in a decloaking chamber effectively exposes antigens masked by formalin cross-linking [74]. The specific retrieval conditions may require optimization for different antibody-epitope combinations.
Antibody Validation and Titration: Each primary antibody must be individually validated and titrated on control tissues to determine optimal dilution that provides specific staining with minimal background [73] [74]. This is particularly critical when combining antibodies from the same host species.
Signal Amplification: Tyramide signal amplification (TSA) using Opal fluorophores enables sensitive detection of multiple markers even with antibodies of similar host species [74]. The TSA reaction involves HRP-conjugated secondary antibodies catalyzing the deposition of fluorescently-labeled tyramide molecules adjacent to the enzyme site.
Antibody Stripping: Between staining rounds, antibody complexes are removed using microwave treatment in retrieval buffer (10-20 minutes) or chemical stripping methods to prevent cross-reactivity in subsequent rounds [74]. Efficiency of stripping should be validated by imaging the section between rounds.
Fluorescent Tracer Integration: Endogenous fluorescent tracers (e.g., fluorescent dextrans, AAV-expressed fluorescent proteins) can typically be visualized alongside immunofluorescence markers without additional processing. For non-fluorescent tracers, an additional immunofluorescence round may be incorporated using species-specific antibodies against the tracer molecule.
Quality Control Measures
- Controls: Include positive control tissues expressing all targets of interest, negative controls omitting primary antibodies, and single-plex stains for spectral library development [74].
- Autofluorescence Assessment: Image unstained sections to assess tissue autofluorescence, which can be subtracted during analysis or minimized with Sudan Black B treatment [76].
- Spectral Library Development: Create a reference spectral library from single-plex stained sections for each fluorophore to enable accurate unmixing of overlapping emission spectra [75] [74].
- Batch Consistency: Process experimental and control samples simultaneously using automated stainers (e.g., intelliPATH) to minimize batch effects [74].
Research Reagent Solutions for Multi-Modal Confirmation
Table 3: Essential Research Reagents for Integrated Fluorescent Tracer and mIHC Studies
| Reagent Category | Specific Examples | Function & Application Notes |
|---|---|---|
| Fluorescent Tracers | Fluorescent dextrans, AAV-expressed GFP/RFP, DiI, ICG [77] | Neural pathway tracing; injection site confirmation |
| Signal Amplification Systems | Tyramide Signal Amplification (TSA), Opal polymer systems [74] | Signal enhancement for low-abundance targets |
| Fluorophores | Opal dyes, Alexa Fluor series, Cy dyes [72] [76] | Multiplex target detection with minimal spectral overlap |
| Nuclear Counterstains | DAPI, Hoechst stains [74] | Cellular identification and segmentation |
| Automated Staining Platforms | intelliPATH, DISCOVERY ULTRA [72] [74] | Standardized, reproducible staining conditions |
| Image Acquisition Systems | Vectra, CODEX, MIBI [72] | Multispectral imaging and whole slide scanning |
| Analysis Software | HALO, inForm, QuPath [72] [74] | Digital quantification and cell phenotyping |
| Antibody Validation Tools | Tissue microarrays, isotype controls [73] [74] | Specificity confirmation for each antibody lot |
Analytical Framework for Data Integration and Interpretation
Signal Processing and Spectral Unmixing
Quantitative Spatial Analysis for Stereotaxic Validation
The integration of fluorescent tracers with multiplex IHC enables sophisticated spatial analysis critical for stereotaxic confirmation:
- Probe Placement Accuracy: Precisely map tracer distribution relative to intended anatomical coordinates and assess spread to adjacent structures [16].
- Cellular Context Characterization: Quantify cell-type-specific responses (neurons, astrocytes, microglia) relative to tracer deposition site using phenotypic markers [73].
- Distance Measurements: Calculate spatial relationships between tracer localization and specific cell populations or pathological features using nearest-neighbor algorithms [73].
- Regional Segmentation: Divide the area surrounding the tracer into concentric zones for quantitative analysis of gradient effects [73].
- Multiparametric Correlation: Integrate stereotaxic targeting data with molecular profiling to establish structure-function relationships.
This analytical approach transforms simple probe placement confirmation into a rich dataset characterizing the molecular and cellular environment surrounding the stereotaxic target, providing valuable insights for interpreting functional outcomes of experimental interventions.
Comparative Experimental Data Supporting Method Selection
Validation Studies Across Research Applications
Table 4: Experimental Performance Data Across Model Systems
| Experimental Context | Methodology Compared | Key Findings | Reference Application |
|---|---|---|---|
| Melanoma TME profiling | mIHC vs. conventional IHC | High correlation (r>0.9) for immune cell quantification [74] | Translational biomarker studies |
| Breast cancer immune context | Multiplex IF vs. flow cytometry | Complementary data with architectural preservation [73] | Tumor immunology research |
| Stereotaxic KA administration | Intrahippocampal vs. systemic delivery | Reduced mortality, precise localization [16] | Epilepsy model characterization |
| Peptide-based tumor targeting | Targeted vs. non-targeted probes | Improved signal-to-noise ratio for margin detection [77] | Surgical guidance applications |
Technical Limitations and Mitigation Strategies
While integrated fluorescent tracer and mIHC approaches offer significant advantages, several technical challenges require consideration:
- Spectral Overlap: Fluorophore emissions can overlap, necessitating careful panel design and spectral unmixing [76]. Mitigation: Use fluorophores with distinct emission spectra and develop comprehensive spectral libraries.
- Photobleaching: Fluorescent signals can fade with repeated imaging [76]. Mitigation: Use photostable fluorophores, anti-fade mounting media, and limit light exposure.
- Tissue Autofluorescence: Endogenous fluorophores can create background signal [76]. Mitigation: Spectral unmixing, Sudan Black B treatment, or phasor analysis approaches.
- Antibody Cross-Reactivity: Sequential staining rounds may exhibit non-specific binding [75]. Mitigation: Optimized blocking, rigorous validation, and efficient antibody stripping.
- Signal Attenuation with Depth: Light scattering limits imaging depth in thick tissues [78]. Mitigation: Tissue clearing techniques, sectioning, or multiphoton microscopy.
For stereotaxic applications specifically, the integration of fluorescent tracers with multiplex IHC provides unparalleled capability to confirm probe placement while generating comprehensive molecular and cellular data from the targeted region. This multi-modal confirmation approach enhances experimental rigor in neuroscience research and drug development, where precise anatomical targeting is essential for valid interpretation of intervention effects.
Comparative Analysis of Manual vs. Automated (AI-Powered) Placement Assessment
Stereotaxic neurosurgery is a cornerstone technique in neuroscience research, enabling precise access to deep brain structures for interventions such as drug delivery, neural recording, and lesioning. The accuracy of probe placement is paramount, as it directly influences experimental validity, animal welfare, and the reduction of variables in post-mortem histological analysis. The transition from manual planning and execution to automated, AI-powered systems represents a significant evolution in this field. This guide provides an objective comparison of manual versus automated placement assessment, framed within the context of validating stereotaxic probe placement for post-mortem histology research. It is designed to inform researchers, scientists, and drug development professionals about the performance characteristics of each approach, supported by experimental data and detailed methodologies.
Performance and Outcome Comparison
Direct comparisons of manual and automated systems across key metrics reveal distinct performance characteristics. The data below summarize findings from controlled studies.
Table 1: Comparison of Procedural Accuracy and Risk
| Metric | Manual Planning/Execution | Automated/AI-Powered Planning/Execution | Source Study Context |
|---|---|---|---|
| Trajectory Angle from Orthogonal | 14.6° | 10.0° | Stereotactic Brain Biopsy [79] |
| Trajectory Length | 43.5 mm | 38.5 mm | Stereotactic Brain Biopsy [79] |
| Trajectory Risk Score | 0.52 | 0.27 | Stereotactic Brain Biopsy [79] |
| Target Point Accuracy | 1.16 mm | 1.58 mm | SEEG Electrode Implantation [80] |
| Entry Point Accuracy | 1.71° (angle error) | 2.13° (angle error) | SEEG Electrode Implantation [80] |
| Trajectory Deviation (Standard Deviation) | 2.33 mm | 0.30 mm | Robotic RFA Electrode Positioning [81] |
Table 2: Comparison of Efficiency and Reproducibility
| Metric | Manual Planning/Execution | Automated/AI-Powered Planning/Execution | Source Study Context |
|---|---|---|---|
| Operative Time per Bolt | 9.06 minutes | 6.36 minutes | SEEG Electrode Implantation [80] |
| Electrode Implantation Time | 51.6 - 88.5 minutes | 32.0 - 38.9 minutes | SEEG Electrode Implantation [82] |
| Procedural Reproducibility | Lower, higher inter-user variability | Higher, enhanced by standardization and QC metrics | Multi-lab Electrophysiology Study [27] |
| Velocity Stability (Std Dev) | 3.05 mm/s | 0.66 mm/s | Robotic RFA Electrode Positioning [81] |
Detailed Experimental Protocols
To critically assess the data presented in the comparison tables, it is essential to understand the methodologies from which they originated. The following protocols detail the key experiments cited.
Protocol 1: Computer-Assisted vs. Manual Trajectory Planning for Stereotactic Brain Biopsy
This study compared computer-assisted planning (CAP) to manual plans (MP) in a retrospective pilot study [79].
- Objective: To evaluate the feasibility and safety of an automated trajectory planning platform (SurgiNav) for stereotactic brain biopsy.
- Materials & Methods:
- Patient Cohort: Fifteen consecutive adult patients undergoing stereotactic brain biopsy for whom postoperative imaging was available.
- Imaging: Preoperative, volumetric, T1-weighted, gadolinium-enhanced MRI scans were used for both planning methods.
- Manual Planning (MP): A senior neurosurgeon used a commercial platform (Medtronic Stealth) to select entry and target points. The trajectory was reviewed in axial, coronal, and sagittal planes using a "probe's eye" view, following a standard trial-and-error process.
- Computer-Assisted Planning (CAP): The preoperative MRI was used to create a skull model and perform whole-brain parcellation. The target lesion was segmented, and the CAP algorithm calculated entry and target points, ranking them according to a "risk score." This risk score was a function of the cumulative distance from critical sulci along the trajectory. The neurosurgeon then selected the most feasible trajectory from the top five lowest-risk options.
- Outcome Measures: The primary outcomes were trajectory angle from orthogonal, trajectory length, and risk score.
- Key Findings: CAP generated feasible trajectories in all cases. Compared to MP, CAP trajectories were more perpendicular to the skull, shorter in length, and had a significantly lower risk score, suggesting a potentially safer profile [79].
Protocol 2: Robotic vs. Manual Implantation of Intracerebral Electrodes (Randomized Controlled Trial)
This single-blinded, randomized controlled trial compared the iSYS1 robotic trajectory guidance device to a manual frameless device (Precision-Aiming Device, PAD) for stereoelectroencephalography (SEEG) electrode implantation [80].
- Objective: To pragmatically assess the differences in operative time and accuracy between robotic and manual implantation methods in a real-world setting.
- Materials & Methods:
- Patient Cohort: Thirty-two patients with drug-refractory focal epilepsy were randomized into robotic (iSYS1) or manual (PAD) groups.
- Trajectory Planning: For both groups, electrode trajectories were pre-operatively planned using the EpiNav platform to minimize trajectory length and risk while maximizing grey-matter sampling. This ensured that planning was identical and unbiased before randomization.
- Intervention: The only difference was the device used for aligning the drill guide. The manual PAD group required the surgeon to physically adjust and lock the guide, while the robotic iSYS1 arm automatically aligned to the planned trajectory.
- Outcome Measures: The primary outcome was operative time for individual SEEG bolt insertion. Secondary outcomes included entry point accuracy, target point accuracy, angle error, and clinical complication rates. Accuracies were measured using an automated algorithm that segmented electrodes from post-operative CT scans.
- Key Findings: The robotic system was significantly faster for bolt insertion. However, the manual PAD method demonstrated better accuracy at the target point and a lower angle error, highlighting a potential trade-off between speed and absolute precision in this specific setup [80].
Workflow and Logical Diagrams
The following diagrams illustrate the general workflows for manual and automated assessment processes, highlighting key decision points and sources of variability.
Manual Placement Assessment Workflow
Automated Placement Assessment Workflow
The Scientist's Toolkit
This section details essential research reagents and equipment critical for conducting stereotaxic procedures and subsequent validation, as cited in the experimental protocols.
Table 3: Essential Materials for Stereotaxic Placement Assessment
| Item | Function in Protocol | Specific Examples / Notes |
|---|---|---|
| Stereotaxic Frame | Provides a stable 3D coordinate system for precise head fixation during surgery. | Small animal stereotaxic instrument (e.g., Kopf Instruments) with non-rupture ear bars and anesthesia mask [83]. |
| Planning Software | Platform for visualizing anatomy, defining targets, and planning trajectories. | EpiNav, SurgiNav (research software), or commercial clinical platforms (e.g., Medtronic Stealth) [79] [80]. |
| Robotic Guidance System | Automates the alignment and guidance of surgical instruments to the pre-defined trajectory. | iSYS1, Renishaw neuromate, or KUKA iiwa manipulator [80] [81] [82]. |
| Medical Imaging (MRI/CT) | Essential for pre-operative planning and post-operative validation of probe placement. | Volumetric T1-weighted gadolinium-enhanced MRI for planning; post-operative CT for accuracy assessment [79] [80]. |
| Histology & Staining Reagents | Used for post-mortem tissue processing to visually confirm probe placement and assess local tissue effects. | Standard histological stains (e.g., Cresyl Violet) for visualizing probe tracks and neuronal architecture. |
| Aseptic Materials | Critical for preventing post-surgical infection, a key factor in animal welfare and data quality. | Sterile surgical tools, drapes, gowns, gloves, and disinfectant solutions (e.g., povidone-iodine, chlorhexidine) [84]. |
| Anesthesia & Analgesia | Ensures animal welfare and immobilization during surgical procedures. | Isoflurane (inhalation), Ketamine/Diazepam, or Pentobarbital (injection), combined with pre- and post-operative analgesics [84]. |
Quantifying the Impact of Stereotactic Method (Robotic vs. Frameless) on Accuracy
Stereotactic neurosurgery requires extreme precision for procedures such as brain biopsy and deep brain stimulation. The evolution from traditional frame-based systems to frameless and robotic technologies represents a significant advancement in the field. For researchers conducting post-mortem histology to validate stereotaxic probe placement, understanding the quantitative accuracy of these different surgical methods is paramount. This guide objectively compares the performance of robotic and frameless stereotactic systems against the conventional frame-based gold standard, providing a synthesis of current experimental data to inform research methodology and technology selection in pre-clinical and translational neuroscience research.
Quantitative Comparison of Stereotactic Methods
The accuracy of stereotactic systems is typically measured through two primary metrics: Target Point Error (TPE), the distance between the planned and actual position of the probe's tip at the target, and Entry Point Error (EPE), the deviation at the point of skull entry. The following table summarizes the performance of different systems as reported in recent clinical studies.
Table 1: Quantitative Accuracy Metrics of Stereotactic Systems
| Stereotactic Method | Target Point Error (TPE) - Mean (mm) | Entry Point Error (EPE) - Mean (mm) | Diagnostic Yield (%) | Key Study Findings |
|---|---|---|---|---|
| Frame-Based (Leksell/CRW) | 1.63 ± 0.41 [85] | 1.33 ± 0.40 [85] | 95.74% [85] | Considered the historical gold standard; frame design can limit trajectory selection [86]. |
| Robotic-Assisted (SINO/ROSA) | 1.10 ± 0.30 [85] | 0.92 ± 0.27 [85] | 98.08% [85] | Significantly higher accuracy (p<0.001) and liberated trajectory selection compared to frames [85] [86]. |
| Frameless (Neuronavigation) | N/A | N/A | 88.9–99.7% [53] | Comparable diagnostic yield to frame-based methods, with time-saving advantages [53]. |
| Patient-Specific 3D-Printed Frame | Resulting deviation: 0.51 ± 0.29 [53] | N/A | N/A | Exceeded clinically required accuracy by more than four times; suitable for autoclave sterilization [53]. |
The data reveals a clear trend: robotic-assisted systems demonstrate statistically superior accuracy in both target and entry point precision compared to traditional frame-based systems [85]. Furthermore, the diagnostic yield—the success rate in obtaining a definitive histopathological diagnosis—is high and comparable across all modern methods, suggesting that accuracy improvements do not come at the cost of diagnostic efficacy [53] [85].
Table 2: Comparison of Procedural and Practical Factors
| Factor | Frame-Based | Robotic-Assisted | Frameless (Neuronavigation) |
|---|---|---|---|
| Operational Workflow | Requires frame attachment and pre-operative CT scan with frame [86]. | Requires patient registration (e.g., bone fiducials or laser surface registration) [86]. | Similar registration process to robotics; may use a mechanical guide arm [86]. |
| Trajectory Flexibility | Limited by the physical frame and arcs; temporal lobe and posterior fossa access can be challenging [86]. | High flexibility; enables lateral and trans-cerebellar trajectories not feasible with frames [86]. | High flexibility, similar to robotic systems. |
| Procedure Time | Longer (e.g., 50.57 ± 41.08 min) [85]. | Shorter (e.g., 29.36 ± 13.64 min) [85]. | Reported to offer time savings [53]. |
| Invasiveness | Frame pins invade the skull; typically uses burr hole [86]. | Frameless; can use a less invasive twist-drill craniostomy [86]. | Frameless; can use a less invasive twist-drill craniostomy [86]. |
Detailed Experimental Protocols and Methodologies
To critically assess the data presented in comparison guides, understanding the underlying experimental protocols is essential. The following sections detail the methodologies from key studies cited in this article.
Protocol for Robotic vs. Frame-Based Comparison (Hu et al., 2022)
A 2022 study directly compared the SINO surgical robot-assisted platform with the Leksell frame-based system in 151 patients [85].
- Presurgical Planning: All patients underwent a preoperative T1-weighted magnetic resonance imaging (MRI) scan with gadolinium contrast (1.5 mm slice thickness) the day before surgery. Images were imported into surgical planning software, and a trajectory was designed to avoid vessels, sulci, and eloquent areas [85].
- Patient Registration and Guidance:
- Frame-Based Group: A Leksell stereotactic frame was fixed to the patient's head under local anesthesia, followed by a preoperative CT scan (1 mm slices). The CT data was merged with the preoperative MRI [85].
- Robot-Assisted Group: A minimum of five bone fiducials (4 mm diameter, 5 mm length) were placed on the patient's skull. After a CT scan, patient-to-robot registration was performed using these fiducials. The patient's head was then fixed in a Mayfield head clamp [85].
- Surgical Procedure and Data Collection: Both procedures were performed under general anesthesia. A burr hole was made, and a biopsy needle was inserted to collect specimens. Postoperative CT scans were performed and merged with the preoperative dataset. The Entry Point Error (EPE) was measured on the cranial bone based on the postoperative CT, while the Target Point Error (TPE) was calculated as the distance between the planned target and the center of the biopsy site as seen on the merged images [85].
Protocol for Assessing Robotic Impact on Trajectories (Lau et al., 2025)
A 2025 study analyzed 376 stereotactic trajectories to evaluate how robotics have changed procedural approaches compared to frame-based and neuronavigated techniques [86].
- Imaging and Planning: A standardized preoperative high-resolution T1-weighted MRI sequence (1.0 mm slice thickness) was used for all patients. The entry point (EP) and target point (TP) were planned following standard stereotactic principles, with the added constraint for the frame-based group to avoid conflicts with the physical frame [86].
- Registration and Surgical Approach:
- Registration for robot-assisted and neuronavigated procedures was done via bone fiducial registration (BFR) or laser surface registration (LSR) after head fixation in a Mayfield clamp [86].
- A key variable was the Surgical Approach (SA): surgeons chose between a conventional burr hole (BH) or a less invasive twist drill (TD) craniostomy based on trajectory characteristics [86].
- Data Analysis: The EP and TP coordinates from the planning software were imported into MATLAB. Preoperative MR images were spatially normalized into a common standard space (MNI space) to allow for the comparison of trajectory lengths and angles across different patients and techniques [86].
Protocol for Technical Accuracy of Patient-Specific Frames
A 2024 study evaluated the technical accuracy of a novel, 3D-printed, patient-specific stereotactic frame, providing a methodology relevant for custom research applications [53].
- Design and Manufacturing: Sixteen patient-specific frames were designed based on MR images (1 mm slices) of a cadaver head equipped with bone anchors and MRI markers. Two needle trajectories were planned for each frame to maximize target variability. Frames were additively manufactured from PA12 polymer using the Multi Jet Fusion process [53].
- Measurement and Sterilization: After manufacturing, the frames were 3D-scanned using an optical scanner. They then underwent a standard autoclave sterilization process and were rescanned. The scanned models were compared with the original CAD plans to determine the deviation of the target points in the XY-plane, Z-direction, and the resulting overall direction [53].
Workflow Visualization of Stereotactic Biopsy Methods
The following diagrams illustrate the core workflows for the stereotactic methods discussed, highlighting key differences in the registration and guidance phases.
The Scientist's Toolkit: Essential Research Reagents and Materials
For researchers designing experiments involving stereotactic targeting, whether in a surgical or post-mortem validation context, the following tools and materials are fundamental.
Table 3: Essential Reagents and Materials for Stereotactic Research
| Item | Function / Application | Example from Literature |
|---|---|---|
| Bone Fiducials | Small markers placed on the skull to provide reference points for patient registration in frameless and robotic systems. | WayPoint (5 mm) bone fiducials were used for patient registration prior to CT scanning [86]. |
| MRI Markers | Visible markers used during MRI scanning to provide a clear reference for correlating imaging data with physical anatomy. | Vitamin D capsules (Dekristol) were used as spherical MRI markers due to their excellent contrast [53]. |
| Stereotactic Biopsy Needle | A specialized cannula for safely extracting tissue samples from precise intracranial targets. | The Nashold biopsy needle (Radionics) with a 9.5 mm sampling window was used to collect specimens from multiple quadrants [87]. |
| 3D Printing Material (PA12) | A durable, medical-grade polymer suitable for manufacturing patient-specific stereotactic devices that can withstand sterilization. | PA12 (Polyamide 12) was used in Multi Jet Fusion 3D printing to create patient-specific frames that were resistant to autoclave distortion [53]. |
| Stereotactic Atlas & Alignment Tools | Reference atlases and physical tools for aligning post-mortem brains in a standardized coordinate system for analysis. | The Talairach and Tournoux atlas space was used with a crafted instrument featuring a transparent plate and mirror to align the AC-PC line in post-mortem hemispheres [20]. |
| Multiplanar Reconstruction Software | Software used to create 3D models from medical images and plan trajectories while avoiding critical structures. | Software like Brainlab's iPlan or Sinoplan allows for careful trajectory planning on 3D-reconstructed images [86] [87]. |
Establishing a Standardized Reporting Framework for Validation Data
Stereotaxic procedures are fundamental to neuroscience, enabling precise targeting of specific brain regions for electrophysiological recording, manipulation, and drug delivery. However, the reproducibility of findings generated using these techniques is critically dependent on the accuracy and consistency of probe placement across experimental replicates and laboratories. A multi-lab collaboration study revealed that despite standardizing behavioral and electrophysiological procedures, variability in electrode targeting significantly hindered the reproducibility of experimental outcomes [27]. This work demonstrated that electrophysiology data in systems neuroscience is vulnerable to a lack of reproducibility, but that across-lab standardization with proper quality-control criteria can effectively mitigate this problem [27]. Establishing a standardized reporting framework for validation data is therefore essential to ensure that stereotaxic probe placement can be accurately verified, compared across studies, and replicated by other research groups.
The evolution of brain atlases and validation technologies has created both opportunities and challenges for standardization. Traditional two-dimensional reference atlases, composed of Nissl-stained coronal sections spaced hundreds of micrometers apart, prevent accurate three-dimensional reconstruction and precise determination of anatomical boundaries [88]. Newer approaches, such as the Stereotaxic Topographic Atlas of the Mouse Brain (STAM) with isotropic 1-μm resolution, enable more precise anatomical localization but require standardized reporting to maximize their utility across the research community [88]. This guide compares current methodologies for validating stereotaxic probe placement and provides a framework for standardized reporting of validation data.
Comparative Analysis of Validation Methodologies
Histological Verification Approaches
Table 1: Comparison of Histological Validation Methods for Stereotaxic Probe Placement
| Method | Spatial Resolution | Primary Applications | Key Advantages | Technical Limitations |
|---|---|---|---|---|
| Nissl Staining & Cytoarchitecture [88] | 1 μm (isotropic) | Precise anatomical boundary identification; reference atlas construction | Reveals cell diversity and distribution patterns; enables definitive boundary determination | Requires specialized processing; labor-intensive |
| Immunohistochemistry (IHC) [89] | Cellular level | Cell-type specific localization; protein expression mapping | High specificity for molecular targets; well-established validation protocols | Susceptible to fixation and antibody variability |
| Fluorescent Cell Labeling [90] | Single-cell resolution | Neural circuit tracing; cell population quantification | Enables multiplexing with multiple labels; compatible with automated quantification | Potential photobleaching; tissue autofluorescence |
| 3D Micro-optical Sectioning Tomography (MOST) [88] | 0.35 × 0.35 × 1 μm³ | Whole-brain reconstruction; precise 3D probe trajectory mapping | Continuous imaging without sectioning artifacts; isotropic resolution | Technically demanding; specialized equipment required |
The selection of an appropriate histological method depends on the specific research question and required level of anatomical precision. Nissl-based cytoarchitecture remains the gold standard for definitive anatomical boundary identification, providing recognizable representation of cell shape, size, and distribution patterns essential for determining brain region boundaries [88]. For studies requiring cell-type specificity, immunohistochemistry offers targeted localization but requires rigorous validation to ensure assay specificity and reproducibility [89]. Fluorescent labeling techniques enable sophisticated multiplexing approaches and are particularly valuable for circuit tracing studies, especially when combined with automated quantification pipelines [90].
Atlas Registration and Computational Alignment Tools
Table 2: Computational Tools for Atlas Registration and Placement Validation
| Tool/Platform | Atlas Compatibility | Registration Method | Quantitative Outputs | Automation Level |
|---|---|---|---|---|
| SHARCQ [90] | Allen CCF and Franklin-Paxinos | Landmark-based manual alignment with affine transformation | Cell counts by brain region; 3D models of registered cells | Semi-automated with GUI |
| STAM Informatics Platform [88] | STAM, Allen CCF, Franklin-Paxinos | Multi-modal image fusion with canonical plane visualization | Arbitrary-angle slice generation; cross-atlas navigation | Manual with automated visualization |
| SHARP-Track [90] | Allen CCF | User-identified landmark points with warping transformation | Electrode track localization; region identification | Manual landmark identification |
Computational tools for registering histological sections to reference atlases have become essential for standardizing the validation of probe placements. The SHARCQ (Slice Histology Alignment, Registration, and Cell Quantification) pipeline exemplifies this approach, providing a semi-automated workflow that registers histological images to established mouse brain atlases and quantifies cellular distributions [90]. This tool is particularly valuable for standardizing validation data as it accommodates tissue imperfections, allows user selection between different atlas systems, and generates both quantitative data and 3D models of registered cells within atlas space [90]. The recently developed STAM platform offers unprecedented single-cell resolution and the ability to generate atlas levels at arbitrary angles, addressing limitations of traditional atlases that were restricted to canonical planes [88].
Experimental Protocols for Validation Data Generation
Standardized Histology Processing Pipeline
A robust histological processing pipeline is essential for generating reliable validation data. The following protocol represents a synthesis of current best practices:
- Perfusion and Fixation: Transcardial perfusion with phosphate buffer followed by 4% paraformaldehyde (PFA). Post-fixation in PFA for 2 hours, followed by cryoprotection in 18% sucrose overnight at 4°C [90].
- Sectioning: Frozen sectioning at 20-30 μm thickness in the coronal plane. Sections are mounted on gelatin-coated slides and cover-slipped with appropriate mounting media [90].
- Staining Selection: Based on experimental needs:
- Nissl Staining: For cytoarchitectural identification and precise boundary determination [88].
- Immunofluorescence: For cell-type specific markers using validated primary and secondary antibodies with appropriate controls [89].
- Combined Approaches: Multi-modal staining to integrate cytoarchitecture with molecular markers.
- Image Acquisition: High-resolution imaging using confocal or slide scanning microscopy. For whole-brain mapping, automated tile-scanning with stitching is recommended [90]. Maintain consistent imaging parameters across all samples.
Probe Track Localization and Atlas Registration
The protocol for probe track localization and registration follows these critical steps:
- Tissue Preparation and Imaging: Process tissue sections to enhance probe track visibility. For silicon probes, appropriate staining protocols must be optimized to visualize the track while preserving cellular architecture [58].
- Landmark Identification: Identify consistent anatomical landmarks across sections to guide registration. The use of a cell marker (e.g., DAPI) as a background channel is recommended to easily discern the edges and landmarks of brain sections [90].
- Atlas Alignment: Using tools like SHARCQ, align histological sections to the reference atlas through a combination of manual landmark identification and automated transformation [90].
- Coordinate Mapping: Map the probe trajectory through the reconstructed series of sections, identifying all brain regions traversed.
- Quality Control: Verify registration accuracy by checking consistency across sections and comparing multiple registration methods when possible.
Quality Scoring Systems for Placement Accuracy
The principles of valid histopathologic scoring provide a framework for developing standardized assessment of probe placement accuracy [91]. Key considerations include:
- Definable Categories: Establish clear, objective criteria for different levels of placement accuracy (e.g., "precise" - within target boundaries; "acceptable" - within 50μm of target; "missed" - outside acceptable range).
- Reproducible Assessments: Implement masking (blinding) procedures to prevent bias during accuracy assessments [91]. Use multiple independent evaluators to establish inter-rater reliability.
- Meaningful Results: Ensure that scoring categories correspond to biologically relevant differences in experimental outcomes, based on known functional topography of the targeted region.
The RIGOR (Recording Inclusion Guidelines for Optimizing Reproducibility) criteria demonstrate how quality-control metrics can be applied to electrophysiological recordings to enhance reproducibility, including both histological and electrophysiological quality measures [27].
Visualization of the Standardized Validation Workflow
The following diagram illustrates the integrated workflow for standardized validation of stereotaxic probe placement, from experimental planning through data reporting:
Figure 1: Integrated workflow for standardized validation of stereotaxic probe placement, showing key stages from planning through reporting.
Essential Research Reagents and Tools
Table 3: Research Reagent Solutions for Stereotaxic Placement Validation
| Category | Specific Products/Tools | Primary Function | Critical Validation Parameters |
|---|---|---|---|
| Reference Atlases | STAM [88], Allen CCFv3 [90], Franklin-Paxinos [90] | Spatial reference framework for coordinate mapping | Resolution, anatomical accuracy, compatibility with analysis tools |
| Histological Stains | Nissl stains [88], DAPI [90], IHC-validated antibodies [89] | Tissue and cellular structure visualization | Specificity, signal-to-noise ratio, batch-to-batch consistency |
| Image Analysis Platforms | SHARCQ [90], STAM web portal [88] | Automated registration and quantification | Registration accuracy, user interface accessibility, output reliability |
| Probe Technologies | Neuropixels [27], ROSE 3D probes [11], Michigan probes [58] | Neural activity recording with spatial targeting | Signal quality, spatial arrangement, mechanical properties |
The selection of appropriate research reagents and tools significantly impacts the quality and reproducibility of validation data. Reference atlases form the foundation of any stereotaxic validation framework, with newer options like STAM providing isotropic 1-μm resolution that enables single-cell localization [88]. Histological stains must be carefully validated, with particular attention to fixation protocols that can affect antigen preservation for immunohistochemistry [89]. Image analysis platforms should be selected based on their compatibility with existing laboratory workflows and their ability to generate standardized, quantifiable outputs. Probe technology selection should consider not only the experimental recording needs but also how the physical properties of the probe will affect tissue response and the visibility of probe tracks during histological verification [58] [11].
Implementation Framework and Reporting Standards
Standardized Reporting Template
To facilitate consistent reporting of stereotaxic validation data across studies, researchers should include the following elements in their methodological descriptions:
- Target Coordinates: Report stereotaxic coordinates in three-dimensional space relative to standard reference points (bregma, lambda), including any angle of approach.
- Reference Atlas: Specify the exact atlas and version used for targeting and validation (e.g., "STAM v1.0," "Allen CCF v3").
- Histological Methods: Detail fixation protocols, staining methods, and any modifications to standard protocols.
- Registration Methodology: Describe the specific tools and parameters used for atlas registration (e.g., "SHARCQ with manual landmark identification").
- Validation Metrics: Report quantitative measures of placement accuracy, including the specific brain regions traversed and the proportion of recording sites within the target region.
- Quality Control Measures: Document any blinding procedures, inter-rater reliability assessments, or other quality control steps implemented.
Integration with Electrophysiological Quality Control
The validation of stereotaxic probe placement should be integrated with electrophysiological quality control metrics to create a comprehensive reproducibility framework. The International Brain Laboratory's approach demonstrates how histological quality control can be combined with electrophysiological quality metrics to enhance the reproducibility of neural recordings [27]. This includes correlating electrode locations with signal quality metrics, such as single-unit yield and spike amplitude, which can vary based on probe design and recording site placement [58].
Emerging technologies, such as monolithic three-dimensional neural probes created using the ROSE (Rolling-of-Soft-Electronics) approach, offer new opportunities for volumetric recording but also present novel challenges for placement validation [11]. These devices require specialized validation approaches that can account for their three-dimensional distribution of recording sites while maintaining the standardized reporting framework outlined above.
By implementing this comprehensive framework for standardized reporting of validation data, the neuroscience community can enhance the reproducibility and reliability of stereotaxic research, facilitating more meaningful comparisons across studies and accelerating progress in understanding brain function.
Conclusion
Histological validation of stereotaxic probe placement is a cornerstone of rigorous neuroscience and preclinical drug development. A methodical approach, encompassing careful tissue processing, precise anatomical alignment, and thorough troubleshooting, is essential for ensuring data integrity. The integration of advanced techniques like post-mortem MRI and AI-powered analysis promises to enhance the objectivity, efficiency, and quantitative power of this process. Widespread adoption of standardized validation protocols will be crucial for improving reproducibility across laboratories, strengthening the translational potential of preclinical findings, and ultimately accelerating the development of novel neurological therapies.
References
- 1. Reproducibility of in vivo electrophysiological measurements ... [https://pmc.ncbi.nlm.nih.gov/articles/PMC12068871/]
- 2. Postmortem examination of patient H.M.'s brain based on ... [https://pmc.ncbi.nlm.nih.gov/articles/PMC3916843/]
- 3. Analysis of the Technical Accuracy of a Patient-Specific ... [https://www.mdpi.com/2075-4426/14/2/180]
- 4. - Post Examination of Animals | SpringerLink mortem [https://link.springer.com/chapter/10.1007/978-2-8178-0472-9_7]
- 5. Standardization of postmortem human brainstem along the ... [https://www.nature.com/articles/s41598-025-20016-7]
- 6. Histological validation of high-resolution DTI in human post ... [https://www.frontiersin.org/journals/neuroanatomy/articles/10.3389/fnana.2015.00098/full]
- 7. High-resolution magnetization-transfer imaging of post ... [https://www.sciencedirect.com/science/article/pii/S1053811923000095]
- 8. Stereotaxic cutting of post-mortem human brains for ... [https://pmc.ncbi.nlm.nih.gov/articles/PMC10232747/]
- 9. A Standardized Protocol for Stereotaxic Intrahippocampal ... [https://www.frontiersin.org/journals/neuroscience/articles/10.3389/fnins.2017.00160/full]
- 10. Ultra-high-density Neuropixels probes improve detection ... [https://www.sciencedirect.com/science/article/pii/S0896627325006658]
- 11. Monolithic three-dimensional neural probes from ... [https://pmc.ncbi.nlm.nih.gov/articles/PMC12425490/]
- 12. Protocol to study adenosine release in the adult mouse ... [https://pmc.ncbi.nlm.nih.gov/articles/PMC12332273/]
- 13. Optimized workflow for behavior-coupled fiber photometry ... [https://pmc.ncbi.nlm.nih.gov/articles/PMC12287066/]
- 14. Integrated bioinformatics and experimental validation identify ... [https://journals.plos.org/plosone/article?id=10.1371/journal.pone.0328530]
- 15. Accuracy of intracranial electrode placement for ... [https://pmc.ncbi.nlm.nih.gov/articles/PMC6736669/]
- 16. A Standardized Protocol for Stereotaxic Intrahippocampal ... [https://pmc.ncbi.nlm.nih.gov/articles/PMC5370320/]
- 17. Post-mortem 11.7T DTI Validation of Myeloarchitectural ... [https://www.sciencedirect.com/science/article/pii/S0361923025003387]
- 18. Why 90% of clinical drug development fails and how to ... [https://pmc.ncbi.nlm.nih.gov/articles/PMC9293739/]
- 19. High thickness histological sections as alternative to study the ... [https://pmc.ncbi.nlm.nih.gov/articles/PMC5899898/]
- 20. Stereotaxic cutting of post-mortem human brains for ... [https://www.frontiersin.org/journals/neuroanatomy/articles/10.3389/fnana.2023.1176351/full]
- 21. Postmortem diffusion MRI of the human brainstem and ... [https://pmc.ncbi.nlm.nih.gov/articles/PMC4652933/]
- 22. Verification of multi-structure targeting in chronic ... [https://www.sciencedirect.com/science/article/pii/S016502702200245X]
- 23. Effect of Fixatives and Tissue Processing on the Content and ... [https://pmc.ncbi.nlm.nih.gov/articles/PMC1850907/]
- 24. An Introduction to Specimen Processing [https://www.leicabiosystems.com/us/knowledge-pathway/an-introduction-to-specimen-processing/]
- 25. A comparison of insertion methods for surgical placement of ... [https://pmc.ncbi.nlm.nih.gov/articles/PMC8600966/]
- 26. Cresyl Violet Stain - an overview [https://www.sciencedirect.com/topics/neuroscience/cresyl-violet-stain]
- 27. Reproducibility of in vivo electrophysiological ... [https://elifesciences.org/articles/100840]
- 28. Nissl bodies cresylviolet stain - The world under ... [https://www.ronaldschulte.nl/en/nissl-bodies-cresylviolet-stain.html]
- 29. Cresyl Violet Staining (Nissl Staining) - The Open Lab Book [https://theolb.readthedocs.io/en/latest/misc/cresyl-violet-staining-nissl-staining.html]
- 30. Cresyl Violet Stain for Nissl Bodies [https://www.stainsfile.com/protocols/cresyl-violet-stain-for-nissl-bodies/]
- 31. 2.9. Cresyl Violet (Nissl) Staining [https://bio-protocol.org/exchange/minidetail?id=10741836&type=30]
- 32. Your Data: LCM Staining Effects on Real-Time RT-PCR [https://www.thermofisher.com/us/en/home/references/ambion-tech-support/rna-isolation/tech-notes/lcm-staining-effects-on-real-time-rt-pcr.html]
- 33. Mastering the art of sectioning: a comprehensive guide to ... [https://www.frontiersin.org/journals/veterinary-science/articles/10.3389/fvets.2025.1635706/full]
- 34. Operationalizing postmortem pathology-MRI association ... [https://actaneurocomms.biomedcentral.com/articles/10.1186/s40478-025-02030-y]
- 35. Mouse Stereotaxic Surgery [https://www.protocols.io/view/mouse-stereotaxic-surgery-d7t99nr6.html]
- 36. Plant anatomy: The next episode—high throughput ... [https://pmc.ncbi.nlm.nih.gov/articles/PMC12510304/]
- 37. Choosing a Fluorescence Microscope - Factors to Consider [https://andor.oxinst.com/learning/view/article/choosing-fluorescence-microscope]
- 38. A comparison of confocal and epifluorescence microscopy ... [https://www.sciencedirect.com/science/article/abs/pii/S0165027023002698]
- 39. Any Way You Slice It—A Comparison of Confocal ... [https://pmc.ncbi.nlm.nih.gov/articles/PMC4365987/]
- 40. Microscopy Basics | Understanding Digital Imaging [https://zeiss-campus.magnet.fsu.edu/articles/basics/digitalimaging.html]
- 41. An Introduction to Digital Microscopy Imaging [https://www.spotimaging.com/resources/white-papers/digital-imaging-concepts/]
- 42. An active texture-based digital atlas enables automated ... [https://pmc.ncbi.nlm.nih.gov/articles/PMC6736610/]
- 43. low cost and accurate determination of stereotactic ... [https://pmc.ncbi.nlm.nih.gov/articles/PMC10867132/]
- 44. Preliminary Validation of Stereotaxic Injection Coordinates ... [https://www.jove.com/t/66262/preliminary-validation-stereotaxic-injection-coordinates-via]
- 45. A robust method for automatic identification of landmarks ... [https://www.nature.com/articles/s41598-019-49573-4]
- 46. Correcting spatial distortion in histological images [https://www.sciencedirect.com/science/article/abs/pii/S0895611105000601]
- 47. SOLID: minimizing tissue distortion for brain-wide profiling ... [https://www.nature.com/articles/s41467-024-52560-7]
- 48. Accuracy and reliability of 3D cephalometric landmark ... [https://pmc.ncbi.nlm.nih.gov/articles/PMC12539169/]
- 49. Automatic identification of radius and ulna bone landmarks ... [https://www.sciencedirect.com/science/article/pii/S0010482524009764]
- 50. CASEMark: A hybrid model for robust anatomical landmark ... [https://link.springer.com/article/10.1007/s44443-025-00031-4]
- 51. Independent histological validation of MR-derived radio ... [https://pubmed.ncbi.nlm.nih.gov/40542949/]
- 52. A probabilistic histological atlas of the human brain for MRI ... [https://www.nature.com/articles/s41586-025-09708-2]
- 53. Analysis of the Technical Accuracy of a Patient-Specific ... [https://pmc.ncbi.nlm.nih.gov/articles/PMC10890199/]
- 54. Comparison of frame-less robotic versus ... [https://www.sciencedirect.com/science/article/abs/pii/S0303846721002912]
- 55. Comparison of Navigated and Frame-Based Stereotactic ... [https://www.mdpi.com/1648-9144/60/6/949]
- 56. Histogram-based normalization technique on human brain ... [https://pubmed.ncbi.nlm.nih.gov/26215471/]
- 57. A modular, adaptable, and accessible implant kit for chronic ... [https://pmc.ncbi.nlm.nih.gov/articles/PMC12539253/]
- 58. Recording site placement on planar silicon-based probes ... [https://www.nature.com/articles/s41598-021-81127-5]
- 59. Optimization of a thermochemical antibody stripping ... [https://pubmed.ncbi.nlm.nih.gov/40426261/]
- 60. H&E Staining Overview: A Guide to Best Practices [https://www.leicabiosystems.com/us/knowledge-pathway/he-staining-overview-a-guide-to-best-practices/]
- 61. The H&E Stain – A Lesson on Consistency and ... [https://www.leicabiosystems.com/us/knowledge-pathway/the-he-stain-a-lesson-on-consistency-and-reproducibility/]
- 62. Cell Optimizing with 8-Well Chambered Slides Staining Protocols [https://ucallmlabs.com/optimizing-cell-staining-protocols-with-8-well-chambered-slides/]
- 63. trajectory metric analysis in stereotactic robotic-guided seeg ... [https://aesnet.org/abstractslisting/trajectory-metric-analysis-in-stereotactic-robotic-guided-seeg-for-epilepsy-laser-versus-fiducial-based-o-arm-registration-workflows]
- 64. Phantom and in vivo validation of a novel contactless ... [https://pmc.ncbi.nlm.nih.gov/articles/PMC12439361/]
- 65. Stereotaxic Accuracy [https://www.leicabiosystems.com/fr-fr/knowledge-pathway/stereotaxic-accuracy/]
- 66. AtlasGuide: Software for stereotaxic guidance using 3D CT ... [https://pmc.ncbi.nlm.nih.gov/articles/PMC3863333/]
- 67. Diagnostic accuracy of unenhanced post-mortem CT and ... [https://link.springer.com/article/10.1007/s00428-025-04130-5]
- 68. Virtopsy Vs. Traditional Autopsy: A Review of Accuracy, ... [https://shodhforensic.com/2025/08/23/virtopsy-vs-traditional-autopsy-a-review-of-accuracy-limitations-and-future-potential/]
- 69. The current state of forensic imaging – recommended ... [https://pmc.ncbi.nlm.nih.gov/articles/PMC12354491/]
- 70. Operationalizing postmortem pathology-MRI association ... [https://pmc.ncbi.nlm.nih.gov/articles/PMC12121285/]
- 71. VIRTual autOPSY—applying CT and MRI for modern ... [https://www.frontiersin.org/journals/radiology/articles/10.3389/fradi.2025.1557636/full]
- 72. Overview of multiplex immunohistochemistry/immunofluorescence techniques in the era of cancer immunotherapy - PMC [https://pmc.ncbi.nlm.nih.gov/articles/PMC7170662/]
- 73. Fluorescent Multiplex Immunohistochemistry Coupled With Other State-Of-The-Art Techniques to Systematically Characterize the Tumor Immune Microenvironment - PMC [https://pmc.ncbi.nlm.nih.gov/articles/PMC8490683/]
- 74. Validation of an Accurate Automated Multiplex Immunofluorescence Method for Immuno-Profiling Melanoma - PMC [https://pmc.ncbi.nlm.nih.gov/articles/PMC9160303/]
- 75. Multiple Immunoenzyme Staining: Methods and ... [https://pmc.ncbi.nlm.nih.gov/articles/PMC2326109/]
- 76. An update on recent advances in fluorescent materials for ... [https://pubs.rsc.org/en/content/articlehtml/2025/ra/d5ra03102h]
- 77. Recent Progress in Peptide-Based Fluorescent Probes ... [https://pmc.ncbi.nlm.nih.gov/articles/PMC12414470/]
- 78. A Guideline for Clinicians Performing Clinical Studies with ... [https://jnm.snmjournals.org/content/63/5/640]
- 79. Computer-Assisted Versus Manual Planning for ... [https://pmc.ncbi.nlm.nih.gov/articles/PMC8414905/]
- 80. Comparison of robotic and manual implantation ... [https://www.nature.com/articles/s41598-021-96662-4]
- 81. The comparison of the process of manual and robotic ... [https://www.nature.com/articles/s41598-020-64472-9]
- 82. Efficiency of robot-assisted stereotactic neurosurgeries [https://www.renishaw.com/en/efficiency-of-robot-assisted-stereotactic-neurosurgeries--49529?srsltid=AfmBOor2zYj4YSlpm75gHdjGVNOzUz801Sz_qz0wCkZXTkuDIxMtWWHu]
- 83. Miniscope Imaging of Nucleus Accumbens Neural Activity ... [https://pmc.ncbi.nlm.nih.gov/articles/PMC11718238/]
- 84. Improving Stereotaxic Neurosurgery Techniques and ... [https://pmc.ncbi.nlm.nih.gov/articles/PMC8465152/]
- 85. A Comparation Between Frame-Based and Robot-Assisted ... [https://www.frontiersin.org/journals/neurology/articles/10.3389/fneur.2022.928070/full]
- 86. The Silent Transformation of Stereotactic Brain Biopsies ... [https://pmc.ncbi.nlm.nih.gov/articles/PMC12228906/]
- 87. Improving Diagnostic Yield and Accuracy of Stereotactic ... [https://pmc.ncbi.nlm.nih.gov/articles/PMC11588611/]
- 88. A mouse brain stereotaxic topographic atlas with isotropic ... [https://www.nature.com/articles/s41586-025-09211-8]
- 89. Principles of Analytic Validation of Immunohistochemical ... [https://www.cap.org/protocols-and-guidelines/cap-guidelines/current-cap-guidelines/principles-of-analytic-validation-of-immunohistochemical-assays]
- 90. A Semi-Automated Workflow for Brain Slice Histology ... [https://pmc.ncbi.nlm.nih.gov/articles/PMC9034756/]
- 91. Principles for valid histopathologic scoring in research - PMC [https://pmc.ncbi.nlm.nih.gov/articles/PMC3795863/]